Advertisement
Food & Drink 2m read
7,041

This Hack Doubles the Shelf Life of Brown Rice

Brown rice is a staple for a reason. Versatile, affordable, and more nutrient-dense than its white counterpart, it serves as a reliable base for almost any meal. Because of this, you may be tempted to buy a bulk bag, stick it in the pantry, and forget about it. Like other grains, brown rice feels like the type of ingredient that will never truly go bad, no matter how it’s stored. But is that actually the case?

All featured products and deals are selected independently and objectively by the author. House Outlook may receive a share of sales via affiliate links in content.

Brown rice is a staple for a reason. Versatile, affordable, and more nutrient-dense than its white counterpart, it serves as a reliable base for almost any meal. Because of this, you may be tempted to buy a bulk bag, stick it in the pantry, and forget about it. Like other grains, brown rice feels like…

You probably won’t like the answer. Brown rice contains natural oils that can go rancid, which significantly worsens the taste. Unlike white rice, brown rice still has its bran and germ attached — the very components that give it that nutritional edge. However, those layers are full of unsaturated fats that oxidize quickly, leaving the rice tasting stale and bitter. While eating a small amount of spoiled rice probably won’t harm you, the flavor is unpleasant and certainly not something you would want to serve. So, how can you extend the shelf life of brown rice?

An Ice Cold Solution

The answer lies, as it often does, in the freezer. Storing your brown rice in the freezer rather than the pantry can significantly prolong its freshness. While a pantry might seem like a sufficiently cool, dark environment, the reality is that temperature and moisture levels fluctuate. The freezer provides the consistent chill needed to keep those natural oils from spoiling. Inside the freezer, brown rice can last for up to 16 months, compared to just six months in the pantry.

Advertisement
Related: 6 Surprising Things You Can Make in Your Rice Cooker

Other Tips To Extend Brown Rice’s Shelf Life

Start by shopping in the right quantities. It may feel counterintuitive, but buying brown rice in small quantities is better due to its shorter shelf life. Once you get home, put it into an airtight container that can withstand freezing temperatures. Minimizing oxygen exposure is key; when oxygen comes into contact with those natural oils, they begin to turn. Keep the rice airtight and cold, and it will stay fresh for months longer.

Advertisement
Advertisement
Cleaning 5m read
1,224

Old-School Cleaning Hacks That Don’t Work Anymore

Many of us inherited a repertoire of cleaning tricks from our parents and grandparents, believing that what worked for them could also work for us. But here’s the catch: Homes, materials, and even everyday products have changed dramatically over time. This means some once-trusted cleaning hacks no longer hold up. In some cases, they’re simply ineffective; in others, they can actually damage modern surfaces or leave you with a bigger mess to deal with.

All featured products and deals are selected independently and objectively by the author. House Outlook may receive a share of sales via affiliate links in content.

Many of us inherited a repertoire of cleaning tricks from our parents and grandparents, believing that what worked for them could also work for us. But here’s the catch: Homes, materials, and even everyday products have changed dramatically over time. This means some once-trusted cleaning hacks no longer hold up. In some cases, they’re simply…

Many of these tips originated when products were manufactured differently or when households relied on what was on hand. Today’s furniture finishes, appliance coatings, and cleaning formulas are designed for entirely different conditions. So while those old-school hacks may sound clever, they often miss the mark in modern homes. Here are several classic cleaning tricks that experts say are best left in the past.

1. Using Hairspray To Remove Ink Stains

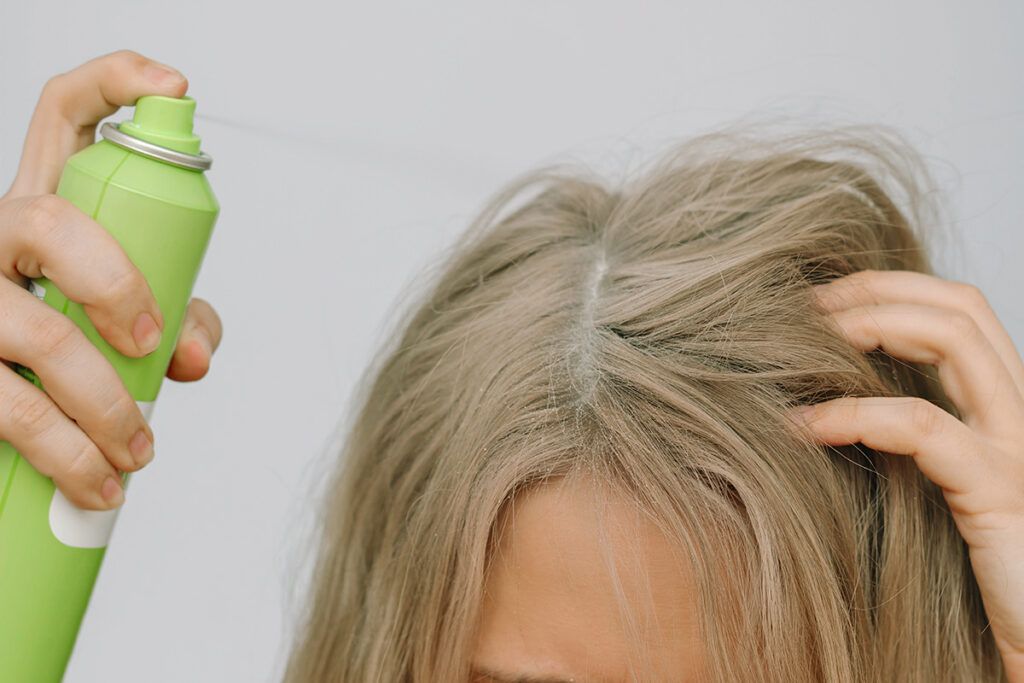
For decades, hairspray was a go-to solution for removing ink stains from clothing and upholstery. It worked for a simple reason: Older formulas contained a high percentage of alcohol, which acted as a solvent to break down the ink.

Today’s hairsprays, however, rarely contain much alcohol. Instead, many modern formulas focus on conditioning ingredients and polymers designed to hold hair in place without drying it out. Using them on an ink stain often does little more than leave behind a sticky residue.

If you’re dealing with ink stains today, rubbing alcohol or specialized stain removers are far more effective options.

Credit: © Liudmila Chernetska/iStock
Advertisement

2. Cleaning Windows With Newspaper

Using crumpled newspaper to achieve streak-free windows is a beloved old-school trick that many people still swear by, convinced it produces a shine that paper towels can’t match.

However, newspapers are manufactured differently than they were decades ago. Modern printing inks are prone to smearing, and the paper itself tends to be thinner and more fragile. When it gets wet, it can fall apart, leaving streaks or ink marks on the glass.

Microfiber cloths are a much better alternative. They’re designed to trap dust and absorb moisture without leaving lint behind.

Credit: © Pradit_Ph/iStock
Related: 11 Household Items You Can Clean in the Dishwasher

3. Cleaning Everything With Bleach

Bleach has long been viewed as the ultimate cleaning solution, capable of tackling nearly any mess. In the past, it was a staple for disinfecting everything from countertops and floors to bathroom fixtures.

However, bleach isn’t the universal cleaner many assume it to be. While it’s an excellent disinfectant, it lacks the surfactants needed to effectively remove dirt or grease. More importantly, it can damage many modern materials, including stainless steel, natural stone, and certain countertop finishes.

Improper use can also release harsh fumes or permanently discolor fabrics and surfaces. These days, most cleaning experts recommend trading that jug of bleach for specialized products tailored to your home’s specific materials.

Credit: © daphnusia/stock.adobe.com
Advertisement

4. Pouring Coca-Cola Into the Toilet Bowl

You may have heard that pouring a can of Coca-Cola into your toilet can dissolve stains and leave the bowl sparkling. The theory behind this hack is that the drink’s acidity helps break down mineral deposits.

While Coke does contain mild acids, it simply isn’t strong enough to compete with actual toilet bowl cleaners. At best, it might loosen very light buildup. At worst, it leaves behind a sticky, sugary residue that doesn’t sanitize anything, and you’re down one can of Coke.

Modern toilet cleaners are designed to tackle limescale, stains, and bacteria simultaneously — something soda just can’t do.

Credit: © Mystockimages/iStock

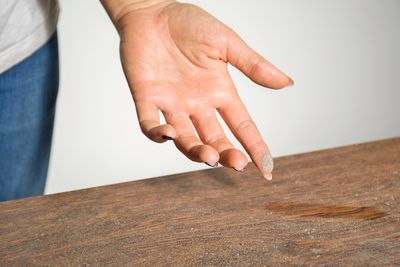
5. Dusting With a Feather Duster

Feather dusters were once considered an essential cleaning tool, praised for their ability to sweep away dust without scratching delicate surfaces.

In reality, traditional feather dusters often just push dust around instead of removing it. The particles become airborne, eventually settling elsewhere in the room.

Today’s microfiber dusters are far more effective. Their fibers are designed to grab and hold dust instead of scattering it, helping surfaces stay clean longer.

Credit: © Phimwilai Kitsuriya/iStock
Related: 3 Hacks for Dusting Oddly Shaped Items

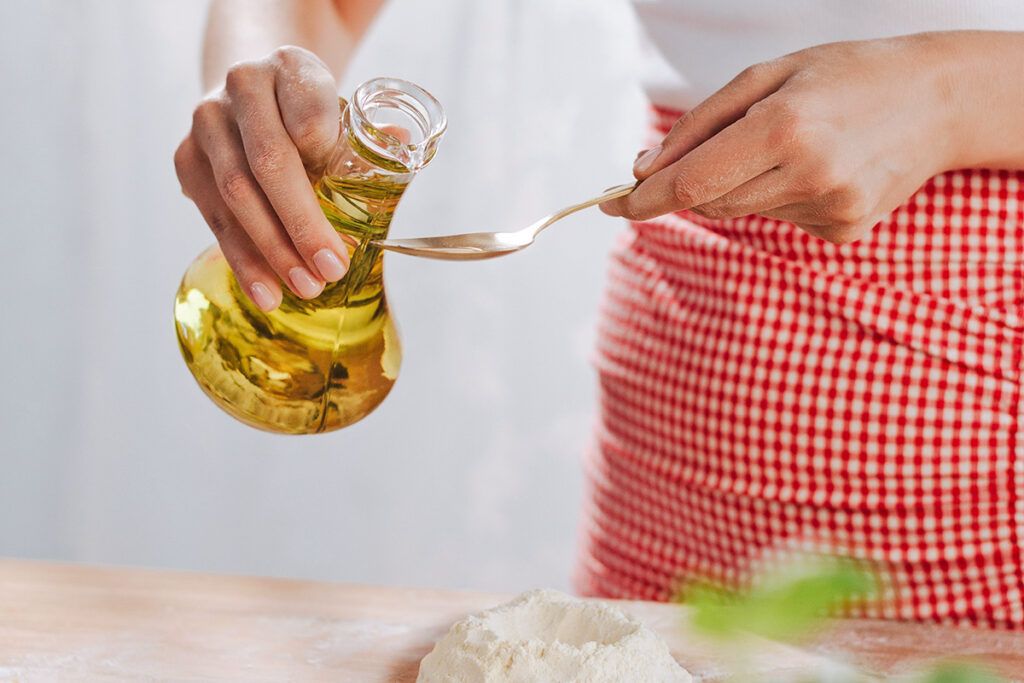
6. Polishing Wood With Olive Oil

Olive oil might seem like a pantry-staple shortcut for perfectly polished wood furniture, but it’s best kept in the kitchen. While it provides an immediate shine, this hack can lead to problems over time.

Because olive oil doesn’t fully dry on surfaces, it acts as a magnet for dust and creates a sticky buildup that can eventually damage the furniture’s finish.

Furniture polishes specifically designed for wood are a safer option because they’re formulated to protect finishes without imparting a greasy residue.

Credit: © BartekSzewczyk/iStock
Advertisement
Featured Image Credit:  © svetikd/iStock | Updated  Apr 13, 2026 |
Jill Layton
Writer
Jill Layton started writing professionally when she realized her emails and texts were kinda funny. She’s an affiliate shopping writer and lifestyle contributor for Scary Mommy, Bustle, Mic, and Best Products. She’s the mom of two alarmingly witty kids and the world’s most perfect dog.
This article is for general informational purposes only.
Featured Image Credit:  © svetikd/iStock | Updated  Apr 13, 2026 |
Advertisement
Organizing 5m read
2,363

How To Double Your Bathroom Storage

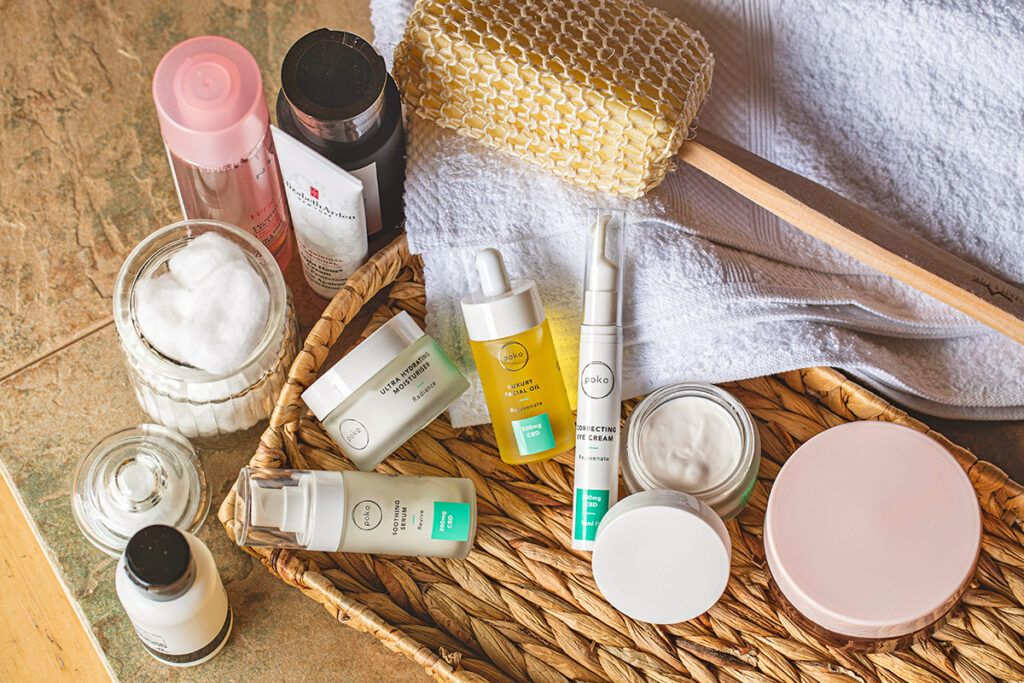
The smallest room in your home often proves the trickiest to organize. Between hair tools, skin care products, cleaning supplies, and towels, the bathroom can quickly feel like it’s short on square footage. You don’t need a renovation to fix it, though. With the right organizers, you can dramatically expand your storage without touching a single tile.

All featured products and deals are selected independently and objectively by the author. House Outlook may receive a share of sales via affiliate links in content.

The smallest room in your home often proves the trickiest to organize. Between hair tools, skin care products, cleaning supplies, and towels, the bathroom can quickly feel like it’s short on square footage. You don’t need a renovation to fix it, though. With the right organizers, you can dramatically expand your storage without touching a…

Whether you’re working with a sprawling primary bath or a pint-sized powder room, these 12 picks will solve storage issues in every corner — from the shower walls and cabinets to the space above the toilet.

1. simplehuman Adjustable Shower Caddy

You deserve better than a rusty wire rack that tips over every time you grab the shampoo. This simplehuman caddy mounts securely to your shower arm and features adjustable shelves you can customize to fit tall bottles. It keeps everything within arm’s reach and off the floor or tub edges, so nothing slips off and stubs your toe mid-rinse.

simplehuman Adjustable Shower Caddy
Price: $59.98
BUY NOW

2. Umbra Estique Over-the-Door Multiuse Organizer

Over-the-door storage is one of the most overlooked opportunities in any bathroom. This Umbra organizer hangs over your door without the need for hardware, holding everything from towels and robes to hair tools and accessories. It’s especially handy in smaller bathrooms where wall and floor space are at a premium.

Umbra Estique Over-the-Door Multiuse Organizer
Price: $30.99
BUY NOW
Related: 8 Things You Should Never Store in Your Bathroom

3. VITEVER Plastic Apothecary Jars With Bamboo Lids, Four-Pack

Is your countertop cluttered? Not for long. These charming apothecary jars offer one of the simplest, most inexpensive ways to bring order to your sink area. Use them to corral cotton rounds, cotton swabs, hair ties, or any small items that tend to scatter. The bamboo lids give them a clean, spa-like aesthetic, ensuring they serve as decor just as much as storage.

VITEVER Plastic Apothecary Jars With Bamboo Lids, Four-Pack
Price: $9.99
BUY NOW
Advertisement

4. Brightroom Bamboo Hair Tools Organizer

Hair tools are notoriously difficult to store neatly, but this organizer was made for that exact purpose. Dedicated slots keep your tools separated and upright so cords don’t tangle, while built-in magnets hold bobby pins and clips — a small detail that makes a real difference in your morning routine.

Brightroom Bamboo Hair Tools Organizer
Price: $30.00
BUY NOW

5. Bntuk Suction-Cup Hooks for Shower, Two-Pack

Sometimes the simplest solutions are the best ones. These suction-cup hooks attach to any smooth surface — tile, glass, acrylic — and can hold towels, loofahs, razors, and more without any drilling.

Bntuk Suction-Cup Hooks for Shower, Two-Pack
Price: $9.48
BUY NOW

6. REALINN Under Sink Organizer

The space under the sink has enormous potential but can easily turn into a mess of tossed-in products. This organizer makes use of that space with adjustable shelves that fit around plumbing pipes, so you aren’t just stacking things in layers and hoping for the best. It’s ideal for keeping cleaning supplies, extra toiletries, and backup products accessible but out of sight.

REALINN Under Sink Organizer
Price: $28.49
BUY NOW
Advertisement

7. Umbra Bellwood Over-the-Toilet Shelf

If you aren’t putting the space above the toilet to work, you’re missing out on prime storage territory. This freestanding shelf (no wall anchors required) creates a dedicated display and storage zone with open shelving for baskets, candles, toilet paper, or towels. Consider it a bathroom game changer.

Umbra Bellwood Over-the-Toilet Shelf
Price: $200.00
BUY NOW

8. Brightroom Round Metal Countertop Turntable

A lazy Susan isn’t just for the kitchen. This turntable spins 360 degrees so you can access your serums, sunscreens, and moisturizers without digging through a drawer or knocking everything over in the process.

Brightroom Round Metal Countertop Turntable
Price: $20.00
BUY NOW

9. Yamazaki Slim Rolling Storage Cart

This minimalist storage cart was designed to fit into narrow gaps, such as the space between a vanity and a wall or a toilet and a tub. Its slim profile slides into tight spots and rolls out when needed, with shelves that hold everything from extra towels to skin care and spare toilet paper.

Yamazaki Slim Rolling Storage Cart
Price: $165.00
BUY NOW
Advertisement

10. Nature’s Source Three-Tier Corner Makeup Organizer

Corners are chronically underutilized in bathrooms, and this tiered organizer is the fix. The three-level design fits neatly into a countertop corner, providing a dedicated home for makeup, skin care, perfume, or nail care products.

Nature’s Source Three-Tier Corner Makeup Organizer
Price: $27.99
BUY NOW
Related: Follow the ‘Show vs. Stow’ Rule for a Stress-Free Home

Blank walls in a bathroom are an opportunity in disguise, and a wall-mounted towel rack is one of the most practical ways to use them. This rack holds multiple towels without taking up any floor space, keeping them aired out and within reach the moment you step out of the shower.

Simple Trending Metal Towel Rack
Price: $19.97
BUY NOW

12. Vtopmart 25-Piece Plastic Drawer Organizers

Bathroom drawers can be a black hole for makeup brushes, bobby pins, and half-used products — until you add a set of organizers. This set comes with 25 interlocking pieces, so you can build a custom layout tailored to your specific needs. Once each item has its own compartment, your drawers go from chaotic to completely manageable, making everything visible at a glance.

Vtopmart 25-Piece Plastic Drawer Organizers
Price: $16.14
BUY NOW
Advertisement
Featured Image Credit:  © Ines Fraile/iStock | Updated  Apr 23, 2026 |
Megan McCarty
Writer
Megan McCarty is a Los Angeles-based writer who covers the fun stuff: design, travel, wellness, beauty, and fashion. She has written for publications including Domino, The Spruce, MyDomaine, Bustle, and Rue Magazine. Her life rules include, but are not limited to, zipper when merging, contribute to your IRA, and do the nice thing.
This article is for general informational purposes only.
Featured Image Credit:  © Ines Fraile/iStock | Updated  Apr 23, 2026 |
Advertisement
Cleaning 3m read
14,716

You’re Probably Using Too Much Laundry Detergent

Whether it’s an open bar or an all-you-can-eat buffet, it’s easy to overindulge without realizing you’ve gone too far. The same can be said for laundry, as people typically use way too much detergent. Some believe more soap means cleaner clothing, but excessive amounts can actually lead to unwanted residue, stiff fabric, and musty odors trapped inside the fibers.

All featured products and deals are selected independently and objectively by the author. House Outlook may receive a share of sales via affiliate links in content.

Whether it’s an open bar or an all-you-can-eat buffet, it’s easy to overindulge without realizing you’ve gone too far. The same can be said for laundry, as people typically use way too much detergent. Some believe more soap means cleaner clothing, but excessive amounts can actually lead to unwanted residue, stiff fabric, and musty odors…

For these reasons, it’s probably in your best interest to cut back. So, how much detergent do you really need? While the precise amount depends on the size of the load, here’s a breakdown of what the experts recommend.

The Case for Using Less Detergent

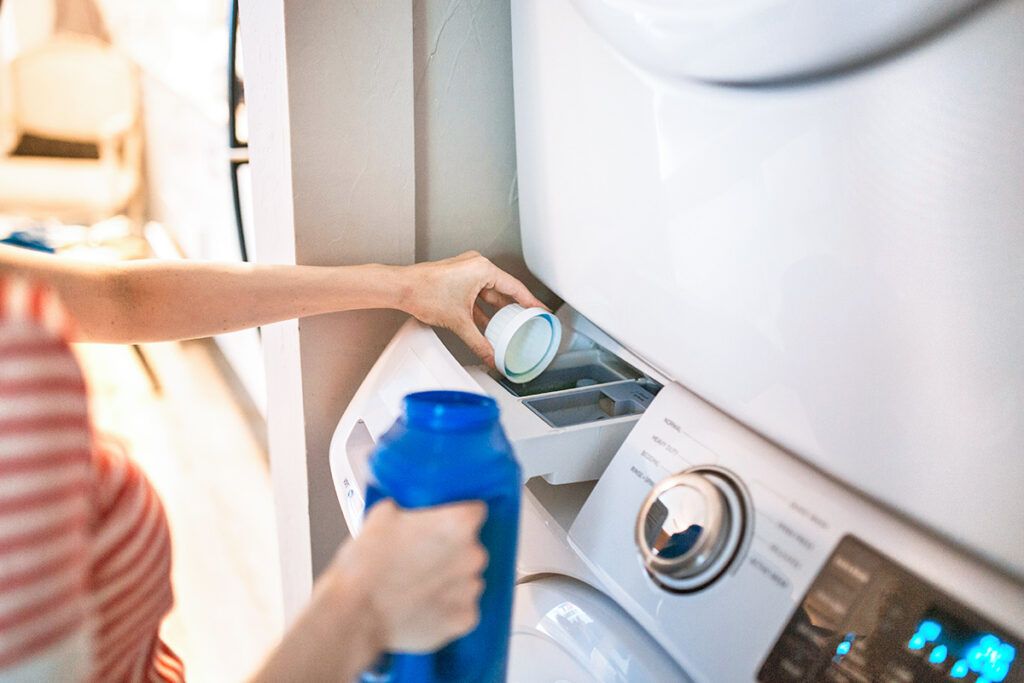
When loading the washing machine, don’t just eyeball the detergent — and don’t follow the instructions on the bottle, either. Wirecutter writer and laundry expert Andrea Barnes suggests using 2 tablespoons of powdered or liquid detergent at most. “And that’s for the big loads, as in 12 pounds and up,” Barnes said in an interview with the outlet. “For most loads — the average is about 8 pounds — just 1 tablespoon is enough.” It sounds like a small amount, but Barnes claims it’s the ideal ratio for clean clothes without the soapy residue.

According to washing machine manufacturers such as Whirlpool and LG, 2 tablespoons is indeed plenty for a normal-sized load in a high-efficiency washing machine. It’s worth noting that using too much detergent isn’t harmful only to clothing; it’s bad for the machine, too. Soapy residue can build up inside, creating mechanical issues that cause the unit to operate less efficiently.

Most laundry detergents sold today are high-efficiency (HE), which are ultraconcentrated, designed to work with less water, and produce fewer suds than traditional soap. This is why you need only 1 to 2 tablespoons to wash an entire load. If your washing machine was made before 2004, you may need to use slightly more HE detergent — about 1/4 cup — to account for the higher water volume. This measurement applies to both powdered and liquid HE detergent.

Advertisement

Don’t Trust the Cap

Keep in mind that detergent makers typically tell you to use more product than necessary. Don’t be fooled by the markings on the cap, which often exceed 2 tablespoons. For example, Tide recommends filling the cap to line 1, which represents 1.5 ounces (about 3 tablespoons) of liquid detergent. Instead, keep a dedicated measuring spoon in the laundry room to confirm you’re adding only what you need.

Related: How To Pick the Right Water Temperature for Every Load of Laundry

At the end of the day, a small amount of detergent goes a long way toward cleaning your clothes, keeping the machine in working order, and saving you money. If a recent load felt stiff or smelled musty, try cutting back on the detergent. You’ll likely notice a positive difference.

Advertisement
Featured Image Credit:  © mihailomilovanovic/iStock | Updated  Apr 13, 2026 |
Bennett Kleinman
Staff Writer
Bennett Kleinman is a New York City-based staff writer for Inbox Studio, covering topics for several brands including House Outlook and Better Report. He previously contributed to television programs such as "Late Show With David Letterman" and "Impractical Jokers," and digital publications like The Onion. Bennett is also a devoted New York Yankees and New Jersey Devils fan, and thinks plain seltzer is the best drink ever invented.
This article is for general informational purposes only.
Featured Image Credit:  © mihailomilovanovic/iStock | Updated  Apr 13, 2026 |
Advertisement
Food & Drink 3m read
14,085

The No-Mess Pancake Batter Hack

Many people would agree that a short stack of pancakes is one of the best ways to start the day. Pancakes are a favorite in American diners and home kitchens alike, thanks to their fluffy texture, lightly sweet taste, and versatility.

All featured products and deals are selected independently and objectively by the author. House Outlook may receive a share of sales via affiliate links in content.

Many people would agree that a short stack of pancakes is one of the best ways to start the day. Pancakes are a favorite in American diners and home kitchens alike, thanks to their fluffy texture, lightly sweet taste, and versatility.

As breakfasts go, pancakes are also a relatively easy undertaking. You can use a boxed mix to speed up the process or whisk them together with just flour, sugar, baking powder, eggs, milk, and butter. The biggest hurdle is actually portioning the batter. Somehow, homemade pancakes never seem to look as uniform or as satisfyingly round as the ones in restaurants.

Ditch the Ladle

The solution? A repurposed, thoroughly cleaned ketchup bottle. Instead of using a ladle or measuring cup to spoon pancake batter onto the griddle, opt for a squeeze bottle. Save the bottle from the recycling bin and scrub it inside and out — this is the most important step. When it’s pancake time, fill the bottle with batter (a funnel helps here) and squeeze perfectly neat circles onto the griddle. This may even be how your favorite diner does it: Many chefs use squeeze bottles for the clean aesthetic and to avoid the mess of a ladle.

When portioning your pancakes, draw the outline first and then fill it in with batter. This technique ensures neat edges and allows you to get creative with shapes. Try dinosaurs or hearts for kids (don’t forget the chocolate chips), or assemble brunch skewers using mini pancakes and sliced fruit.

Advertisement

More Tips for Perfect Pancake Preparation

The secret to perfect pancakes lies in the technique. While the batter itself is simple, there’s plenty of nuance to the cooking process. First, let the batter rest for 10 minutes after mixing. Second, ensure the griddle is truly hot enough before you begin. Flick a couple of water droplets onto the surface of the pan to test the temperature. If they start sizzling immediately, the griddle is good to go.

Related: You’ve Been Throwing Away This Versatile Ingredient

Have patience while the bottom of the pancake cooks. Wait until the bubbles on the surface have popped before flipping. Finally, don’t be afraid to throw out the first pancake — or feed it to the dog, assuming it’s plain and fully cooked. The first one famously tends to fail, but that’s OK. Just squeeze the next round onto the griddle and trust the process.

Advertisement
Advertisement
Organizing 3m read
2,061

Why You Need a ‘Use Me Bin’ in Every Room

When you’ve got the itch to declutter, tossing almost-empty bottles feels like an easy win — but it’s often a waste of product and money. Even if you resist the urge to throw them out, these half-used items often migrate to the back of the cabinet where they eventually expire and get replaced anyway. To break this cycle, you need a visual reminder that keeps your nearly finished household goods front and center until every last drop is gone.

When you’ve got the itch to declutter, tossing almost-empty bottles feels like an easy win — but it’s often a waste of product and money. Even if you resist the urge to throw them out, these half-used items often migrate to the back of the cabinet where they eventually expire and get replaced anyway. To…

Time for a ‘Use Me’ Bin

“Use it or lose it” applies to many things in life, including those almost-empty containers with just a little bit of product left. Whether it’s the last squeeze of ketchup in the fridge or the final few pumps of lotion on your vanity, letting partially filled containers sit while you move on to fresh ones leads to waste and unnecessary clutter. The solution? Create a designated “use me” bin to prioritize those items. You can implement this practice in any space, including the kitchen pantry, the refrigerator, under the sink, the bathroom vanity, and the laundry room.

In an r/CleaningTips subreddit thread, users shared their most effective spring cleaning hacks. One Redditor, AdChemical1663, suggested creating “use me” baskets for storage areas with consumables. These are designated bins placed within each space (such as a bathroom vanity or kitchen cabinet) that corral almost-empty products from that room, keeping them visible and grouped together so they don’t get lost or forgotten at the back of drawers or shelves. “So the hair mask with one to two treatments left, the liquid hand soap with half an inch left, the condiment with a quarter cup left, the cleaning product that’s almost empty … anything you’re saving for a special occasion? This is the occasion,” user AdChemical1663 wrote.

Advertisement

You can use any container you have on hand, but we recommend an open-top bin for direct access. This ensures you don’t have to remove a lid or disturb other items when retrieving or returning a nearly empty bottle.

Related: 12 Items You’ll Never Regret Decluttering

Sort From Least to Most

If you want to take your organization a step further, try sorting your “use me” bin by volume. Start with the containers that are nearly empty to quickly clear out the stragglers and reclaim your storage space.

Advertisement
Advertisement
Food & Drink 3m read
18,105

Add This to Cooked Broccoli To Boost Its Health Benefits

It’s no secret that a healthy diet can help prevent illness and keep you feeling better for longer. It’s also well known that cruciferous vegetables — the vast family including cabbage, kale, mustard greens, broccoli, and Brussels sprouts — are prized for their nutritional value.

All featured products and deals are selected independently and objectively by the author. House Outlook may receive a share of sales via affiliate links in content.

It’s no secret that a healthy diet can help prevent illness and keep you feeling better for longer. It’s also well known that cruciferous vegetables — the vast family including cabbage, kale, mustard greens, broccoli, and Brussels sprouts — are prized for their nutritional value.

One component contributing to these health benefits is a compound called sulforaphane, which shows promise in protecting against certain kinds of cancer, diabetes, and obesity. The catch is that cooking broccoli, or other vegetables in this family, deactivates myrosinase, the enzyme needed to create sulforaphane. Fortunately, if you’ve already cooked your broccoli, you can still add this enzyme back in — here’s how.

Reach for the Mustard

Cruciferous vegetables go by many names: You may know them as brassicas or the “cabbage family,” but it’s just as accurate to refer to them as the “mustard family.” Mustards are one of the largest groups within the brassicas, whether they’re grown for the seeds used in condiments or for pungent leafy greens such as mizuna and tatsoi.

Related: Why You Should Freeze Bread Before You Eat It

Because they’re close kin to broccoli, mustard plants produce a significant amount of myrosinase. This makes mustard a quick way to bring the enzyme back to your plate once the vegetables are cooked. A light sprinkling of mustard powder (be careful, it’s potent) or a homemade, mustard-based dressing or sauce will do the trick.

Advertisement
Freshness Is Key

Most packaged mustard products from the grocery store do not contain myrosinase. These are pasteurized for shelf stability, a process that destroys the heat-sensitive enzyme. A better option is to choose a stone-ground mustard from the refrigerated section or whisk together a sauce at home using dry mustard powder. When used raw — meaning it hasn’t been heat-treated — the spice retains active myrosinase.

A Culinary Match

The close relationship between broccoli and mustard is more than just a nutritional coincidence; it’s a perfect culinary partnership. Mustard-based sauces and vinaigrettes work well with broccoli and other brassicas such as cauliflower, Brussels sprouts, and cabbage. As a bonus, mustard acts as an emulsifier to thicken your vinaigrette. You can even serve a good-quality sweet or grainy mustard as a dipping condiment for your broccoli — the flavors go together better than you might expect.

No matter how you combine them, a dab of mustard helps bring out the full health potential of your broccoli. It’s proof that eating well doesn’t have to mean eating food that tastes bad.

Advertisement
Featured Image Credit:  © GMVozd/iStock | Updated  Apr 13, 2026 |
Fred Decker
Writer
Fred Decker is a trained chef and former restaurateur. Since closing his restaurants over a decade ago he has been a prolific freelance writer, publishing several thousand articles on dozens of high-volume websites including Taste Of Home, Hunker, Tasting Table, Week&, eHow, and GOBankingRates. He lives on a rural acreage shared with a big garden, chickens, rabbits, and grandkids.
This article is for general informational purposes only.
Featured Image Credit:  © GMVozd/iStock | Updated  Apr 13, 2026 |
Advertisement
Cleaning 2m read
10,117

You’re Loading Silverware the Wrong Way

Running the dishwasher is a time-saving luxury that frees you up to relax on the couch. But it’s important to take a few moments of the time you’ve reclaimed to load the machine properly. Far too many people pack their dishwashers haphazardly, which leads to a less-efficient clean and poses safety risks to boot.

Running the dishwasher is a time-saving luxury that frees you up to relax on the couch. But it’s important to take a few moments of the time you’ve reclaimed to load the machine properly. Far too many people pack their dishwashers haphazardly, which leads to a less-efficient clean and poses safety risks to boot.

This is especially true for silverware, which often has grime in tough-to-reach places and can be rather sharp. Don’t make the same mistakes as everyone else — here’s how to properly load dirty silverware in the dishwasher.

How To Handle Silverware

Picture it: You’ve just run a full cycle, only to find bits of gunk still stuck to your forks and spoons. To make matters worse, you go to reach for a knife and accidentally cut yourself. As you wrap your finger in a bandage, you might wonder if there’s a better method for loading dirty silverware. There is — and it all comes down to proper orientation.

Related: 12 Things You Should Never Put in the Dishwasher

For forks and spoons, always place the handles into the basket first. This leaves the “business end” — the tines or the bowl — exposed. Because these areas are more likely to come into contact with food, they need to face upward. This ensures water and detergent can clean those dirty surfaces, leaving your utensils spotless.

Advertisement

As for knives, some argue the handle should go in first for the same reason as forks and spoons. However, many experts advise the opposite, saying you should place the blade of the knife into the basket first. This is a matter of safety; if the handle remains exposed, the knife is easier to remove afterward. If the blade faces up, you risk cutting yourself when unloading.

Ultimately, how you load your dishwasher is up to you. But our recommendation is clear: handles down for spoons and forks, and blades down for knives. This approach strikes the best balance between cleanliness and safety.

Advertisement
Featured Image Credit:  © Oleksandr Hrytsiv/iStock | Updated  Apr 13, 2026 |
Bennett Kleinman
Staff Writer
Bennett Kleinman is a New York City-based staff writer for Inbox Studio, covering topics for several brands including House Outlook and Better Report. He previously contributed to television programs such as "Late Show With David Letterman" and "Impractical Jokers," and digital publications like The Onion. Bennett is also a devoted New York Yankees and New Jersey Devils fan, and thinks plain seltzer is the best drink ever invented.
This article is for general informational purposes only.
Featured Image Credit:  © Oleksandr Hrytsiv/iStock | Updated  Apr 13, 2026 |
Advertisement
Gardening 3m read
1,358

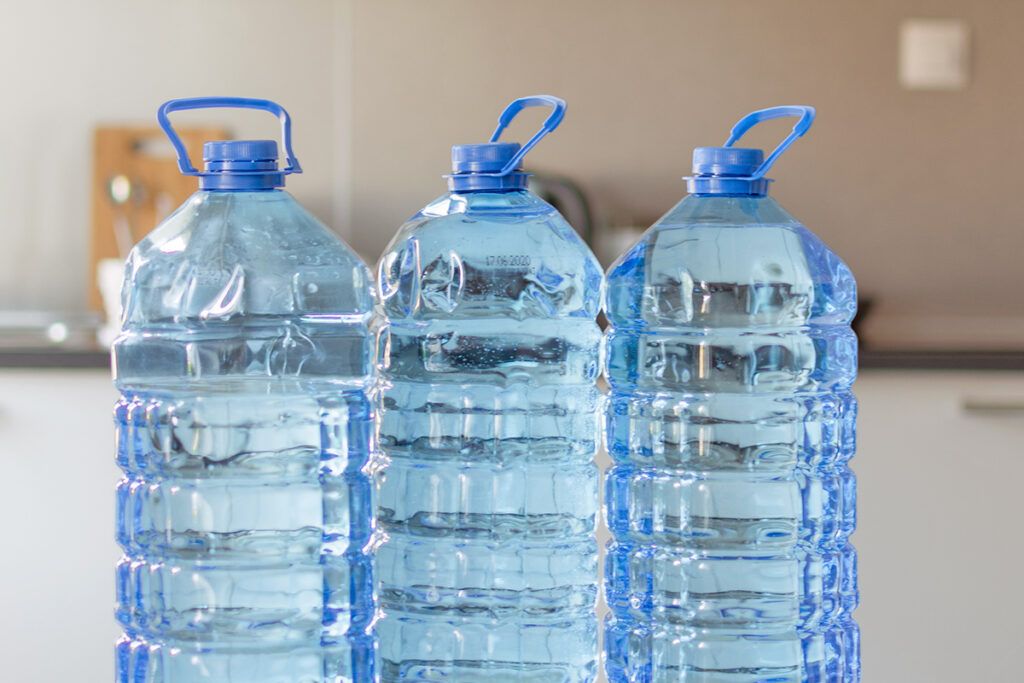
Why You Should Keep a Bucket in Your Shower

What do you do while waiting for the shower to warm up? Maybe you brush your teeth or give the countertop a quick wipe, but there’s a better way to use those precious few minutes. The next time you step into the shower to turn on the tap, bring a 5-gallon bucket with you. While you’re crossing a task off your to-do list, you could be collecting water to repurpose all around the house.

All featured products and deals are selected independently and objectively by the author. House Outlook may receive a share of sales via affiliate links in content.

What do you do while waiting for the shower to warm up? Maybe you brush your teeth or give the countertop a quick wipe, but there’s a better way to use those precious few minutes. The next time you step into the shower to turn on the tap, bring a 5-gallon bucket with you. While…

Water While You Wait

If you have a garden or houseplants to water, you might have a gold mine running straight down the drain every morning. Most people spend a minute or two letting the shower run until it’s warm enough to step in. Even if you have a low-flow showerhead, that adds up to gallons of water — and money — wasted. To put things into perspective, a standard U.S. showerhead has a flow rate of 2.5 gallons per minute. Waiting just three minutes for the water to warm up means sending more than 7 gallons of potable water straight down the drain.

So, why not collect it and feed it to your foliage? This simple, money-saving hack requires almost no extra effort: Just place a bucket under the faucet while the water warms up, move it aside when you’re ready to rinse, and use the collected water to hydrate your houseplants or garden.

Related: The Easiest Way To Help Plants Survive a Heat Wave

Other Ways To Use Potable Water

If you have only a few pots to water, you may end up collecting more water than your plants need — and that’s not a bad problem to have. There are plenty of other uses for a bucket of clean, potable water, especially if you live in an area with water restrictions. Use it to fill mop buckets, replenish humidifiers, or soak dirty dishes. You can even use it to flush toilets, hand-wash laundry, or rinse off muddy garden tools. You’ll be surprised how many uses you find once you have a bucket on hand.

Advertisement

What About Greywater?

The water captured from your shower as it heats up is treated, potable water that’s safe for drinking, bathing, and cooking. Greywater, on the other hand, is gently used water from bathrooms, kitchens, and laundries that can be recycled to hydrate gardens and lawns. To collect it, simply keep your bucket in the shower while you use your toiletries, or scoop out some used bathwater before pulling the drain stopper. You can also collect water from handwashing in the sink or go a step further by diverting the drain hose from your washing machine to a drainpipe that leads to your garden.

Greywater is only recommended for nonedible plants, so limit its use to grass, flowers, hedges, trees, and salt-tolerant houseplants. Ensure your bath products are plant-based and safe for greywater collection; look for labels such as “biocompatible” or “boron-free.” You don’t want to water your plants with harsh chemicals or heavy surfactants, so remember to switch to plant-based soaps, laundry detergents, and shampoos before attempting this hack.

Safety Tip: Greywater must be used within 24 hours to prevent bacteria from rapidly multiplying. If allowed to sit, it can become unsafe for handling and potentially damaging to your soil’s health.

Advertisement
Advertisement
Food & Drink 3m read
9,740

One Thing You Should Always Do When Cutting Fruit

Many people won’t eat grapes without rinsing them or apples without at least a quick buff on a shirtsleeve. However, we rarely give the same kind of attention to fruit we plan to peel. After all, the rinds of many popular fruits — from bananas and melons to pineapples and oranges — are usually discarded.

All featured products and deals are selected independently and objectively by the author. House Outlook may receive a share of sales via affiliate links in content.

Many people won’t eat grapes without rinsing them or apples without at least a quick buff on a shirtsleeve. However, we rarely give the same kind of attention to fruit we plan to peel. After all, the rinds of many popular fruits — from bananas and melons to pineapples and oranges — are usually discarded.

But if you’re cutting up the fruit, skipping the wash is a mistake. Before you reach for a knife to tackle your next watermelon, take a moment to learn the proper way to prep.

Wash Before You Cut

Any fruit with a sturdy rind that requires a knife should be washed before you make the first cut. To do it right, follow these steps:

Wash your hands, knife, and cutting board with hot, soapy water, then rinse them well.

1. Rinse the fruit under cool, running tap water, working from end to end.

2. Cut the fruit and remove the rind.

3. Wash your hands and work surface again when finished

Why go to all this trouble just to make a fruit tray? The skin is where bacteria, pesticides, and dirt accumulate. Rinsing removes the vast majority of pathogens that cause foodborne illness. Otherwise, the knife transfers bacteria from the surface into the fruit. Washing your hands before and after also prevents cross-contamination throughout your kitchen.

Advertisement

A Couple of Special Cases

A few fruits, such as pineapples, jackfruit, and cantaloupes, have rough skins that can trap dirt and bacteria. For these, you’ll need to take the extra step of scrubbing with a vegetable brush under running water to dislodge any debris. You will also need to sanitize the brush between uses; a hot cycle in the dishwasher will do that effectively.

Related: 5 Tips for Ripening Your Favorite Fruits Faster

You may be tempted to use a bleach solution or produce wash, but don’t. The FDA advises against it, as the chemical residues can make you sick. A thorough rinse and basic hygiene are more reliable. If you follow this process, you can worry less the next time there’s a food recall for contaminated fruit.

Advertisement
Featured Image Credit:  © Karolina Grabowska/Unsplash.com | Updated  Apr 13, 2026 |
Fred Decker
Writer
Fred Decker is a trained chef and former restaurateur. Since closing his restaurants over a decade ago he has been a prolific freelance writer, publishing several thousand articles on dozens of high-volume websites including Taste Of Home, Hunker, Tasting Table, Week&, eHow, and GOBankingRates. He lives on a rural acreage shared with a big garden, chickens, rabbits, and grandkids.
This article is for general informational purposes only.
Featured Image Credit:  © Karolina Grabowska/Unsplash.com | Updated  Apr 13, 2026 |