Advertisement
Decorating 5m read
7,487

The Best (And Worst) Paint Colors for Selling Your House

When preparing a home for sale, few upgrades deliver as much impact for as little investment as paint. A warm, welcoming interior palette can instantly turn a forgettable listing into a Zillow superstar. “Paint is the single highest return-on-investment (ROI) change a seller can make when preparing to list,” says Erik Leland, a real estate broker with Realty First in Lake Oswego, Oregon.

All featured products and deals are selected independently and objectively by the author. House Outlook may receive a share of sales via affiliate links in content.

When preparing a home for sale, few upgrades deliver as much impact for as little investment as paint. A warm, welcoming interior palette can instantly turn a forgettable listing into a Zillow superstar. “Paint is the single highest return-on-investment (ROI) change a seller can make when preparing to list,” says Erik Leland, a real estate…

The catch? Choosing the wrong colors can actually work against you, turning buyers off before they’ve even stepped through the entryway. Here, two industry experts weigh in on the interior paint colors they believe sell homes faster — and the ones that send buyers running.

Why Paint Color Matters to Buyers

The goal is simple: Make your home look as move-in ready as possible. If buyers are focused on mentally repainting every room, it becomes harder for them to picture themselves living there. The right palette eliminates distractions, allowing the home’s architecture and natural light to shine.

Related: These Are the White Paint Colors Designers Use the Most

The Best Colors for Selling Your House

Warm Neutrals: Soft White, Warm Taupe, Gray-Beige

If there’s one color category that’s a consistent home run, it’s warm neutrals. Think greige (gray-beige), soft white, and warm taupe. Leland says these colors look especially great in listing photos, which matters more than many sellers realize. “Ninety-five percent of buyers are forming their first impression online,” he says. “Homes using a palette from this group come across as bright, clean, and move-in ready in the listing photos. That is the trifecta for selling.”

Not just any white will do, though. Atlanta, Georgia-based interior designer Megan Paterson of Megan Paterson Interiors emphasizes that the best neutrals align with your home’s existing fixed elements, such as flooring, cabinetry, and stone. “Homes with warmer wood tones will benefit from soft, warm whites like Sherwin-Williams Shoji White or Benjamin Moore Swiss Coffee,” she explains. “Cooler finishes call for more balanced or slightly cool neutrals, such as Sherwin-Williams Snowbound.”

Leland echoes this advice, noting that a slightly tinted white will always outperform a flat, bright white. Benjamin Moore White Dove and Swiss Coffee — both warm whites with slightly different undertones — are two of his go-to recommendations.

Credit: © Jordan González/Unsplash.com
Advertisement

Soft Greens and Muted Blue-Grays

Beyond classic neutrals, light sage green and muted blue-grays are buyer-approved favorites, particularly for kitchens and bathrooms. “[These shades] feel intentional and modern without putting off buyers [who] prefer a traditional look,” Leland says. The key is that these colors read as thoughtful design choices rather than a personal statement, which is exactly what you want when trying to appeal to the broadest pool of buyers.

Sherwin-Williams Sea Salt is a designer pick in this category, offering a soft, spa-like quality that elevates a variety of home styles.

Credit: © Andrej Lišakov/Unsplash.com

Strategic Pops of Bold Color

While neutrals should carry the majority of the home, that doesn’t mean every space needs to be bland. Paterson notes that smaller spaces — like a powder room or home office — can handle moodier, deeper colors such as navy, forest green, or even violet without overwhelming the overall palette. The key is intentionality; think of these tones as doses of personality that add dimension to an otherwise calm, cohesive color story.

Credit: © Elena Popova/Unsplash.com
Advertisement
Related: 10 Affordable Upgrades Realtors Say Increase the Value of Your Home

The Worst Colors for Selling Your Home

Yellow

If you’ve dipped into yellow paint hoping to inject some cheer into your space, beware: You’ll want to repaint before listing. “Yellow is very polarizing,” Leland says. In listing photos, the color often casts a sickly, jaundiced tone over everything in the room. Leland even recalls a fellow agent who had to reshoot an entire home because the photographer couldn’t correct a “buttery” yellow tint in post-production.

Credit: © Julia/Unsplash.com

Dark Gray

Charcoal walls had their moment, but that moment has passed. Once-trendy choices can quickly date a home, and buyers are taking notice. Dark wall colors are especially problematic in overcast climates, where they only compound the gloom. “Buyers walk in and immediately comment on the house feeling dark,” Leland says.

Credit: © Clay Banks/Unsplash.com
Advertisement

Bright White

White might seem like the safest paint choice, but it can easily tip into feeling sterile or institutional. Buyers expect a home to convey warmth, and a flat, bright white simply doesn’t deliver. Instead, opt for a warm, slightly tinted white (like the ones mentioned above) to create a space that feels light yet inviting.

Credit: © MD SHAFAAT HOSSAIN/Pexels.com

Bright Reds and Oranges

Certain shades, while striking in the right context, can have adverse effects in large doses. Bold reds and oranges tend to be overstimulating — the opposite of the relaxed, welcoming atmosphere you want a buyer walking into. Rather than paint an entire room in a fiery hue, stick to a neutral palette and use red or orange sparingly in pillows, rugs, or artwork to add color without the commitment.

Credit: © Berna/Pexels.com
Advertisement
Featured Image Credit:  © Alex Tyson/Unsplash.com | Updated  Apr 7, 2026 |
Megan McCarty
Writer
Megan McCarty is a Los Angeles-based writer who covers the fun stuff: design, travel, wellness, beauty, and fashion. She has written for publications including Domino, The Spruce, MyDomaine, Bustle, and Rue Magazine. Her life rules include, but are not limited to, zipper when merging, contribute to your IRA, and do the nice thing.
This article is for general informational purposes only.
Featured Image Credit:  © Alex Tyson/Unsplash.com | Updated  Apr 7, 2026 |
Advertisement
Cleaning 2m read
473

Let Your Kettle Descale Itself

Enjoying a cup of tea — whether it’s a caffeine-packed blend in the morning or a soothing decaf at night — is a simple pleasure. You can savor each sip and enjoy a variety of additions, like a bit of sugar, honey, or milk. But sweetener can’t cover up an off-putting taste. If it’s not the tea or the ingredients, the culprit might be your kettle.

All featured products and deals are selected independently and objectively by the author. House Outlook may receive a share of sales via affiliate links in content.

Enjoying a cup of tea — whether it’s a caffeine-packed blend in the morning or a soothing decaf at night — is a simple pleasure. You can savor each sip and enjoy a variety of additions, like a bit of sugar, honey, or milk. But sweetener can’t cover up an off-putting taste. If it’s not…

To Descale, or Not To Descale, That Is the Question

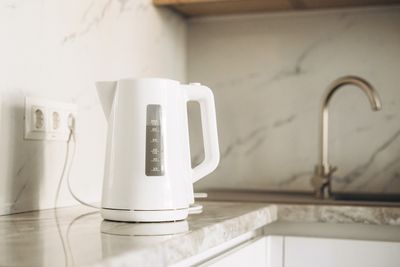
When you start noticing an off-taste in your tea, there’s no question about it: Your kettle needs a deep clean. More specifically, it likely needs to be descaled. When you use a kettle frequently, minerals in the tap water can create limescale buildup — especially if you live in an area with hard water.

Related: Why You Should Never Throw Away Used Tea Bags

The solution is simple, and it’s one of those self-cleaning hacks we know and love. (We’re looking at you, self-cleaning blender hack.) To descale your tea kettle, fill it with a 50/50 mix of distilled white vinegar and water, then bring it to a boil. Turn off the burner and remove the kettle from the heat. Let the solution sit for 30 minutes to an hour, giving it enough time to dissolve the limescale. Finally, pour out the mixture and give the kettle a good rinse. If the vinegar scent lingers, boil a fresh pot of water once or twice to clear it out.

Advertisement

Make Kettle Cleaning a Habit

If you use your tea kettle every day, plan to clean it more frequently to prevent any unwelcome flavors. Daily cleaning is as easy as emptying the kettle of leftover water, leaving the lid open to air-dry the interior, and wiping down the exterior with a microfiber cloth while it’s still warm. Aim to descale your kettle every one to three months, or monthly if you live in an area with hard water.

Advertisement
Advertisement
Food & Drink 2m read
297

The Safest Way To Grate Vegetables

Grating vegetables is essential for making recipes such as carrot cake or hash browns, but it’s important to be careful while shredding. All it takes is one wrong move for the sharp blades to cut your fingers — and nothing ruins a bowl of veggies faster than a few drops of blood. The risk grows as the vegetable whittles down to a nub and your fingers get closer to the grater. So, how can you protect yourself from injury?

All featured products and deals are selected independently and objectively by the author. House Outlook may receive a share of sales via affiliate links in content.

Grating vegetables is essential for making recipes such as carrot cake or hash browns, but it’s important to be careful while shredding. All it takes is one wrong move for the sharp blades to cut your fingers — and nothing ruins a bowl of veggies faster than a few drops of blood. The risk grows as…

The solution is quite simple, and it requires only a standard fork used in a somewhat creative way. Here’s a trick to protect your fingertips from cuts while grating with ease.

Related: You’re Grating Cheese All Wrong

Stick a Fork in It

Whether it’s a carrot, zucchini, potato, or any other vegetable you have on hand, stick a fork directly into one end. For this hack, it’s best to position the veggie so it runs lengthwise, parallel to the utensil rather than perpendicular. Be sure that the tines are deep enough to hold the vegetable firm, but not so deep that you risk hitting the utensil against the grater before the task is finished.

Advertisement

Grab the fork handle and vigorously rub the vegetable against the grater in an up-and-down motion. Once one side of the vegetable wears down near the tines, twist the fork handle in your hand to rotate the vegetable and grate the remaining sides. (There’s no need to remove or reposition the utensil while you shred.) Repeat until the vegetable is thoroughly whittled down and you’re left with a negligible hunk that you can compost.

Since you’ll hold the fork handle the entire time, your fingers will never get close enough to the blades to worry about accidental cuts. You can also use this hack to avoid injury when slicing veggies with a mandolin — an extremely sharp tool that’s dangerous if used improperly. In either case, the fork provides valuable distance between your fingers and the blades. For an added layer of protection, consider wearing cut-resistant gloves while prepping your meal.

Advertisement
Featured Image Credit:  © DebbiSmirnoff/iStock | Updated  Apr 7, 2026 |
Bennett Kleinman
Staff Writer
Bennett Kleinman is a New York City-based staff writer for Inbox Studio, covering topics for several brands including House Outlook and Better Report. He previously contributed to television programs such as "Late Show With David Letterman" and "Impractical Jokers," and digital publications like The Onion. Bennett is also a devoted New York Yankees and New Jersey Devils fan, and thinks plain seltzer is the best drink ever invented.
This article is for general informational purposes only.
Featured Image Credit:  © DebbiSmirnoff/iStock | Updated  Apr 7, 2026 |
Advertisement
Home Improvement 2m read
12,706

The Surprising Reason To Run an Empty Dryer

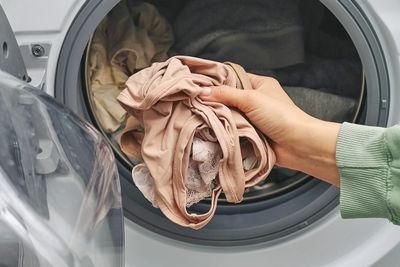
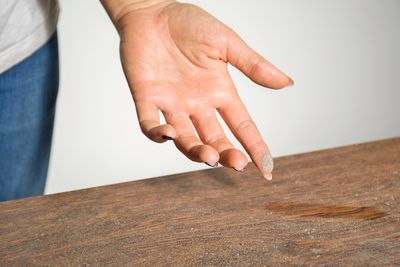
Imagine spending hours deep-cleaning the dryer, only to find you’re still dealing with pesky lint. The truth is that even if you disconnect the device, vacuum all its tubes and vents, and put it back in place, lint may be hiding in places you don’t even know about. But don’t panic — there’s a simple solution that takes only 15 minutes of your time. Before you start your next load, here’s why you should run a cycle with the drum completely empty.

All featured products and deals are selected independently and objectively by the author. House Outlook may receive a share of sales via affiliate links in content.

Imagine spending hours deep-cleaning the dryer, only to find you’re still dealing with pesky lint. The truth is that even if you disconnect the device, vacuum all its tubes and vents, and put it back in place, lint may be hiding in places you don’t even know about. But don’t panic — there’s a simple…

An Empty Cycle With Fulfilling Results

This hack works best after a deep clean has removed the bulk of the dust and lint. Once the dryer is back in place, run one empty load. Let the appliance run for 10 to 15 minutes on a “cool” or “air-only” setting. This process captures any loose dust you might have missed. When the cycle ends, simply wipe the lint trap clean.

Related: The Common Laundry Habit That’s Ruining Your Towels

We recommend doing this after every deep clean, which should be performed every six to 12 months to keep the unit in top condition and reduce potential fire risks.

Advertisement

General Tips for Lint Mitigation

You’re probably wondering if there’s a way to keep lint levels low between deep cleans. Lint can build up significantly in just six months, so staying on top of maintenance is key.

The best habit is to clear the lint trap before and after every load. You can do this by hand, with a dry cloth, a soft brush, or even a vacuum. Speaking of vacuums: Be sure to suction out the slot where the lint trap slides in, as lint often gets trapped inside. You can also use a long, flexible brush for this task.

Finally, give the lint trap a deep clean every month. Use a bit of dish soap, warm water, and a soft brush to rid the mesh screen of any residue. Once the trap is completely dry, reinsert it and continue your laundry routine as usual.

Advertisement
Featured Image Credit:  Elmar Gubisch/iStock | Updated  Apr 7, 2026 |
Bennett Kleinman
Staff Writer
Bennett Kleinman is a New York City-based staff writer for Inbox Studio, covering topics for several brands including House Outlook and Better Report. He previously contributed to television programs such as "Late Show With David Letterman" and "Impractical Jokers," and digital publications like The Onion. Bennett is also a devoted New York Yankees and New Jersey Devils fan, and thinks plain seltzer is the best drink ever invented.
This article is for general informational purposes only.
Featured Image Credit:  Elmar Gubisch/iStock | Updated  Apr 7, 2026 |
Advertisement
Cleaning 3m read
709

You Touch This Daily But Never Clean It

The fight against germs is a never-ending struggle. People sanitize their hands, disinfect countertops, and keep their distance from anyone who’s coughing or sneezing. But even the most hygiene-conscious individuals may miss potential problem areas, and we’re here to point out one glaring example.

All featured products and deals are selected independently and objectively by the author. House Outlook may receive a share of sales via affiliate links in content.

The fight against germs is a never-ending struggle. People sanitize their hands, disinfect countertops, and keep their distance from anyone who’s coughing or sneezing. But even the most hygiene-conscious individuals may miss potential problem areas, and we’re here to point out one glaring example.

Most of us touch this object every day, but if asked when we last cleaned it, we’d likely struggle to remember. Many have probably never cleaned it at all. Let’s take a closer look at this overlooked touchpoint and how to keep it clean.

The Keys to Cleanliness

You touch your keys several times a day — but you’re not the only one handling them. You might give your house keys to a family member or toss your car keys to a valet without a second thought. Through it all, those keys likely accumulate a host of germs, yet they often go unsanitized. And at the end of the day, the dirty keys sit on your countertop, where bacteria can freely spread.

Related: 10 Items Around the House That Are Way Dirtier Than You Think

Fortunately, this is an easy issue to reverse. You can keep your keys germ-free with minimal effort. All you need are two small bowls, liquid dish soap, an old toothbrush, and a clean cloth.

Advertisement

Before proceeding, remove any electronics or decorative items from the key ring to prevent water damage. Then fill two small bowls — one with warm water and a few drops of liquid dish soap, the other with plain water. Submerge the keys in the soapy solution and swirl them for a few seconds. Remove them and use the toothbrush to scrub away built-up dirt or grime, then rinse the keys in the bowl of clean water.

Now it’s time for the finishing touches. Dry the keys thoroughly to prevent rust; while most are made of rust-resistant brass or nickel-silver, this step also helps avoid water spots. Finally, apply isopropyl alcohol to a clean rag and wipe down the metal. This kills any remaining bacteria, leaving your keys sanitized and ready for use.

Advertisement
Featured Image Credit:  © blackCAT/iStock | Updated  Apr 7, 2026 |
Bennett Kleinman
Staff Writer
Bennett Kleinman is a New York City-based staff writer for Inbox Studio, covering topics for several brands including House Outlook and Better Report. He previously contributed to television programs such as "Late Show With David Letterman" and "Impractical Jokers," and digital publications like The Onion. Bennett is also a devoted New York Yankees and New Jersey Devils fan, and thinks plain seltzer is the best drink ever invented.
This article is for general informational purposes only.
Featured Image Credit:  © blackCAT/iStock | Updated  Apr 7, 2026 |
Advertisement
Food & Drink 3m read
10,093

Make Your Berries Last Twice as Long

While all fresh produce is perishable, some items are hardier than others. Root vegetables, such as rutabagas and carrots, can last quite a while, but salad greens and fresh berries are far more delicate. In fact, berries are among the most perishable items in the produce aisle. Seeing them spoil before you can finish them is a frustrating waste of both food and money.

While all fresh produce is perishable, some items are hardier than others. Root vegetables, such as rutabagas and carrots, can last quite a while, but salad greens and fresh berries are far more delicate. In fact, berries are among the most perishable items in the produce aisle. Seeing them spoil before you can finish them…

If you enjoy fresh berries — whether they’re home-picked, store-bought, or from the farmers market — you’ll be delighted to know there’s a simple trick that can double their storage life. 

The Berry-Saving Vinegar Soak

The key to making your berries last longer lies in giving them a quick bath as soon as you get home. Because berries are high in moisture and sugar, they’re — pardon the pun — ripe for mold, fungus, and spoilage bacteria. Rather than putting your haul directly into the fridge, take a few minutes to prep them for storage.

Related: 10 Chef-Approved Storage Hacks To Make Food Last Longer

First, pick through your berries and discard any that are moldy or deteriorating. Also be sure to eat or throw away any overripe fruit, as it can accelerate ripening in the rest of the batch. Next, mix together three parts cool water and one part distilled white vinegar in a bowl large enough to hold your berries. For firmer berries like strawberries and blueberries, submerge the berries and swish them gently, letting them sit for about five to 10 minutes. More delicate varieties, such as raspberries and blackberries, should be soaked for only 30 seconds to two minutes. When the time’s up, drain them in a colander and give them a quick rinse under cool running water.

Advertisement

Why This Hack Works

While rinsing most produce can actually shorten its lifespan, berries are a notable exception. A vinegar soak is a positive because the acidity kills bacteria, mold, and fungal spores. This not only makes the fruit safer to eat — berries, like salad greens, are occasionally subject to recalls — but it also eliminates the main culprits that threaten their storage life.

The few minutes you invest in soaking your berries can extend their refrigerator life to a week or more, roughly double what you’d ordinarily expect. It saves money, reduces food waste, and helps your grocery budget — not a bad exchange for a few minutes of your time.

Advertisement
Featured Image Credit:  © Global_Pics/iStock | Updated  Apr 7, 2026 |
Fred Decker
Writer
Fred Decker is a trained chef and former restaurateur. Since closing his restaurants over a decade ago he has been a prolific freelance writer, publishing several thousand articles on dozens of high-volume websites including Taste Of Home, Hunker, Tasting Table, Week&, eHow, and GOBankingRates. He lives on a rural acreage shared with a big garden, chickens, rabbits, and grandkids.
This article is for general informational purposes only.
Featured Image Credit:  © Global_Pics/iStock | Updated  Apr 7, 2026 |
Advertisement
Cleaning 2m read
301

Are You Using Your Scrub Daddy Correctly?

Many people consider Scrub Daddy sponges a household staple, largely due to the brand’s proprietary polymer foam. This material, called FlexTexture, is designed to be nonscratch and temperature-sensitive; it turns soft in warm water for light cleaning and remains firm in cold water for tough scrubbing. The foam is also odor-resistant, preventing that nasty “old sponge” smell. And while the smiley face design makes it hard to resist at the checkout counter, the Scrub Daddy provides more functionality than its adorable appearance suggests.

All featured products and deals are selected independently and objectively by the author. House Outlook may receive a share of sales via affiliate links in content.

Many people consider Scrub Daddy sponges a household staple, largely due to the brand’s proprietary polymer foam. This material, called FlexTexture, is designed to be nonscratch and temperature-sensitive; it turns soft in warm water for light cleaning and remains firm in cold water for tough scrubbing. The foam is also odor-resistant, preventing that nasty “old…

Smile, It’s Contagious (and Serves a Purpose)

There’s actually a point to the smiley face — and it isn’t just to make dish duty more enjoyable. The design is a functional feature: The eyes are ergonomic finger holes, allowing you to secure the sponge with your pointer and middle fingers to prevent hand cramping during deep cleans. These holes are also the perfect size for cleaning chopsticks, the outside of reusable straws, or digital meat thermometers.

Related: Disinfect Sponges Overnight With This Pantry Staple

The beaming smile also has a specific purpose. It’s designed to clean the fronts and backs of spoons, forks, and knives in a single swipe. It’s even wide enough to accommodate spatulas, serving spoons, and ice cream scoopers. And if your Scrub Daddy has spiky hair, use those edges to tackle grill grates, cupcake tins, and other nooks and crannies.

Advertisement

What About Scrub Mommy Sponges?

While the Scrub Daddy features the same texture on both sides, the Scrub Mommy is dual-sided. One side is FlexTexture, while the other is a softer material called ResoFoam. This spongy side is highly absorbent, making it useful for everyday cleaning tasks or washing delicate dinnerware. You can sanitize both the Scrub Daddy and Scrub Mommy on the top rack of a dishwasher.

Advertisement
Featured Image Credit:  © Rokas/stock.adobe.com | Updated  Apr 6, 2026 |
Jessie Quinn
Writer
Jessie Quinn is a Los Angeles-based lifestyle journalist with words published in PEOPLE, StyleCaster, Apartment Therapy, The Spruce, Byrdie, and more. She has a Bachelor's Degree in fashion journalism from Academy of Art University and her work spans across many categories, including style, beauty, home, health, crafts, and more.
This article is for general informational purposes only.
Featured Image Credit:  © Rokas/stock.adobe.com | Updated  Apr 6, 2026 |
Advertisement
Organizing 5m read
15,765

12 Items You’ll Never Regret Decluttering

“What if I need it someday? What if I miss it?” Most of us have probably asked ourselves these questions when deciding whether to part with certain personal belongings. Decluttering can feel overwhelming, especially when you’re worried about future regrets. However, professional organizers say there are some items you can let go of without a second thought. Clearing out these common clutter culprits — from forgotten craft supplies to unused household extras — is guaranteed to make your home feel calmer and cleaner.

“What if I need it someday? What if I miss it?” Most of us have probably asked ourselves these questions when deciding whether to part with certain personal belongings. Decluttering can feel overwhelming, especially when you’re worried about future regrets. However, professional organizers say there are some items you can let go of without a…

If you’re looking for a quick organizational win, start with these 12 items that experts say people rarely regret giving up.

1. Old Linens and Pillowcases

After years of wear, sheets and pillowcases can become thin, stained, and dingy. “A lot of people keep them tucked away in a closet thinking they might use them someday, but they rarely do,” says Gillian Economou, a professional organizer based in Washington, D.C. Saving just a few sets of linens you genuinely like makes for a more manageable linen closet and sounder sleep.

Credit: © Yusuke Ide/iStock

2. Promotional Merchandise

Free promotional items, such as branded tote bags, T-shirts, and water bottles, have a way of quietly accumulating over time. Since they weren’t intentionally chosen, Lisa Jacobs of Imagine It Done says they’re rarely items people truly want to use. “It’s a big relief to see them go,” she says.

Advertisement

3. Mystery Cables

Many households have a drawer filled with tangled cords saved “just in case.” But when was the last time you actually used any of them? “If you don’t know what it belongs to and haven’t needed it in a long time, you probably won’t miss it once it’s gone,” New Orleans-based professional organizer Olivia Parks says.

Credit: © Claudio Borquez/iStock
Related: How To Find and Fix Hidden Clutter Hot Spots

4. Beauty Product Samples

Be honest: What are the chances you’ll ever use that pile of travel-sized beauty products? “Samples end up becoming an aspirational ‘to do,’ and freeing yourself from them can be liberating,” says Tova Weinstock of Tidy Tova. Paring down to the products you actually use makes daily routines simpler and keeps bathroom storage from overflowing.

Advertisement

5. Worn-Out Kitchen Sponges

Economou warns that once a sponge starts smelling or falling apart, it’s time for a replacement. Swapping in a fresh sponge is a small change that makes a big impact, ensuring your sink area feels and smells noticeably cleaner.

Credit: © Ladanifer/iStock

6. Sentimental Items Kept Out of Guilt

Holiday cards and children’s artwork can be meaningful, but not if you’re hanging on to them for the wrong reasons. “The guilt dissolves as soon as you let go,” Jacobs says. “Take a photo [and] keep it in a folder on your phone. That memory is more impactful than when it was stored deep in a space somewhere, rarely seen.”

Advertisement

7. Expired Food Items

The back of a fridge can easily become a graveyard for nearly empty ketchup bottles, moldy leftovers, and mystery takeout containers. If you can’t remember when a meal was made — or what it even is — it’s past time to let it go. “If food has been sitting in your fridge or freezer so long that you forgot it was even there, it’s a sign it can go,” Economou says.

Credit: © Zhen Yao/Unsplash.com

8. Unfinished Craft Projects

That half-knitted scarf or abandoned paint-by-numbers kit may have started with good intentions, but unfinished projects can sometimes feel more stressful than inspiring. “Unfinished projects can lead to heavy emotions — worthlessness, for one — and bring you down, so get rid of them and move on to the next project that actually energizes you to completion,” Weinstock says.

Advertisement

9. Extra Hardware

When assembling a new nightstand, it’s common to end up with a small bag of leftover screws, bolts, or brackets. “As long as the furniture has successfully been built — or the TV mounted, or the toy put together — trash those extra parts before they take up precious space in your junk drawer and mind,” Weinstock says.

Credit: © Dhoxax/iStock
Related: Why Every Home Needs an ‘I Don’t Know’ Bin

10. Stained or Torn Clothing

Face it: No matter how many times you wash it, that oil stain on your once-favorite shirt will never come out. Take a deep sigh and move along,” Weinstock says.

Advertisement

11. Junk Mail

Paper clutter is one of the fastest ways surfaces become overwhelmed — and it’s some of the easiest clutter to eliminate. Parks recommends creating a simple habit of sorting mail as soon as it comes inside to keep useless coupons and paper bills you automatically pay online from piling up in the first place.

Credit: © ideabug/iStock

12. Excess Jewelry Boxes and Dust Bags

A dust bag (or two) and a jewelry box (or two) are admittedly great for travel. However, there’s no need to keep a dust bag for every pair of shoes you own. “I guarantee you’ll be OK without a robust collection,” Weinstock says.

Advertisement
Featured Image Credit:  © Beatriz Herrera/iStock | Updated  Mar 31, 2026 |
Megan McCarty
Writer
Megan McCarty is a Los Angeles-based writer who covers the fun stuff: design, travel, wellness, beauty, and fashion. She has written for publications including Domino, The Spruce, MyDomaine, Bustle, and Rue Magazine. Her life rules include, but are not limited to, zipper when merging, contribute to your IRA, and do the nice thing.
This article is for general informational purposes only.
Featured Image Credit:  © Beatriz Herrera/iStock | Updated  Mar 31, 2026 |
Advertisement
Food & Drink 3m read
277

The Bathroom Essential That Belongs on Your Coffee Cart

What’s the best part of waking up? According to Folgers in the ’90s, it was a hot cup of coffee — and decades later, we couldn’t agree more. Whether you take it black or light and sweet, crafting a cup at home is quick and easy. However, if you’re craving something a little fancier, like perhaps a foamy café au lait, but you don’t have a milk frother at home, you might think you’re out of luck. Before you head out to your local coffee shop, try this genius hack using a common household item — one you likely have sitting right next to your sink.

All featured products and deals are selected independently and objectively by the author. House Outlook may receive a share of sales via affiliate links in content.

What’s the best part of waking up? According to Folgers in the ’90s, it was a hot cup of coffee — and decades later, we couldn’t agree more. Whether you take it black or light and sweet, crafting a cup at home is quick and easy. However, if you’re craving something a little fancier, like…

How To Hack a Free Frother

If you’re searching for a free or low-cost way to take your morning coffee from average to café quality, look no further than your kitchen sink. You can turn a basic foaming soap dispenser into a DIY milk frother in minutes.

Of course, you’ll need to deep-clean the soap dispenser before you fill it with milk. To prime the pump for service, first empty out the soap, then flush the container with hot water until the bubbles stop. Next, fill it with a mixture of hot water and a drop of dish soap; pump this through several times to clear away any lingering hand-soap oils. If the dispenser was filled with scented soap, follow up with a 1:1 mixture of hot water and distilled white vinegar. Let the solution sit inside the pump for 15 minutes before pumping it through. Then, unscrew the pump and soak it in a fresh vinegar and water bath (using the same 1:1 ratio) for about one hour. After a final rinse with plain hot water, you’re ready to froth.

Related: Why You Should Use a Tea Steeper for Baking

If you’re worried about an aftertaste, you can always invest in a brand-new foaming soap dispenser. We recommend these UUJOLY foaming soap dispensers, which are sold in a two-pack and have a 33-ounce capacity.

Advertisement

Why Does It Work?

Foaming soap pumps work well for this hack because they function exactly like a professional-grade milk frother. These pumps create a thick, foamy consistency by injecting air into foaming soap — which is more diluted than liquid hand soap — as it passes through a fine mesh screen. Milk frothers, such as the Subminimal NanoFoamer, do the same thing by whipping air into milk, resulting in a velvety texture. While this hack won’t produce steamed milk, it delivers a perfect dollop of foam to top or mix into your favorite morning blend.

Got Milk?

Wondering which dairy or plant-based milks work best in a soap-dispenser-turned-frother? Liquids that are too thick will clog the internal mesh screen, while those that are too thin will result in bubbles that pop instantly. To get a dense dollop of foam, use 2% or whole milk; for nondairy drinkers, a barista-blend oat milk or regular soy milk will do the trick.

Advertisement
Advertisement
Home Improvement 3m read
1,668

Your Oven’s Most Controversial Setting, Explained

Between bake, broil, warm, start, cancel, light, timer, clock, and so on, the average oven has nearly as many buttons as a computer keyboard. Thankfully, most features are self-explanatory, which makes operating the oven a breeze. Be careful, though: While one particular setting may seem harmless, it comes with trade-offs many people don’t realize. Instead of relying on it regularly, it may be worth using this function sparingly to avoid potential issues. Keep reading to find out which oven setting deserves a second look before you press start.

Between bake, broil, warm, start, cancel, light, timer, clock, and so on, the average oven has nearly as many buttons as a computer keyboard. Thankfully, most features are self-explanatory, which makes operating the oven a breeze. Be careful, though: While one particular setting may seem harmless, it comes with trade-offs many people don’t realize. Instead…

Can’t Stand the Heat

Ovens become greasy and dirty over time, whether from scattered pie crumbs or the juices that drip down while you’re roasting a turkey. When it’s time to clean, the last thing most people want to do is get on their hands and knees and scrub, which is why many use the oven’s self-clean feature instead. But while this setting is convenient, it isn’t always as simple — or as risk-free — as it seems.

Related: Clean Your Oven While You Sit on the Couch

The self-clean setting uses extreme heat to burn off residue and melt away grease. During this process, internal temperatures can reach 800 to 1,000 degrees Fahrenheit. This heat effectively turns food debris into ash, but it can also put added stress on critical components over time, including the control board, thermal fuses, heating elements, and temperature sensors. In some cases — particularly in older or heavily used ovens — this strain can lead to malfunctions or costly repairs.

Advertisement

Additionally, despite its name, the self-clean cycle doesn’t actually leave your oven spotless. It works by turning grime into ash, which still needs to be wiped away once the oven cools. As the residue burns off, the oven may also produce smoke or noxious odors. While associated health issues are uncommon, this feature should be used sparingly rather than routinely.

To reduce the risk of problems, manufacturers typically recommend removing oven racks, aluminum foil, and any cookware before starting the cycle. It’s also a good idea to wipe up any large spills beforehand and run the hood vent or open a window to ventilate the kitchen. Keep any heat-sensitive items away from the unit as well. Your oven’s self-cleaning feature should only be used every few months at most — overdoing it can shorten the appliance’s lifespan.

Advertisement
Featured Image Credit:  shine.graphics/stock.adobe.com | Updated  Mar 31, 2026 |
Bennett Kleinman
Staff Writer
Bennett Kleinman is a New York City-based staff writer for Inbox Studio, covering topics for several brands including House Outlook and Better Report. He previously contributed to television programs such as "Late Show With David Letterman" and "Impractical Jokers," and digital publications like The Onion. Bennett is also a devoted New York Yankees and New Jersey Devils fan, and thinks plain seltzer is the best drink ever invented.
This article is for general informational purposes only.
Featured Image Credit:  shine.graphics/stock.adobe.com | Updated  Mar 31, 2026 |