Advertisement
Cleaning 2m read
1,037

The Common Laundry Habit That’s Ruining Your Towels

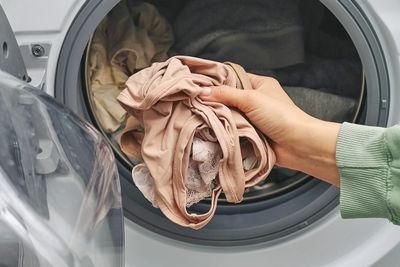
Investing in high-quality, plush towels is a surefire way to elevate your shower routine to a five-star hotel experience. And popping them in the dryer before you step into the shower — or, you know, whenever you actually get around to the laundry — leaves your bathroom linens feeling exceptionally soft and fluffy. However, you might be making a grave mistake the moment you hit the “start” button.

All featured products and deals are selected independently and objectively by the author. House Outlook may receive a share of sales via affiliate links in content.

Investing in high-quality, plush towels is a surefire way to elevate your shower routine to a five-star hotel experience. And popping them in the dryer before you step into the shower — or, you know, whenever you actually get around to the laundry — leaves your bathroom linens feeling exceptionally soft and fluffy. However, you…

Before you panic, know that towels are perfectly dryer-safe, and a low-to-medium heat cycle actually helps preserve the fibers’ integrity. The trouble starts when you reach for a dryer sheet.

Why Dryer Sheets Are a No-No for Towels

Dryer sheets are coated with fabric softener that melts into your laundry as the dryer heats up. This process coats the fabric in a thin layer of residue to reduce static and improve softness. While this sounds great in theory, that buildup wreaks havoc on a towel’s absorbency, resulting in a linen that’s all fluff and no function.

Related: The Secret to Supersoft, Fluffy Towels

That transfer from the dryer sheet creates a hydrophobic barrier that prevents towel fibers from soaking up water — no matter how fluffy they look. Repeatedly exposing your linens to these sheets leads to a waxy buildup that reduces their efficacy with every load. It’s also worth noting that you shouldn’t use fabric softener in the wash, either, as the same issues can occur.

Advertisement

Tips To Keep Towels Plush

To get softer, fluffier towels without dryer sheets, use a low-to-medium heat cycle to prevent that stiff, crunchy texture. You can also toss in a few wool dryer balls; they’ll improve softness and cut down on drying time without interfering with your towels’ absorbency.

Advertisement
Featured Image Credit:  Julia/stock.adobe.com | Updated  Mar 31, 2026 |
Jessie Quinn
Writer
Jessie Quinn is a Los Angeles-based lifestyle journalist with words published in PEOPLE, StyleCaster, Apartment Therapy, The Spruce, Byrdie, and more. She has a Bachelor's Degree in fashion journalism from Academy of Art University and her work spans across many categories, including style, beauty, home, health, crafts, and more.
This article is for general informational purposes only.
Featured Image Credit:  Julia/stock.adobe.com | Updated  Mar 31, 2026 |
Advertisement
Gardening 3m read
391

Skip the Pesticides — Try Beer Instead

After a long day of gardening, you may feel the urge to reward yourself with a nice, cold beer. But that bottle can do more than just help you unwind. Much like companion planting and beneficial insects, beer can be used as a form of natural pest control to keep plants free of invaders. Here’s why you should head to the fridge for a brew instead of reaching for toxic pesticides.

After a long day of gardening, you may feel the urge to reward yourself with a nice, cold beer. But that bottle can do more than just help you unwind. Much like companion planting and beneficial insects, beer can be used as a form of natural pest control to keep plants free of invaders. Here’s…

Turning Beer Into a Pest Magnet

Beer is a secret weapon in the garden, but not in the way you might think. Unlike marigolds or cinnamon, which drive pests away, beer acts as a lure. Its yeasty, hoppy aroma is irresistible to slugs and snails, drawing them away from your favorite garden plants and into a simple trap. You don’t need a craft IPA for this to work; any cheap, yeasty lager (think Pabst Blue Ribbon, Budweiser, or Coors Banquet) should suffice.

Related: How To Stop Birds From Destroying Your Garden

Making a Beer Trap

Because the smell of fermentation is highly attractive to slugs (the nemesis of every gardener in a nonarid climate), a simple beer trap is your best line of defense.

Advertisement

Making a beer trap couldn’t be easier: Bury a shallow container so the rim sits about an inch above the soil; then, fill it with an inch of cheap lager. This height prevents beneficial insects from tumbling into your trap while allowing slugs — who are expert climbers — to scale the lip and perish in the pool of alcohol below. They have little chance of escaping because the mucus they rely on for movement and grip becomes ineffective and begins to break down once they’re submerged in the beer.

The slugs will eagerly crawl inside the trap and drown or succumb to alcohol poisoning. For the best results, empty and refill your traps every two to three days — or sooner if they fill up quickly. Avoid using old or stale beer, which lacks the yeasty scent needed to attract these slimy pests. Use as many traps as necessary to keep your garden slug-free, placing them 3 to 5 feet away from the plants you’re trying to protect. Tuck them into shady, damp corners where slugs are likely to seek protection from the sun.

Advertisement
Featured Image Credit:  © mtreasureiStock | Updated  Mar 31, 2026 |
Fred Decker
Writer
Fred Decker is a trained chef and former restaurateur. Since closing his restaurants over a decade ago he has been a prolific freelance writer, publishing several thousand articles on dozens of high-volume websites including Taste Of Home, Hunker, Tasting Table, Week&, eHow, and GOBankingRates. He lives on a rural acreage shared with a big garden, chickens, rabbits, and grandkids.
This article is for general informational purposes only.
Featured Image Credit:  © mtreasureiStock | Updated  Mar 31, 2026 |
Advertisement
Food & Drink 3m read
181

Stop Using a Measuring Spoon for Vanilla

Vanilla, with its aromatic and complex profile, has been a prized botanical for centuries. Its history dates back to the 12th-century Totonac people in present-day Mexico. The spice remained a labor-intensive luxury for hundreds of years until the 1840s, when chemist Joseph Burnett invented vanilla extract. While still derived from vanilla beans, the extract captured their flavor in alcohol, making it easier to distribute and use — and helped turn vanilla into a household staple.

All featured products and deals are selected independently and objectively by the author. House Outlook may receive a share of sales via affiliate links in content.

Vanilla, with its aromatic and complex profile, has been a prized botanical for centuries. Its history dates back to the 12th-century Totonac people in present-day Mexico. The spice remained a labor-intensive luxury for hundreds of years until the 1840s, when chemist Joseph Burnett invented vanilla extract. While still derived from vanilla beans, the extract captured…

For many people, the scent of vanilla extract conjures up fond memories of baking. Because it’s a key component in so many desserts — including cakes, cookies, and creamy custards — it sparks that instant sensory connection.

Most bakers measure their vanilla with a measuring spoon, of course. But there’s a much simpler way to get a precise pour without ever opening the utensil drawer.

Related: Why You Should Use a Tea Steeper for Baking

The One-Cap Plus Splash Shortcut

The secret lies in the packaging: It turns out that the caps on many major brands of vanilla extract measure either 1/2 or 3/4 teaspoon. McCormick, the most popular brand of vanilla extract in the U.S., offers two common sizes: a 2-ounce bottle with a 1/2 teaspoon cap and a 4-ounce bottle with a 3/4 teaspoon cap.

Because most cake and cookie recipes call for a full teaspoon, savvy bakers follow the “cap and splash” rule: one capful of vanilla extract followed by a generous splash to make up the difference. While you should verify this with your specific bottle first, you can likely skip the measuring spoon the next time you bake a batch of chocolate chip cookies.

Advertisement

Tips and Cautions

Verify this method once before proceeding by filling a capful and pouring the liquid into a measuring spoon. Remember: The volume can vary by brand and bottle size. Also note that this trick may not work for other extract flavors, or for imitation vanilla, which is an entirely different product.

Using an exact measurement of vanilla rarely makes or breaks a recipe. It doesn’t trigger a precise chemical reaction like baking powder does. If your recipe calls for 1 teaspoon of vanilla extract and your cap measures 3/4 of a teaspoon, it will usually suffice. The only risk is overwhelming a recipe with too much vanilla — its potent flavor can easily dominate other ingredients. If you’re scaling up a recipe to feed a crowd, it’s worth the extra step to measure out the vanilla.

Advertisement
Featured Image Credit:  © Rachel Loughman/Pexels.com | Updated  Mar 31, 2026 |
Allegra Ringo
Writer
Allegra Ringo is a California-based writer who has written for publications including Reductress, The Hard Times, VICE, and The Atlantic. She loves sparkling water and old Chihuahuas with hardly any teeth, like her dog Pistachio.
This article is for general informational purposes only.
Featured Image Credit:  © Rachel Loughman/Pexels.com | Updated  Mar 31, 2026 |
Advertisement
Decorating 3m read
442

The One Design Mistake That Makes Rooms Feel Flat

Take a look around your living room — or any space that feels a bit flat. The sofa fits, the colors coordinate, and the artwork inspires, yet the room still lacks energy. Often, the issue is how your eyes move, or don’t move, through the room. Well-designed spaces gently guide the eye from one area to another, creating a sense of rhythm and interest. Think of it like a city skyline: Buildings of different heights make a landscape more engaging because your gaze has somewhere to travel. Interiors work the same way. When most pieces sit at the same visual level, the space can feel static. Fortunately, there’s a simple styling principle designers use to fix this.

All featured products and deals are selected independently and objectively by the author. House Outlook may receive a share of sales via affiliate links in content.

Take a look around your living room — or any space that feels a bit flat. The sofa fits, the colors coordinate, and the artwork inspires, yet the room still lacks energy. Often, the issue is how your eyes move, or don’t move, through the room. Well-designed spaces gently guide the eye from one area to…

How To Create a “Skyline” in a Space

When furniture pieces all land at a similar height — sofa, coffee table, side tables, console — the room can appear visually level, like a plateau. Creating more dimension doesn’t require a full redesign or a big budget, however. Simply introduce a few thoughtfully placed vertical elements to draw the eye upward. Think of yourself as the room’s architect, arranging a mix of tall, medium, and low elements. This variety adds movement and keeps the space from feeling stagnant.

Related: Design Trends Homeowners Regret the Most, According to Interior Designers

Design Tricks To Draw the Eye Upward

Wall art is one of the easiest ways to introduce height. A large framed piece or gallery wall lifts the room’s visual weight while adding a personal touch. Textiles achieve a similar effect; a tapestry, wall hanging, or mounted fabric panel brings in both height and texture.

Advertisement

Window treatments are another powerful, practical trick. Hanging curtain rods closer to the ceiling elongates the walls, subtly raising the room’s perceived height. A tall bookshelf works the same way, adding vertical structure while providing space for books, plants, and framed photos. Floor lamps are another smart option, offering height and light without taking up much floor space.

You can’t beat the efficiency of a tall, slim mirror either. Leaning one against a wall introduces a strong upward line while reflecting light around the room, helping the space look brighter and more open.

Ultimately, the goal isn’t to fill every wall with towering pieces, but to create balance. Pair low furniture with a few taller elements, and the room immediately feels more visually dynamic.

Advertisement
Featured Image Credit:  © Clay Banks/Unsplash.com | Updated  Mar 31, 2026 |
Megan McCarty
Writer
Megan McCarty is a Los Angeles-based writer who covers the fun stuff: design, travel, wellness, beauty, and fashion. She has written for publications including Domino, The Spruce, MyDomaine, Bustle, and Rue Magazine. Her life rules include, but are not limited to, zipper when merging, contribute to your IRA, and do the nice thing.
This article is for general informational purposes only.
Featured Image Credit:  © Clay Banks/Unsplash.com | Updated  Mar 31, 2026 |
Advertisement
Cleaning 3m read
1,637

Clean Your Oven While You Sit on the Couch

When you’re lying on the couch, productivity usually takes a backseat to figuring out which Netflix show to stream. But what if we told you there’s a way to clean the oven while you’re sprawled out on the sofa? It sounds hard to believe, but ovens aren’t actually that difficult to clean. It takes only a few seconds to prepare a cleaning solution that works its magic while you spend the next hour watching your favorite show. Check out this simple, game-changing hack that clears away oven grease and grime.

All featured products and deals are selected independently and objectively by the author. House Outlook may receive a share of sales via affiliate links in content.

When you’re lying on the couch, productivity usually takes a backseat to figuring out which Netflix show to stream. But what if we told you there’s a way to clean the oven while you’re sprawled out on the sofa? It sounds hard to believe, but ovens aren’t actually that difficult to clean. It takes only…

A Sour Solution With Sweet Results

Steam cleaning is one of the most effective ways to remove built-up gunk in your oven. Whether a cheesy pizza dripped onto the grates or a casserole bubbled over and made a mess, steam can loosen food residue to make it easier to wipe away. But for a truly effective clean, add a bit of distilled white vinegar.

Related: Stop Scrubbing Your Oven Racks in the Sink — Do This Instead

Begin by preheating the oven to 400 degrees Fahrenheit. While the appliance heats up, fill a deep, oven-safe baking dish with about 2 inches of water and 3/4 to 1 cup of distilled white vinegar for extra oomph. Once the oven reaches the desired temperature, place the dish on the middle rack, shut the door, and wait for the mixture to boil. In general, this takes about 10 to 20 minutes, but it’s a good idea to check periodically for bubbling through the oven window. Once it begins to boil, turn off the heat and let the mixture steam for 30 minutes. Keep the door firmly shut to prevent steam from escaping — but otherwise, you’re free to relax on the couch for the next half-hour.

Advertisement

Cool Down, Then Clean Up

After 30 minutes, return to the kitchen, open the oven door, and remove the dish. Head back to the living room to relax for another 30 minutes while the oven cools. Once it’s cool to the touch, it’s time to get off the couch and get to work.

Use a microfiber cloth to wipe down the oven’s interior. You’ll be surprised by how easily the gunk clears away thanks to the steam. For an even deeper clean, mix a 50-50 solution of water and distilled white vinegar in a spray bottle to use as you wipe. Steam is often enough on its own, but a spray bottle is a great backup for stubborn spots. After a little light scrubbing, your oven should look as good as new.

Advertisement
Featured Image Credit:  © JazzIRT/iStock | Updated  Mar 31, 2026 |
Bennett Kleinman
Staff Writer
Bennett Kleinman is a New York City-based staff writer for Inbox Studio, covering topics for several brands including House Outlook and Better Report. He previously contributed to television programs such as "Late Show With David Letterman" and "Impractical Jokers," and digital publications like The Onion. Bennett is also a devoted New York Yankees and New Jersey Devils fan, and thinks plain seltzer is the best drink ever invented.
This article is for general informational purposes only.
Featured Image Credit:  © JazzIRT/iStock | Updated  Mar 31, 2026 |
Advertisement
Decorating 4m read
0

The Best Home Deals From Amazon’s Big Spring Sale

The days are getting longer, the weather is getting warmer, and Amazon’s Big Spring Sale is blooming with home deals. From March 25 to 31, the weeklong sales event is offering discounts of up to 40% off a wide range of home essentials, including furniture and decor, kitchenware, cleaning supplies, organizing solutions, gardening gear, and home improvement products.

All featured products and deals are selected independently and objectively by the author. House Outlook may receive a share of sales via affiliate links in content.

The days are getting longer, the weather is getting warmer, and Amazon’s Big Spring Sale is blooming with home deals. From March 25 to 31, the weeklong sales event is offering discounts of up to 40% off a wide range of home essentials, including furniture and decor, kitchenware, cleaning supplies, organizing solutions, gardening gear, and…

Unlike Amazon Prime Day, which typically happens twice a year, the Big Spring Sale doesn’t require you to be a Prime member to access most deals. Exclusive deals marked “Prime Spring Deal” will be available for Prime members only, but you can take advantage of them by signing up for a free 30-day trial. Eligible government assistance recipients, including those who receive SNAP benefits or are enrolled in Medicaid, and income-verified customers can benefit from reduced membership fees with Prime Access. It’s just $6.99 a month compared to the full price of $14.99 a month (or $139 per year).

We’ve rounded up the best home deals, many of which are products that have been previously reviewed by the House Outlook team. Whether you’re looking to refresh your living space, start your first garden, or dive into spring cleaning and organizing, there are thousands of ways to save on what you need during Amazon’s Big Spring Sale.

The Best Cleaning Deals

LEVOIT Air Purifier
LEVOIT Air Purifier
Price: $68.94
$89.99
BUY NOW
A 16-ounce bottle of Dawn Platinum Powerwash Dish Spray.
Dawn Platinum Powerwash Dish Spray, Four-Pack
Price: $14.87
$17.50
BUY NOW
Person's hands holding up a variety pack of black and white Swedish dish cloths with floral and geometric patterns on them.
RECYCO Swedish Dishcloths, Five-Pack
Price: $7.99
$12.99
BUY NOW
Purriko Refrigerator Deodorizer
Price: $22.39
$24.99
BUY NOW
Shark Cordless Pet Plus Vacuum
Price: $149.00
$179.99
BUY NOW
SXhyf Crevice Cleaning Brushes, Three-Pack
Price: $6.98
$9.99
BUY NOW
BISSELL Little Green Mini
Price: $74.99
$99.99
BUY NOW
The Beautural Fabric Shaver shown with two of the adjustable shaving heights.
BEAUTURAL Fabric Shaver and Lint Remover
Price: $9.43
$14.99
BUY NOW
Bomves Electric Spin Scrubber
Price: $35.99
$56.99
BUY NOW
Advertisement

The Best Organizing Deals

Pipishell Bamboo Expandable Silverware Drawer Organizer
Price: $22.18
$27.04
BUY NOW
HBlife Clear Shelf Dividers, Six-Pack
Price: $18.69
$21.99
BUY NOW
Spospo Water Bottle Organizer
Price: $14.23
$17.99
BUY NOW
Helteko Back Seat Car Organizer, Two-Pack
Price: $20.78
$25.99
BUY NOW
ZEDODIER Belt Hanger
Price: $8.49
$9.99
BUY NOW
Vlando Jewelry Travel Organizer
Price: $5.99
$9.99
BUY NOW
ClearSpace Pantry Organizers, Four-Pack
Price: $35.99
$47.99
BUY NOW
A close-up of the Volnamel Leggings Organizer, a single hanger with 10 clips for hanging up multiple pairs of leggings.
Volnamel Leggings Organizer
Price: $8.49
$15.99
BUY NOW
Amooca Car Seat Headrest Hook, Four-Pack
Price: $5.99
$10.99
BUY NOW
Advertisement

The Best Kitchenware Deals

Fullstar Vegetable Chopper and Spiralizer
Fullstar Vegetable Chopper and Spiralize
Price: $24.99
$49.99
BUY NOW
Razab Glass Food Storage Containers With Lids, 15-Pack
Price: $34.99
$49.99
BUY NOW
Instant Pot Duo 7-in-1 Electric Pressure Cooker
Price: $99.99
$139.99
BUY NOW
ThermoWorks ThermoPop 2
Price: $39.95
$47.00
BUY NOW
BoxedHome Mixing Bowl Set
Price: $22.46
$27.99
BUY NOW
PGYARD Meat Chopper
PGYARD Meat Chopper
Price: $8.49
$9.99
BUY NOW
Duxtop 8500 Portable Induction Cooktop
Duxtop 9600LS Portable Induction Cooktop
Price: $112.36
$132.19
BUY NOW
Kitchen Mama 2.0 Electric Can Opener
Price: $27.99
$34.99
BUY NOW
Our Place Wonder Oven in beige finish.
Our Place Wonder Oven
Price: $195.00
$245.00
BUY NOW
Advertisement

The Best Home Decor Deals

Beckham Hotel Collection Bed Pillows
Price: $41.97
$79.99
BUY NOW
AMOAMI Waffle Bath Mat, 24” x 36”
Price: $19.99
$26.99
BUY NOW
Creative Co-Op Decorative Wood Pedestal
Price: $12.99
$18.75
BUY NOW
Madison Park Ruched Faux-Fur Throw
Price: $23.99
$39.99
BUY NOW
Marycele Candle Warmer Lamp With Timer and Dimmer
Price: $19.99
$27.99
BUY NOW
Pinkpum 20-Inch Eucalyptus Wreath
Price: $18.79
$29.99
BUY NOW
Advertisement

The Best Gardening Deals

Winpull Raised Garden Bed Kit, 4x2x1 Feet
Price: $24.98
$49.99
BUY NOW
HARYMOR Smart Bird Feeder With AI Identification
HARYMOR Bird Feeder With Camera and AI Identify
Price: $59.98
$139.99
BUY NOW
Gardeners Basics Survival Vegetable Seeds, 35 Varieties
Price: $23.95
$39.95
BUY NOW
WOLFMEN Cordless Electric Leaf Blower
Price: $64.99
$99.99
BUY NOW
Bamworld Indoor Plant Stand
Price: $19.99
$32.99
BUY NOW
Back to the Roots DIY Microgreen Grow Kit, Six-Pack
Price: $29.74
$34.99
BUY NOW
Advertisement

The Best Home Improvement Deals

Blink Video Doorbell
Price: $35.99
$69.99
BUY NOW
Energizer AA Batteries, 32-Count
Price: $14.25
$19.95
BUY NOW
Jackery Portable Power Station Explorer 300
Price: $188.99
$259.00
BUY NOW
BesLowe Outdoor Wall Light Fixtures, Two-Pack
Price: $35.98
$49.99
BUY NOW
WINONLY Magnetic Door Stoppers, Two-Pack
Price: $11.88
$13.98
BUY NOW
Karcher Pressure Washer
Price: $109.98
$229.99
BUY NOW
Advertisement
Featured Image Credit:  FabrikaCr/ iStock | Updated  Mar 26, 2026 |
Kelsey Morrison
Staff Editor
Kelsey Morrison is the Staff Editor of House Outlook. She has been covering all things home-related for over a decade, including real estate, interior design, commerce, and a slew of other lifestyle topics. Kelsey previously worked as a commerce editor for World of Good Brands (eHow.com and Cuteness.com) and as an associate editor for Livabl.com. She describes her personal design style as 1970s ski chalet-chic and has a thing for latch-hook tapestries.
This article is for general informational purposes only.
Featured Image Credit:  FabrikaCr/ iStock | Updated  Mar 26, 2026 |
Advertisement
Food & Drink 9m read
2,305

6 Cooking Basics Almost Everyone Gets Wrong

Nobody is born with an intuitive knowledge of cooking. Over the years, we pick up skills and techniques by watching others or — once we’re old enough — by experimenting in our own kitchens and following our favorite chefs and influencers online.

All featured products and deals are selected independently and objectively by the author. House Outlook may receive a share of sales via affiliate links in content.

Nobody is born with an intuitive knowledge of cooking. Over the years, we pick up skills and techniques by watching others or — once we’re old enough — by experimenting in our own kitchens and following our favorite chefs and influencers online.

That’s a good thing; it means no one is innately a “good” or “bad” cook. But it also means we sometimes absorb bad habits along with the good, and it takes time (or coaching) to unlearn them. I was an avid home cook for years before I trained as a chef and began teaching my own cooking classes. Here are a few of the most common cooking mistakes I see, along with tips to help you move past them.

1. Not Warming the Pan

If you read through reviews of skillets online, you’ll notice a curious trend. For the exact same pan, one reviewer will write, “It’s great — nothing sticks!” while another might claim, “It’s terrible — everything sticks!” How can that be? The difference often comes down to one basic cooking technique.

Whether you’re working with cast iron, nonstick, carbon steel, or stainless, it’s rarely a good idea to put food into a cold pan. Metals expand as they heat, compressing the microscopic pores in the pan’s surface. If food is already in the pan when that happens, fibers and juices get caught in those pores, causing whatever you’re cooking to stick. If you’ve ever had to soak a skillet lined with stuck-on scrambled eggs, you know the feeling.

It’s best to gently warm the pan over medium heat until the air above it feels warm to your hand, then add your cooking fat. If it’s butter, wait for it to foam and then subside. For oil, swirl it around and watch for a light, rippling shimmer. By the time you add your food, the pan’s pores will be closed and the fat will be hot enough to sear ingredients on contact. This results in food that doesn’t stick and a much easier cleanup after the meal.

Kitchen Tip: Always use gentle heat to warm your pan. High heat can warp an empty skillet and damage the coating on nonstick cookware.

Credit: © Sasha Kim/Pexels

2. Adding Garlic Too Soon

Everyone has a different level of affection for garlic. Personally, I’m in the “recipes calling for one clove are just not serious” camp — I even grow my own garlic for home use. No matter your preference, though, there’s one mistake people consistently make: adding it to the pan too early.

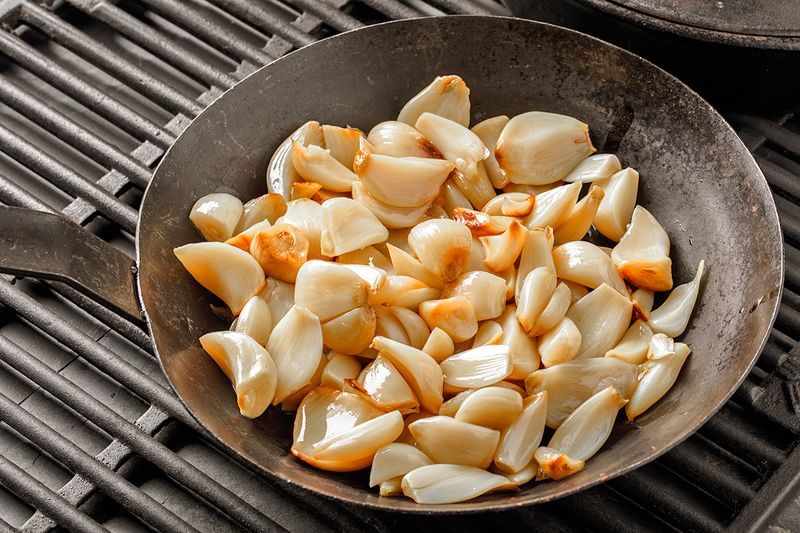
Aromatic ingredients such as celery and onions can withstand a relatively long time in the pan before they scorch. That’s not the case with garlic. Because of its sticky juices and high levels of natural sugar, garlic browns quickly and can easily burn unless you add some liquid to the pan. Once garlic scorches, there’s no saving it — it becomes bitter and can ruin an entire dish.

Instead, wait until your onions, celery, bell peppers, or fresh ginger are translucent and tender. Then add your garlic and stir diligently for about a minute until it becomes fragrant. At that point, you can safely add your liquids or any other remaining ingredients.

Kitchen Tip: The finer you chop garlic, the stronger its flavor will be. For best results, let chopped garlic sit for 10 to 15 minutes before cooking. This allows the natural enzymes to react with the air, giving it a fuller, richer flavor.

Credit: © Liudmila Chernetska/iStock
Advertisement

3. Using Too Much Heat

In an action movie, “coming in hot” usually means something exciting is about to happen. In the kitchen, it’s a different story — knowing how and when to apply heat is a fundamental skill. Many people tend to crank their burners too high, which I totally understand. I’m as impatient as the next person, and some days I just want dinner on the table ASAP. But dialing up the heat is seldom the shortcut it seems.

High heat is occasionally necessary, like when searing meat or fish, but usually, it works against you. It causes protein molecules to contract and toughen, often leaving food overdone on the outside and underdone in the middle. It can also burn the natural juices from your food, which would otherwise caramelize and add flavor.

If you watch cooking shows, this might seem confusing. Professional chefs often work with screaming-hot pans and billows of flame because it makes for great TV. Those dishes, however, are designed to be cooked hot and fast. While you can crank out food that way, it requires constant hands-on attention. For home cooking, you’ll see better results by sticking to medium heat.

Credit: © Bohdan Bevz/iStock
Related: 10 Foods You Should Never Microwave

4. Relying on Rules of Thumb for Doneness

I know many people who pride themselves on cooking their steak or chops “just so.” A few can even do it consistently — a skill that comes with a lot of practice. However, that intuition rarely translates to extra-thick steaks, roasts, poultry, or fish.

If you look online or ask your friends, you’ll hear all kinds of advice on how to nail the perfect degree of doneness. Some people rely on precise timing, while others wait “until the juices run clear.” There’s even a complicated system that compares the firmness of the meat to different parts of your hand. Realistically, though, the only reliable guide to doneness is a good thermometer.

I keep three types on hand. The first is an old-school meat thermometer that stays in a roast or a bird while it cooks. The second uses a wired probe that remains in the meat and sends a readout to an external LCD screen. I also have a couple of inexpensive instant-read thermometers. These don’t stay in the food; instead, you use them to test a steak, roast, or burger for doneness in just a few seconds. It might not have the panache of prodding a steak and announcing, “That’s medium-rare,” but it’s a lot more reliable.

Kitchen Tip: Don’t cook food all the way to your target temperature. Because of “carryover cooking,” internal temperatures continue to rise after you remove the meat from the heat. A steak might rise 5 degrees or more, while a roast can jump 10 to 15 degrees. Pull your meat a few degrees short of your target, and it will get there on its own.

Credit: © v_l/stock.adobe.com
Advertisement

5. Overfilling Your Pan

This is a cardinal sin of cookery, yet I see it all the time. It’s a fundamental mistake that can take the luster from almost any dish. Whether you’re browning beef for a stew, searing scallops for a special meal, or preparing a simple vegetable stir-fry, crowding the pan sets you up for failure.

When you overload a pan, two things happen: First, the sheer volume of food saps the heat from the pan — even heavy cast iron can’t hold out for long. Second, your ingredients inevitably release juices. In an uncrowded, hot pan, those juices evaporate with a quick sizzle, caramelizing and adding flavor. In a crowded pan, they pool and simmer. Instead of searing, your scallops or mushrooms poach in their own liquid, leaving them rubbery, pale, and devoid of the browning they deserve. Even a simple pan of stir-fried vegetables won’t have the tender-crisp texture you’re looking for.

There are a few cooking tips that can help you avoid this common mistake. Start by using the largest pan that fits your burner to ensure you have heat from edge to edge. Preheat the pan as described above, add your oil, and then begin cooking. Work in small batches; you should always hear a distinct sizzle with each addition to the pan. If you don’t hear a sizzle, or if moisture begins to pool around the food, the pan is too crowded. Remove a portion, blot up the excess moisture, and add less next time.

Credit: © staticnak1983/iStock
Related: How To Store Spices Like a Chef

6. Not Tasting as You Go

Culinary school is an intense experience because there’s so much to learn, but this is one lesson the chef-instructors emphasize constantly: If you wait until a meal is nearly finished before asking, “What does this need?” you won’t get the best results.

Instead, budding chefs are taught to build flavor at every step and to frequently check how those flavors are developing. If you’re making a stew, for example, you might start by softening some onions and garlic in a Dutch oven, then scooping them out while you brown and season the beef. At this point, you should taste a small bite of the beef to ensure it’s seasoned enough and has developed some of those browned-on flavors.

After that is when you add water, broth, or stock to the pot as your main cooking liquid. If you use anything other than water, taste it as it goes into the pot. This helps you determine if the dish needs more salt or how the broth’s distinct flavors will influence the final product. These flavors will mellow and evolve as the stew cooks, so taste it periodically. You can also consider additional flavorings: Spices, bay leaves, and sturdy dried herbs should go in early, while umami-rich ingredients like soy sauce can be added at any time. Save fresh herbs and acidic ingredients like Worcestershire sauce for the end. By tasting after each addition, you’ll barely need to tweak the seasoning before serving.

Kitchen Tip: If you’re unsure how best to bring out the flavors in your dish, avoid experimenting on the entire pot or pan of food. Instead, test your seasoning inspirations on a single mouthful.

If you’re worried about hygiene, use the two-spoon technique. Keep one spoon for the food and one for your mouth. Scoop a taste with the first, drop it onto the second, and keep them scrupulously separate. I put one on my left and one on my right to avoid any mix-ups.

Credit: © Cavan for Adobe/stock.adobe.com
Advertisement
Featured Image Credit:  © cottonbro studio/Pexels | Updated  Mar 26, 2026 |
Fred Decker
Writer
Fred Decker is a trained chef and former restaurateur. Since closing his restaurants over a decade ago he has been a prolific freelance writer, publishing several thousand articles on dozens of high-volume websites including Taste Of Home, Hunker, Tasting Table, Week&, eHow, and GOBankingRates. He lives on a rural acreage shared with a big garden, chickens, rabbits, and grandkids.
This article is for general informational purposes only.
Featured Image Credit:  © cottonbro studio/Pexels | Updated  Mar 26, 2026 |
Advertisement
Gardening 2m read
185

Before You Toss That ‘Dead’ Plant, Try This 5-Second Test

Anyone who lives in the countryside has likely heard some variation of this folk wisdom: “Never cut down a tree in winter.” That’s because during the colder months, it’s difficult to tell if a tree is dead or merely dormant, and overeager gardeners run the risk of cutting down a perfectly healthy specimen.

Anyone who lives in the countryside has likely heard some variation of this folk wisdom: “Never cut down a tree in winter.” That’s because during the colder months, it’s difficult to tell if a tree is dead or merely dormant, and overeager gardeners run the risk of cutting down a perfectly healthy specimen.

The same logic applies to woody-stemmed garden plants and houseplants. Perennial plants, shrubs, and biennials wintering outdoors go dormant while waiting for spring to arrive. Even some houseplants may enter a dormancy period that makes them look dead. But you don’t need a degree in botany to tell if a plant is gone for good or just resting — you need only one common item that’s probably already in your pocket.

Related: How To Prep Your Garden for Spring While It’s Still Winter

Scratch the Surface

This hack really is as simple as it sounds. Pick a spot on a branch or main stem and use the edge of a coin to gently scrape away the outer layer of bark. The color you find underneath tells you everything you need to know.

Advertisement

If the tissue is brown and dry, that branch or stem is dead. If you find moist green tissue, the plant is still alive — it’s just dormant and waiting for spring. One warning: For large plants or vines, finding one dead spot doesn’t necessarily mean the entire plant is a goner. Test several stems, especially near the root crown, to make sure you don’t tear out a healthy plant just because of a few dead branches.

Don’t Have a Coin?

Coins are ideal because they’re blunt enough to avoid damaging the plant, but you have other options. For delicate garden plants like woody herbs, your thumbnail will often do the job. For sturdier plants with thicker bark, the edge of a spoon is a similarly safe alternative.

Advertisement
Featured Image Credit:  © Mohammed Al Ali/iStock | Updated  Mar 25, 2026 |
Fred Decker
Writer
Fred Decker is a trained chef and former restaurateur. Since closing his restaurants over a decade ago he has been a prolific freelance writer, publishing several thousand articles on dozens of high-volume websites including Taste Of Home, Hunker, Tasting Table, Week&, eHow, and GOBankingRates. He lives on a rural acreage shared with a big garden, chickens, rabbits, and grandkids.
This article is for general informational purposes only.
Featured Image Credit:  © Mohammed Al Ali/iStock | Updated  Mar 25, 2026 |
Advertisement
Food & Drink 2m read
729

Why Chefs Always Soak Raw Onions

Onions provide a savory, pungent boost to almost any dish, but that flavor can sometimes be overwhelming, especially if the onions are raw. Because they become more potent after being cut, adding them to a salad or sandwich you won’t eat until the next day can result in the onions taking over. You could opt for sweet onions, which contain less sulfur, but those are often pricey. Instead, try this simple hack to make any onion a bit less assertive.

Onions provide a savory, pungent boost to almost any dish, but that flavor can sometimes be overwhelming, especially if the onions are raw. Because they become more potent after being cut, adding them to a salad or sandwich you won’t eat until the next day can result in the onions taking over. You could opt…

The Cold Water Onion Hack

The flavors of onions and their cousins in the allium family — chives, leeks, shallots, and garlic — come from sulfur compounds. When you slice or bite into them, you crush the cell walls and trigger an enzymatic reaction that releases that familiar, pungent bite. While this reaction takes only seconds, the resulting volatile compounds continue to break down and spread, which explains why raw onions’ flavors seem to get stronger with time.

Related: A Time-Saving Hack for Perfectly Caramelized Onions

Because these compounds are water-soluble, however, the solution is simple: cold water. Submerge your sliced or chopped onions in a bowl of cold tap water for 10 to 15 minutes to let the sharpest sulfur compounds leach out. Don’t worry — you’ll still have plenty of that distinctive onion flavor, but the pieces will remain much milder after their water bath.

Advertisement

Infuse New Flavors

This hack is a great “pro tip” in its own right, but you can take it a step further by changing up the liquid. Soaking the onions in wine, beer, or a mild vinegar will mellow them out while lending them a new and complementary flavor. If you’re making a sauce or dressing to go with the finished dish, double down by reusing that leftover onion-infused liquid as your base — it’s two hacks in one.

Advertisement
Featured Image Credit:  © Alejandro Cajas/iStock | Updated  Mar 24, 2026 |
Fred Decker
Writer
Fred Decker is a trained chef and former restaurateur. Since closing his restaurants over a decade ago he has been a prolific freelance writer, publishing several thousand articles on dozens of high-volume websites including Taste Of Home, Hunker, Tasting Table, Week&, eHow, and GOBankingRates. He lives on a rural acreage shared with a big garden, chickens, rabbits, and grandkids.
This article is for general informational purposes only.
Featured Image Credit:  © Alejandro Cajas/iStock | Updated  Mar 24, 2026 |
Advertisement
Cleaning 3m read
1,955

3 Dish Soap Hacks That Will Change How You Clean

Dish soap might live next to your kitchen sink, but its cleaning power goes far beyond plates and pans. Designed to break down grease and grime, this everyday staple can tackle messes all over your home — often with better results than specialty cleaners. The best part? You likely already have it on hand, making it one of the easiest and most affordable cleaning tricks to try.

All featured products and deals are selected independently and objectively by the author. House Outlook may receive a share of sales via affiliate links in content.

Dish soap might live next to your kitchen sink, but its cleaning power goes far beyond plates and pans. Designed to break down grease and grime, this everyday staple can tackle messes all over your home — often with better results than specialty cleaners. The best part? You likely already have it on hand, making…

Beyond dinner cleanup, dish soap can help cut through stubborn buildup, refresh overlooked surfaces, and simplify tasks you might normally dread. If you’re looking to streamline your cleaning routine, these lesser-known uses might surprise you.

Related: 11 Household Items You Can Clean in the Dishwasher

1. Remove Grease Buildup From Cabinets

Kitchen cabinets near the stove inevitably collect grease. This residue leaves surfaces looking dull or sticky, but dish soap is formulated to cut through exactly that kind of buildup.

Mix a few drops of dish soap with warm water and dip a microfiber cloth into the solution. Wring it out until it’s damp, then gently wipe cabinet faces. For tougher spots, use a soft sponge. Finish by wiping with a clean, damp cloth to remove any soap residue, then dry with a towel. Your cabinets will look noticeably fresher — without harsh cleaners.

Advertisement

2. Clean Patio Furniture

Outdoor furniture quickly becomes grimy from dust, pollen, and seasonal use. Instead of pulling out a specialized outdoor cleaner, you can use dish soap to do the job just as well.

Fill a bucket with warm water and add a small amount of dish soap. Use a sponge or a soft-bristle brush to scrub plastic, metal, or resin furniture. The soap breaks down dirt and sticky residue without damaging surfaces. After a thorough rinse with a garden hose, allow everything to air-dry. This quick clean will revive your outdoor seating just in time for your next gathering.

3. Brighten Cloudy Glass Light Fixtures

Glass light fixtures and shades tend to collect dust, cooking residue, and fingerprints — all of which can leave them looking cloudy and dim. After turning off the light and letting the bulbs cool, carefully remove the glass pieces. Wash them in a sink filled with warm water and a few drops of dish soap, much like you would any delicate dish. Use a soft cloth or sponge to gently clean the surface, then rinse and dry thoroughly with a lint-free towel before reinstalling. You will find the difference in brightness is surprisingly noticeable.

Advertisement
Featured Image Credit:  © CARME PARRAMON/iStock | Updated  Mar 24, 2026 |
Jill Layton
Writer
Jill Layton started writing professionally when she realized her emails and texts were kinda funny. She’s an affiliate shopping writer and lifestyle contributor for Scary Mommy, Bustle, Mic, and Best Products. She’s the mom of two alarmingly witty kids and the world’s most perfect dog.
This article is for general informational purposes only.
Featured Image Credit:  © CARME PARRAMON/iStock | Updated  Mar 24, 2026 |