Advertisement
Home Improvement 4m read
21,564

6 House Sounds That Require Immediate Attention

Homes make noise. It’s part of living in a structure full of pipes, wiring, appliances, and moving air. Floorboards creak, HVAC systems kick on, and there’s an occasional thud here and there. It might just be a shifting beam or a temperature change. But not every sound falls into the “normal house noise” category. Some can signal serious problems brewing behind the walls or beneath the floors — and ignoring them could lead to expensive repairs or even safety hazards.

Homes make noise. It’s part of living in a structure full of pipes, wiring, appliances, and moving air. Floorboards creak, HVAC systems kick on, and there’s an occasional thud here and there. It might just be a shifting beam or a temperature change. But not every sound falls into the “normal house noise” category. Some…

Certain sounds serve as early warning systems, often pointing to issues that can worsen quickly if left unchecked. The sooner you recognize these red flags, the better your chances of stopping damage before it spreads. If your home suddenly starts making unfamiliar noises, it’s worth paying attention — those sounds are often a plea for immediate help.

1. Hissing Near Gas Appliances

A hissing sound near your stove, water heater, or furnace is one of the most urgent noises a home can make. In many cases, it signals a gas leak. Because natural gas lines operate under pressure, a crack or loose connection allows gas to escape, creating that unmistakable hiss.

Gas leaks are extremely dangerous and increase the risk of fire or explosion. If you hear hissing or smell the sulfur-like “rotten egg” odor added to natural gas, leave the house immediately and contact your gas company or emergency services. Do not investigate the leak yourself, turn on lights, or use electronics until professionals deem the area safe.

Credit: © oasisamuel/stock.adobe.com

2. Buzzing From Light Fixtures or Outlets

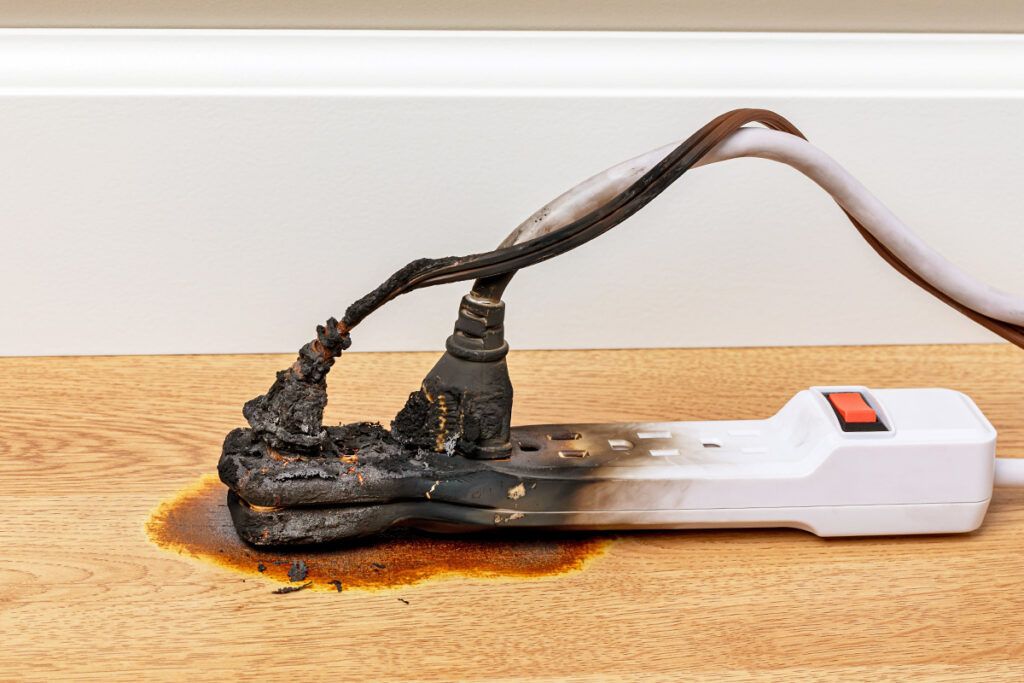
A faint electrical buzz might seem harmless, but it can signal faulty wiring, loose connections, or overloaded circuits. Electrical systems should operate silently, so any buzzing, humming, or crackling coming from outlets, switches, or light fixtures requires attention.

While the issue may be as simple as a loose bulb or an incompatible dimmer switch, persistent buzzing can indicate wiring problems that increase the risk of an electrical fire. Turn off the power to the affected fixture if possible and call a licensed electrician to diagnose the problem safely.

Credit: © Curated Lifestyle/Unsplash.com
Advertisement

3. Dripping or Trickling Behind Walls

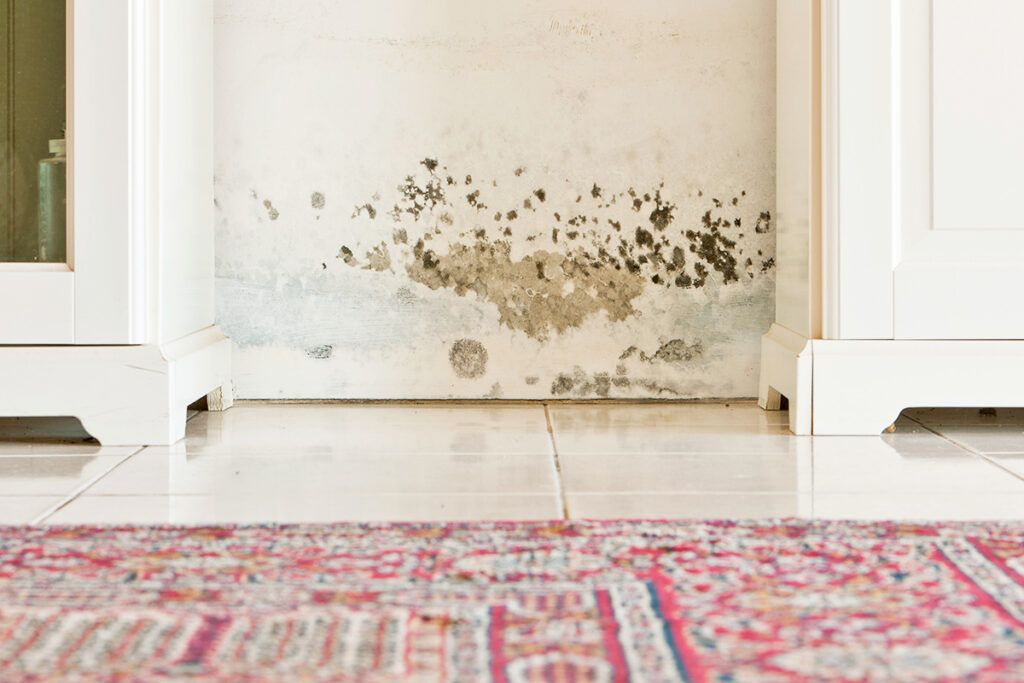
If you hear steady dripping or the sound of water running inside your walls while your faucets are off, you likely have a hidden plumbing leak. These small leaks often start quietly, but they can lead to significant water damage, mold growth, and structural issues over time.

Even a minor drip can waste gallons of water daily and weaken drywall, insulation, and framing. If you hear unexplained water sounds, check visible pipes and nearby fixtures, then contact a plumber as soon as possible. Early repairs can prevent the need for costly restoration work later.

Credit: © Alex Arnold/iStock
Related: 10 Lifesaving Home Safety Tips You’ve Probably Never Heard

4. Scratching or Scurrying in Walls or Attics

While many household noises have mechanical causes, scratching or scurrying inside walls or ceilings often points to unwanted guests — namely, rodents or other pests. Mice, rats, squirrels, and even raccoons can find their way into attics or wall cavities, where they chew through wiring, insulation, and wood.

Beyond the annoyance, these intruders pose real risks to your home. Chewed electrical wires can create fire hazards, and droppings can spread bacteria. If you consistently hear scratching, especially at night, contact a pest control professional to safely remove the animals and seal entry points.

Credit: © Sebastian Ramirez Morales/iStock
Advertisement

5. Loud Popping or Cracking Sounds

Homes naturally expand and contract as temperatures fluctuate, often causing occasional pops in the framing or drywall. However, repeated loud cracking sounds — especially if they’re a new development — may indicate structural stress or foundation movement.

This is particularly concerning if the noises are accompanied by visible signs, such as new wall cracks, sticking doors, or uneven floors. In these cases, a structural engineer or qualified contractor should evaluate the situation. Addressing structural issues early can prevent more serious damage down the road.

Credit: © FotoDuets/iStock
Related: 6 Home Maintenance Tasks You Can’t Afford To Skip

6. Continuous Running Water in the Toilet

While not as dramatic as other noises, the sound of a toilet constantly refilling shouldn’t be ignored. A running toilet often indicates a worn flapper, a faulty fill valve, or an improper float adjustment.

Although it’s usually an easy fix, a continuously running toilet can waste hundreds of gallons of water per day. If simple adjustments don’t stop the noise, a plumber can quickly replace the failing parts.

Credit: © ferlistockphoto/iStock
Advertisement
Featured Image Credit:  © Prostock-Studio/iStock | Updated  Mar 25, 2026 |
Jill Layton
Writer
Jill Layton started writing professionally when she realized her emails and texts were kinda funny. She’s an affiliate shopping writer and lifestyle contributor for Scary Mommy, Bustle, Mic, and Best Products. She’s the mom of two alarmingly witty kids and the world’s most perfect dog.
This article is for general informational purposes only.
Featured Image Credit:  © Prostock-Studio/iStock | Updated  Mar 25, 2026 |
Advertisement
Food & Drink 2m read
1,227

You’re Storing Your Eggs the Wrong Way

Eggs have been an American breakfast staple for more than a century, but their history as daily sustenance dates back much further. Ancient Romans are believed to have eaten eggs for a morning meal, possibly because chickens typically lay in the early hours. Later, during the Industrial Revolution, eggs helped fuel workers for long days on the job. Then, in the 1920s, a marketing campaign designed to boost bacon sales branded bacon and eggs as the ultimate breakfast pairing. The campaign was extraordinarily successful, cementing the duo as a permanent fixture on restaurant menus and solidifying the egg’s place in the breakfast canon. Today, the average American consumes about 259 eggs each year. Protein-rich and relatively affordable, they remain a staple in most kitchens.

All featured products and deals are selected independently and objectively by the author. House Outlook may receive a share of sales via affiliate links in content.

Eggs have been an American breakfast staple for more than a century, but their history as daily sustenance dates back much further. Ancient Romans are believed to have eaten eggs for a morning meal, possibly because chickens typically lay in the early hours. Later, during the Industrial Revolution, eggs helped fuel workers for long days…

And since eggs typically come by the dozen, proper storage is essential. But are you actually doing it right?

Related: Are You Cracking Eggs the Right Way?

Flip for Freshness

Eggs are often packed with the blunt, rounded end facing down — the exact opposite of how they should be stored. For the best results, store your eggs with the pointy side down and the rounded end facing up. You can house them in either their original packaging or a space-saving fridge organizer.

Advertisement

The Eggsplanation

Why store eggs this way? There’s a scientific reason this position helps maintain freshness. Every egg has an air pocket at its rounded end that expands as moisture naturally evaporates through the shell. Keeping this air pocket at the top prevents it from pressing against the yolk, which keeps the yolk centered and protects the internal membrane from rupturing.
This storage method can extend the freshness of your eggs by several days to a week. That said, eggs are still a perishable product with a limited shelf life. The USDA recommends consuming refrigerated eggs within three to five weeks.

Advertisement
Advertisement
Cleaning 2m read
177

The Kitchen Scrap That Fixes a Stinky Dishwasher

There are countless ways to make use of kitchen scraps, whether you collect odds and ends in a freezer bag for a rainy-day vegetable stock or sneak overripe bananas into pancake batter to increase your fiber intake. Citrus peels are especially versatile; you can turn them into homemade candies, use them as an aromatic candle alternative in a stovetop simmer pot, or dry them for drink garnishes. Citrus peels are also great for infusing sugars and salts — just mix in the zest — or for whipping up bright cocktail syrups.

There are countless ways to make use of kitchen scraps, whether you collect odds and ends in a freezer bag for a rainy-day vegetable stock or sneak overripe bananas into pancake batter to increase your fiber intake. Citrus peels are especially versatile; you can turn them into homemade candies, use them as an aromatic candle…

Where citrus peels truly shine, however, is in household cleaning. You might already use them in homemade countertop sprays or room scents, but they’re remarkably effective at eliminating stubborn dishwasher odors, too.

Related: 11 Household Items You Can Clean in the Dishwasher

Deodorize Your Dishwasher With Citrus Peels

Just as lemon juice refreshes a garbage disposal, citrus scraps are a great way to neutralize your dishwasher. Even if you clean the filter — which you should do monthly — the appliance is still prone to a musky, mildewy stench.

Think of citrus peels as a natural deodorizer for your dishwasher. After squeezing lemons, oranges, or grapefruit into your citrus-forward recipes, place the peels (pulp and all) in the dishwasher’s cutlery basket, ideally in a dedicated slot away from utensils. Run a normal cycle and let the citrus work its magic. Once the cycle is complete, toss the peels in the garbage and enjoy your noticeably cleaner machine. You can use this hack two to three times per week to keep odors at bay.

Advertisement

Why Citrus Is a Cleaning Powerhouse

Citrus is an excellent, multifunctional cleaner: Its natural oils cut through grease, its acidity dissolves soap scum, and its low pH neutralizes unpleasant odors. The citric acid is especially effective for glassware, preventing hard-water minerals from redepositing and leaving your favorite bar glasses streak-free with minimal effort.

Advertisement
Featured Image Credit:  © almaphoto/iStock | Updated  Mar 25, 2026 |
Jessie Quinn
Writer
Jessie Quinn is a Los Angeles-based lifestyle journalist with words published in PEOPLE, StyleCaster, Apartment Therapy, The Spruce, Byrdie, and more. She has a Bachelor's Degree in fashion journalism from Academy of Art University and her work spans across many categories, including style, beauty, home, health, crafts, and more.
This article is for general informational purposes only.
Featured Image Credit:  © almaphoto/iStock | Updated  Mar 25, 2026 |
Advertisement
Gardening 10m read
100

These 11 Houseplants Are for Experts Only

Some activities can be either a passing hobby or a lifelong obsession. You can learn the basics of chess or bread baking in an afternoon, for example, but it takes a lifetime to master them. Caring for houseplants is similar. You might start with a small collection of beginner-friendly houseplants and be perfectly content with just those. Or you might discover a real passion for houseplants that keeps you hooked for life.

All featured products and deals are selected independently and objectively by the author. House Outlook may receive a share of sales via affiliate links in content.

Some activities can be either a passing hobby or a lifelong obsession. You can learn the basics of chess or bread baking in an afternoon, for example, but it takes a lifetime to master them. Caring for houseplants is similar. You might start with a small collection of beginner-friendly houseplants and be perfectly content with…

If you’ve been successful with low-maintenance varieties such as spider plants, pothos, or ZZ plants, it’s only natural to want to test your green thumb on a broader range of plants. The problem is that some houseplants are not meant for beginners, and you may quickly find yourself in over your head. With that in mind, here’s a list of 11 appealing houseplants that are — if not strictly for experts — a bit more challenging than you might be prepared for.

1. Prayer Plant (Maranta leuconeura)

Let’s start with a plant that might surprise you: the popular “prayer plant,” or Maranta leuconeura. (Calatheas, which are closely related, can be even more challenging.) The reason we’re including the prayer plant here is simple: Keeping it alive is not the challenge, but keeping it flourishing is.

Because marantas and calatheas are native to the South American rainforest, their needs are specific. They require consistent warmth and humidity; otherwise, they’ll develop brown, crispy edges. They’re also sensitive to water quality and often struggle to thrive with hard or chlorinated tap water. Trying to grow them in an arid climate is an uphill battle. Unless you can replicate a tropical, high-humidity environment, opt for a more forgiving houseplant.

Credit: © Luoxi/stock.adobe.com
Advertisement

2. Echeveria (Echeveria spp.)

If succulents become your obsession, you’ll likely fall for Echeveria at some point. Like most succulents, they’re fond of heat and light but struggle with excess moisture. What sets Echeveria apart — and makes them more difficult than many varieties — is their need for precise light conditions.

They demand plenty of bright morning sunshine, but intense afternoon rays can leave them sunburnt. They’re also poorly suited for low-light environments. It may take time to find a spot that offers the perfect balance. Ventilation is equally important because moisture and humidity will kill them in no time.

Credit: © leisuretime70/stock.adobe.com
Related: 12 Common Houseplants That Could Harm Your Pets

3. Fiddle-Leaf Fig (Ficus Lyrata)

Ficus trees are widely grown indoors, and the fiddle-leaf fig — a West African variety — is especially appealing because of its large, violin-shaped leaves. However, it’s a notoriously high-maintenance plant. It won’t flourish without sufficient light but burns easily in direct sun. It wilts if under-watered and drops leaves if overwatered. To top it off, the fiddle-leaf fig is susceptible to salt buildup from fertilizer or hard water.

For the best results, provide six hours of filtered, indirect light, rotating the pot regularly so all leaves get equal exposure. You should also wipe the leaves clean regularly, as dust interferes with photosynthesis. Use a high-quality soil, water carefully, and flush the soil thoroughly under running water once a month to limit salt buildup. If you have hard tap water, consider using distilled water instead.

Credit: © Anan/stock.adobe.com
Advertisement

4. Elephant Ears (Alocasia spp.)

If you want to give your room an exotic, tropical feel, a pot of elephant ears will certainly do the trick. They’re big, showy, and bring plenty of drama — but they’re not easy to grow well. They need lots of indirect light but they scorch in direct sun. They won’t tolerate drafts, sudden heat spikes, or temperatures below 60 degrees Fahrenheit. They also crave high, consistent humidity, and hate their soil being either too dry or too wet.

To keep them flourishing, you need soil that drains well but retains some moisture. Water when the top 2 inches of soil are dry to the touch, shield them from drafts, and find a spot that offers just the right balance of bright, indirect light.

Credit: © jobrestful/stock.adobe.com

6. Miniature Roses (Rosa chinensis var. minimus)

Don’t let their size fool you: Miniature roses are among the trickiest plants to grow indoors. While they flourish in a sunny garden bed, they’re famously high-maintenance as houseplants. These adorable roses require copious direct light, high humidity, and proper ventilation to ward off mold and fungi. That’s easy enough to provide outdoors, but it requires considerable effort indoors.

The unfortunate truth is that miniature roses are not really meant for indoor growing. However, if you’re up for the challenge, you can combine natural light with grow lights, use a humidifier and fans to create the right environment, and feed them regularly with slow-release or water-soluble fertilizer during the spring and summer. Remember: You can always transplant them outdoors if they don’t take to life on a windowsill.

Credit: © ChamilleWhite/iStock
Advertisement

7. Maidenhair Fern (Adiantum spp.)

Ah, ferns — so pretty, yet so temperamental. Boston ferns and several others could just as easily be on this list, but maidenhair ferns are arguably the most challenging of the lot, making them a true test of your gardening skills. If you can keep one flourishing, you definitely have some chops.

These ferns require bright, indirect light. An east-facing window is ideal, though a south- or west-facing window works if the light is filtered. Their soil must remain consistently moist, as letting them dry out even once can be fatal. Above all, they crave humidity. Your best bet is to cluster them with other moisture-loving plants, use a humidifier, or keep them in a naturally humid spot like a bathroom (or maybe even inside your shower).

Credit: © JulieAlexK/iStock

8. String of Pearls (Curio rowleyanus)

A string of pearls is a heartbreakingly seductive succulent, though it arguably looks more like strings of peas (the beads are actually uniquely shaped leaves). Like most succulents, it hails from an arid climate where humidity is not its friend. Neither is overwatering; it’s prone to root rot if it sits in wet soil for any length of time. These succulents are happiest at 70 degrees Fahrenheit or higher, though they tolerate temperatures of 50 to 60 degrees Fahrenheit during their winter “slumber.” Anything below 50 degrees Fahrenheit will damage the plant quickly.

If you can’t resist trying one, choose a pot with good drainage (decorative pots with poor drainage kill a lot of plants) and fill it with sandy, well-draining soil. Be sure to fill the pot to the lip — if the soil sits too low, the top of the plant will be shaded and won’t flourish. Place the plant where it’ll receive direct morning sunlight and indirect light thereafter. Water only when the soil is dry — usually every seven to 10 days in summer, and every two weeks in winter (but use your judgment). Even if you cause your plant serious harm, you can usually take cuttings from your victim and start over before it’s too late.

Credit: © Creative by Nature/stock.adobe.com
Advertisement

9. Croton (Codiaeum variegatum)

The croton is a nearly irresistible houseplant, prized for its dramatic foliage and bright colors. Unfortunately, it’s notoriously temperamental. If its growing conditions aren’t perfect, the leaves will droop, wilt, or drop off entirely. It loves warmth, ideally up to the mid-80s, and finds anything below 60 degrees Fahrenheit too cool for its taste. While it needs plenty of light to produce its signature colors, too much direct sun will leave the leaves bleached and gray.

To keep a croton happy, provide moist, well-draining soil and ample bright, indirect light. It requires high humidity — between 40% and 80% — and consistent watering. Aim for steady moisture rather than a wet-dry cycle, and keep it away from hot or cold drafts. Manage all that, and you’ll have a thriving houseplant and the admiration of your neighbors.

Credit: © Elena/stock.adobe.com
Related: 10 Easy Ways To Fix Common Houseplant Problems

10. Camellias (Camellia spp.)

While camellias offer glorious outdoor displays, they are among the most demanding plants to bring indoors. Growing one in the living room is decidedly not for beginners; even those with a green thumb will face significant challenges. For example, they require a cool winter dormancy with an extended rest below 60 degrees Fahrenheit. They also need acidic, forest-style soil and more humidity than most homes provide.

To attempt to grow one indoors, you’ll need to find a cool, humid spot where temperatures stay between the mid-40s and mid-60s. Use a mildly acidic potting soil, similar to an African violet mix, and monitor the pH closely to keep it in the 4.5 to 5.0 range. During spring and summer, apply an acidic fertilizer every two weeks and provide plenty of bright, indirect light.

Credit: © Barcin/ iStock
Advertisement

11. Gardenias (Gardenia jasminoides)

Let’s finish with the gardenia, yet another beautiful heartbreaker. When flourishing, it provides masses of fragrant white blossoms that can reach 5 inches in width. When it’s not, well … you’ll know. Common signs of distress include yellowing leaves and drooping buds.

The care requirements are similar to those for camellias: rich, acidic soil with good drainage and plenty of bright light. While they can handle a bit of direct sun, they prefer indirect light or dappled shade. Gardenias also favor daytime highs in the mid-70s to low 80s and require nighttime temperatures of at least 60 degrees Fahrenheit. They are highly sensitive to drafts, so keep them away from windows and doors in winter and air conditioners in summer.

Maintain a humidity level of at least 60% year-round. Like crotons, gardenias need consistent moisture without being overwatered. Keep the soil moist during the growing season and allow the surface to dry slightly during winter dormancy. Every few weeks, feed them a well-diluted, acidic fertilizer meant for azaleas. If you get all of those things right, your gardenias will be glorious — if not, it’ll at least be a learning experience.

Credit: © magicflute002/ iStock

A Few Tips To Improve Your Odds

Challenging yourself is the only way to learn and grow, but you can stack the deck in your favor by keeping a few things in mind:

• Choose strategically: If you live in an arid climate, avoid plants that thrive in humidity. Conversely, if you live in a humid climate, steer clear of plants that require dry conditions.

• Do your research: Impulse purchases can lead to heartbreak. Research the necessary growing conditions first to understand the level of commitment required.

• Consider placement: Do you even have a spot in your home that provides the necessary light and temperature without drafts or unexpected heat sources?

Answering these questions honestly will save you time, grief, and potentially expense. 

Advertisement
Featured Image Credit:  © Elena Esich/iStock | Updated  Mar 18, 2026 |
Fred Decker
Writer
Fred Decker is a trained chef and former restaurateur. Since closing his restaurants over a decade ago he has been a prolific freelance writer, publishing several thousand articles on dozens of high-volume websites including Taste Of Home, Hunker, Tasting Table, Week&, eHow, and GOBankingRates. He lives on a rural acreage shared with a big garden, chickens, rabbits, and grandkids.
This article is for general informational purposes only.
Featured Image Credit:  © Elena Esich/iStock | Updated  Mar 18, 2026 |
Advertisement
Food & Drink 3m read
5

How To Get Even Cheese Slices Every Time

Serving a cheese board at any gathering is a guaranteed hit. Guests inevitably arrive hungry and need something to graze on, and a pleasing array of cheeses, crackers, fruits, nuts, and assorted accompaniments is always a welcome sight.

All featured products and deals are selected independently and objectively by the author. House Outlook may receive a share of sales via affiliate links in content.

Serving a cheese board at any gathering is a guaranteed hit. Guests inevitably arrive hungry and need something to graze on, and a pleasing array of cheeses, crackers, fruits, nuts, and assorted accompaniments is always a welcome sight.

A good cheese board should contain a variety of textures and flavors, ranging from hard and sharp to soft and mild. These options might include sharp cheddar or gouda on the firmer end, and brie or fresh mozzarella on the softer side.

There is an art to arranging a cheeseboard, however, and it starts with slicing your medium-to-hard cheeses evenly. Anyone who has sliced a fair amount of cheese knows this task is easier said than done.

So, how do you ensure your slices are uniform? You don’t need any special tools — just a regular fork.

The Tine Technique

Unwrap your cheese and place it on a cutting board in front of you. Hold your fork horizontally, extending it away from you with the tines facing outward. Then, lower the fork so the flat back of the tines rests against the top of the cheese block, with the tips of the tines hanging just over the edge of the cheese. Gently press the tines into the surface to create a row of uniform indentations. Repeat this motion across the length of the block. These marks serve as the guide for your knife. By following the notches, you can ensure perfectly even slices every time. Your cheeseboard will look more professional and you won’t end up with varying widths of aged cheddar.

Advertisement
Related: This Kitchen Staple Helps Your Cheese Last Longer

To Slice or Not To Slice

You don’t have to preslice cheese for your guests. It’s acceptable to leave the cheese as-is and provide cheese knives so guests can serve themselves. However, if you’re looking to stretch your cheese to feed a larger crowd, preslicing is the way to go. Additionally, providing a dedicated knife for every type of cheese can prove cumbersome, as it often results in a cluttered board with too many tools.

Advertisement
Advertisement
Cleaning 3m read
510

Why Your Shirts Still Smell After Washing

Whether it’s your favorite white T-shirt or your go-to moisture-wicking workout top, you might notice that some shirts retain an odor even after washing. The underarms are typically the culprit, and while it may seem strange at first — after all, you just did laundry — there is, in fact, a logical explanation.

All featured products and deals are selected independently and objectively by the author. House Outlook may receive a share of sales via affiliate links in content.

Whether it’s your favorite white T-shirt or your go-to moisture-wicking workout top, you might notice that some shirts retain an odor even after washing. The underarms are typically the culprit, and while it may seem strange at first — after all, you just did laundry — there is, in fact, a logical explanation.

The aluminum found in common antiperspirant formulas can transfer to the fabric, building up over time to create a barrier, especially on synthetic materials. With regular wear, that barrier gets stronger and stronger, preventing water and detergent from penetrating the fibers to get rid of the buildup and the lingering odor.

How To Strip Away Odors

When dealing with tough-to-remove stains — even those we cannot see — liquid dish soap is your secret weapon for cutting through the buildup. While laundry detergent is specifically formulated to remove dirt, dish soap targets grease and grime, making it a heavy-duty solution for many household woes.

Related: The Trick To Saving Sweat-Stained Hats

To remove stubborn underarm odors, apply about 1 teaspoon of liquid dish soap (blue Dawn is best) to each of the affected areas and gently scrub with your fingers until the fabric is fully saturated. You want to start with a dry article of clothing to prevent diluting the dish soap. Let the soap sit for 30 minutes to an hour, then rinse with hot water. Finally, run the item through a full wash cycle to lift the residue and rinse away the soap.

Advertisement

Pit Stains Don’t Have To Be Permanent

Dealing with unsightly yellow stains on your shirt’s underarms? These are the result of a chemical reaction between aluminum in antiperspirant and proteins in human sweat. While these stains might seem irreversible, they can often be faded or even removed entirely. Create a paste using one part dish soap and two parts 3% hydrogen peroxide. Apply it to the affected area, then sprinkle baking soda on top. Scrub the fabric gently with an old toothbrush or a laundry stain brush, let it sit for up to an hour, then launder as usual. This process helps remove both the yellowing and the underlying odor.

Advertisement
Featured Image Credit:  © anatoliycherkas/iStock | Updated  Mar 17, 2026 |
Jessie Quinn
Writer
Jessie Quinn is a Los Angeles-based lifestyle journalist with words published in PEOPLE, StyleCaster, Apartment Therapy, The Spruce, Byrdie, and more. She has a Bachelor's Degree in fashion journalism from Academy of Art University and her work spans across many categories, including style, beauty, home, health, crafts, and more.
This article is for general informational purposes only.
Featured Image Credit:  © anatoliycherkas/iStock | Updated  Mar 17, 2026 |
Advertisement
Gardening 3m read
68

This One Tool Saves You From Killing Plants

Too much water or not enough? It’s the question that haunts every plant parent. Getting the answer wrong can lead to withered leaves or root rot for our potted friends. But what if you could end the guessing game? There’s a foolproof way to look beneath the soil’s surface and determine exactly what your plant needs. This battery-free device is more affordable than buying a new houseplant, making it a cost-effective way to ensure your current collection continues to thrive.

All featured products and deals are selected independently and objectively by the author. House Outlook may receive a share of sales via affiliate links in content.

Too much water or not enough? It’s the question that haunts every plant parent. Getting the answer wrong can lead to withered leaves or root rot for our potted friends. But what if you could end the guessing game? There’s a foolproof way to look beneath the soil’s surface and determine exactly what your plant…

Save Your Soil With a Moisture Meter

Whether you’re a plant pro or a total newbie, keeping a moisture meter on hand can take the guesswork out of your watering routine. These tools work by measuring the electrical conductivity of the potting soil. Damp, mineral-rich soil conducts electricity easily, while dry soil blocks the current. The reading you get is a direct reflection of the soil’s electrical conductivity, indicating whether your plant is dry, moist, or wet.

Related: 12 Common Houseplants That Could Harm Your Pets

After you insert the probe into the soil — about halfway to two-thirds deep is best — wait 30 to 60 seconds for the meter to stabilize. For the most accurate results, take a few readings in different spots around the pot. While designs vary, most meters feature a numbered, multicolor display. The red, green, and blue sections are labeled to indicate dry, moist, or wet conditions. Most houseplants should be watered when the meter hits 3 or 4. For drought-tolerant plants, wait until the reading is 1 or 2; for moisture-loving plants, plan to water when the needle is at 4 or 5. After you take a reading, clean the probe to prevent mineral buildup and store the device in a cool, dry place. Never leave it in a plant long-term.

Advertisement

Moisture meters are incredibly easy to use, and you can find a reliable one for under $10. Warning: Do not submerge the probe in water to check its accuracy — this can overwhelm the sensor and lead to unreliable readings going forward.

Making a DIY Moisture Meter

Need help gauging your plant’s moisture levels but not ready to commit to a new tool? You can create a DIY moisture meter using nothing more than a wooden chopstick, a popsicle stick, or an untreated dowel. To check your plant’s hydration level, insert the stick a few inches into the soil and let it sit for about a minute. When you pull it out, look for dampness or soil particles clinging to the wood — these are clear signs of wet soil, meaning your plant doesn’t need to be watered yet. Conversely, if the stick comes out clean and dry, it’s time to give your plant a drink. Repeat this every few days to learn your plant’s watering schedule, and be sure to retest during seasonal shifts when changes in sunlight or indoor heating alter how quickly the soil dries out.

Advertisement
Advertisement
Food & Drink 3m read
499

The Secret to Keeping Sparkling Wine Bubbly for Days

There’s nothing more satisfying than popping open a bottle of sparkling wine for a special occasion — or just because. Whether it’s Champagne (from France’s Champagne region), cava (from Spain), prosecco (from Italy), or another variety, many would agree that sparkling wine is one of the most delicious ways to celebrate.

All featured products and deals are selected independently and objectively by the author. House Outlook may receive a share of sales via affiliate links in content.

There’s nothing more satisfying than popping open a bottle of sparkling wine for a special occasion — or just because. Whether it’s Champagne (from France’s Champagne region), cava (from Spain), prosecco (from Italy), or another variety, many would agree that sparkling wine is one of the most delicious ways to celebrate.

Indeed, sparkling wines have long been synonymous with celebration. In their early days, these wines were accessible only to the upper classes, and they still carry an air of sophistication today. Fortunately, contemporary production methods have made sparkling wine more affordable and widely available. Thanks to marketing efforts over the years, many people now buy sparkling wine to mark a special occasion (or even christen a boat).

There’s an old joke that there’s no need to worry about storing sparkling wine because it’s always consumed in one sitting. And while it’s certainly tempting to polish off the bottle, that isn’t always feasible. If you don’t have a Champagne stopper on hand, how can you keep the fizz from falling flat?

Related: How To Keep Leftover Wine Fresh for Days

That’s a Wrap

There’s a little-known solution for this problem, and it involves two items you probably already have in your kitchen drawer: plastic wrap and a rubber band. Here’s what to do: Cut a piece of plastic wrap, place it over the bottle’s opening, pull it taut, and secure it tightly with a rubber band. It may sound simple, but it works surprisingly well to keep the carbonation trapped inside.

Advertisement

Tips and Tricks

For the best results, use a large sheet of plastic wrap folded into three or four layers. Once you place it over the opening, use a spoon to push the plastic wrap down into the neck of the bottle, then secure it tightly with a rubber band. This creates an airtight seal and reduces the amount of empty space inside the bottle, which slows the loss of carbonation.

Whether you use this method or a traditional Champagne stopper, aim to consume the sparkling wine within two to three days. Once the bottle is uncorked, there’s no way to completely stop the gradual loss of carbonation, so enjoy those bubbles as soon as you’re able.

Advertisement
Featured Image Credit:  © Curated Lifestyle/Unsplash.com | Updated  Mar 17, 2026 |
Allegra Ringo
Writer
Allegra Ringo is a California-based writer who has written for publications including Reductress, The Hard Times, VICE, and The Atlantic. She loves sparkling water and old Chihuahuas with hardly any teeth, like her dog Pistachio.
This article is for general informational purposes only.
Featured Image Credit:  © Curated Lifestyle/Unsplash.com | Updated  Mar 17, 2026 |
Advertisement
Home Improvement 2m read
210

Closing Your Bedroom Door at Night Could Be a Lifesaver

Some people close their bedroom door at night to muffle sound, while others shut it to prevent the bogeyman from entering. But whether you’re a light sleeper or superstitious, there are additional safety benefits to closing the door while you snooze. It all has to do with halting the spread of fire and toxic gases, which can strike in the middle of the night when you’re at your most vulnerable. Here’s how a closed bedroom door saves lives.

Some people close their bedroom door at night to muffle sound, while others shut it to prevent the bogeyman from entering. But whether you’re a light sleeper or superstitious, there are additional safety benefits to closing the door while you snooze. It all has to do with halting the spread of fire and toxic gases,…

An Open-and-Shut Solution

According to FEMA, 51% of fatal fires occur between 10 p.m. and 6 a.m. This high rate is largely because many people are asleep during these hours and may not notice a fire until it is already out of control. Even if a smoke detector jolts you awake, it won’t help to stop the spread of fire or smoke. A closed door, however, can.

Related: 10 Lifesaving Home Safety Tips You’ve Probably Never Heard

The Fire Safety Research Institute (FSRI) found that a closed door can create a 900-degree Fahrenheit temperature difference between the inside of a room and a fire blazing outside. For example, if hallway flames reach 1,000 degrees Fahrenheit, a closed door can keep your bedroom at  100 degrees Fahrenheit. While still hot, it’s a survivable temperature that allows you to get out of bed and escape through the window.

Advertisement

A closed door also reduces your risk of smoke inhalation, which can cause serious harm and disorient you before the flames even reach your room. The FSRI notes that during a fire, carbon monoxide levels can be 100 times higher in areas with open doors compared to those that are closed.

While every second counts during a fire, a closed door creates a literal stopgap that buys you the time needed to get your wits about you and plan an escape. And when there isn’t an emergency, it provides you with quiet and privacy.

Advertisement
Featured Image Credit:  © whitebalance.space/iStock | Updated  Mar 17, 2026 |
Bennett Kleinman
Staff Writer
Bennett Kleinman is a New York City-based staff writer for Inbox Studio, covering topics for several brands including House Outlook and Better Report. He previously contributed to television programs such as "Late Show With David Letterman" and "Impractical Jokers," and digital publications like The Onion. Bennett is also a devoted New York Yankees and New Jersey Devils fan, and thinks plain seltzer is the best drink ever invented.
This article is for general informational purposes only.
Featured Image Credit:  © whitebalance.space/iStock | Updated  Mar 17, 2026 |
Advertisement
Food & Drink 3m read
263

Forget Baking Soda — Eliminate Fridge Odors With This Instead

When rifling through the fridge in search of a quick snack, nothing kills the mood quite like catching a whiff of something rancid. Often, the smell lingers even after you’ve gotten rid of the source. To mitigate those unpleasant odors, many people place an open box of baking soda on a back shelf.

All featured products and deals are selected independently and objectively by the author. House Outlook may receive a share of sales via affiliate links in content.

When rifling through the fridge in search of a quick snack, nothing kills the mood quite like catching a whiff of something rancid. Often, the smell lingers even after you’ve gotten rid of the source. To mitigate those unpleasant odors, many people place an open box of baking soda on a back shelf.

But what if you’re fresh out of that baking ingredient and dealing with a stomach-churning stench creeping into your kitchen? There’s an unexpected pantry staple that can help you get a handle on fridge funk — and it’s a brilliant way to give a second life to an item you might otherwise toss out.

The Best Thing Since Sliced Bread

White bread can act as a quick, temporary fix for lingering scents. Its porous texture physically absorbs odor molecules, although it doesn’t chemically neutralize them like baking soda does. The best part? You don’t have to waste a perfectly good slice of bread you’d use in a tasty sandwich. Instead, just repurpose those crusty ends that so often get thrown away.

Related: Why You Should Freeze Bread Before You Eat It

You may be asking: Why white bread? While other varieties, such as rye or sourdough, are also porous, they often have a pungent aroma of their own that can make matters worse. White bread also tends to be fluffy rather than dense, meaning it’s full of tiny air pockets that act as a trap for wandering odor molecules. It’s best to use a fresh loaf for this hack — stale, dried-out slices aren’t as absorbent.

Advertisement

How To Freshen Your Fridge

For this hack, you’ll need two bread heels, distilled white vinegar, and a shallow, wide-mouthed container. Place the two slices side-by-side in the same container; if the odor is coming from multiple areas, use separate containers for each. Next, pour a tablespoon of vinegar over the bread and leave the open container in the fridge for 12 to 24 hours. It’s important to remove the bread within 24 hours to prevent mold growth and potential contamination.

During this time, the bread will trap any fetid stenches, whether from wilting vegetables, week-old leftovers, or other stinky foodstuffs. When you wake up in the morning, open the fridge — the offending smells should be gone, or at the very least, significantly improved. Should any lingering odors remain, replace the bread and vinegar, and repeat the process as needed until those nasty odors vanish altogether.

Advertisement
Featured Image Credit:  © AndreyPopov/iStock | Updated  Mar 17, 2026 |
Bennett Kleinman
Staff Writer
Bennett Kleinman is a New York City-based staff writer for Inbox Studio, covering topics for several brands including House Outlook and Better Report. He previously contributed to television programs such as "Late Show With David Letterman" and "Impractical Jokers," and digital publications like The Onion. Bennett is also a devoted New York Yankees and New Jersey Devils fan, and thinks plain seltzer is the best drink ever invented.
This article is for general informational purposes only.
Featured Image Credit:  © AndreyPopov/iStock | Updated  Mar 17, 2026 |