Advertisement
Food & Drink 2m read
79

Why You Should Use a Tea Steeper for Baking

Dessert decorating doesn’t need to be fancy, and it certainly doesn’t have to be complicated. One of the best ways to finish cookies, cakes, brownies, scones, and other baked goods is by dusting them with powdered sugar. However, attempting to shake it from a spoon usually results in uneven coverage and a big mess.

All featured products and deals are selected independently and objectively by the author. House Outlook may receive a share of sales via affiliate links in content.

Dessert decorating doesn’t need to be fancy, and it certainly doesn’t have to be complicated. One of the best ways to finish cookies, cakes, brownies, scones, and other baked goods is by dusting them with powdered sugar. However, attempting to shake it from a spoon usually results in uneven coverage and a big mess.

Home bakers and professionals often rely on flour sifters for uniform coverage when sprinkling powdered sugar. But we think another tool works even better: a snap-ball tea infuser.

Get Better Control With a Tea Steeper

Tea steepers (also called infusers or strainers) feature uniformly spaced holes that dispense powdered sugar evenly. Because they’re much smaller than flour sifters, they also offer more control over application.

Related: The Baking Trick for Perfectly Flat Cake Layers

All you have to do is fill one half of a snap-ball infuser (or any similar tool made of mesh or perforated metal) with a spoonful of powdered sugar, close it, and gently dust your baked goods. This trick also works well for lightly flouring surfaces, coating proteins in cornstarch, or dusting sourdough loaves with rice flour before scoring.

Advertisement

Your Next-Best Sifter? An Empty Spice Jar

If you don’t have a tea steeper, you can use an empty spice jar to sift sugar, flour, cornstarch, rice flour, and other powdery ingredients. This works best with spice jars featuring small, evenly spaced holes rather than the larger openings used for chili flakes and other whole spices. Start by cleaning the jar thoroughly with hot water and dish soap — or run it through the dishwasher for fuss-free cleaning. Let it dry completely before adding your desired ingredient. Once it’s filled, snap the lid into place and give it a gentle shake to dust your baked good.

If you’re in a real bind, a fine-mesh strainer also works to top desserts with powdered sugar. It isn’t as precise, but it beats using a spoon or your fingers.

Advertisement
Featured Image Credit:  © boonsom/iStock | Updated  Mar 17, 2026 |
Jessie Quinn
Writer
Jessie Quinn is a Los Angeles-based lifestyle journalist with words published in PEOPLE, StyleCaster, Apartment Therapy, The Spruce, Byrdie, and more. She has a Bachelor's Degree in fashion journalism from Academy of Art University and her work spans across many categories, including style, beauty, home, health, crafts, and more.
This article is for general informational purposes only.
Featured Image Credit:  © boonsom/iStock | Updated  Mar 17, 2026 |
Advertisement
Cleaning 5m read
683

7 Air Purifier Tips That Actually Make a Difference

Indoor air quality has become a priority for many people, particularly as we spend more time indoors for work, to manage allergies, or due to seasonal changes. Air purifiers are great tools, but simply plugging them in isn’t enough to ensure the cleanest air possible. To get the most benefit from your investment, you need to be strategic about how you use them.

All featured products and deals are selected independently and objectively by the author. House Outlook may receive a share of sales via affiliate links in content.

Indoor air quality has become a priority for many people, particularly as we spend more time indoors for work, to manage allergies, or due to seasonal changes. Air purifiers are great tools, but simply plugging them in isn’t enough to ensure the cleanest air possible. To get the most benefit from your investment, you need…

Here are practical tips to measurably improve your home’s air quality.

1. Place Purifiers Where You Need Them Most

The first step to cleaner air isn’t buying the biggest or most expensive unit — it’s placing the unit where it will make the most impact.

Think high-traffic and problem areas:

Bedrooms: Since we spend nearly a third of our lives sleeping, clean air here can significantly impact health and sleep quality.

Living rooms and family spaces: These areas are where pollutants from pets, cooking, and outdoor air tend to accumulate.

Near pollutant sources: If you cook frequently, a purifier near the kitchen can help capture fumes and neutralize odors.

Credit: © DutcherAerials/iStock
Advertisement

2. Understand How Many Units You Actually Need

A common misconception is that one large air purifier can clean an entire home. That’s rarely true.

Air purifiers are room-specific devices — their efficiency depends on the Clean Air Delivery Rate (CADR) relative to the size of the space. A unit that works for a bedroom may be underpowered in a spacious living room.

Heed these general guidelines:

• Use one unit per main living space (living room, primary bedroom, etc.).

• For open-plan layouts, choose a purifier with a high CADR that matches the total square footage.

• If someone in the home has severe allergies or asthma, additional units may be necessary.

Credit: © DutcherAerials/ iStock
Related: 9 Forgotten Household Filters You Need To Clean or Replace

3. Match Purifier Size to Room Size

Manufacturers list recommended room sizes on their products, but choosing the right one requires a bit of math.

Here’s what to consider:

Measure the space: Multiply the room’s length by its width to get the square footage.

Match CADR ratings: The unit’s CADR should align with or exceed the room’s dimensions.

A purifier that’s too small will run all day with little effect, but one that’s correctly sized will cycle the air multiple times per hour, significantly reducing contaminants.

Credit: © galaganov/stock.adobe.com
Advertisement

4. Keep Filters Clean and Replace Them on Schedule

Air purifiers don’t clean the air — their filters do. And because filters clog over time, regular upkeep is a must.

Follow these filter maintenance tips:

• Check filters monthly. Most units have an indicator light, but a manual inspection is still helpful.

• Replace HEPA filters every six to 12 months, or as the manufacturer recommends.

• Prefilters can often be vacuumed or washed, which helps prolong the life of the main HEPA filter.

Dirty filters not only reduce efficiency but can also become sources of pollutants themselves. Treat filter care like changing HVAC filters: It’s essential maintenance, not an elective task.

Credit: © Pixel-Shot/stock.adobe.com

5. Run Your Purifier Continuously

Turning a purifier on only when the air feels “bad” isn’t sufficient. Many pollutants are invisible: VOCs from plastics, formaldehyde from new furniture, and fine particles from cooking or outdoor air.

Run purifiers continuously, especially if:

• You have pets.

• Someone in your household has allergies or respiratory issues.

• You’re in wildfire or high-pollen season.

Most modern air purifiers are energy-efficient, quiet, and designed for 24/7 use, so leaving them on is a strategic move, not a wasteful one.

Credit: © blackCAT/ iStock
Advertisement

6. Position for Airflow, Not Aesthetics

Placement is about more than just finding a spot; it’s about maximizing airflow. Purifiers draw air in and push it out. If that flow is disrupted, efficiency drops.

Adopt these best practices for better performance:

• Place purifiers at least 2 to 3 feet from walls.

• Avoid corners that trap stagnant air.

• Keep purifiers away from direct sunlight and moisture, which can damage filters.

Credit: © Imageologist/stock.adobe.com
Related: Burping Your Home — What It Is and Why You Should Try It

7. Pair Purifiers With Other Healthy-Home Habits

Air purifiers are powerful, but they’re only one piece of the clean-air puzzle:

Ventilate: Open windows when outdoor air quality is good.

Vacuum: Use a vacuum with a HEPA filter regularly to suck up dust and dander.

Control humidity: Keep moisture levels steady to prevent mold growth.

Limit indoor pollutants: Avoid smoking indoors and always use exhaust fans while cooking.

These habits reduce the pollutant load so your purifier doesn’t have to work overtime.

Air purifiers are more than gadgets; they’re essential tools that improve health and comfort. But like any tool, their impact depends on how you use them. With the right placement, maintenance, and usage habits, you’ll notice cleaner, fresher air — and perhaps even better sleep and fewer allergy symptoms.

Credit: © frantic00/iStock
Advertisement
Featured Image Credit:  © brizmaker/iStock | Updated  Mar 10, 2026 |
Jill Layton
Writer
Jill Layton started writing professionally when she realized her emails and texts were kinda funny. She’s an affiliate shopping writer and lifestyle contributor for Scary Mommy, Bustle, Mic, and Best Products. She’s the mom of two alarmingly witty kids and the world’s most perfect dog.
This article is for general informational purposes only.
Featured Image Credit:  © brizmaker/iStock | Updated  Mar 10, 2026 |
Advertisement
Organizing 3m read
92

This Is How Professionals Hide Clutter in Plain Sight

Everyday clutter is often the most overwhelming thing to organize. Because these items are used frequently, stashing them away is impractical, yet leaving them in plain sight creates an eyesore. Maintaining order while ensuring accessibility is actually easier than you might think, though — you just need to trick your eyes.

All featured products and deals are selected independently and objectively by the author. House Outlook may receive a share of sales via affiliate links in content.

Everyday clutter is often the most overwhelming thing to organize. Because these items are used frequently, stashing them away is impractical, yet leaving them in plain sight creates an eyesore. Maintaining order while ensuring accessibility is actually easier than you might think, though — you just need to trick your eyes.

Color-Block Your Clutter

Try a monochrome or color-blocking approach to tame your daily clutter. This creates a uniform look that hides clutter while keeping it within reach. Since the eye is naturally drawn to cohesion, using containers that are all the same color or part of the same color family — such as sage green and evergreen — effectively camouflages clutter. Beyond color, consider the texture: Opt for linen-wrapped or seagrass containers for an organic feel, or metal or hardwood bins for a more utilitarian aesthetic. When your storage solutions are cohesive, your eye sweeps past them, ignoring the clutter contained within.

Related: 15 Things To Declutter From Your Kitchen Right Now

Curate and Cluster

You can apply this same color-matching method to your kitchen. Instead of using boxes and bins, however, focus on coordinating your everyday items, such as bowls, plates, mugs, and small appliances. For example, if you have light blue plates, pair them with kitchen gadgets — like a stand mixer or an electric tea kettle — in the same shade or a complementary color to establish visual continuity.

Advertisement

If you have open kitchen shelving, grouping items together — while leaving adequate space between clusters — is the secret to an intentional, decorative look. This negative space allows each arrangement to stand on its own, preventing your shelves from looking messy. Try stacking a couple of serving bowls, then finish the look with a set of decorative spoons. You can also cluster daily essentials, such as your salt and pepper shakers, utensil crock, and kitchen timer. Grouping items in odd numbers, like threes or fives, is a classic design trick that creates a well-balanced composition.

Whether you’re styling office built-ins or open kitchen shelving, these strategies help your storage fade into the background. The result is a stylish, functional display that feels curated and intentional, not overwhelming.

Advertisement
Featured Image Credit:  © towfiqu ahamed/iStock | Updated  Mar 9, 2026 |
Jessie Quinn
Writer
Jessie Quinn is a Los Angeles-based lifestyle journalist with words published in PEOPLE, StyleCaster, Apartment Therapy, The Spruce, Byrdie, and more. She has a Bachelor's Degree in fashion journalism from Academy of Art University and her work spans across many categories, including style, beauty, home, health, crafts, and more.
This article is for general informational purposes only.
Featured Image Credit:  © towfiqu ahamed/iStock | Updated  Mar 9, 2026 |
Advertisement
Food & Drink 3m read
652

You’ve Been Throwing Away This Versatile Ingredient

Chickpeas, or garbanzo beans, are one of the most popular and versatile legumes around. They’re a staple in everything from healthy salads to hearty stews, and, of course, the main ingredient in hummus. Because of their versatility, canned chickpeas are an essential pantry item and an excellent emergency food to keep on hand.

Chickpeas, or garbanzo beans, are one of the most popular and versatile legumes around. They’re a staple in everything from healthy salads to hearty stews, and, of course, the main ingredient in hummus. Because of their versatility, canned chickpeas are an essential pantry item and an excellent emergency food to keep on hand.

However, you might not be using them to their full potential. The next time you open a can of chickpeas, pause before pouring off the liquid and rinsing the beans. That thick, starchy brine, known as aquafaba, is a useful ingredient in its own right. While vegans have long used aquafaba as a reliable egg substitute for baking, you don’t need to follow a plant-based diet to benefit from it. It comes “free” with your can of chickpeas, after all, and can help you offset the cost of eggs. So, why not use it in your next baking project?

Related: What To Do With Leftover Tomato Paste

A Quick Aquafaba Primer

Why is this liquid so useful? Its thick consistency comes from the starches and soluble fibers released by the chickpeas during the cooking and canning process. Those dissolved starches make aquafaba a useful binder in dishes such as meatloaf or hamburgers, where you would otherwise use an egg. However, aquafaba has a couple of key advantages over other egg substitutes like ground flaxseed: It has a neutral flavor, and it can be whipped into a light, fluffy foam, just like egg whites.

Advertisement

Here are a few ideas on how to use aquafaba at home, whether you’re dabbling in veganism or just a frugal and adventurous cook:

• Make eggless meringue, either for meringue cookies or to top a pie, without having to discard a bunch of yolks.

• Bake light and fluffy cakes without eggs.

• Use aquafaba as a light thickener in soups.

• Swap aquafaba for beaten egg whites in foamy cocktails and other beverages (and avoid the potential salmonella risk).

• Fold whipped aquafaba into anything from muffins to pancakes and waffles to make them lighter and fluffier.

If you aren’t careful, you’ll find yourself needing new recipes to use up the chickpeas left over from your aquafaba. It’s a good problem to have, though; chickpeas are a healthy, filling way to add protein and fiber to your diet.

Advertisement
Featured Image Credit:  © Kristina Ratobilska/iStock | Updated  Mar 9, 2026 |
Fred Decker
Writer
Fred Decker is a trained chef and former restaurateur. Since closing his restaurants over a decade ago he has been a prolific freelance writer, publishing several thousand articles on dozens of high-volume websites including Taste Of Home, Hunker, Tasting Table, Week&, eHow, and GOBankingRates. He lives on a rural acreage shared with a big garden, chickens, rabbits, and grandkids.
This article is for general informational purposes only.
Featured Image Credit:  © Kristina Ratobilska/iStock | Updated  Mar 9, 2026 |
Advertisement
Cleaning 3m read
67

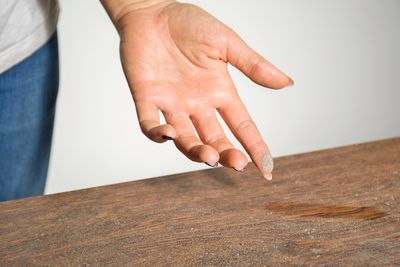
Is Your Dusting Routine Making Your House Dirtier?

A dusty home is no match for a microfiber cloth, which picks up most debris in a single wipe without leaving streaks or lint behind. These cloths work best for dry dusting, but sometimes they struggle to grab everything — particularly pet hair and other allergens. Fortunately, you can improve their performance without spending a dime.

All featured products and deals are selected independently and objectively by the author. House Outlook may receive a share of sales via affiliate links in content.

A dusty home is no match for a microfiber cloth, which picks up most debris in a single wipe without leaving streaks or lint behind. These cloths work best for dry dusting, but sometimes they struggle to grab everything — particularly pet hair and other allergens. Fortunately, you can improve their performance without spending a…

Ditch Dust With a Damp Cloth

Microfiber cloths are great for dusting because they generate a slight electrostatic charge as you wipe. As the name suggests, the material is made up of millions of tiny synthetic polyester or nylon fibers. These fibers are split to be thinner than a human hair, increasing their surface area so they can trap and hold dust. The friction caused by wiping also creates a static charge that helps pull dust into the cloth.

Sometimes, however, dry dusting seems to only push debris around, especially if it’s been a while since you last cleaned or if there’s heavy buildup of pet hair and grime. In these cases, dampen your cloth with clean water, wring it out well, and wipe whatever surfaces need cleaning. This ensures that dust and allergens are picked up by the fibers rather than kicked up into the air to resettle elsewhere.

Related: Keep Your Ceiling Fan Dust-Free With This Easy Trick

Microfiber cloths are renowned for their ability to capture dust through static, but they are equally impressive when damp. They can hold over five times their weight in water, making them the perfect tool for tackling tough messes, such as sticky food spills, stubborn soap scum, and grease-laden cabinets.

Advertisement

Keeping Your Cloths Clean

Want to extend the lifespan of your microfiber cloths? Whether you prefer using them damp or dry, you can guarantee years of use from them with proper washing. Avoid using bleach or fabric softener, as these chemicals can damage the superfine fibers that make these cloths so effective. Bleach degrades the structural integrity of the fibers, while softeners leave behind a waxy residue that reduces their ability to trap dust or absorb liquid.

Instead, clean your cloths in a solution of warm water and your choice of either 3% hydrogen peroxide, distilled white vinegar, or an oxygen-based bleach alternative, such as OxiClean Odor Blasters. (Warning: Never mix hydrogen peroxide and vinegar together in the same container, as this causes a chemical reaction that can irritate the eyes, skin, and respiratory system.) Soak the microfiber cloths in the solution for 15 to 30 minutes, then rinse them thoroughly with clean water. It’s best to air dry them whenever possible, but if you must use a dryer, opt for a low-heat setting and skip the dryer sheets.

Advertisement
Advertisement
Home Improvement 3m read
709

How a Single Quarter Can Save You From a Highway Disaster

Anyone who’s been around the block knows that a quarter doesn’t have the same buying power it used to. Purchasing a slice of pizza or a movie ticket for 25 cents is a thing of the past, but the coin remains an unlikely yet incredibly useful tool for staying safe on the road. Many drivers don’t realize their car is at risk until it’s too late — especially when it comes to tire tread. Here’s how one measly quarter can prevent disaster.

Anyone who’s been around the block knows that a quarter doesn’t have the same buying power it used to. Purchasing a slice of pizza or a movie ticket for 25 cents is a thing of the past, but the coin remains an unlikely yet incredibly useful tool for staying safe on the road. Many drivers…

Treading With Caution

If you look at a brand-new set of tires, you’ll notice a series of intricate patterns and grooves. This is tire tread, and it’s essential for maintaining traction on the road. However, as you drive, those grooves gradually wear down until the tires become “bald.” A lack of tread prevents your tires from being able to grip the pavement, putting you at serious risk of losing control of your vehicle.

Related: Why You Should Keep Clear Nail Polish in Your Glove Box

For safety reasons, it’s important to keep track of the tread depth — which is measured in 32nds of an inch — and replace the tires when necessary. While new tires typically start with 10/32 to 12/32 of an inch of tread, you should consider replacements once they wear down to 4/32 of an inch, as that’s when traction begins to weaken. If your tread reaches 2/32 of an inch or less, you are at the legal limit and must replace the tires immediately.

Advertisement

The Quarter Trick

How do you know if your tires are in bad condition without consulting a mechanic? It’s simple: Insert a quarter into the tread with the top of Washington’s head pointing down into the groove. The distance from the edge of the coin to the top of his head is approximately 4/32 of an inch. If George’s scalp is concealed, you still have a safe amount of tread. But if you can clearly see the top of his head — or the tread sits right at that level — your tires are around 4/32 of an inch or less, which means it’s a good time to think about replacing them.

As stated before, things get especially dangerous when your tread depth is 2/32 of an inch or less. To check this, repeat the test with a penny, which measures about 2/32 of an inch from the rim to the top of Abraham Lincoln’s head. If you can see the top of Lincoln’s scalp — or the words “IN GOD WE TRUST” between his head and the rim — your tread is worn to the legal limit and the tires should be replaced right away.

Advertisement
Featured Image Credit:  © JJ Gouin/iStock | Updated  Mar 9, 2026 |
Bennett Kleinman
Staff Writer
Bennett Kleinman is a New York City-based staff writer for Inbox Studio, covering topics for several brands including House Outlook and Better Report. He previously contributed to television programs such as "Late Show With David Letterman" and "Impractical Jokers," and digital publications like The Onion. Bennett is also a devoted New York Yankees and New Jersey Devils fan, and thinks plain seltzer is the best drink ever invented.
This article is for general informational purposes only.
Featured Image Credit:  © JJ Gouin/iStock | Updated  Mar 9, 2026 |
Advertisement
Food & Drink 2m read
504

You’re Not Using Your Potato Peeler Correctly

Most people intuitively understand how to use a potato peeler. You hold the long blade against the potato, press gently, and remove the skin with smooth, repeated motions. But what about the “eyes,” those pesky brown spots found on most potatoes? While they won’t harm anyone, they’re far too unsightly to leave behind.

All featured products and deals are selected independently and objectively by the author. House Outlook may receive a share of sales via affiliate links in content.

Most people intuitively understand how to use a potato peeler. You hold the long blade against the potato, press gently, and remove the skin with smooth, repeated motions. But what about the “eyes,” those pesky brown spots found on most potatoes? While they won’t harm anyone, they’re far too unsightly to leave behind.

Some people use a paring knife to remove potato eyes. This method works in a pinch, but having to switch tools is annoying, and the knife’s straight edge often creates unnecessary waste by digging too deep or wide. Other people run the peeler blade over the blemish multiple times until the eye no longer exists. While effective, this method wastes a lot of potato. It’s also cumbersome and time-consuming when you’re prepping for a dinner party, holiday meal, or weeknight coq au vin.

Related: Make Your Potatoes Last Longer With Only a Cardboard Box

In the Eye of the Beholder

Fortunately, most potato peelers include a feature designed specifically for this problem. It’s called a “potato eye remover” — that small, pointed notch found on the side or end of the peeler’s head.

Advertisement

Here’s how to use it: First, peel the potato as you normally would. To remove an eye, hold the pointed notch over the dark spot, press down gently, and twist. The tool scoops out the eye without removing excess potato. This feature is standard on most modern peelers, both swivel and Y-shaped. Just look for a protruding loop or a pointed prong at the tip or side of the head.

The potato eye remover is a simple tool, but its purpose appears to have been lost to time. Previous generations may well have been aware of it, but many contemporary home cooks are surprised to learn it even exists. Hopefully, that changes with your next meal.

Advertisement
Featured Image Credit:  © dkalashnikov/stock.adobe.com | Updated  Mar 20, 2026 |
Allegra Ringo
Writer
Allegra Ringo is a California-based writer who has written for publications including Reductress, The Hard Times, VICE, and The Atlantic. She loves sparkling water and old Chihuahuas with hardly any teeth, like her dog Pistachio.
This article is for general informational purposes only.
Featured Image Credit:  © dkalashnikov/stock.adobe.com | Updated  Mar 20, 2026 |
Advertisement
Decorating 3m read
33

The ‘Boring’ Secret to Making Interesting Furniture Pop

Designing a room that’s layered and inviting — one that earns compliments while making you feel at home — doesn’t require filling every square foot with statement pieces. Instead, the most compelling interiors rely on balance. Some furniture speaks loudly; other pieces are intentionally understated. When everything in a room tries to steal the spotlight, the result feels chaotic, but when every item fades into neutrality, it risks being boring. The sweet spot lies in the middle.

Designing a room that’s layered and inviting — one that earns compliments while making you feel at home — doesn’t require filling every square foot with statement pieces. Instead, the most compelling interiors rely on balance. Some furniture speaks loudly; other pieces are intentionally understated. When everything in a room tries to steal the spotlight, the…

For a more dynamic space, try pairing a plain element with an interesting one. Think of each room as having a few lead characters with a supporting cast. Not every piece needs to command attention, just as not everything should fade into the background.

Alyssa Owens, a Melbourne, Australia-based interior designer, agrees. “The most compelling spaces balance expression with restraint,” she says. “A more minimal piece next to something sculptural or textural allows both to really land. You get that push and pull that makes a room feel layered and interesting, rather than overworked.”

Related: 9 Ways To Make Your Living Room Better for Conversation

Let One Piece Shine

Suppose you’re centering a space around a sculptural coffee table or an ornate vintage console. Instead of surrounding it with equally bold pieces, create contrast by pairing it with something simpler. A tailored sofa becomes the perfect backdrop for an interesting coffee table; the sofa grounds the space while the table brings personality.

Advertisement

This principle can work throughout your home. A streamlined vanity offers an opportunity for an eye-catching mirror. A simple bed frame allows sculptural side tables or bold lamps to shine. A clean-lined dining table becomes far more dynamic when paired with interesting chairs — perhaps with woven seats or an unexpected pop of color.

How To Create Contrast

Restraint is not synonymous with boring. A blank slate of a fireplace can feel architectural when juxtaposed with striking art. Minimal cabinetry becomes more impactful with dramatic hardware. When one element fades, the other stands out.

“Contrast is what keeps a room from falling flat,” Owens says. “I’m always pairing something soft with something structured, or something bold with something grounding. That tension is what gives a space energy while still allowing it to feel composed.”

Advertisement
Featured Image Credit:  © Hans/ Unsplash.com | Updated  Mar 9, 2026 |
Megan McCarty
Writer
Megan McCarty is a Los Angeles-based writer who covers the fun stuff: design, travel, wellness, beauty, and fashion. She has written for publications including Domino, The Spruce, MyDomaine, Bustle, and Rue Magazine. Her life rules include, but are not limited to, zipper when merging, contribute to your IRA, and do the nice thing.
This article is for general informational purposes only.
Featured Image Credit:  © Hans/ Unsplash.com | Updated  Mar 9, 2026 |
Advertisement
Cleaning 3m read
681

How To Remove Pet Smells From Furniture

There’s nothing quite like coming home after a long day and curling up on the couch with your favorite four-legged friend. The cuddles are great — the odor left behind on couches, bedding, and other soft surfaces, however, is not. Fortunately, a handful of inexpensive household items can eliminate those smells in seconds.

All featured products and deals are selected independently and objectively by the author. House Outlook may receive a share of sales via affiliate links in content.

There’s nothing quite like coming home after a long day and curling up on the couch with your favorite four-legged friend. The cuddles are great — the odor left behind on couches, bedding, and other soft surfaces, however, is not. Fortunately, a handful of inexpensive household items can eliminate those smells in seconds.

DIY Deodorizer Recipe

To get rid of pet odors in a pinch, you need a spray bottle, lukewarm water, and distilled white vinegar. Mix equal parts vinegar and water in your spritzer, give it a quick shake, and spray the solution liberally on any surface that needs freshening up. The solution is safe for pets, but you should allow it to dry completely before letting your dog or cat back onto the furniture.

Love the deodorizing power of vinegar but hate the sharp scent? Don’t worry — the sour odor naturally dissipates within 30 to 60 minutes. But if you want to mask the scent of vinegar with a more pleasant one, you can create a custom fragrance using your favorite herbs and fruits.

Related: 6 Cleaning Products Pet Parents Can’t Live Without

Why It Works

Why is vinegar such a powerhouse for eliminating odors? Its high acetic acid content neutralizes odor-causing particles rather than covering them up. The acid binds with the compounds found in pet odor molecules and chemically alters them until the scent vanishes.

Advertisement

The Power of Peels

Warning: This next step is not recommended for pet owners. Citrus peels contain high concentrations of d-limonene, a compound that is toxic to both dogs and cats.

Start by peeling the rind of whatever citrus you have on hand. Lemon is a popular choice, but you can also opt for orange or grapefruit for a sweeter, zestier aroma.

Fill a small saucepan halfway with water, then simmer the rinds of one citrus fruit with a few sprigs of an aromatic herb, such as rosemary, lavender, thyme, sage, or lemon balm, for 15 to 30 minutes. Remove the saucepan from the heat and let it sit for 24 hours. The next day, fill a spray bottle (preferably glass) halfway with the strained, infused liquid. Then, add an equal amount of distilled white vinegar and shake well to combine. Spritz the upholstery with your DIY deodorizer to eliminate those deep-seated odors.

A Time-Saving Tip

In lieu of peels, you can use citrus essential oils. Adding 10 to 15 drops to your spray bottle will take the edge off the vinegar and leave your upholstery smelling fresh. Note that citrus essential oils are also toxic to pets because they contain d-limonene.

Advertisement
Advertisement
Cleaning 6m read
883

11 Household Items You Can Clean in the Dishwasher

When we think of the dishwasher, most of us picture plates, glasses, and utensils, but this hardworking appliance can do so much more than clean dinnerware. With the right settings and a little common sense, your dishwasher can be a powerful tool for cleaning many household items that are otherwise painstaking to scrub by hand.

All featured products and deals are selected independently and objectively by the author. House Outlook may receive a share of sales via affiliate links in content.

When we think of the dishwasher, most of us picture plates, glasses, and utensils, but this hardworking appliance can do so much more than clean dinnerware. With the right settings and a little common sense, your dishwasher can be a powerful tool for cleaning many household items that are otherwise painstaking to scrub by hand.

Discover surprising things you can safely wash in the dishwasher below. While you should always check the manufacturer’s recommendations, the dishwasher can save you time and elbow grease while delivering sparkling results.

1. Range Hood Filters

Cleaning greasy range hood filters is one of those chores we tend to put off, but you can let your dishwasher do the dirty work for you. Simply remove the metal filters, place them on the bottom rack, and run a normal cycle with your usual detergent. To prevent cross-contamination, wash the filters in their own load. Space them several inches apart and angle them slightly downward to allow the grease to drain.  The hot water and detergent will dissolve the built-up grease and grime, keeping the air in your kitchen cleaner and improving ventilation. Note: Charcoal filters are not dishwasher-compatible; aluminum versions can be washed, but they are prone to discoloration.

Credit: Igor Paszkiewicz/ iStock

2. Refrigerator Shelves and Bins

Glass shelves and plastic bins from your fridge often get gunky with spills and stains. Rather than scrubbing them in the sink, place removable parts on the bottom rack of your dishwasher. Use a gentle cycle and a mild detergent, and skip the high-heat drying cycle for plastics to avoid warping or melting. Once the cycle ends, just dry them off with a kitchen towel and slide them back in.

Credit: Thai Liang Lim/ iStock
Advertisement

3. Microwave Turntables and Plates

That microwave turntable is a magnet for stains and splatters. Instead of scrubbing it by hand, pop it in the dishwasher and select a normal cycle. It fits perfectly on the bottom rack and usually comes out spotless. If the support ring is also speckled with sauce, toss it in along with the turntable. Just remember to place it on the top rack to keep it secure during the wash cycle.

Credit: Birdlkportfolio/ iStock
Related: 12 Things You Should Never Put in the Dishwasher

4. Glass Light Fixture Covers

Dusty or sticky glass covers from light fixtures often seem too bulky for the sink and too delicate to scrub. Your dishwasher can handle the grime — just be sure the pieces are made from dishwasher-safe glass and place them carefully on the top rack. To prevent thin glass from cracking, avoid the high-heat drying cycle.

Credit: Bryan Chavez/ iStock
Advertisement

5. Toothbrush Holders and Soap Dishes

Bathroom accessories can accumulate toothpaste, mildew, and soap scum. Items such as toothbrush holders and soap dishes made from plastic, ceramic, or stainless steel are prime candidates for the dishwasher. Place them upside down on the top rack and let the machine handle the buildup.

Credit: Igor Klyakhin/ iStock

6. Hairbrushes and Combs

Plastic hairbrushes and combs can go in the dishwasher, but a little prep goes a long way. Remove hair from the bristles first, then place the items on the top rack in a basket to keep them secure. (Avoid using the utensil holder, which sits too close to the heating element on some older models and can melt or warp plastic.) The machine’s warm water and detergent will disinfect the hair tools and dissolve product buildup, leaving them like new. Never put hairbrushes with wooden handles, natural boar bristles, or rubber cushions through a dishwasher cycle, as this can lead to damage or mold growth.

Credit: Volodymyr Kalyniuk/ iStock
Advertisement

7. Plastic Shower Caddies and Soap Trays

Your shower caddy is a host to soap scum, hard water buildup, and who knows what else. Toss it in the dishwasher’s top rack and run a normal cycle. The hot water and detergent blast away grime better than a spray bottle ever could. While stainless steel, plastic, and silicone caddies are generally dishwasher-safe, skip the chrome-plated versions. Their protective coatings can be stripped by harsh detergents, causing them to rust.
Credit: CorbalanStudio/ iStock

8. Kids’ Plastic Toys

Many plastic children’s toys — without batteries or electronics — can be refreshed in the dishwasher. Place them on the top rack and avoid the heat-dry setting if the plastic is lightweight. For smaller pieces, use a mesh bag or a stainless steel basket to prevent them from falling through the rack. It’s also best to hand-wash any “squeeze” toys, such as rubber ducks, to prevent trapped water from turning into mold.

Credit: Towfiqu barbhuiya/ Pexels
Advertisement

9. Silicone Baking Tools and Utensils

From silicone cupcake liners to spatulas and baking mats, most silicone baking tools are dishwasher-safe. Lay them on the top rack, where the heat and water circulation will reach nooks and crannies more effectively than hand-washing.

Credit: oliakolvitz/ iStock
Related: 9 Forgotten Household Filters You Need To Clean or Replace

10. Grill Grates and Small Barbecue Parts

For small grill components that fit, the dishwasher can remove cooking grease faster than elbow grease. Place removable stainless steel or porcelain-enameled grill grates on the bottom rack and run a heavy-duty cycle. Avoid this method for cast iron, as the detergent and moisture will strip the seasoning and cause rust.

Credit: kelifamily/ Adobe Stock
Advertisement

11. Small Garden Tools and Pots

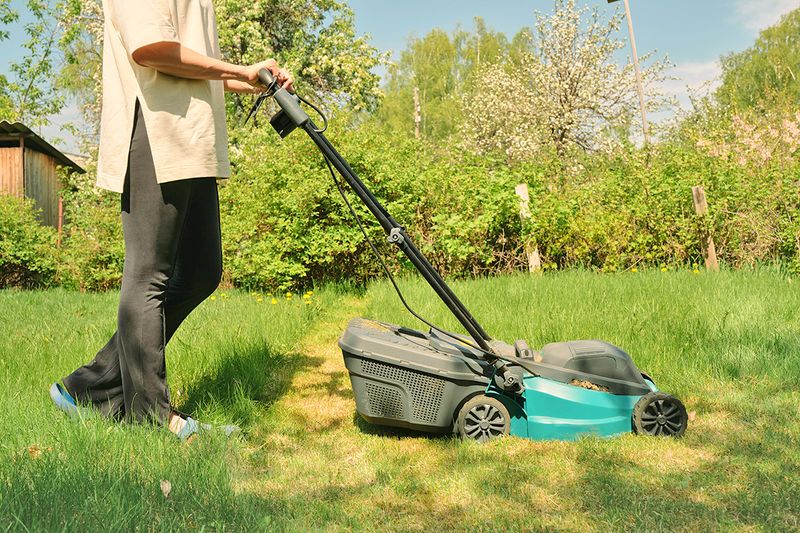
Gardening gear made from hard plastic, stainless steel, glazed ceramic, or rubber is typically dishwasher-safe. After rinsing off any visible dirt that could clog the filter, position your small hand tools, planters, saucers, seed starting trays, watering cans, and other equipment on the top rack. It’s best to wash these in a dedicated load and follow up with a quick empty cycle to keep dirt away from your dinnerware. Avoid the dishwasher when cleaning tools with wooden handles, terra-cotta pots, cast iron items, or copper and chrome-plated instruments.
Credit: ArtesiaWells/ iStock

Dishwasher Safety Tips

Before washing nontraditional items:

Check materials: Avoid wood, cast iron, electronics, and anything labeled “hand-wash only.”

Secure small pieces: Use baskets or mesh bags to prevent smaller items from falling through racks.

Skip high heat for plastics: High-heat drying can warp lightweight plastics. Opt for air-dry or low heat settings.

Separate your loads: Run a dedicated cycle for especially greasy or grimy items rather than mixing them with dishes.

Your dishwasher can be one of your best cleaning allies when you know which items are safe to load. Next time you’re about to scrub stubborn grime by hand, consider letting the machine do the heavy lifting for you.

Advertisement
Featured Image Credit:  kunertus/ iStock | Updated  Mar 3, 2026 |
Jill Layton
Writer
Jill Layton started writing professionally when she realized her emails and texts were kinda funny. She’s an affiliate shopping writer and lifestyle contributor for Scary Mommy, Bustle, Mic, and Best Products. She’s the mom of two alarmingly witty kids and the world’s most perfect dog.
This article is for general informational purposes only.
Featured Image Credit:  kunertus/ iStock | Updated  Mar 3, 2026 |