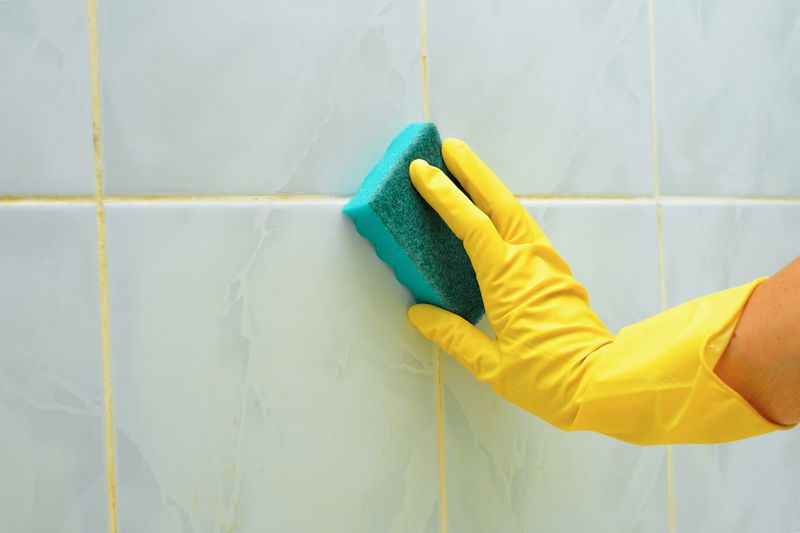
Advertisement
Decorating 3m read
8,325

The One Design Mistake That Makes Rooms Feel Flat

Take a look around your living room — or any space that feels a bit flat. The sofa fits, the colors coordinate, and the artwork inspires, yet the room still lacks energy. Often, the issue is how your eyes move, or don’t move, through the room. Well-designed spaces gently guide the eye from one area to another, creating a sense of rhythm and interest. Think of it like a city skyline: Buildings of different heights make a landscape more engaging because your gaze has somewhere to travel. Interiors work the same way. When most pieces sit at the same visual level, the space can feel static. Fortunately, there’s a simple styling principle designers use to fix this.

All featured products and deals are selected independently and objectively by the author. House Outlook may receive a share of sales via affiliate links in content.

Take a look around your living room — or any space that feels a bit flat. The sofa fits, the colors coordinate, and the artwork inspires, yet the room still lacks energy. Often, the issue is how your eyes move, or don’t move, through the room. Well-designed spaces gently guide the eye from one area to…

How To Create a “Skyline” in a Space

When furniture pieces all land at a similar height — sofa, coffee table, side tables, console — the room can appear visually level, like a plateau. Creating more dimension doesn’t require a full redesign or a big budget, however. Simply introduce a few thoughtfully placed vertical elements to draw the eye upward. Think of yourself as the room’s architect, arranging a mix of tall, medium, and low elements. This variety adds movement and keeps the space from feeling stagnant.

Related: Design Trends Homeowners Regret the Most, According to Interior Designers

Design Tricks To Draw the Eye Upward

Wall art is one of the easiest ways to introduce height. A large framed piece or gallery wall lifts the room’s visual weight while adding a personal touch. Textiles achieve a similar effect; a tapestry, wall hanging, or mounted fabric panel brings in both height and texture.

Advertisement

Window treatments are another powerful, practical trick. Hanging curtain rods closer to the ceiling elongates the walls, subtly raising the room’s perceived height. A tall bookshelf works the same way, adding vertical structure while providing space for books, plants, and framed photos. Floor lamps are another smart option, offering height and light without taking up much floor space.

You can’t beat the efficiency of a tall, slim mirror either. Leaning one against a wall introduces a strong upward line while reflecting light around the room, helping the space look brighter and more open.

Ultimately, the goal isn’t to fill every wall with towering pieces, but to create balance. Pair low furniture with a few taller elements, and the room immediately feels more visually dynamic.

Advertisement
Featured Image Credit:  © Clay Banks/Unsplash.com | Updated  Mar 31, 2026 |
Megan McCarty
Writer
Megan McCarty is a Los Angeles-based writer who covers the fun stuff: design, travel, wellness, beauty, and fashion. She has written for publications including Domino, The Spruce, MyDomaine, Bustle, and Rue Magazine. Her life rules include, but are not limited to, zipper when merging, contribute to your IRA, and do the nice thing.
This article is for general informational purposes only.
Featured Image Credit:  © Clay Banks/Unsplash.com | Updated  Mar 31, 2026 |
Advertisement
Cleaning 3m read
20,488

Clean Your Oven While You Sit on the Couch

When you’re lying on the couch, productivity usually takes a backseat to figuring out which Netflix show to stream. But what if we told you there’s a way to clean the oven while you’re sprawled out on the sofa? It sounds hard to believe, but ovens aren’t actually that difficult to clean. It takes only a few seconds to prepare a cleaning solution that works its magic while you spend the next hour watching your favorite show. Check out this simple, game-changing hack that clears away oven grease and grime.

All featured products and deals are selected independently and objectively by the author. House Outlook may receive a share of sales via affiliate links in content.

When you’re lying on the couch, productivity usually takes a backseat to figuring out which Netflix show to stream. But what if we told you there’s a way to clean the oven while you’re sprawled out on the sofa? It sounds hard to believe, but ovens aren’t actually that difficult to clean. It takes only…

A Sour Solution With Sweet Results

Steam cleaning is one of the most effective ways to remove built-up gunk in your oven. Whether a cheesy pizza dripped onto the grates or a casserole bubbled over and made a mess, steam can loosen food residue to make it easier to wipe away. But for a truly effective clean, add a bit of distilled white vinegar.

Related: Stop Scrubbing Your Oven Racks in the Sink — Do This Instead

Begin by preheating the oven to 400 degrees Fahrenheit. While the appliance heats up, fill a deep, oven-safe baking dish with about 2 inches of water and 3/4 to 1 cup of distilled white vinegar for extra oomph. Once the oven reaches the desired temperature, place the dish on the middle rack, shut the door, and wait for the mixture to boil. In general, this takes about 10 to 20 minutes, but it’s a good idea to check periodically for bubbling through the oven window. Once it begins to boil, turn off the heat and let the mixture steam for 30 minutes. Keep the door firmly shut to prevent steam from escaping — but otherwise, you’re free to relax on the couch for the next half-hour.

Advertisement

Cool Down, Then Clean Up

After 30 minutes, return to the kitchen, open the oven door, and remove the dish. Head back to the living room to relax for another 30 minutes while the oven cools. Once it’s cool to the touch, it’s time to get off the couch and get to work.

Use a microfiber cloth to wipe down the oven’s interior. You’ll be surprised by how easily the gunk clears away thanks to the steam. For an even deeper clean, mix a 50-50 solution of water and distilled white vinegar in a spray bottle to use as you wipe. Steam is often enough on its own, but a spray bottle is a great backup for stubborn spots. After a little light scrubbing, your oven should look as good as new.

Advertisement
Featured Image Credit:  © JazzIRT/iStock | Updated  Mar 31, 2026 |
Bennett Kleinman
Staff Writer
Bennett Kleinman is a New York City-based staff writer for Inbox Studio, covering topics for several brands including House Outlook and Better Report. He previously contributed to television programs such as "Late Show With David Letterman" and "Impractical Jokers," and digital publications like The Onion. Bennett is also a devoted New York Yankees and New Jersey Devils fan, and thinks plain seltzer is the best drink ever invented.
This article is for general informational purposes only.
Featured Image Credit:  © JazzIRT/iStock | Updated  Mar 31, 2026 |
Advertisement
Gardening 2m read
11,699

Before You Toss That ‘Dead’ Plant, Try This 5-Second Test

Anyone who lives in the countryside has likely heard some variation of this folk wisdom: “Never cut down a tree in winter.” That’s because during the colder months, it’s difficult to tell if a tree is dead or merely dormant, and overeager gardeners run the risk of cutting down a perfectly healthy specimen.

Anyone who lives in the countryside has likely heard some variation of this folk wisdom: “Never cut down a tree in winter.” That’s because during the colder months, it’s difficult to tell if a tree is dead or merely dormant, and overeager gardeners run the risk of cutting down a perfectly healthy specimen.

The same logic applies to woody-stemmed garden plants and houseplants. Perennial plants, shrubs, and biennials wintering outdoors go dormant while waiting for spring to arrive. Even some houseplants may enter a dormancy period that makes them look dead. But you don’t need a degree in botany to tell if a plant is gone for good or just resting — you need only one common item that’s probably already in your pocket.

Related: How To Prep Your Garden for Spring While It’s Still Winter

Scratch the Surface

This hack really is as simple as it sounds. Pick a spot on a branch or main stem and use the edge of a coin to gently scrape away the outer layer of bark. The color you find underneath tells you everything you need to know.

Advertisement

If the tissue is brown and dry, that branch or stem is dead. If you find moist green tissue, the plant is still alive — it’s just dormant and waiting for spring. One warning: For large plants or vines, finding one dead spot doesn’t necessarily mean the entire plant is a goner. Test several stems, especially near the root crown, to make sure you don’t tear out a healthy plant just because of a few dead branches.

Don’t Have a Coin?

Coins are ideal because they’re blunt enough to avoid damaging the plant, but you have other options. For delicate garden plants like woody herbs, your thumbnail will often do the job. For sturdier plants with thicker bark, the edge of a spoon is a similarly safe alternative.

Advertisement
Featured Image Credit:  © Mohammed Al Ali/iStock | Updated  Mar 25, 2026 |
Fred Decker
Writer
Fred Decker is a trained chef and former restaurateur. Since closing his restaurants over a decade ago he has been a prolific freelance writer, publishing several thousand articles on dozens of high-volume websites including Taste Of Home, Hunker, Tasting Table, Week&, eHow, and GOBankingRates. He lives on a rural acreage shared with a big garden, chickens, rabbits, and grandkids.
This article is for general informational purposes only.
Featured Image Credit:  © Mohammed Al Ali/iStock | Updated  Mar 25, 2026 |
Advertisement
Food & Drink 2m read
37,464

Why Chefs Always Soak Raw Onions

Onions provide a savory, pungent boost to almost any dish, but that flavor can sometimes be overwhelming, especially if the onions are raw. Because they become more potent after being cut, adding them to a salad or sandwich you won’t eat until the next day can result in the onions taking over. You could opt for sweet onions, which contain less sulfur, but those are often pricey. Instead, try this simple hack to make any onion a bit less assertive.

Onions provide a savory, pungent boost to almost any dish, but that flavor can sometimes be overwhelming, especially if the onions are raw. Because they become more potent after being cut, adding them to a salad or sandwich you won’t eat until the next day can result in the onions taking over. You could opt…

The Cold Water Onion Hack

The flavors of onions and their cousins in the allium family — chives, leeks, shallots, and garlic — come from sulfur compounds. When you slice or bite into them, you crush the cell walls and trigger an enzymatic reaction that releases that familiar, pungent bite. While this reaction takes only seconds, the resulting volatile compounds continue to break down and spread, which explains why raw onions’ flavors seem to get stronger with time.

Related: A Time-Saving Hack for Perfectly Caramelized Onions

Because these compounds are water-soluble, however, the solution is simple: cold water. Submerge your sliced or chopped onions in a bowl of cold tap water for 10 to 15 minutes to let the sharpest sulfur compounds leach out. Don’t worry — you’ll still have plenty of that distinctive onion flavor, but the pieces will remain much milder after their water bath.

Advertisement

Infuse New Flavors

This hack is a great “pro tip” in its own right, but you can take it a step further by changing up the liquid. Soaking the onions in wine, beer, or a mild vinegar will mellow them out while lending them a new and complementary flavor. If you’re making a sauce or dressing to go with the finished dish, double down by reusing that leftover onion-infused liquid as your base — it’s two hacks in one.

Advertisement
Featured Image Credit:  © Alejandro Cajas/iStock | Updated  Mar 24, 2026 |
Fred Decker
Writer
Fred Decker is a trained chef and former restaurateur. Since closing his restaurants over a decade ago he has been a prolific freelance writer, publishing several thousand articles on dozens of high-volume websites including Taste Of Home, Hunker, Tasting Table, Week&, eHow, and GOBankingRates. He lives on a rural acreage shared with a big garden, chickens, rabbits, and grandkids.
This article is for general informational purposes only.
Featured Image Credit:  © Alejandro Cajas/iStock | Updated  Mar 24, 2026 |
Advertisement
Cleaning 3m read
18,023

3 Dish Soap Hacks That Will Change How You Clean

Dish soap might live next to your kitchen sink, but its cleaning power goes far beyond plates and pans. Designed to break down grease and grime, this everyday staple can tackle messes all over your home — often with better results than specialty cleaners. The best part? You likely already have it on hand, making it one of the easiest and most affordable cleaning tricks to try.

All featured products and deals are selected independently and objectively by the author. House Outlook may receive a share of sales via affiliate links in content.

Dish soap might live next to your kitchen sink, but its cleaning power goes far beyond plates and pans. Designed to break down grease and grime, this everyday staple can tackle messes all over your home — often with better results than specialty cleaners. The best part? You likely already have it on hand, making…

Beyond dinner cleanup, dish soap can help cut through stubborn buildup, refresh overlooked surfaces, and simplify tasks you might normally dread. If you’re looking to streamline your cleaning routine, these lesser-known uses might surprise you.

Related: 11 Household Items You Can Clean in the Dishwasher

1. Remove Grease Buildup From Cabinets

Kitchen cabinets near the stove inevitably collect grease. This residue leaves surfaces looking dull or sticky, but dish soap is formulated to cut through exactly that kind of buildup.

Mix a few drops of dish soap with warm water and dip a microfiber cloth into the solution. Wring it out until it’s damp, then gently wipe cabinet faces. For tougher spots, use a soft sponge. Finish by wiping with a clean, damp cloth to remove any soap residue, then dry with a towel. Your cabinets will look noticeably fresher — without harsh cleaners.

Advertisement

2. Clean Patio Furniture

Outdoor furniture quickly becomes grimy from dust, pollen, and seasonal use. Instead of pulling out a specialized outdoor cleaner, you can use dish soap to do the job just as well.

Fill a bucket with warm water and add a small amount of dish soap. Use a sponge or a soft-bristle brush to scrub plastic, metal, or resin furniture. The soap breaks down dirt and sticky residue without damaging surfaces. After a thorough rinse with a garden hose, allow everything to air-dry. This quick clean will revive your outdoor seating just in time for your next gathering.

3. Brighten Cloudy Glass Light Fixtures

Glass light fixtures and shades tend to collect dust, cooking residue, and fingerprints — all of which can leave them looking cloudy and dim. After turning off the light and letting the bulbs cool, carefully remove the glass pieces. Wash them in a sink filled with warm water and a few drops of dish soap, much like you would any delicate dish. Use a soft cloth or sponge to gently clean the surface, then rinse and dry thoroughly with a lint-free towel before reinstalling. You will find the difference in brightness is surprisingly noticeable.

Advertisement
Featured Image Credit:  © CARME PARRAMON/iStock | Updated  Mar 24, 2026 |
Jill Layton
Writer
Jill Layton started writing professionally when she realized her emails and texts were kinda funny. She’s an affiliate shopping writer and lifestyle contributor for Scary Mommy, Bustle, Mic, and Best Products. She’s the mom of two alarmingly witty kids and the world’s most perfect dog.
This article is for general informational purposes only.
Featured Image Credit:  © CARME PARRAMON/iStock | Updated  Mar 24, 2026 |
Advertisement
Food & Drink 2m read
22,201

You’re Storing Your Eggs the Wrong Way

Eggs have been an American breakfast staple for more than a century, but their history as daily sustenance dates back much further. Ancient Romans are believed to have eaten eggs for a morning meal, possibly because chickens typically lay in the early hours. Later, during the Industrial Revolution, eggs helped fuel workers for long days on the job. Then, in the 1920s, a marketing campaign designed to boost bacon sales branded bacon and eggs as the ultimate breakfast pairing. The campaign was extraordinarily successful, cementing the duo as a permanent fixture on restaurant menus and solidifying the egg’s place in the breakfast canon. Today, the average American consumes about 259 eggs each year. Protein-rich and relatively affordable, they remain a staple in most kitchens.

All featured products and deals are selected independently and objectively by the author. House Outlook may receive a share of sales via affiliate links in content.

Eggs have been an American breakfast staple for more than a century, but their history as daily sustenance dates back much further. Ancient Romans are believed to have eaten eggs for a morning meal, possibly because chickens typically lay in the early hours. Later, during the Industrial Revolution, eggs helped fuel workers for long days…

And since eggs typically come by the dozen, proper storage is essential. But are you actually doing it right?

Related: Are You Cracking Eggs the Right Way?

Flip for Freshness

Eggs are often packed with the blunt, rounded end facing down — the exact opposite of how they should be stored. For the best results, store your eggs with the pointy side down and the rounded end facing up. You can house them in either their original packaging or a space-saving fridge organizer.

Advertisement

The Eggsplanation

Why store eggs this way? There’s a scientific reason this position helps maintain freshness. Every egg has an air pocket at its rounded end that expands as moisture naturally evaporates through the shell. Keeping this air pocket at the top prevents it from pressing against the yolk, which keeps the yolk centered and protects the internal membrane from rupturing.

This storage method can extend the freshness of your eggs by several days to a week. That said, eggs are still a perishable product with a limited shelf life. The USDA recommends consuming refrigerated eggs within three to five weeks.

Advertisement
Advertisement
Cleaning 2m read
21,422

The Kitchen Scrap That Fixes a Stinky Dishwasher

There are countless ways to make use of kitchen scraps, whether you collect odds and ends in a freezer bag for a rainy-day vegetable stock or sneak overripe bananas into pancake batter to increase your fiber intake. Citrus peels are especially versatile; you can turn them into homemade candies, use them as an aromatic candle alternative in a stovetop simmer pot, or dry them for drink garnishes. Citrus peels are also great for infusing sugars and salts — just mix in the zest — or for whipping up bright cocktail syrups.

There are countless ways to make use of kitchen scraps, whether you collect odds and ends in a freezer bag for a rainy-day vegetable stock or sneak overripe bananas into pancake batter to increase your fiber intake. Citrus peels are especially versatile; you can turn them into homemade candies, use them as an aromatic candle…

Where citrus peels truly shine, however, is in household cleaning. You might already use them in homemade countertop sprays or room scents, but they’re remarkably effective at eliminating stubborn dishwasher odors, too.

Related: 11 Household Items You Can Clean in the Dishwasher

Deodorize Your Dishwasher With Citrus Peels

Just as lemon juice refreshes a garbage disposal, citrus scraps are a great way to neutralize your dishwasher. Even if you clean the filter — which you should do monthly — the appliance is still prone to a musky, mildewy stench.

Think of citrus peels as a natural deodorizer for your dishwasher. After squeezing lemons, oranges, or grapefruit into your citrus-forward recipes, place the peels (pulp and all) in the dishwasher’s cutlery basket, ideally in a dedicated slot away from utensils. Run a normal cycle and let the citrus work its magic. Once the cycle is complete, toss the peels in the garbage and enjoy your noticeably cleaner machine. You can use this hack two to three times per week to keep odors at bay.

Advertisement

Why Citrus Is a Cleaning Powerhouse

Citrus is an excellent, multifunctional cleaner: Its natural oils cut through grease, its acidity dissolves soap scum, and its low pH neutralizes unpleasant odors. The citric acid is especially effective for glassware, preventing hard-water minerals from redepositing and leaving your favorite bar glasses streak-free with minimal effort.

Advertisement
Featured Image Credit:  © almaphoto/iStock | Updated  Mar 25, 2026 |
Jessie Quinn
Writer
Jessie Quinn is a Los Angeles-based lifestyle journalist with words published in PEOPLE, StyleCaster, Apartment Therapy, The Spruce, Byrdie, and more. She has a Bachelor's Degree in fashion journalism from Academy of Art University and her work spans across many categories, including style, beauty, home, health, crafts, and more.
This article is for general informational purposes only.
Featured Image Credit:  © almaphoto/iStock | Updated  Mar 25, 2026 |
Advertisement
Food & Drink 3m read
5

How To Get Even Cheese Slices Every Time

Serving a cheese board at any gathering is a guaranteed hit. Guests inevitably arrive hungry and need something to graze on, and a pleasing array of cheeses, crackers, fruits, nuts, and assorted accompaniments is always a welcome sight.

All featured products and deals are selected independently and objectively by the author. House Outlook may receive a share of sales via affiliate links in content.

Serving a cheese board at any gathering is a guaranteed hit. Guests inevitably arrive hungry and need something to graze on, and a pleasing array of cheeses, crackers, fruits, nuts, and assorted accompaniments is always a welcome sight.

A good cheese board should contain a variety of textures and flavors, ranging from hard and sharp to soft and mild. These options might include sharp cheddar or gouda on the firmer end, and brie or fresh mozzarella on the softer side.

There is an art to arranging a cheeseboard, however, and it starts with slicing your medium-to-hard cheeses evenly. Anyone who has sliced a fair amount of cheese knows this task is easier said than done.

So, how do you ensure your slices are uniform? You don’t need any special tools — just a regular fork.

The Tine Technique

Unwrap your cheese and place it on a cutting board in front of you. Hold your fork horizontally, extending it away from you with the tines facing outward. Then, lower the fork so the flat back of the tines rests against the top of the cheese block, with the tips of the tines hanging just over the edge of the cheese. Gently press the tines into the surface to create a row of uniform indentations. Repeat this motion across the length of the block. These marks serve as the guide for your knife. By following the notches, you can ensure perfectly even slices every time. Your cheeseboard will look more professional and you won’t end up with varying widths of aged cheddar.

Advertisement
Related: This Kitchen Staple Helps Your Cheese Last Longer

To Slice or Not To Slice

You don’t have to preslice cheese for your guests. It’s acceptable to leave the cheese as-is and provide cheese knives so guests can serve themselves. However, if you’re looking to stretch your cheese to feed a larger crowd, preslicing is the way to go. Additionally, providing a dedicated knife for every type of cheese can prove cumbersome, as it often results in a cluttered board with too many tools.

Advertisement
Advertisement
Cleaning 3m read
2,062

Why Your Shirts Still Smell After Washing

Whether it’s your favorite white T-shirt or your go-to moisture-wicking workout top, you might notice that some shirts retain an odor even after washing. The underarms are typically the culprit, and while it may seem strange at first — after all, you just did laundry — there is, in fact, a logical explanation.

All featured products and deals are selected independently and objectively by the author. House Outlook may receive a share of sales via affiliate links in content.

Whether it’s your favorite white T-shirt or your go-to moisture-wicking workout top, you might notice that some shirts retain an odor even after washing. The underarms are typically the culprit, and while it may seem strange at first — after all, you just did laundry — there is, in fact, a logical explanation.

The aluminum found in common antiperspirant formulas can transfer to the fabric, building up over time to create a barrier, especially on synthetic materials. With regular wear, that barrier gets stronger and stronger, preventing water and detergent from penetrating the fibers to get rid of the buildup and the lingering odor.

How To Strip Away Odors

When dealing with tough-to-remove stains — even those we cannot see — liquid dish soap is your secret weapon for cutting through the buildup. While laundry detergent is specifically formulated to remove dirt, dish soap targets grease and grime, making it a heavy-duty solution for many household woes.

Related: The Trick To Saving Sweat-Stained Hats

To remove stubborn underarm odors, apply about 1 teaspoon of liquid dish soap (blue Dawn is best) to each of the affected areas and gently scrub with your fingers until the fabric is fully saturated. You want to start with a dry article of clothing to prevent diluting the dish soap. Let the soap sit for 30 minutes to an hour, then rinse with hot water. Finally, run the item through a full wash cycle to lift the residue and rinse away the soap.

Advertisement

Pit Stains Don’t Have To Be Permanent

Dealing with unsightly yellow stains on your shirt’s underarms? These are the result of a chemical reaction between aluminum in antiperspirant and proteins in human sweat. While these stains might seem irreversible, they can often be faded or even removed entirely. Create a paste using one part dish soap and two parts 3% hydrogen peroxide. Apply it to the affected area, then sprinkle baking soda on top. Scrub the fabric gently with an old toothbrush or a laundry stain brush, let it sit for up to an hour, then launder as usual. This process helps remove both the yellowing and the underlying odor.

Advertisement
Featured Image Credit:  © anatoliycherkas/iStock | Updated  Mar 17, 2026 |
Jessie Quinn
Writer
Jessie Quinn is a Los Angeles-based lifestyle journalist with words published in PEOPLE, StyleCaster, Apartment Therapy, The Spruce, Byrdie, and more. She has a Bachelor's Degree in fashion journalism from Academy of Art University and her work spans across many categories, including style, beauty, home, health, crafts, and more.
This article is for general informational purposes only.
Featured Image Credit:  © anatoliycherkas/iStock | Updated  Mar 17, 2026 |
Advertisement
Gardening 3m read
662

This One Tool Saves You From Killing Plants

Too much water or not enough? It’s the question that haunts every plant parent. Getting the answer wrong can lead to withered leaves or root rot for our potted friends. But what if you could end the guessing game? There’s a foolproof way to look beneath the soil’s surface and determine exactly what your plant needs. This battery-free device is more affordable than buying a new houseplant, making it a cost-effective way to ensure your current collection continues to thrive.

All featured products and deals are selected independently and objectively by the author. House Outlook may receive a share of sales via affiliate links in content.

Too much water or not enough? It’s the question that haunts every plant parent. Getting the answer wrong can lead to withered leaves or root rot for our potted friends. But what if you could end the guessing game? There’s a foolproof way to look beneath the soil’s surface and determine exactly what your plant…

Save Your Soil With a Moisture Meter

Whether you’re a plant pro or a total newbie, keeping a moisture meter on hand can take the guesswork out of your watering routine. These tools work by measuring the electrical conductivity of the potting soil. Damp, mineral-rich soil conducts electricity easily, while dry soil blocks the current. The reading you get is a direct reflection of the soil’s electrical conductivity, indicating whether your plant is dry, moist, or wet.

Related: 12 Common Houseplants That Could Harm Your Pets

After you insert the probe into the soil — about halfway to two-thirds deep is best — wait 30 to 60 seconds for the meter to stabilize. For the most accurate results, take a few readings in different spots around the pot. While designs vary, most meters feature a numbered, multicolor display. The red, green, and blue sections are labeled to indicate dry, moist, or wet conditions. Most houseplants should be watered when the meter hits 3 or 4. For drought-tolerant plants, wait until the reading is 1 or 2; for moisture-loving plants, plan to water when the needle is at 4 or 5. After you take a reading, clean the probe to prevent mineral buildup and store the device in a cool, dry place. Never leave it in a plant long-term.

Advertisement

Moisture meters are incredibly easy to use, and you can find a reliable one for under $10. Warning: Do not submerge the probe in water to check its accuracy — this can overwhelm the sensor and lead to unreliable readings going forward.

Making a DIY Moisture Meter

Need help gauging your plant’s moisture levels but not ready to commit to a new tool? You can create a DIY moisture meter using nothing more than a wooden chopstick, a popsicle stick, or an untreated dowel. To check your plant’s hydration level, insert the stick a few inches into the soil and let it sit for about a minute. When you pull it out, look for dampness or soil particles clinging to the wood — these are clear signs of wet soil, meaning your plant doesn’t need to be watered yet. Conversely, if the stick comes out clean and dry, it’s time to give your plant a drink. Repeat this every few days to learn your plant’s watering schedule, and be sure to retest during seasonal shifts when changes in sunlight or indoor heating alter how quickly the soil dries out.

Advertisement