If you’re prone to spills, you’re probably well versed in laundry stain-removal hacks. Here at House Outlook, some of our favorites include hydrogen peroxide and the one-two punch of vinegar and baking soda. However, furniture messes are a whole different beast. While you can invest in portable upholstery cleaners and spot treatments, these often saturate…
The Unexpected Upholstery Spot Cleaner
Instead of dragging out the upholstery cleaner or reaching for the spray bottle, grab a pack of baby wipes. As it turns out, these diaper bag essentials have multiple uses beyond the bathroom and are surprisingly effective at spot cleaning, especially on upholstery.
Since baby wipes have mild surfactants, controlled moisture, and dry quickly, they are a great alternative to traditional upholstery cleaners. These wipes can lift fresh, water-based spills and even erase marks from art supplies and dirt without leaving a trace.
More from our network
House Outlook is part of Inbox Studio, which publishes content that uplifts, informs, and inspires.


How To Remove Spills With Baby Wipes
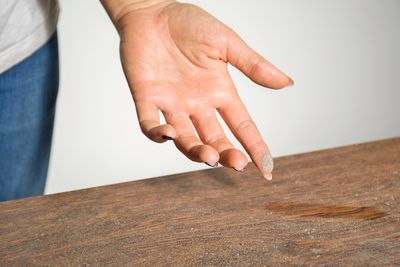
Baby wipes work best on fresh spills that haven’t had a chance to set, so achieving an effective clean requires a quick response. As soon as you notice a mark — whether it be from a leaky pen or spilled coffee — use a baby wipe to gently dab, blot, and wipe it away. Avoid applying firm pressure or rubbing the area, as doing so will push the stain deeper into the fabric fibers. Once you’ve spot-cleaned the stain, use a clean, damp microfiber cloth to remove any residue.
While baby wipes are safe to use on many upholstery fabrics, they can cause damage to leather, velvet, silk, viscose, and microfiber with an “S” cleaning code, so be sure to read the product care tag before you begin. Opt for wipes that are water-based and free of any fragrances or alcohol. It’s also a good idea to conduct a spot test in an inconspicuous area before treating the stain.