Advertisement
Decorating 4m read
0

Amazon’s Best Black Friday Home Deals Are Here

One day of Black Friday deals simply wasn’t enough — Amazon had to turn the sale into a weeklong affair. That’s good news for anyone who’s traveling for Thanksgiving, responsible for cooking the turkey, or merely waiting for their end-of-month paycheck to drop. Shoppers have from Thursday, November 20, to Monday, December 1, to take advantage of Black Friday Week deals across popular categories, including home, kitchen, lawn and garden, furniture, and home improvement. So, if all that tryptophan causes you to sleep right through Black Friday, you can rest assured knowing the deals will still be waiting when you wake up.

All featured products and deals are selected independently and objectively by the author. House Outlook may receive a share of sales via affiliate links in content.

One day of Black Friday deals simply wasn’t enough — Amazon had to turn the sale into a weeklong affair. That’s good news for anyone who’s traveling for Thanksgiving, responsible for cooking the turkey, or merely waiting for their end-of-month paycheck to drop. Shoppers have from Thursday, November 20, to Monday, December 1, to take…

This year, you can expect new daily deal drops found within Amazon’s Today’s Big Deals section. These deals are bound by both time and quantity, so don’t miss out. Now is also a perfect time to refresh your holiday decorations, with up to 50% off artificial Christmas trees from National Tree Company and Fraser Hill Farm, up to 40% off ornaments from Lenox, and up to 20% off holiday gift wrap, bags, and bows from Hallmark. And if you’re unsure what to get for that special someone, browse The Holiday Shop for inspiration.

Unlike October’s Prime Day, Black Friday deals are available even to those who don’t have an Amazon Prime membership. However, signing up for a 30-day free trial will unlock fast, free shipping on everything you add to cart. Eligible government assistance recipients, including those who receive SNAP benefits or are enrolled in Medicaid, and income-verified customers can benefit from reduced membership fees with Prime Access. It’s just $6.99 a month compared to the full price of $14.99 a month.

Advertisement

Why You Should Trust Us

As House Outlook’s editor, I dedicate a lot of time to researching and writing about products that bring more comfort and convenience to readers’ daily lives. So, in the spirit of smart planning, I’ve compiled an irresistible assortment of deals — all priced under $100 — to start your holiday shopping right.

These include products I own and wholeheartedly recommend, sales I personally think are worthwhile, and other marked-down items that have been reader favorites in the past. Keep scrolling to snag the best deals Amazon’s Black Friday Week has to offer.

Advertisement

The Best Black Friday Deals Under $100

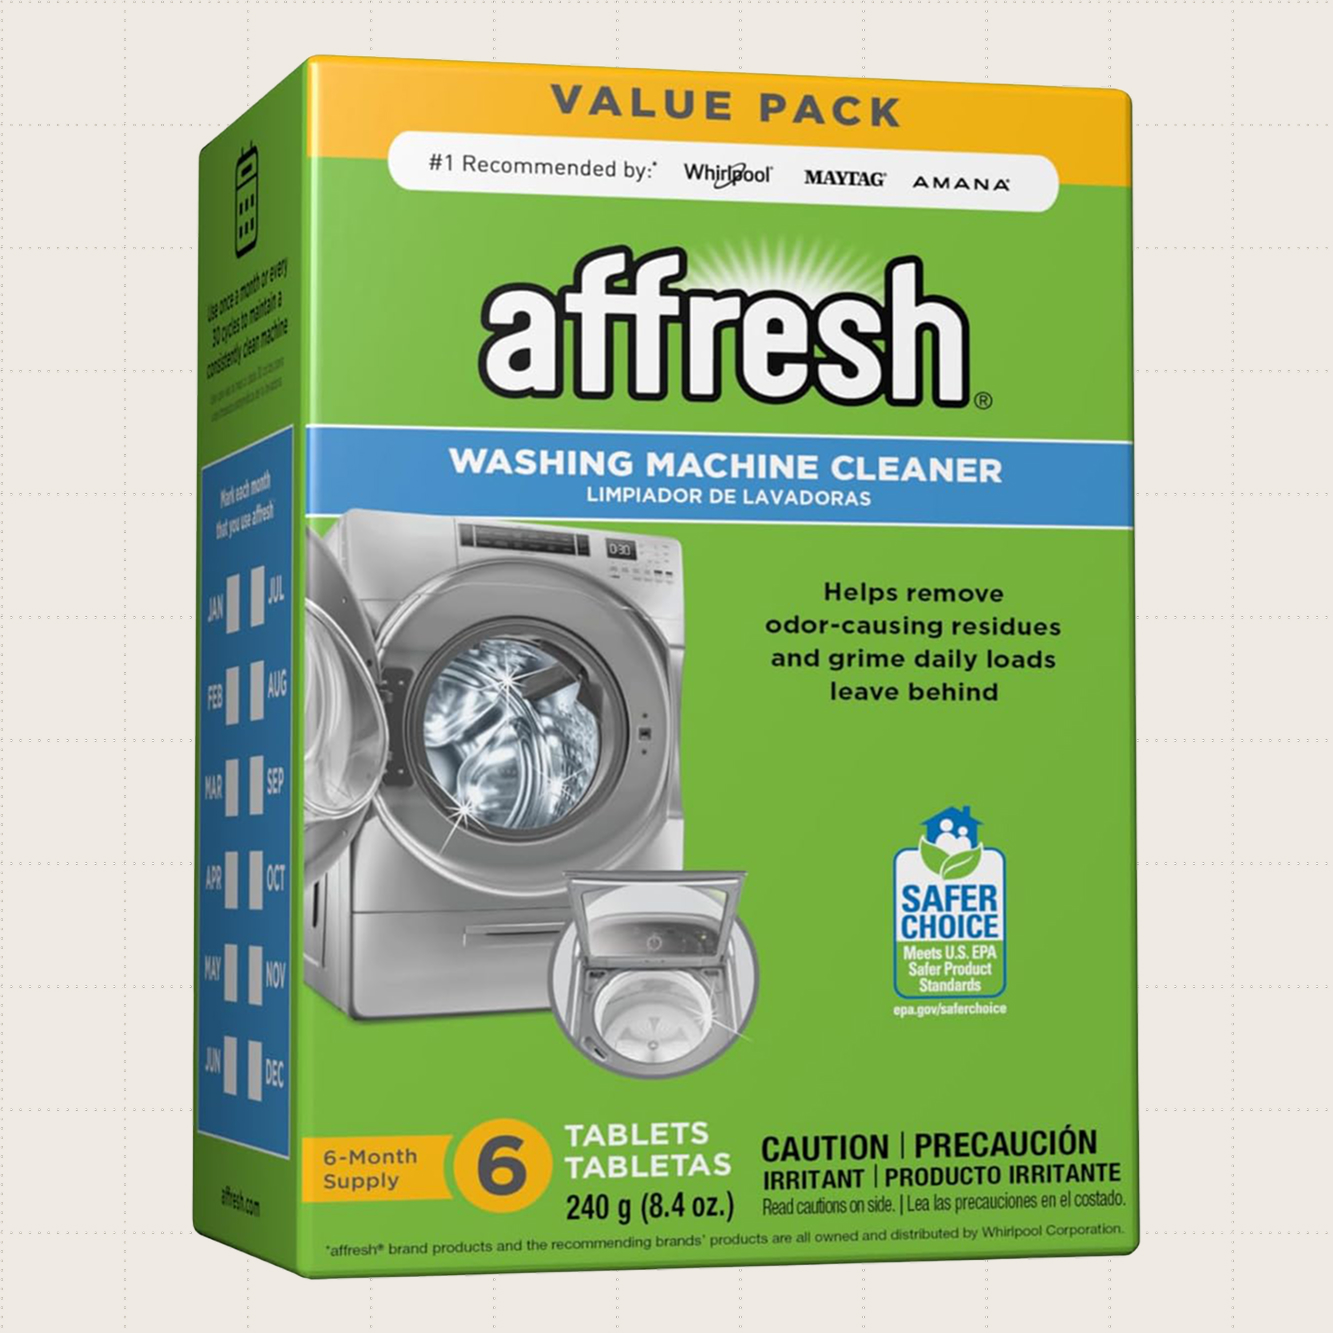
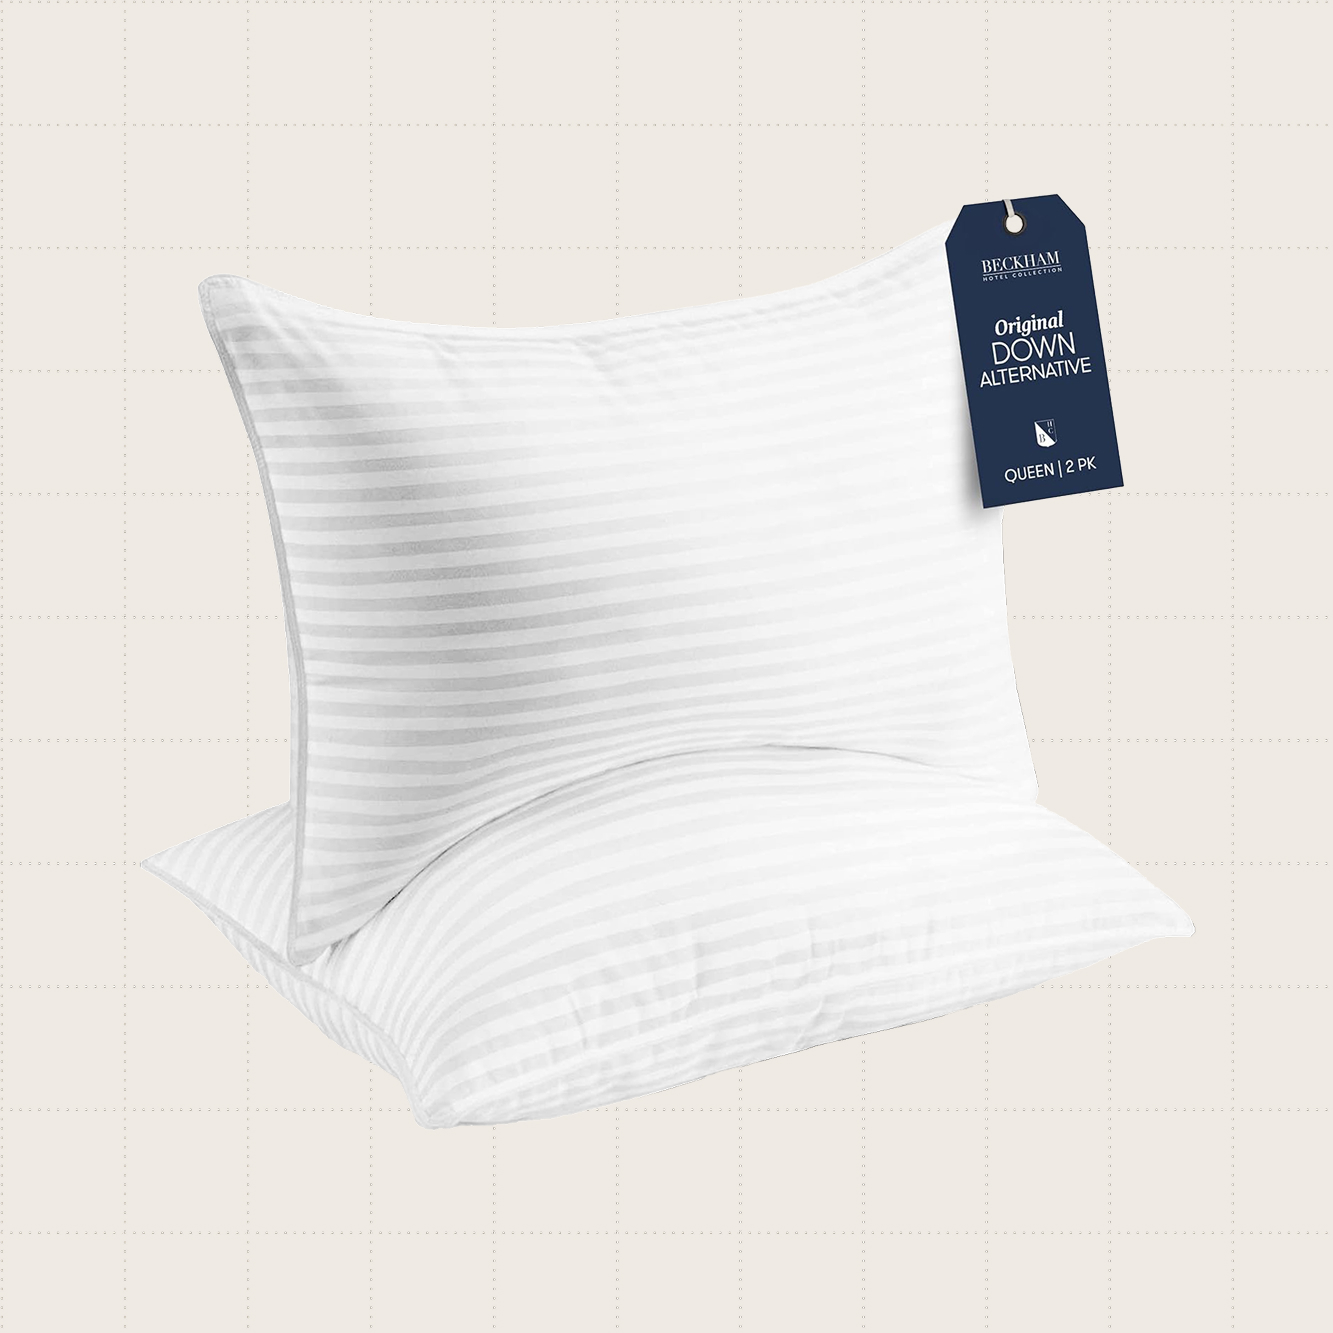
The Best Cleaning Deals

Affresh Washing Machine Cleaner, Six-Pack
Price: $9.99
$11.99
BUY NOW
MRS. MEYER'S CLEAN DAY Hand Soap, Three-Pack
Price: $8.97
$21.85
BUY NOW
PULIDIKI Car Cleaning Gel
Price: $6.29
$8.99
BUY NOW
Philips 3000 Series Handheld Travel Steamer
Price: $34.99
$69.99
BUY NOW
Stardrops The Pink Stuff Miracle Cleaning Paste and SQeeZY Scrubber
Price: $7.49
$9.99
BUY NOW
DII Swedish Dishcloths, Three-Pack in lemon print.
DII Swedish Dishcloths, Three-Pack
Price: $6.99
$8.99
BUY NOW
Advertisement

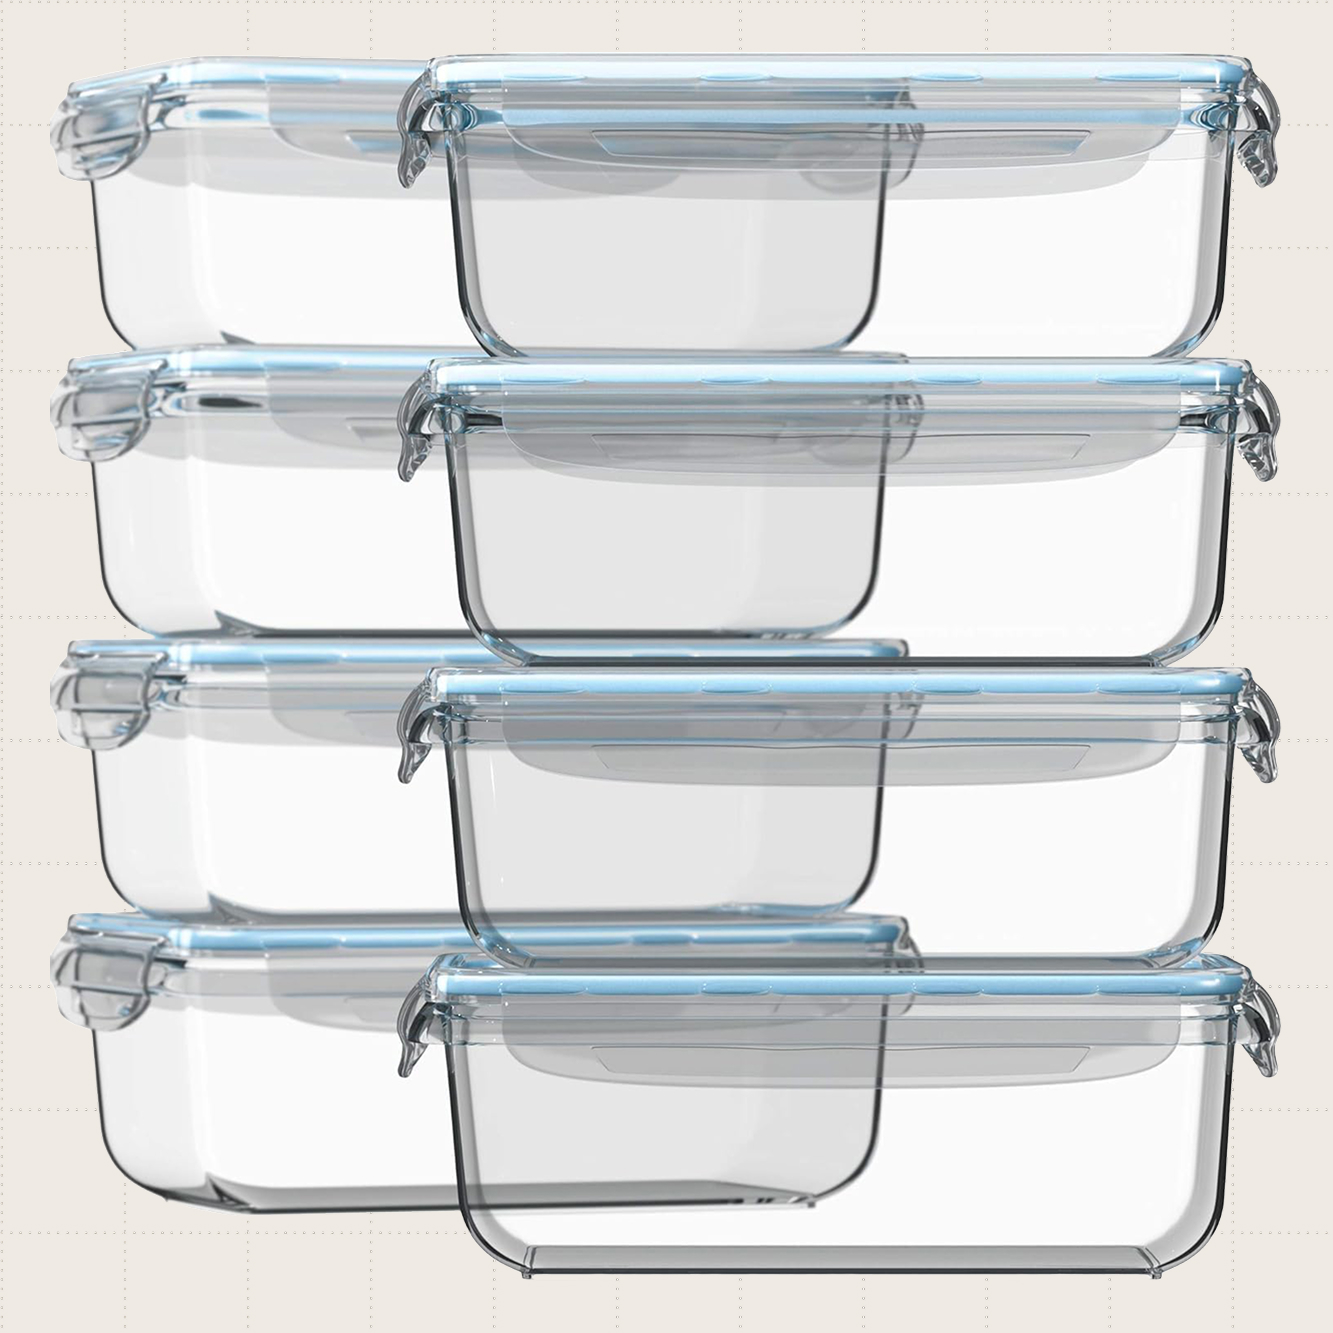
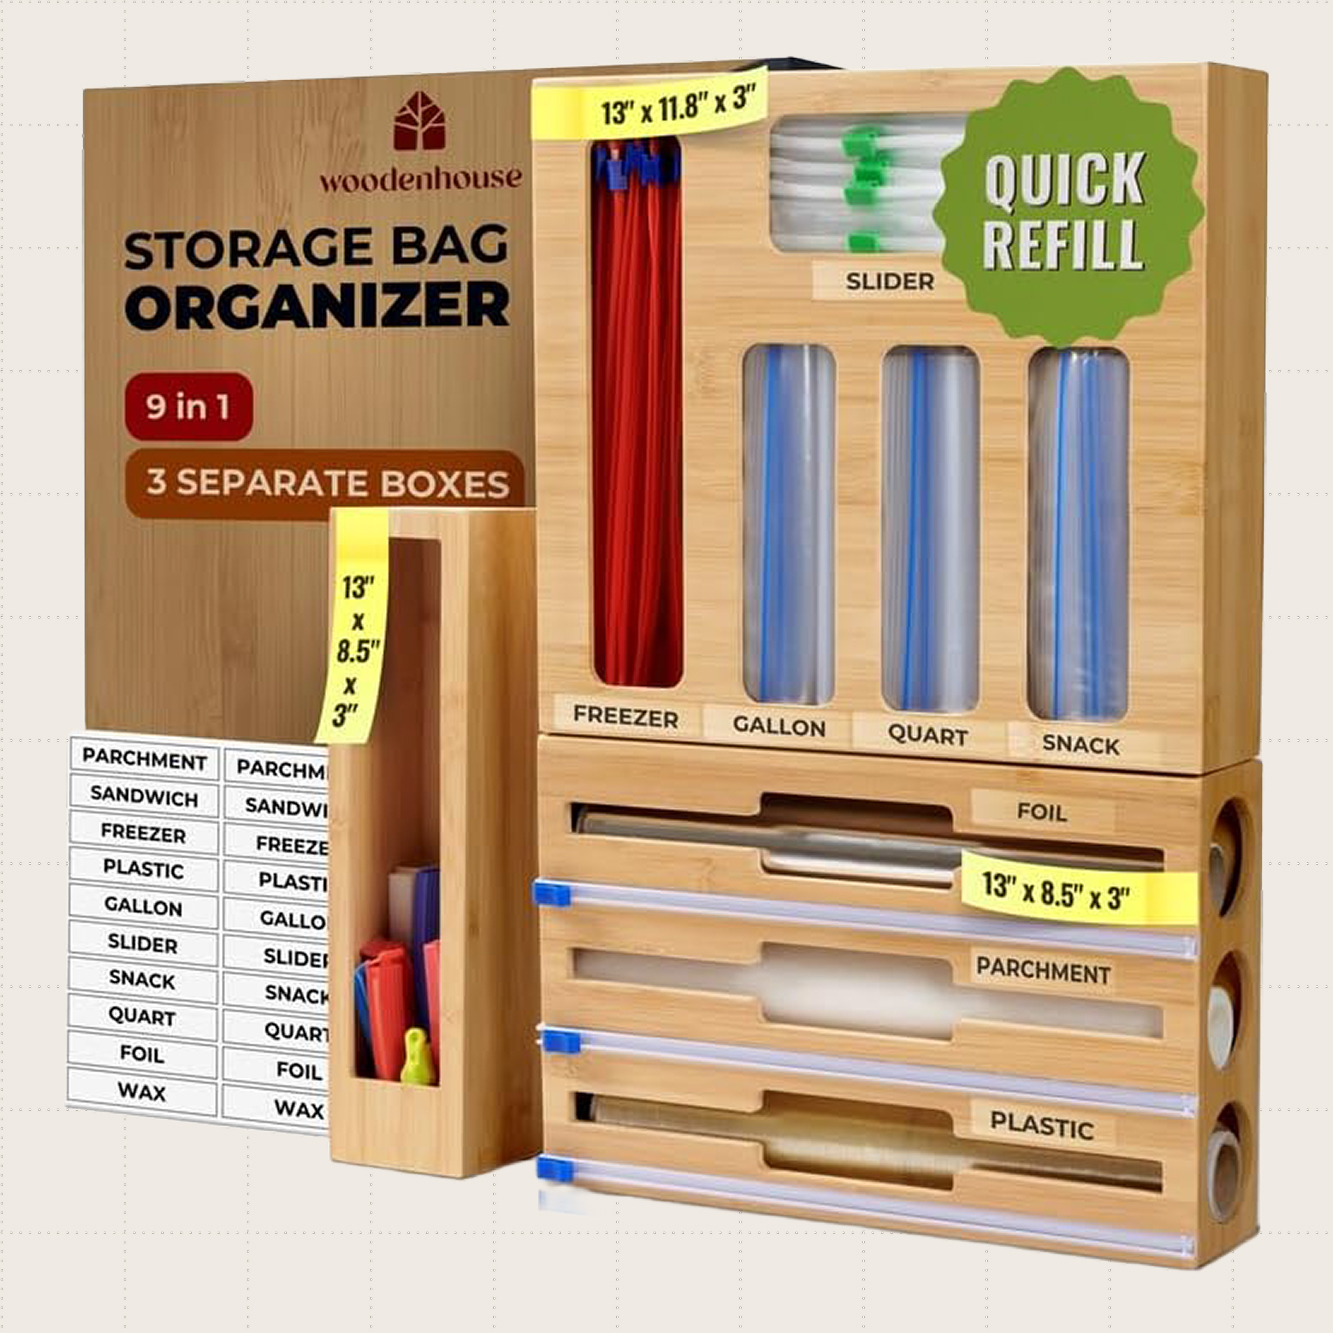
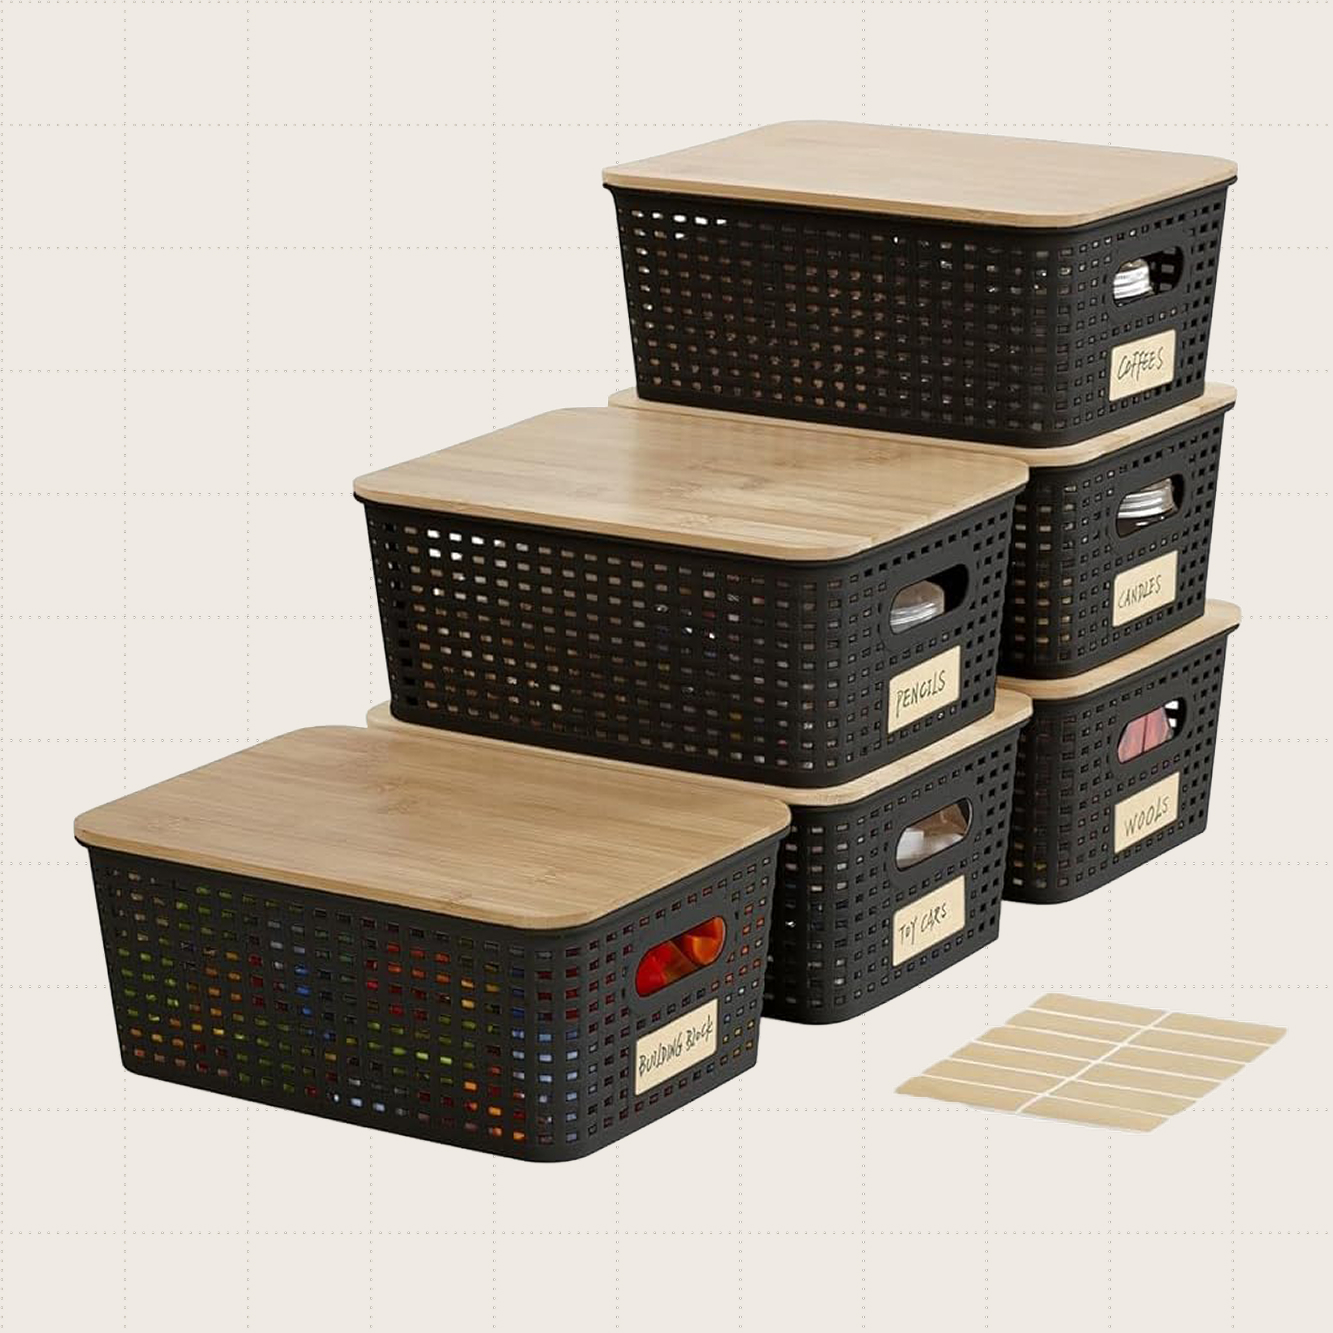
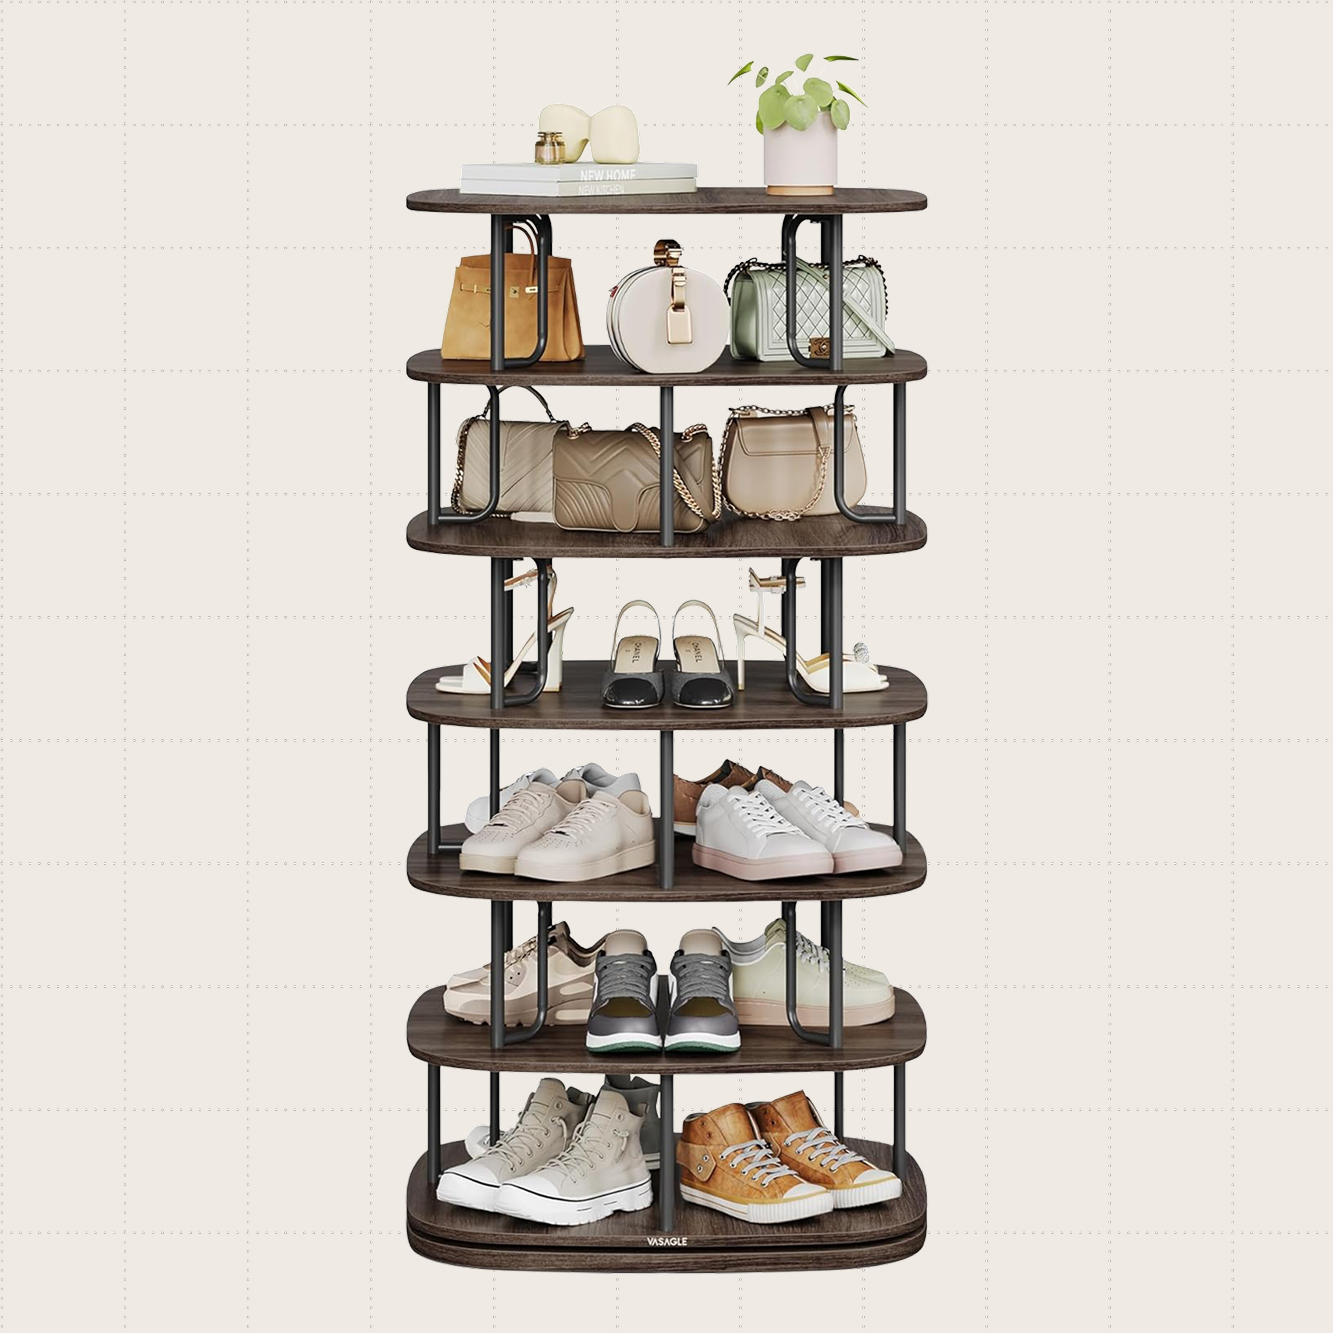
The Best Organizing Deals

Razab 30-Ounce Airtight Glass Meal Prep Containers, Eight-Pack
Price: $37.39
$60.99
BUY NOW
Amazon Basics Four-Tier Jewelry Tree Stand
Price: $15.70
$19.80
BUY NOW
Woodenhouse Storage Bag Organizers, Set of Three
Price: $39.99
$65.99
BUY NOW
Bagnizer Small Plastic Storage Bins With Bamboo Lids, Six-Pack
Price: $28.49
$35.59
BUY NOW
VASAGLE Seven-Tier Rotating Shoe Rack
Price: $74.99
$149.99
BUY NOW
Joseph Joseph Stainless Steel Sink Caddy
Price: $17.19
$23.00
BUY NOW
Advertisement

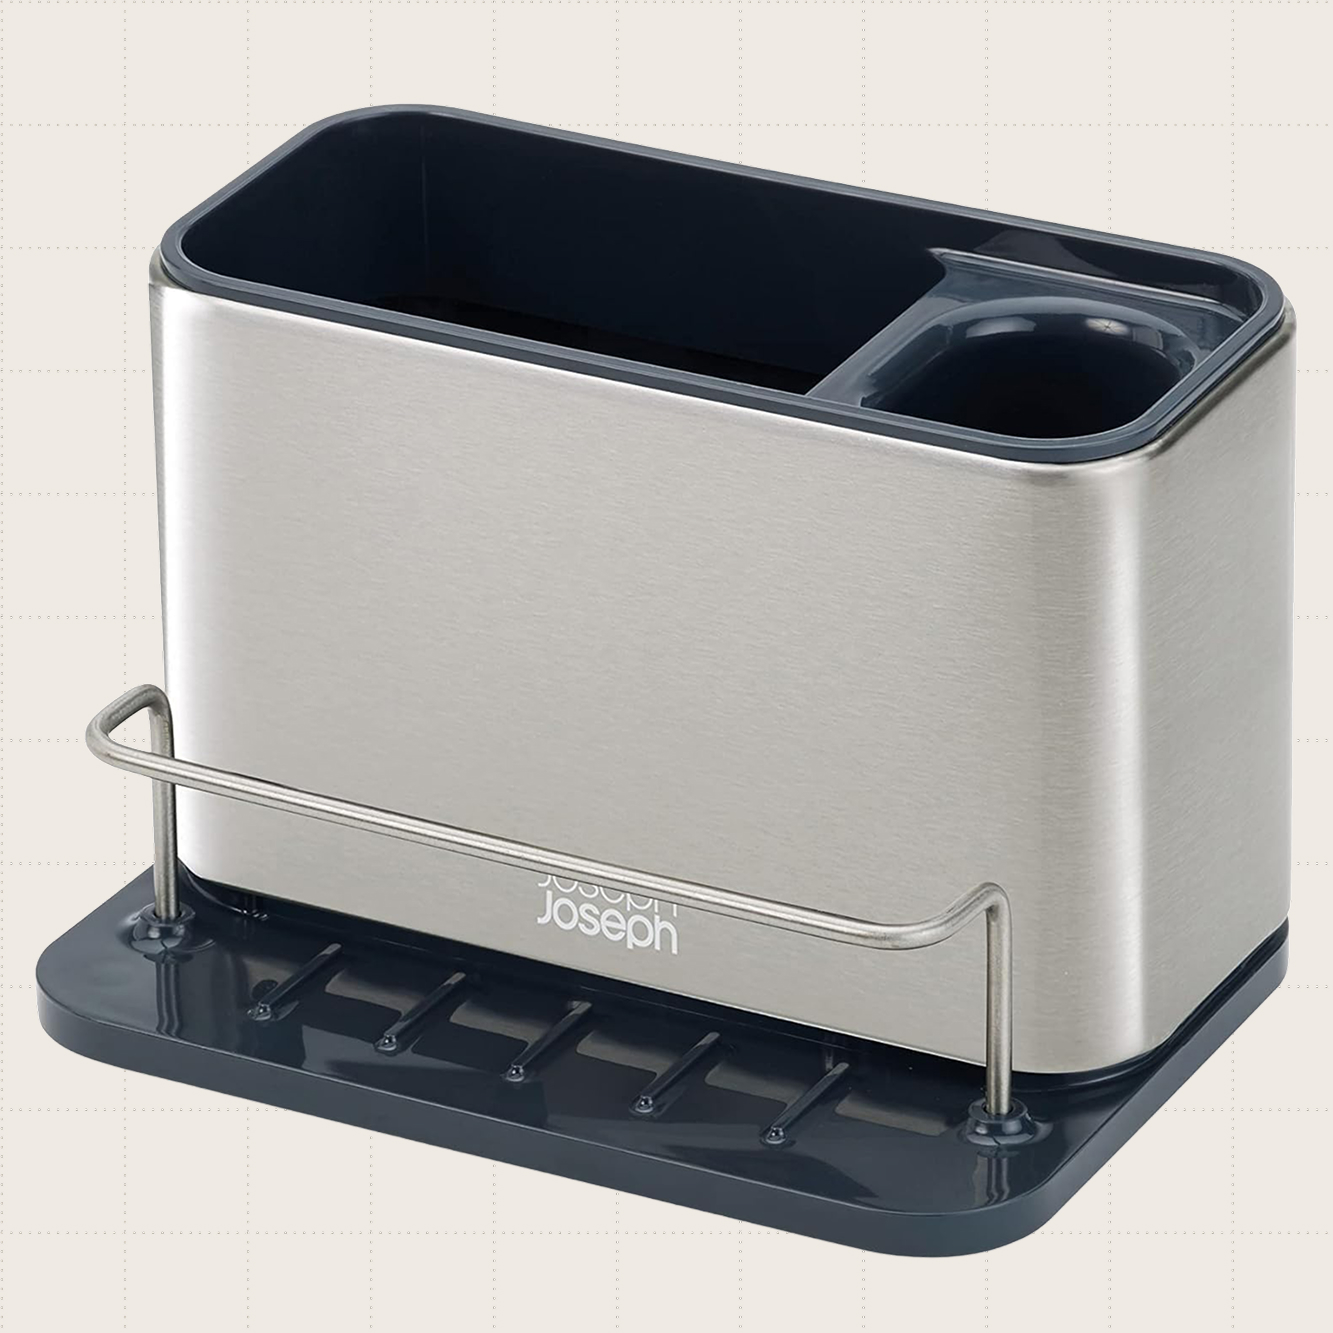
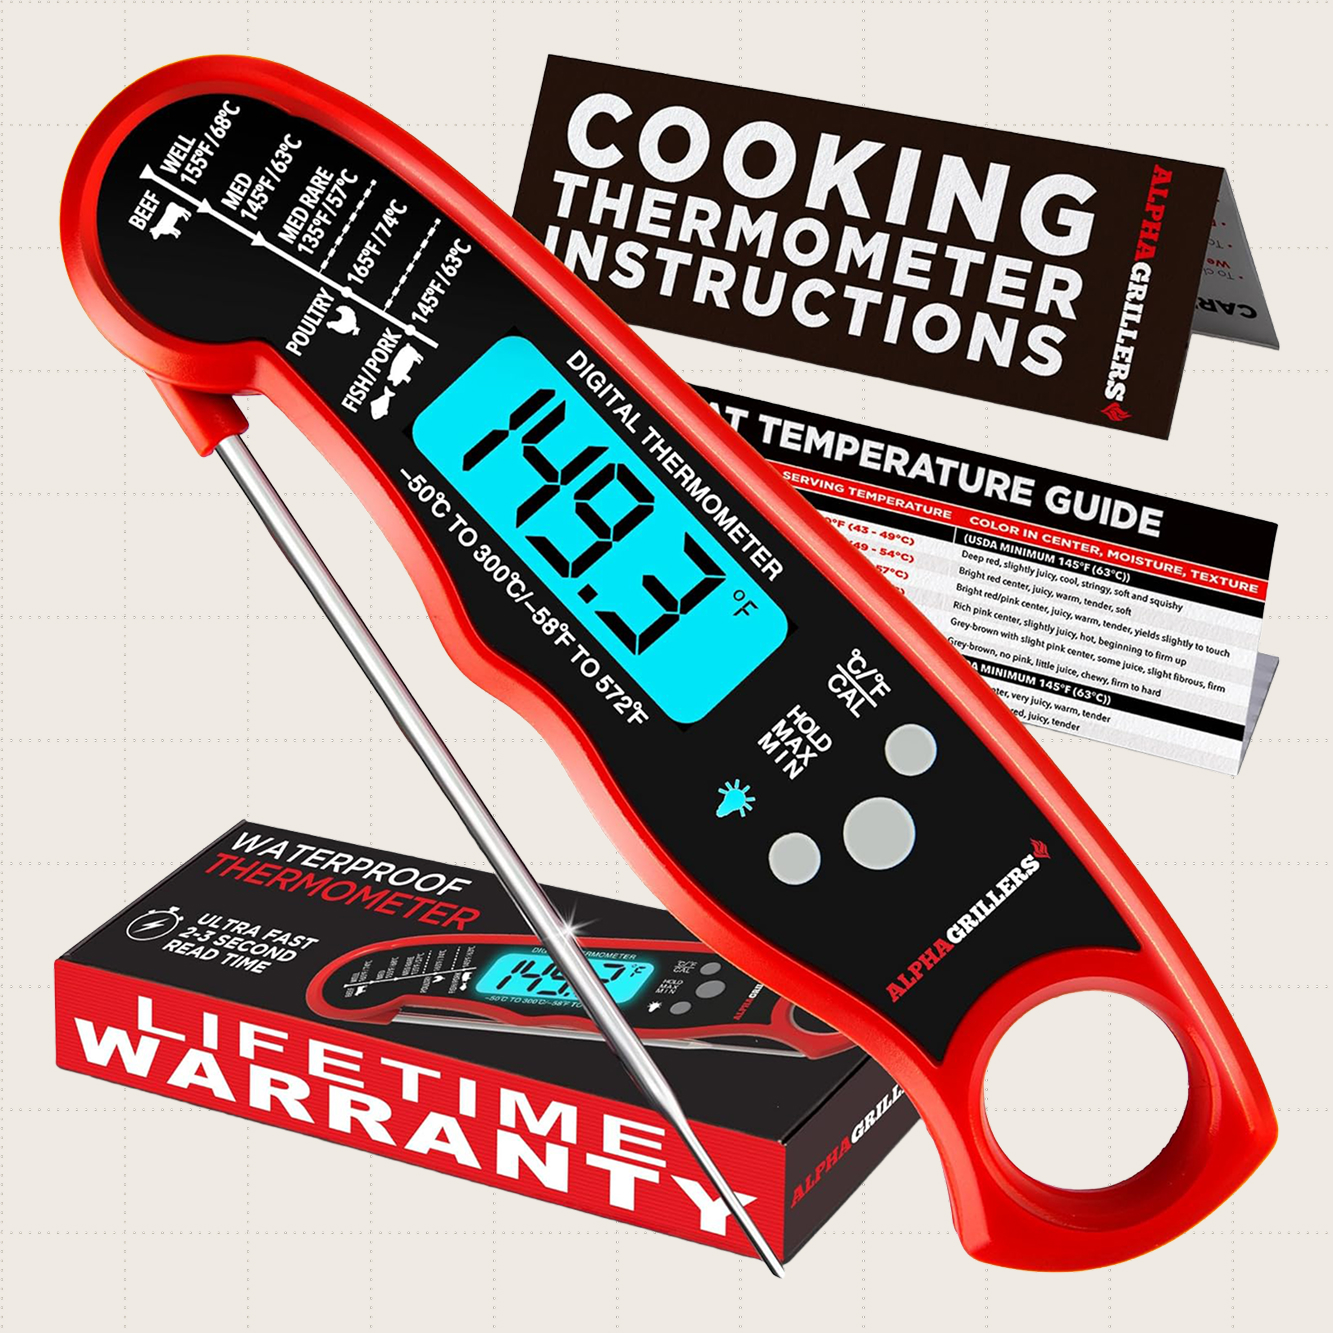
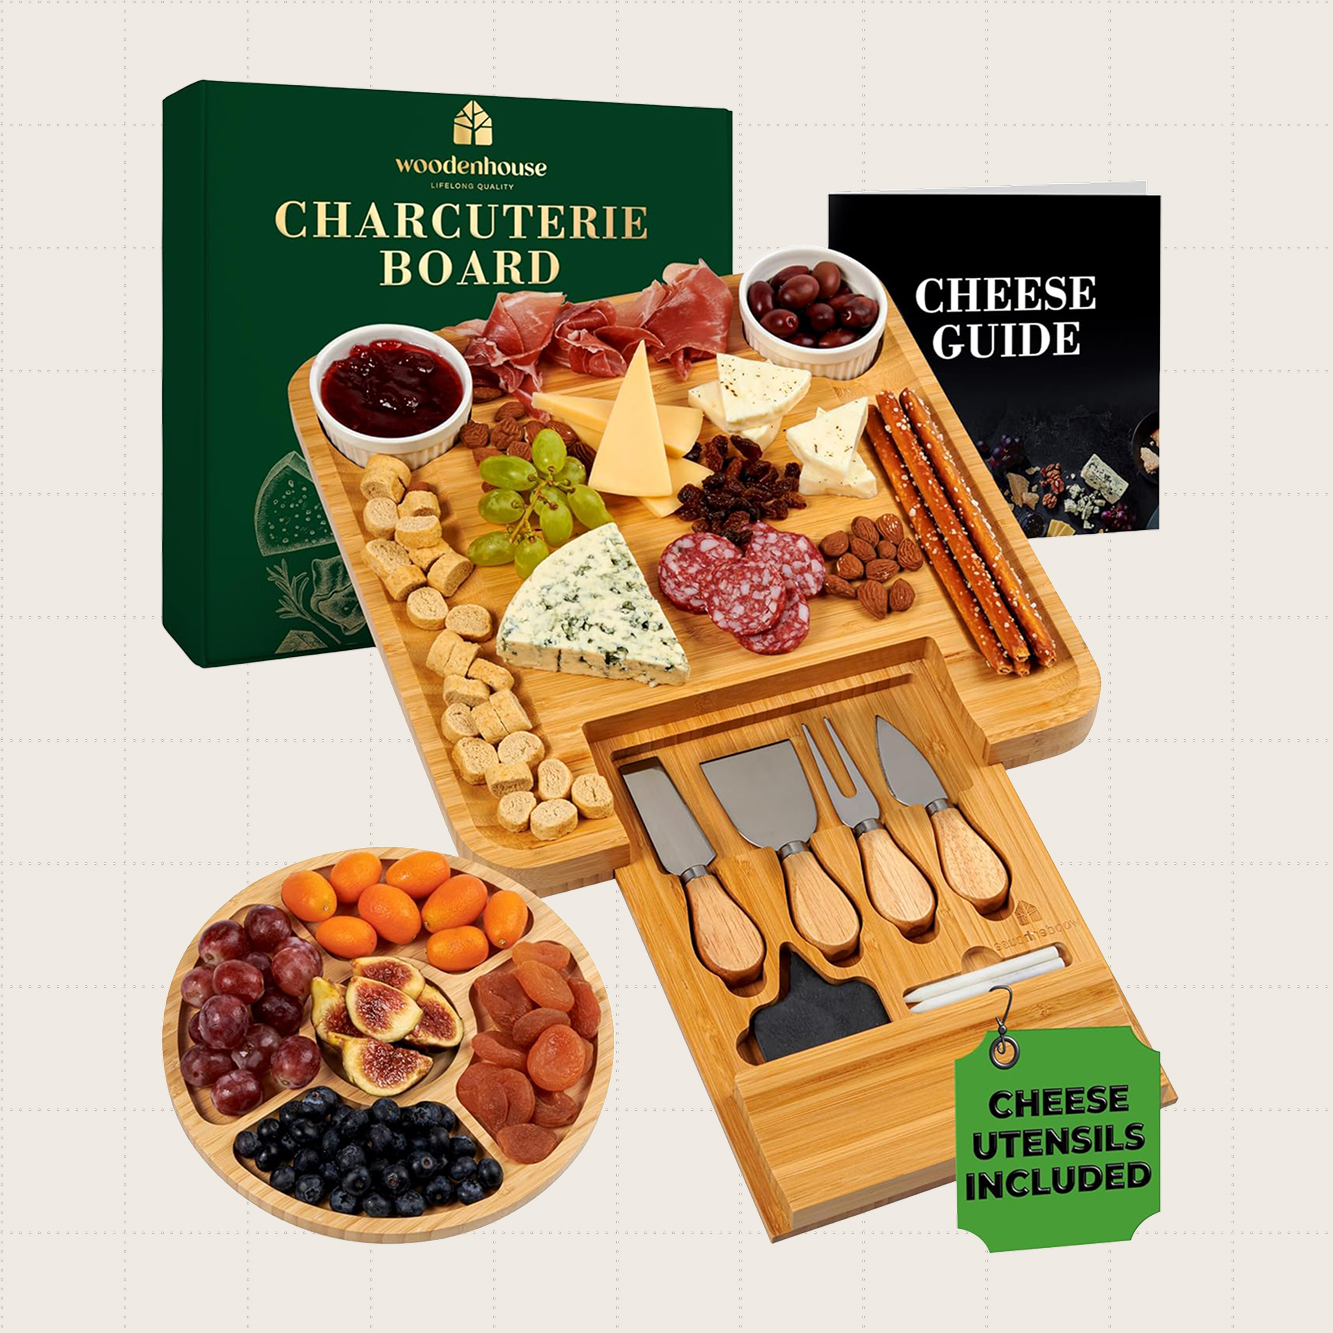
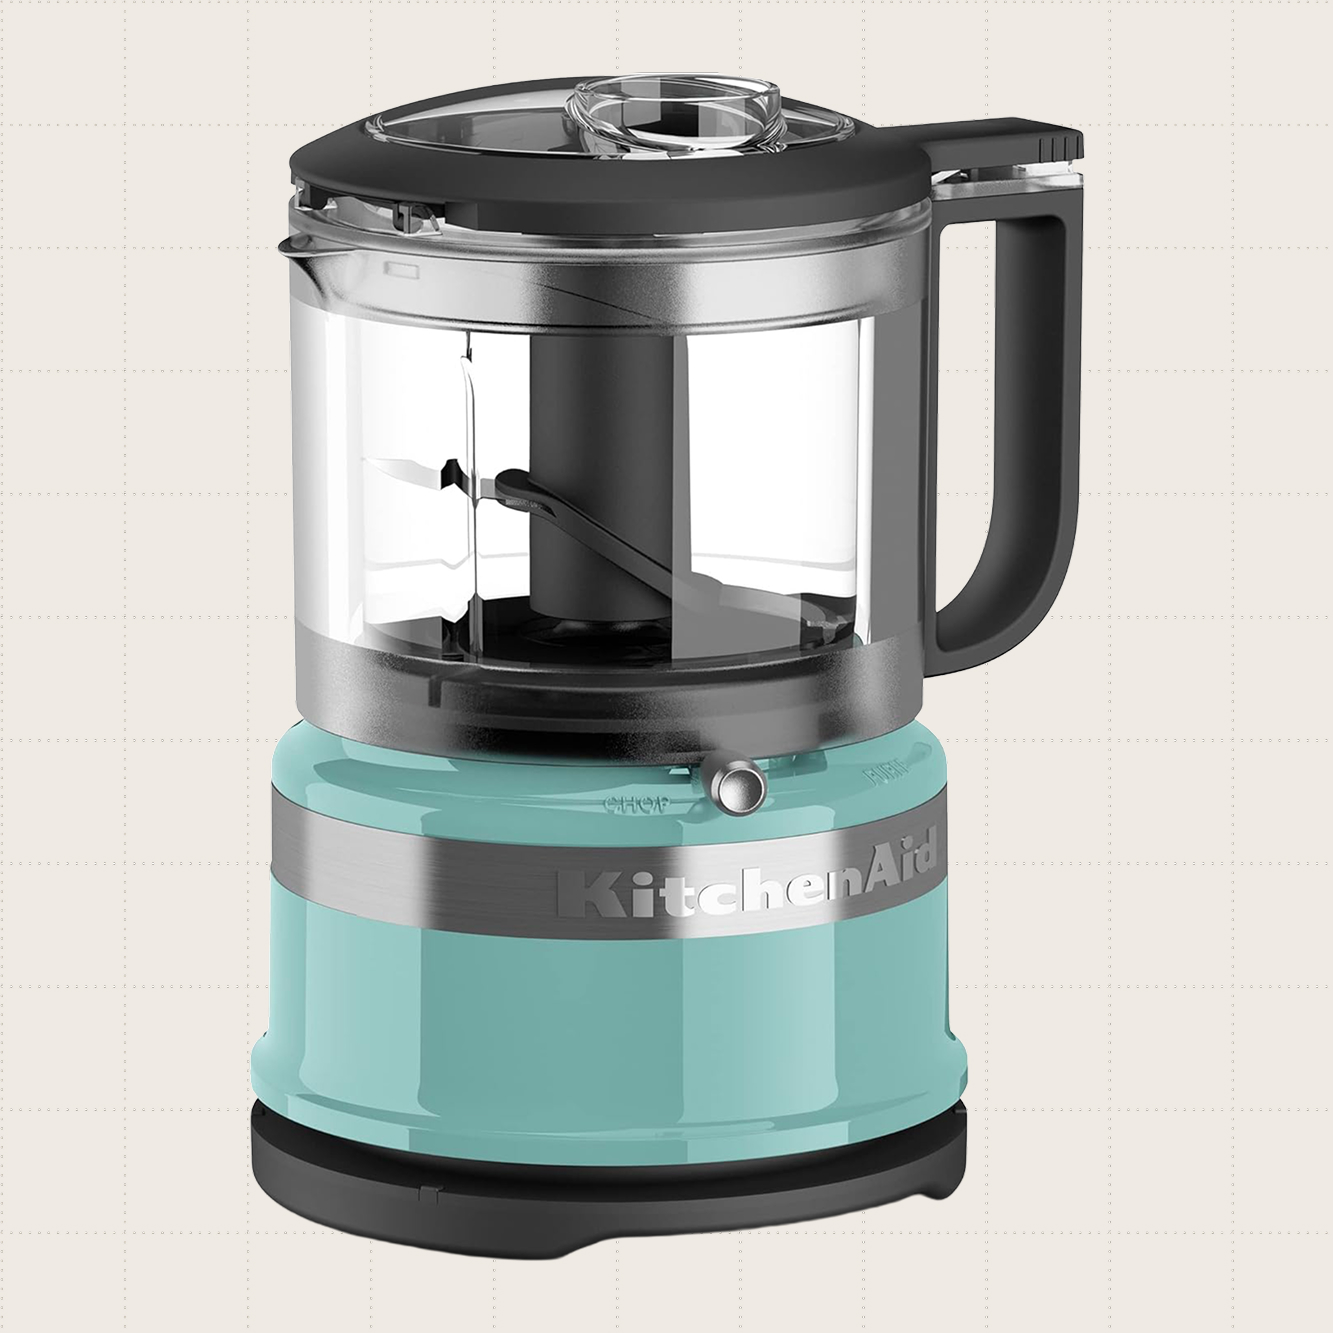
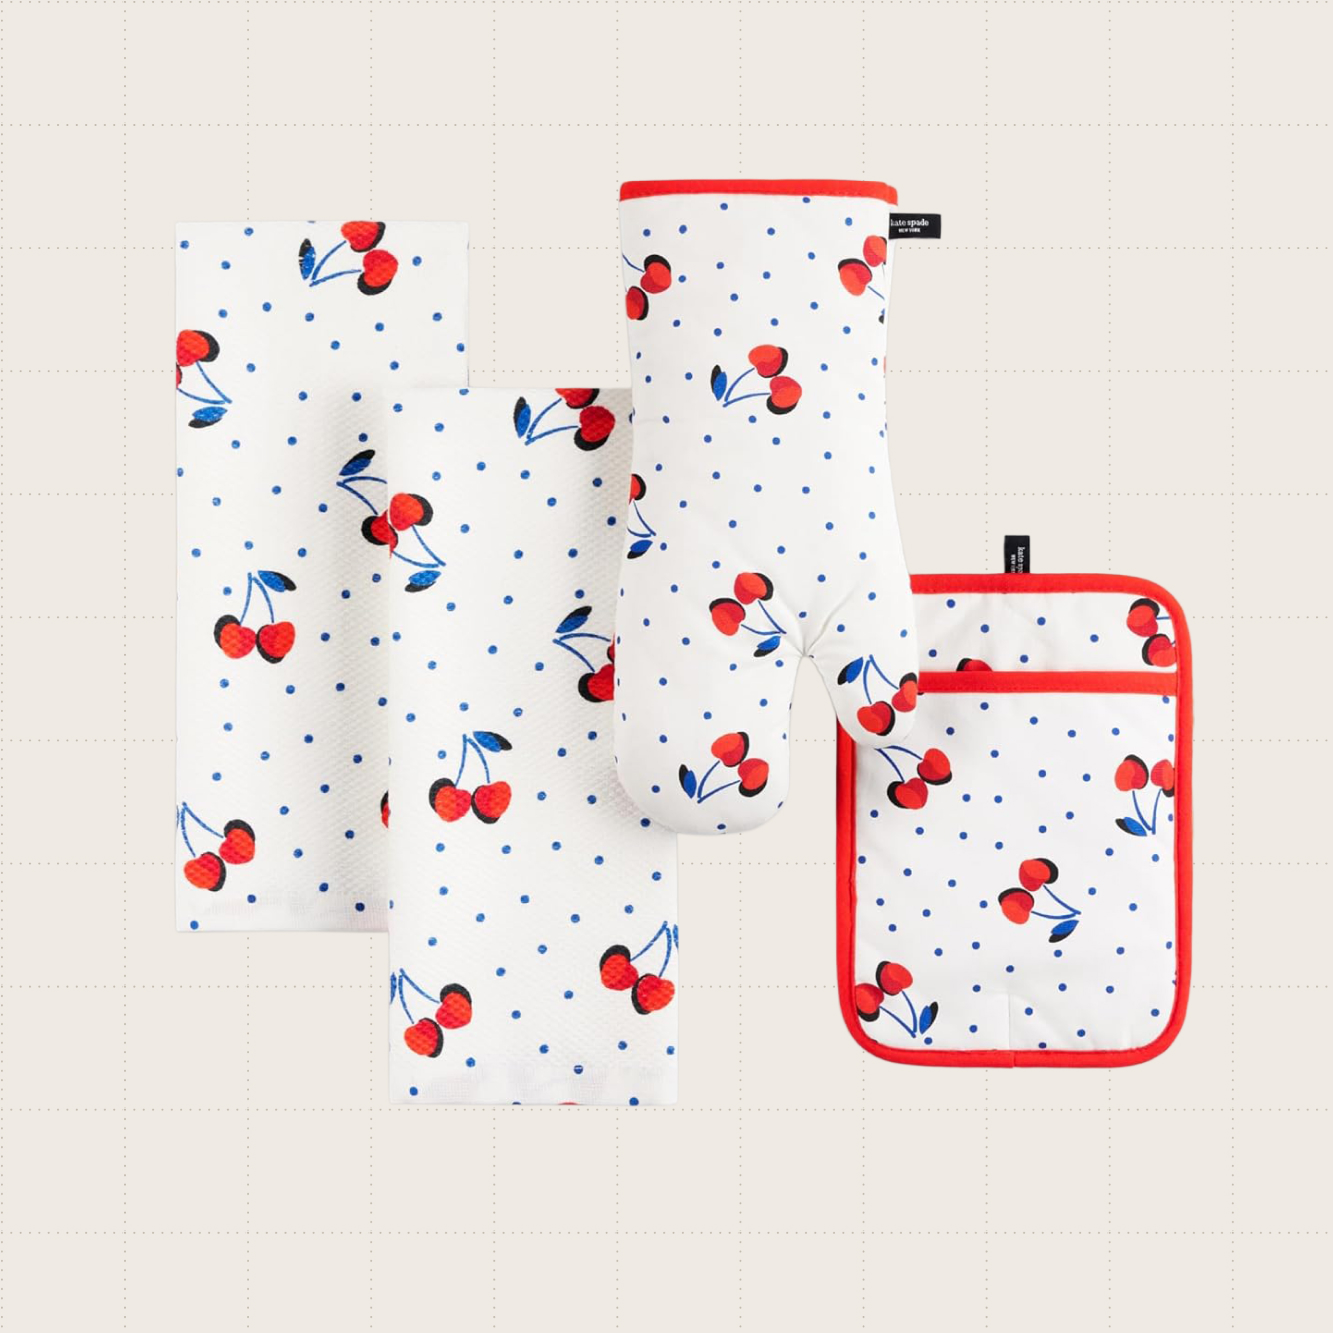
The Best Kitchenware Deals

Chefman Electric Warming Tray
Price: $39.99
$79.99
BUY NOW
Alpha Grillers Digital Meat Thermometer
Price: $9.99
$19.99
BUY NOW
Woodenhouse Bamboo Charcuterie Boards Gift Set
Price: $28.49
$42.99
BUY NOW
KitchenAid 3.5-Cup Food Chopper
Price: $38.24
$69.99
BUY NOW
Kate Spade New York Cherry Dot Four-Piece Set
Price: $20.37
$45.00
BUY NOW
FoodSaver Vacuum Sealer Machine
Price: $99.99
$146.98
BUY NOW
Advertisement

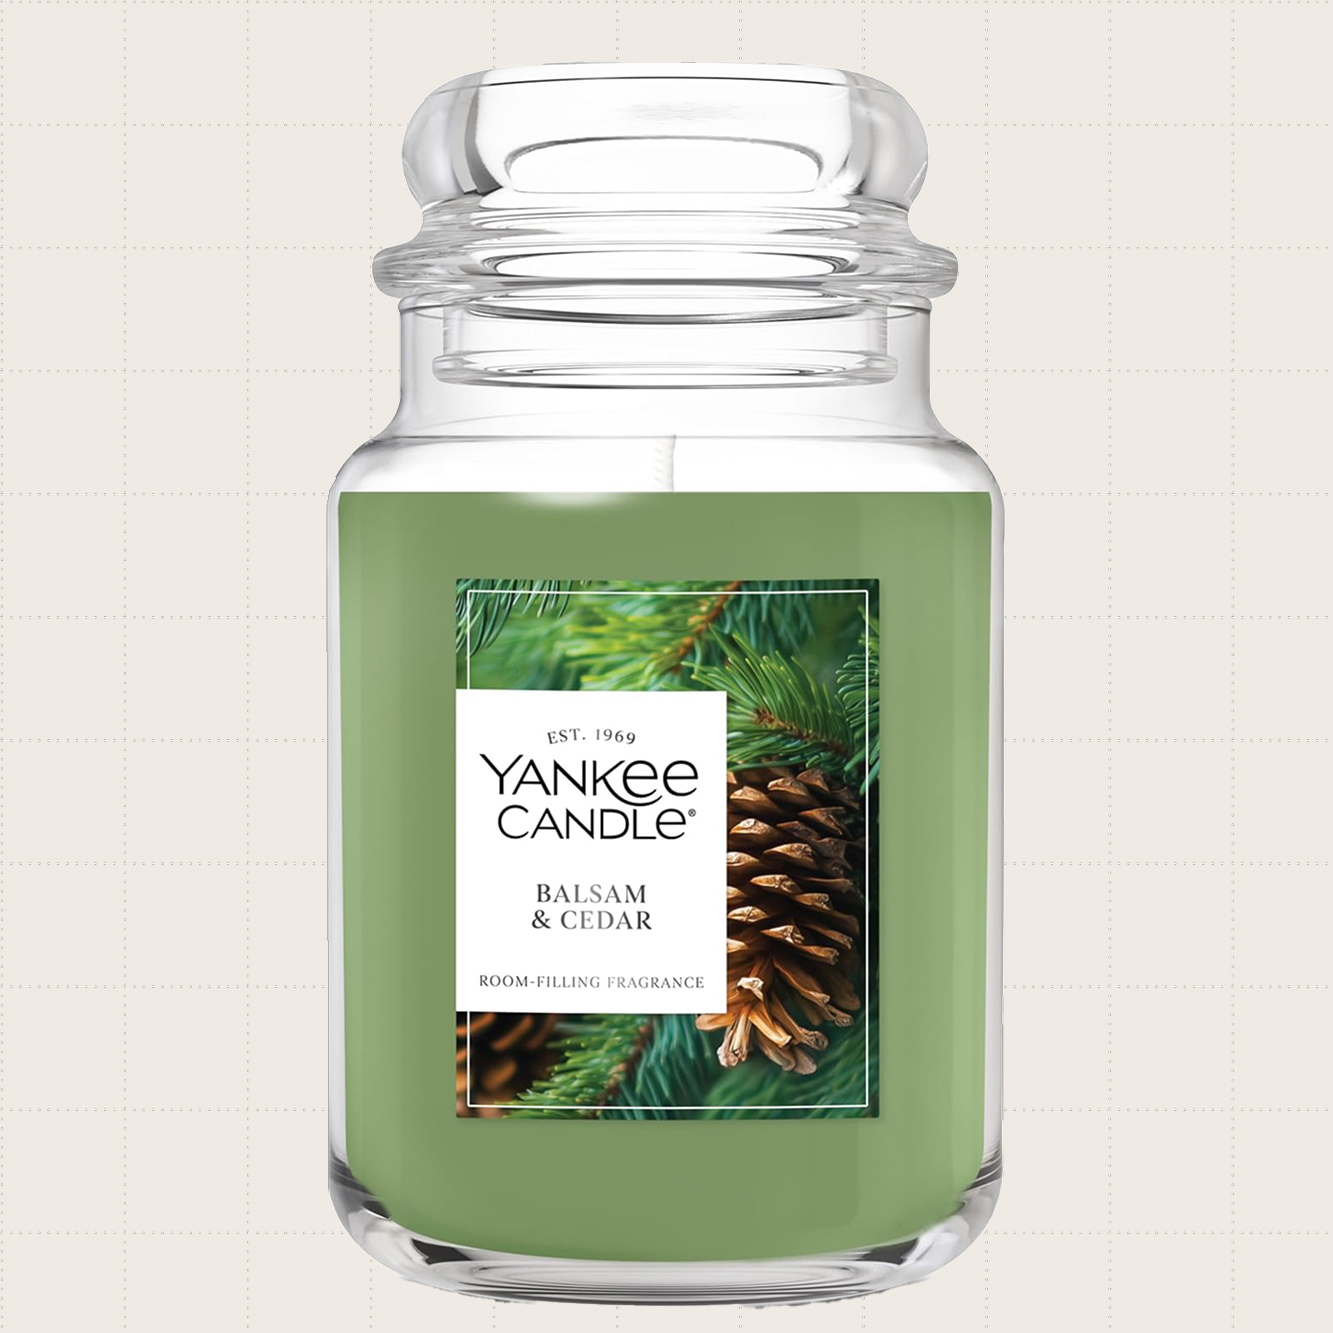
The Best Home Decor Deals

National Tree Company 6-Foot Unlit Artificial Christmas Tree
Price: $75.99
$112.49
BUY NOW
BEDELITE Faux Fur Throw Blanket
Price: $31.99
$39.99
BUY NOW
Yankee Candle 22-Ounce Jar Candle
Price: $14.99
$24.99
BUY NOW
Beckham Hotel Collection Bed Pillows
Beckham Hotel Collection Bed Pillows, Two-Pack
Price: $41.98
$79.99
BUY NOW
Vasagle Small Round Side Table; the table has a white finish and there's a fabric beige basket underneath the tabletop for additional storage.
Vasagle Small Round Side Table
Price: $33.99
$39.99
BUY NOW
Pinkpum 20-Inch Eucalyptus Wreath
Price: $18.80
$24.99
BUY NOW
Advertisement

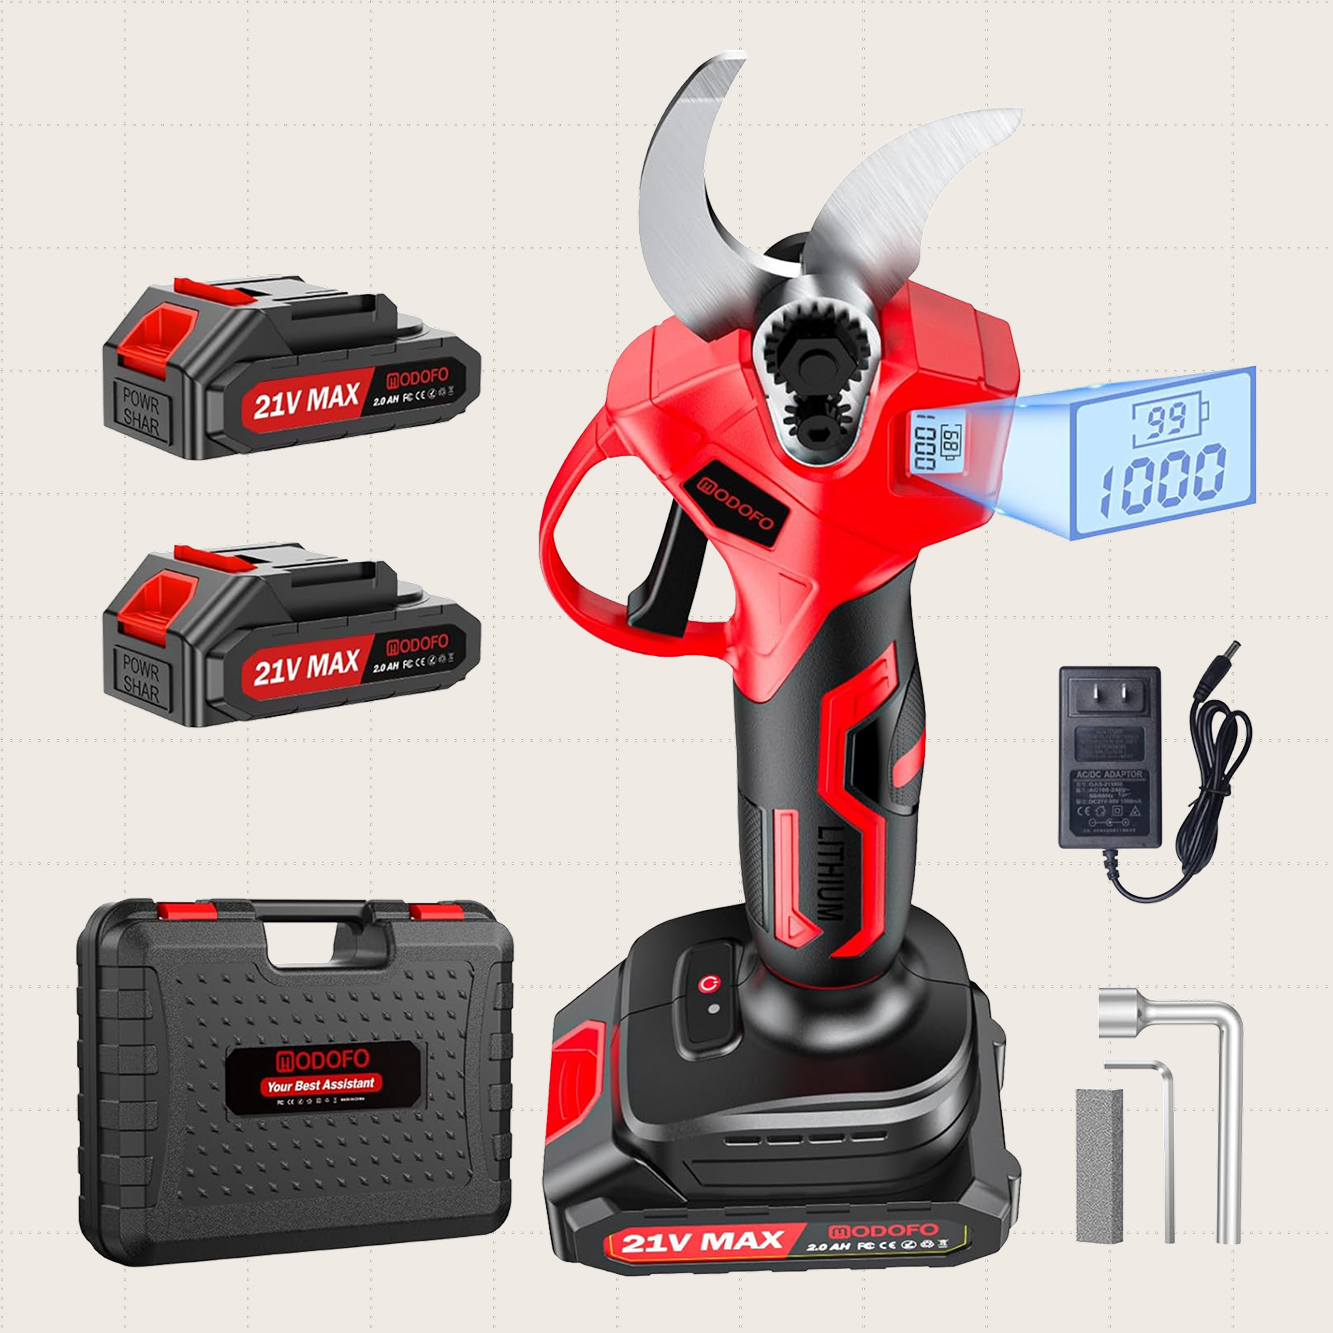
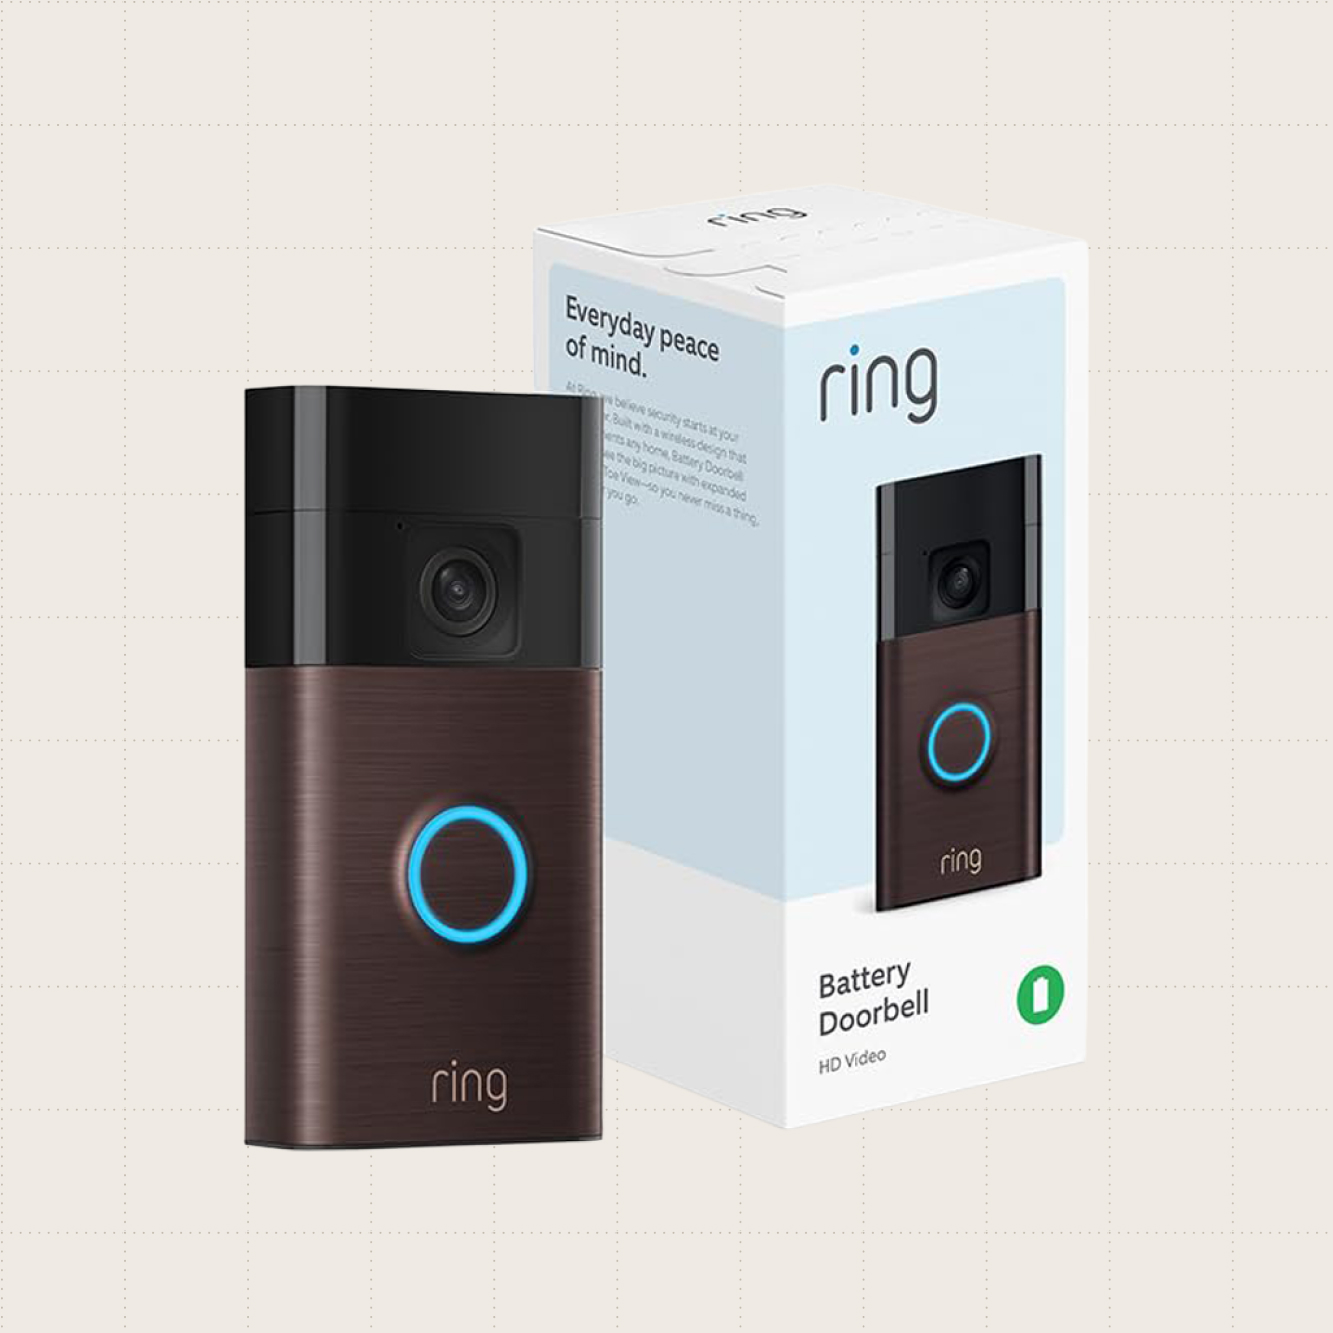
The Best Home Improvement Deals

Ring Battery-Powered Video Doorbell
Price: $49.99
$99.99
BUY NOW
Energizer AA Batteries, 32-Count
Energizer AA Batteries Alkaline Power, 32-Count
Price: $14.28
$23.98
BUY NOW
LEVOIT Top Fill Humidifier
Price: $27.98
$39.99
BUY NOW
DEWALT 20V MAX Cordless Drill Driver Set
Price: $99.00
$179.00
BUY NOW
Filtrete Furnace Air Filters, Four-Pack
Price: $37.38
$59.75
BUY NOW
WOLFMEN Cordless Electric Leaf Blower
Price: $61.74
$99.99
BUY NOW

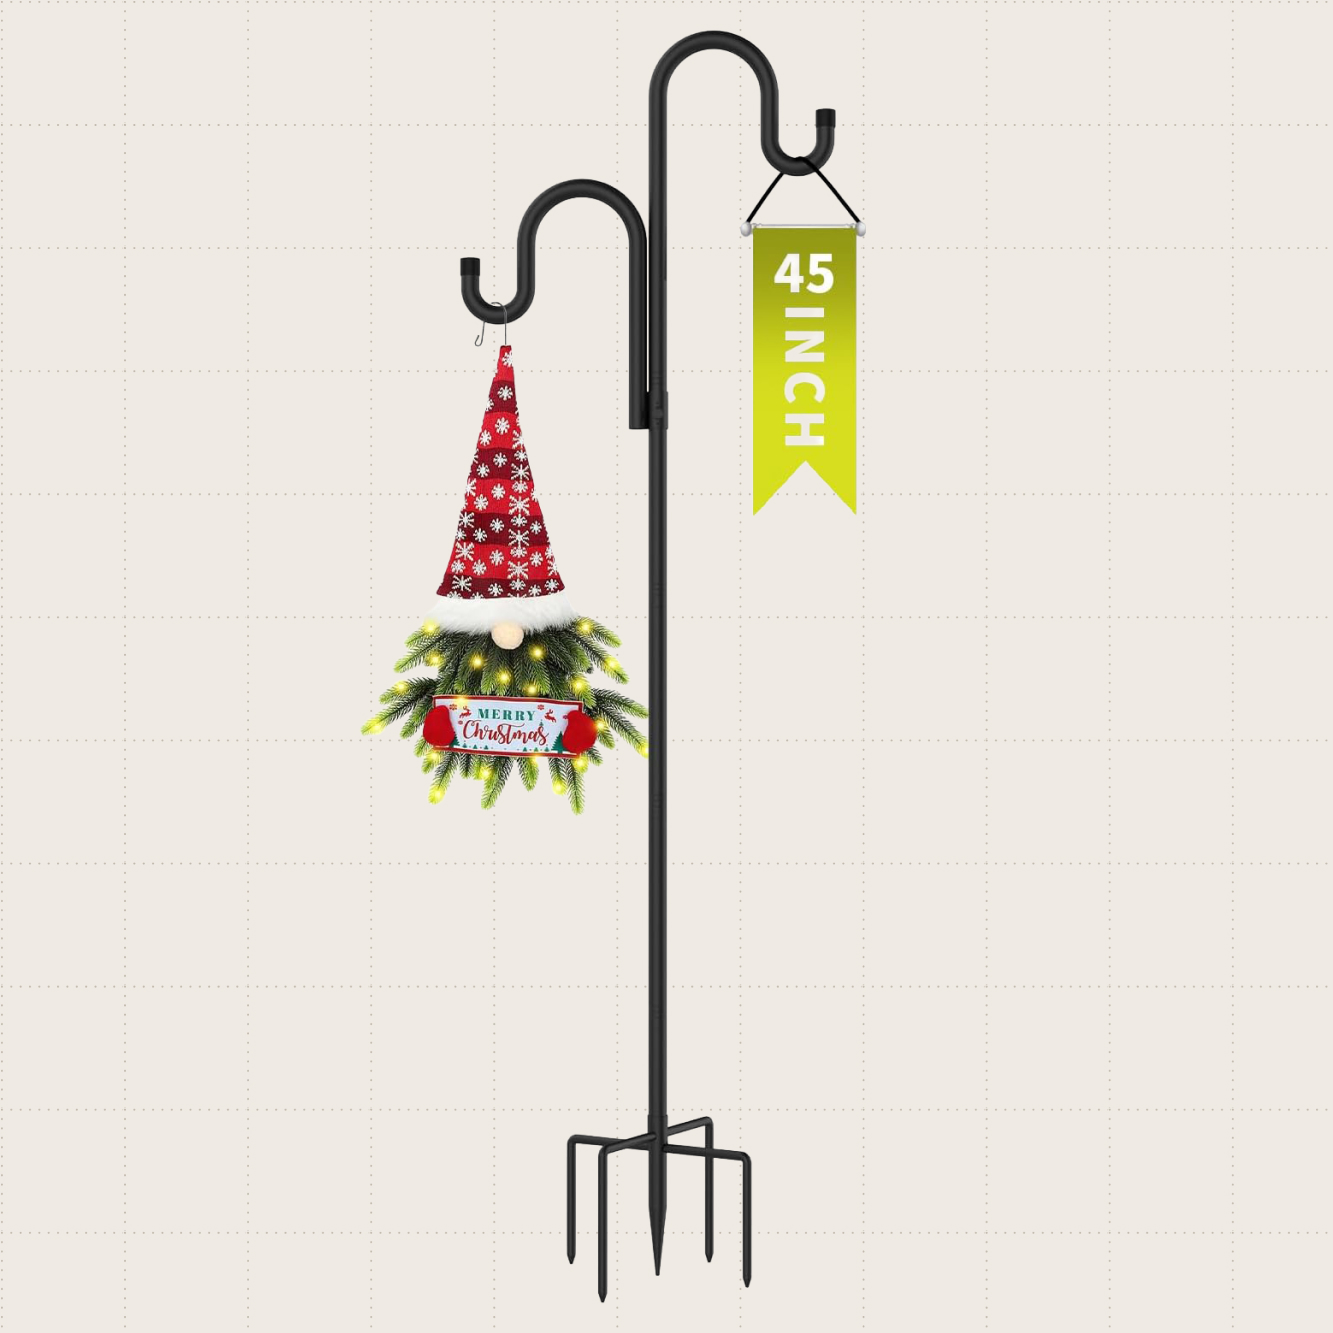
The Best Gardening Deals

Fazoxo Smart Bird Feeder With HD Camera
Price: $66.49
$79.99
BUY NOW
Bamllum Leather Gardening Gloves
Price: $7.99
$9.99
BUY NOW
Cuisinart Portable Tabletop Patio Heater
Price: $99.74
$149.99
BUY NOW
GARGENTOL Double Shepherds Hook
GARGENTOL Double Shepherds Hook – 2 Pack
Price: $29.56
$36.95
BUY NOW
MODOFO Electric Pruning Shears
Price: $47.48
$79.99
BUY NOW
Onlysuki Repotting Mat
Price: $5.49
$6.27
BUY NOW
Advertisement
Featured Image Credit:  Jennifer J Taylor/ iStock | Updated  Dec 2, 2025 |
Kelsey Morrison
Staff Editor
Kelsey Morrison is the Staff Editor of House Outlook. She has been covering all things home-related for over a decade, including real estate, interior design, commerce, and a slew of other lifestyle topics. Kelsey previously worked as a commerce editor for World of Good Brands (eHow.com and Cuteness.com) and as an associate editor for Livabl.com. She describes her personal design style as 1970s ski chalet-chic and has a thing for latch-hook tapestries.
This article is for general informational purposes only.
Featured Image Credit:  Jennifer J Taylor/ iStock | Updated  Dec 2, 2025 |
Advertisement
Home Improvement 9m read
0

25 Home Hacks That Make Life So Much Easier

Life is hard enough. Why not make keeping a clean, organized home a little easier? From clever kitchen shortcuts to simple cleaning tricks, these 25 home hacks are designed to save you time, effort, and — perhaps most importantly — your sanity. Whether you’re looking to streamline household chores or make your groceries last longer, these reader-favorite tips will help you create a home that works with you, not against you.

Life is hard enough. Why not make keeping a clean, organized home a little easier? From clever kitchen shortcuts to simple cleaning tricks, these 25 home hacks are designed to save you time, effort, and — perhaps most importantly — your sanity. Whether you’re looking to streamline household chores or make your groceries last longer,…

1. A Microfiber Cloth Makes Cleaning Baseboards a Breeze

Dampen a microfiber cloth in a mixture of hot water, a cup of distilled white vinegar, and a few drops of liquid dish soap. Wrap the cloth around your broom’s bristles and secure it with a rubber band. Then, glide the broom along your baseboards — no back-breaking bending required.

Related: A Baseboard Cleaning Hack That Will Protect Your Back
Credit: eugenesergeev/ iStock

2. Clean Window Screens Without Taking Them Out

Use a vacuum with a dust attachment to remove loose debris from the window screen, and then spray it with a mixture of warm water and a few drops of liquid dish soap. Wipe it down with a lint-free microfiber cloth and rinse using another spray bottle filled with clean water. Dab it dry with a clean cloth, and don’t forget to wipe the windowsill afterward to catch any drips.

Related: How To Clean Window Screens Without Taking Them Out

3. Clean Rooms Top to Bottom

Order matters when it comes to cleaning efficiently. Always start with high surfaces, such as ceiling fans and light fixtures. Then, move to furniture, countertops, and other midlevel areas. Finish by cleaning the floors once all the dust has naturally fallen.

Related: You Should Be Cleaning Your House in This Order

4. There’s a Trick to Plush Towels — And It’s Not Fabric Softener

To turn stiff towels into fluffy ones, load a few into the washing machine with your usual detergent, being careful not to overcrowd. During the rinse cycle, add half a cup of baking soda to help remove grime. Next, pour in half a cup of distilled white vinegar, which naturally softens fabrics by removing residue. Dry on low to medium heat.

Related: The Secret to Supersoft, Fluffy Towels
Advertisement

5. Use a Balloon To Tackle Dust

Balloons aren’t just for birthdays — they can also be a handy dust-cleaning tool. Rub a balloon against hair or fabric to generate static electricity, and then glide it over dusty surfaces to lift the particles.

Related: How To Use a Balloon To Clean Up Dust
Credit: Yavdat/ Shutterstock

6. Extend the Life of a Kitchen Sponge by Soaking It in Salt Water

So long, stinky sponges. Combine 1/4 cup of salt with a quart of warm water, stirring until the salt fully dissolves. Then, submerge your sponges in the salt water overnight. The salt draws out moisture and oils, which helps inhibit bacterial growth and break down stains.

Related: Disinfect Sponges Overnight With This Pantry Staple

7. Bring an Orange Into the Shower for a Mini Mindfulness Moment

Peeling (and even eating) an orange in the shower might sound odd, but it’s a surprisingly effective mini aromatherapy boost. The warm steam helps release essential oils from the zest, and the shower setup ensures sticky juice runs off your hands and straight down the drain.

Related: Why You Should Bring an Orange Into the Shower With You

8. Clean Your Fridge’s Condenser Coils

The key to an efficient fridge is to clean the condenser coils, which are often hidden underneath or behind the appliance. When those coils are clogged with dust, pet hair, and grime, the fridge has to work harder to cool your food. Luckily, brushing and vacuuming them can boost energy efficiency by up to 30%.

Related: The One Thing You Should Do To Make Your Refrigerator Run More Efficiently

9. There’s a Smart Way To Store a Wet Toilet Brush

Storing a wet toilet brush in its caddy is basically asking for bacteria growth and unpleasant odors. Instead, wedge it between the lowered toilet seat and the rim to air-dry before returning it to its holder.

Related: How To Keep Your Toilet Brush Germ-Free
Advertisement

10. There’s a Simple Way To Salvage Crystallized Honey

Crystallized honey is perfectly good to eat, but restoring the bees’ fine work to a smooth, pourable state is an easy fix. Place the jar in a bowl of warm (not boiling) water for five to 10 minutes, stirring gently until the crystals dissolve.

Related: Don’t Throw Away Crystalized Honey — Do This Instead
Credit: Hsyn20/ Shutterstock

11. Cutting Bell Peppers Is Easier Upside Down

After removing the stem, place a bell pepper upside down on a cutting board. Slice along its natural curves to leave the seeds and membrane attached to the core. This method not only minimizes waste but also keeps seeds from scattering everywhere.

Related: Use the ‘Upside-Down’ Method for Cutting Bell Peppers

12. Parchment Paper Helps Cheese Stay Fresher, Longer

Cheese lasts longer when it can breathe, so swap the original plastic wrap for parchment paper instead. Unlike plastic, which can trap moisture and cause mold, the parchment paper lets in just enough air to prevent drying out while keeping your cheese fresh.

Related: This Kitchen Staple Helps Your Cheese Last Longer

13. This Free Method Kills Weeds Without Chemicals

No cost and no chemicals? You bet. Kill young weeds by pouring boiling water directly onto them. (Aim for about half a cup per plant.) Use a kettle with a narrow spout for more targeted pouring.

Related: This Natural Method Kills Weeds Instantly

14. For Maximum Storage, Alternate Your Shoes When Arranging Them

Squeeze the most storage space out of a shoe rack by simply alternating the direction of each shoe. Place one shoe toe-out and the other shoe toe-in. You’ll be able to fit a few extra pairs of shoes while keeping everything neat and accessible.

Related: Arrange Your Shoes Like This To Free Up More Closet Space
Advertisement

15. A Bath Towel Can Dramatically Reduce Dryer Time

Toss a clean, dry bath towel into the dryer with a wet load. It’ll absorb extra moisture, helping clothes dry faster. Just be sure to remove the towel after five to 15 minutes — otherwise, it will turn into a damp sponge.

Related: This Genius Laundry Hack Can Significantly Reduce Drying Time
Credit: nopponpat/ iStock

16. There’s a Better Way To Grate Cheese

Lay a box grater on its side, flat against a rimmed baking sheet. Firmly hold the grater’s handle and the edge of the baking sheet with the same hand. With your free hand, glide a small chunk of cheese along the top of the grater in a consistent motion away from your body. This method uses body weight instead of relying solely on wrist strength. 

Related: You’re Grating Cheese All Wrong

17. Save Ice Cream From Freezer Burn With a Ziploc Bag

Freezer burn occurs when your beloved pint of mint chocolate chip is exposed to air. To avoid this, place your ice cream container in a Ziploc bag, squeezing out as much air as possible before sealing. This will also keep the ice cream softer and easier to scoop.

Related: How To Store Ice Cream To Avoid Freezer Burn

18. Rubber Bands Are the Trick To Keeping Clothes From Falling Off Hangers

Tired of clothes sliding off hangers? Wrap a wide rubber band around each shoulder support, about 2 inches in. This creates a grippy surface that will keep garments in place and prevent them from piling up at the bottom of your closet.

Related: Stop Clothes From Slipping Off Hangers With This Simple Trick

19. Dust Delicate Plant Leaves With a Fuzzy Sock

Fuzzy socks not only keep your feet warm but can also keep your plants clean. Slip one over your hand to gently wipe dust off your houseplant leaves. The soft fibers trap dust effectively without damaging the delicate foliage.

Related: This Is the Best Way To Dust Delicate Plant Leaves
Advertisement

20. A Coffee Filter Is Essential When Potting Houseplants

Before adding soil and a plant to a pot, line the bottom of it with a coffee filter to cover the drainage holes. The filter works in two ways: It prevents soil loss and supports moisture retention, helping roots stay hydrated without becoming soggy. This, in turn, reduces the risk of dreaded root rot.

Related: You’ll Never Pot a Plant Without This Trick Again
Credit: Unsplash+ via Getty Images

21. Slice Many Grapes or Cherry Tomatoes at Once

Who has the time to slice grapes or cherry tomatoes individually? Instead, place the fruit between two flat lids and use a serrated knife to cut through multiple pieces at once.

Related: How To Slice Grapes and Cherry Tomatoes in Seconds Flat

22. Clean a Cast Iron Pan With Salt

Rule number one of a cast-iron pan: no harsh detergent. Use this technique instead. First, clean a warm skillet using a damp, nonscratch pad. Dry it with a clean kitchen towel, then pour 2 to 3 tablespoons of kosher salt onto the cooking surface and rub it with a folded-up paper towel to lift residue. Toss the salt, then follow up by rinsing, drying, heating briefly, and applying a coat of seasoning oil before storing.

Related: A Natural Cleaning Hack for Your Cast-Iron Skillet

23. Use Aluminum Foil To Boost Plant Growth in Low Light

Create a DIY sun box by lining a cardboard box with shiny aluminum foil. Place your plant inside near a window so that the foil reflects maximum sunlight onto the plant. This setup helps the plant thrive even in dim spaces.

Related: A Surprising Way To Boost Plant Growth in a Dim Space

24. Double Ziploc Bag Storage With a Simple Trick

Instantly double a zip-top bag’s capacity by turning one inside out and aligning its seal with a second bag’s seal. Press them together and — voilà — you have a single, larger storage bag.

Related: This Ziploc Bag Trick Doubles Storage Instantly

25. A Single Penny Can Help Flowers Live Longer

Drop a pre-1982 penny (which is about 95% copper) into a vase to help prolong the lifespan of fresh flowers. Copper acts as a natural fungicide, which works by reducing bacteria, fungi, and algae growth.

Related: Why You Should Always Drop a Penny in Your Flower Vase
Credit: Lisa Fotios/ Pexels
Advertisement
Featured Image Credit:  Clay Banks/ Unsplash+ | Updated  Feb 18, 2026 |
Megan McCarty
Writer
Megan McCarty is a Los Angeles-based writer who covers the fun stuff: design, travel, wellness, beauty, and fashion. She has written for publications including Domino, The Spruce, MyDomaine, Bustle, and Rue Magazine. Her life rules include, but are not limited to, zipper when merging, contribute to your IRA, and do the nice thing.
This article is for general informational purposes only.
Featured Image Credit:  Clay Banks/ Unsplash+ | Updated  Feb 18, 2026 |
Advertisement
Organizing 2m read
0

Organize Any Drawer So Essentials Are Easy To Find

Never underestimate the power of a well-organized drawer. Being the precious storage real estate that they are, drawers are meant to keep everything you need neatly organized, but that only happens with a solid system in place.

All featured products and deals are selected independently and objectively by the author. House Outlook may receive a share of sales via affiliate links in content.

Never underestimate the power of a well-organized drawer. Being the precious storage real estate that they are, drawers are meant to keep everything you need neatly organized, but that only happens with a solid system in place.

In reality, many of us have ventured into junk drawer territory. We all have at least one drawer (if not several) where we’ve adopted a “throw and go” mentality. This might be convenient in the moment, but it becomes a bit of a nightmare when you can’t find what you’re looking for. Thankfully, there’s a simple, helpful, and ultimately better way to organize your drawers, and you’ll be surprised you didn’t think of it sooner. 

The Best Way To Organize Drawers

A good drawer organization system relies not on what you use to store items, but on where you place them. The key is to position your most-used items front and center. By front-loading your drawers with the things you need the most, you always know exactly where to find them.

By default, lower-priority items can be stored in the back of the drawer. Take a nightstand, for example. If you’re in the habit of taking vitamins or applying lotion before bed, those items should be placed at the very front of the drawer for easy access.

Advertisement

Taking It a Step Further

If you find that this front-loading system works well for you, then it’s time to level up your organization game. You can do this by investing in a set of drawer organizers to quickly whip any drawer into shape.

Related: Don’t Shop for Drawer Organizers Without Doing This First

Alternatively, you can use adjustable drawer dividers. When placed horizontally, these dividers can separate the front of the drawer from the back. When positioned vertically, they can divide the drawer into smaller, specialized compartments.

Advertisement
Advertisement
Food & Drink 3m read
0

Get Dinner Ready Sooner With This Defrosting Hack

Frozen food was one of the great innovations of the 20th century. Of course, that convenient new preservation method came with a corresponding inconvenience: having to thaw things before we cook them. The USDA endorses three defrosting methods: in the fridge overnight, in the microwave, or in cold water. While all three are effective, there’s a defrosting hack for quick meals that holds its own against those officially recognized methods.

All featured products and deals are selected independently and objectively by the author. House Outlook may receive a share of sales via affiliate links in content.

Frozen food was one of the great innovations of the 20th century. Of course, that convenient new preservation method came with a corresponding inconvenience: having to thaw things before we cook them. The USDA endorses three defrosting methods: in the fridge overnight, in the microwave, or in cold water. While all three are effective, there’s…

The Two-Pan Hack To Defrost Meat

Here’s how it works:

• Take one metal skillet (or other shallow metal pan) and place it upside down on your counter.

• Lay the package of food you want to defrost (meat, poultry, etc.) on top of the first pan.

• Put a second metal pan on top of the food, right side up.

• Give it about an hour or so to thaw.

Tip: This hack works best with meat that’s packaged as flat as possible. Consider portioning the meat into freezer bags and using a rolling pin or an empty wine bottle to compress it.

Related: The Secret Ingredient for Better-Browned Ground Beef

You can speed things up by putting a bit of weight in the top pan, such as a can of vegetables or a cup or two of water. This is optional, but that added weight helps make sure there’s good contact between the meat and the metal.

Advertisement

Now that you know how it works, you probably want to know why it works. Well, it’s basic science: Heat always moves from a warmer spot to a colder spot. When you cook, your skillets transfer the stove’s heat to your food; this thawing hack is just a slower version of that process, using the room’s ambient temperature as the heat source.

But What About Food Safety?

Quick weeknight meals are important, but food safety is even more important, of course. That’s why the USDA emphasizes overnight thawing in your refrigerator: It ensures your food always stays at a safe temperature. This skillet method falls into the same category as thawing in cold water: Only use it for food you plan to cook right away since it will get warmer than the safe range for storage. Still, it beats microwave thawing (which is uneven and gives you partially cooked spots) and water thawing (which can be messy and risks waterlogging your food).

This method won’t work for all cuts, of course. It’s best for things like thin steaks and chops, or packages of sliced or ground meat — especially if they’ve been packed flat to save thawing time and storage space. For larger items, such as a roast or a whole chicken, you’ll still need to use another defrosting method. They’re simply too large to thaw completely within a food-safe time frame, and their irregular shape means the top pan would just slide off.

Advertisement
Featured Image Credit:  Qwart/ iStock | Updated  Nov 23, 2025 |
Fred Decker
Writer
Fred Decker is a trained chef and former restaurateur. Since closing his restaurants over a decade ago he has been a prolific freelance writer, publishing several thousand articles on dozens of high-volume websites including Taste Of Home, Hunker, Tasting Table, Week&, eHow, and GOBankingRates. He lives on a rural acreage shared with a big garden, chickens, rabbits, and grandkids.
This article is for general informational purposes only.
Featured Image Credit:  Qwart/ iStock | Updated  Nov 23, 2025 |
Advertisement
Home Improvement 3m read
0

Forget This Winter Task and You Could Face Burst Pipes

There’s a well-known saying that the only two certainties in life are death and taxes. That’s true — but there are also a handful of other things that, while not as inevitable, seem to crop up year after year. Every January, for example, a horde of people search the internet for “best workout routines for beginners.” Similarly, once the winter cold sets in, searches for information on frozen pipes predictably spike.

All featured products and deals are selected independently and objectively by the author. House Outlook may receive a share of sales via affiliate links in content.

There’s a well-known saying that the only two certainties in life are death and taxes. That’s true — but there are also a handful of other things that, while not as inevitable, seem to crop up year after year. Every January, for example, a horde of people search the internet for “best workout routines for…

There’s no reason you should be one of them. To quote another well-known saying, “An ounce of prevention is better than a pound of cure.” Here’s the simple routine you need to winterize your outdoor faucet and avoid burst pipes before the next big freeze hits.

How To Avoid Burst Pipes

As the weather gets colder, your need to water the lawn and garden largely goes away. While a good watering can certainly help protect your plants from frost, you can use a bucket if necessary. So, once temperatures drop below freezing, it’s time to shut down your outdoor faucet for the winter. Here’s what to do:

1. Disconnect your hose from the outdoor faucet, drain it, and store it away for the winter in a sheltered spot.

2. Locate the indoor shut-off for the faucet (if you have one) and turn it off. Then, run the outside faucet until the water stops. Skip this step if you don’t have an indoor shut-off valve.

3. Place an insulated cover over the outdoor faucet. These are inexpensive and readily available at most hardware stores or online retailers.

That’s usually enough to do the job, but there are a few other things to consider if you experience severe winters.

Advertisement

More Tips for Colder Climates

If you live in a climate with cold winters (especially if you’re new to the area or your house), there are a few extra precautions worth taking.

Look inside your basement or buildup and locate the pipe that runs to your outdoor faucet. If it runs up an uninsulated wall in an unheated area, that section of the water line could freeze in an unusually harsh cold spell. You can prevent this by placing insulation between the wall and the pipe, or by buying the wrap-around insulation specifically meant for water lines. 

Related: Do This Once a Year To Save Your Home From Rot

If you want to be really sure, or if the neighbors warn you that frozen pipes are a common issue where you live, you can also wrap the water line with low-voltage heating tape. This is inexpensive as well, and means you’ll be able to sleep soundly (and so will your plumber) even during the worst cold snaps.

Advertisement
Featured Image Credit:  CRobertson/ iStock | Updated  Nov 23, 2025 |
Fred Decker
Writer
Fred Decker is a trained chef and former restaurateur. Since closing his restaurants over a decade ago he has been a prolific freelance writer, publishing several thousand articles on dozens of high-volume websites including Taste Of Home, Hunker, Tasting Table, Week&, eHow, and GOBankingRates. He lives on a rural acreage shared with a big garden, chickens, rabbits, and grandkids.
This article is for general informational purposes only.
Featured Image Credit:  CRobertson/ iStock | Updated  Nov 23, 2025 |
Advertisement
Cleaning 3m read
0

Clean Your Curtains Without Ever Taking Them Down

Cleaning curtains easily ranks near the top of many people’s “most annoying chores” list. Wrestling with the rod, bumping your head in the process, and then trying to stuff bulky fabric into your washing machine — or worse, hauling it to the dry cleaner — is nobody’s idea of fun. It’s no wonder this chore gets postponed again and again. Unfortunately, it must be done, as curtains quietly collect dust, allergens, pet hair, and the occasional mystery stain.

All featured products and deals are selected independently and objectively by the author. House Outlook may receive a share of sales via affiliate links in content.

Cleaning curtains easily ranks near the top of many people’s “most annoying chores” list. Wrestling with the rod, bumping your head in the process, and then trying to stuff bulky fabric into your washing machine — or worse, hauling it to the dry cleaner — is nobody’s idea of fun. It’s no wonder this chore…

Here’s the good news: There’s an easier way to get your curtains clean, and you don’t even have to take them down.

Start With a Good Shake and a Vacuum

Think of your curtains like a delicate, hanging rug. Instead of beating the dirt out, shake the curtains gently while they’re still on the rod to loosen any settled dust and debris. (A step stool will be helpful here.) It’s best to shake them from the top so everything falls downward, ideally out an open window.

Related: How To Clean Window Screens Without Taking Them Out

Next, grab your vacuum. Using the soft brush attachment, glide it from top to bottom, paying special attention to folds and pleats where dust loves to hide. Finish by giving the floor a quick once-over with the vacuum too.

Advertisement

Steam Away the Stale

Once the surface dust is gone, it’s time to take out the secret weapon: a steamer. A handheld garment steamer will smooth out wrinkles, lift away any lingering dust, neutralize odors, and even eliminate bacteria and dust mites — all without you ever having to take the curtains down.

After heating, move the steamer slowly in vertical strokes, keeping a couple of inches between the nozzle and the fabric. Use the gentlest setting, especially if your curtains are made of natural materials, such as cotton or linen, or delicate sheer fabric. Don’t worry about moisture, either; the curtains will be only slightly damp and will dry within minutes.

Fresh Air Does Wonders

After steaming, let Mother Nature take over. Open your windows, if possible, to let in a breeze. This airflow will help whisk away any lingering odors and keep mildew at bay, all while speeding up the drying process.

Advertisement
Featured Image Credit:  Deagreez/ iStock | Updated  Nov 23, 2025 |
Megan McCarty
Writer
Megan McCarty is a Los Angeles-based writer who covers the fun stuff: design, travel, wellness, beauty, and fashion. She has written for publications including Domino, The Spruce, MyDomaine, Bustle, and Rue Magazine. Her life rules include, but are not limited to, zipper when merging, contribute to your IRA, and do the nice thing.
This article is for general informational purposes only.
Featured Image Credit:  Deagreez/ iStock | Updated  Nov 23, 2025 |
Advertisement
Organizing 2m read
0

A Recycling Bin Fix for Unruly Wrapping Paper Rolls

Choosing festive wrapping paper is almost as fun as shopping for the gifts themselves. Keeping that gift wrap stored in a neat and tidy manner, however, is an entirely different matter. Whether you choose specific wrapping paper for each family member, have dedicated Santa wrapping paper, or stick with neutral wrapping paper (hello, brown Kraft paper) versatile enough for holidays, birthdays, baby showers, and other gift-giving traditions, chances are, you’ll always have a little left over. Storing opened wrapping paper is tricky, often resulting in an unruly situation that makes the next gift-wrapping session overwhelming.

All featured products and deals are selected independently and objectively by the author. House Outlook may receive a share of sales via affiliate links in content.

Choosing festive wrapping paper is almost as fun as shopping for the gifts themselves. Keeping that gift wrap stored in a neat and tidy manner, however, is an entirely different matter. Whether you choose specific wrapping paper for each family member, have dedicated Santa wrapping paper, or stick with neutral wrapping paper (hello, brown Kraft…

A Free Fix for Unraveling Rolls

Fortunately, there is a simple hack for fixing unraveling wrapping paper. Best of all, it doesn’t require you to go out and buy any fancy organizers or innovative clips (though, if you are planning to buy something, we swear by the Little ELF storage tote). Instead, dig into your recycling and grab a few empty toilet paper and paper towel rolls.

Related: 3 Easy Hacks for Flawless Gift Wrapping

Cut a vertical slit down the center of the cardboard roll so it opens when pulled apart, but closes (mostly) back up when left alone — sort of like a cuff. Wrap this cuff around your opened wrapping paper roll, and it will hold everything neatly in place. When you’re ready to use the wrapping paper, simply remove the cuff, cut what you need, and then replace the cuff to secure the roll again. In addition to toilet paper and paper towel rolls, empty wrapping paper rolls cut into 6-inch tubes also work well for this hack.

Advertisement

Another Snappy Solution

If you don’t have any empty rolls on hand, a slap bracelet is another unique way to keep everything in place. You can purchase slap bracelets specifically designed for holding wrapping paper, such as these silicone snap bands. Or you can just order a pack of Christmas slap bracelets, such as these or these. Slap bracelets also happen to make great gift toppers or stocking stuffers.

Advertisement
Featured Image Credit:  Image courtesy of Kelsey Morrison | Updated  Nov 23, 2025 |
Jessie Quinn
Writer
Jessie Quinn is a Los Angeles-based lifestyle journalist with words published in PEOPLE, StyleCaster, Apartment Therapy, The Spruce, Byrdie, and more. She has a Bachelor's Degree in fashion journalism from Academy of Art University and her work spans across many categories, including style, beauty, home, health, crafts, and more.
This article is for general informational purposes only.
Featured Image Credit:  Image courtesy of Kelsey Morrison | Updated  Nov 23, 2025 |
Advertisement
Food & Drink 2m read
0

The Secret Ingredient for Better-Browned Ground Beef

Ground beef is a staple protein in many American households for a reason. Not only is it incredibly versatile — used in everything from hamburgers to tacos to casseroles — but it’s also widely available and relatively inexpensive. However, ground beef has one annoying quality: It releases a significant amount of liquid when cooked, and it never seems to brown the way you want it to. If you’ve ever spent an at-home Taco Tuesday wondering why your ground beef doesn’t look as nicely browned as it does in restaurants, you’re not alone. Luckily, there’s a simple way to fix this, and the solution is something you probably already have in your pantry: baking soda.

All featured products and deals are selected independently and objectively by the author. House Outlook may receive a share of sales via affiliate links in content.

Ground beef is a staple protein in many American households for a reason. Not only is it incredibly versatile — used in everything from hamburgers to tacos to casseroles — but it’s also widely available and relatively inexpensive. However, ground beef has one annoying quality: It releases a significant amount of liquid when cooked, and it…

Mix, Rest, and Cook

Here’s what to do: For every pound of meat you’re cooking, dissolve 1/4 to 1/2 teaspoon of baking soda in 1 tablespoon of water. Add the solution to the raw ground beef, mixing thoroughly until it’s distributed evenly. Then, allow the meat to rest on the counter for 15 to 30 minutes before cooking. After that, you can simply cook your beef as you normally would.

Why Does Baking Soda Help Brown Ground Beef?

Baking soda is something of a miracle ingredient when it comes to ground beef. It works by raising the pH of the beef’s surface, which alters the charge on the muscle filaments so they repel each other instead of coming together. This repelling action keeps the filaments a very small distance apart and allows them to retain more moisture. (Without this, the muscle filaments collapse and release a large amount of liquid — that’s the runoff you see when you cook ground beef without baking soda.) This method also works on thin slices of meat and is commonly used in Chinese stir-fry recipes.

Advertisement
Related: The Meat-Freezing Hack That Saves Time and Storage Space

Beyond browning, baking soda also tenderizes the meat. The same chemical process described above helps the meat stay tender by locking moisture inside. Since the meat isn’t releasing all that liquid into the pan, it won’t dry out and develop a chewy texture.

Advertisement
Advertisement
Cleaning 3m read
0

A Low-Effort Hack for Cleaner Kitchen Cabinets

You’ve wiped the counters, scrubbed the cooktop, sanitized the sink, and mopped the floors, but there’s one spot in your kitchen you’ve almost certainly forgotten: the tops of your kitchen cabinets. Many people use them for storage (that oversized serving platter has to go somewhere), but since they’re rarely seen, keeping them clean isn’t a priority for most of us. However, this overlooked spot is a magnet for cooking grease and dust, which forms into a sticky, stubborn residue over time.

All featured products and deals are selected independently and objectively by the author. House Outlook may receive a share of sales via affiliate links in content.

You’ve wiped the counters, scrubbed the cooktop, sanitized the sink, and mopped the floors, but there’s one spot in your kitchen you’ve almost certainly forgotten: the tops of your kitchen cabinets. Many people use them for storage (that oversized serving platter has to go somewhere), but since they’re rarely seen, keeping them clean isn’t a…

Once those cabinet tops are thoroughly cleaned (a mix of distilled white vinegar and warm water should do the trick), you’ll be happy to know there’s a simple way to prevent airborne grime from ever coating them again.

Clean Cabinets in One Step

The buildup on your cabinet tops may not accumulate as quickly or heavily as it would in a high-traffic area, such as the floor space beneath your fridge, but it certainly adds up over time. These surfaces don’t just collect dust; they also get seriously grimy, mostly due to cooking humidity combined with oil splatter and other minor kitchen messes.

So, how can you keep the tops of kitchen cabinets clean with minimal effort? You line them with aluminum foil. (You can also use parchment paper, newspaper, or wax paper if you have it on hand — any disposable liner works.) Simply measure and cut pieces of foil to fit the size and shape of each cabinet top. Then, lay the sheets flat across the surface with a slight overlap to prevent any gaps. Once in place, the foil can be left there for weeks or months — replacing it is the only cleaning required.

Advertisement
Related: The Easiest Way To Clean Kitchen Cabinets

What Makes Aluminum Foil a Top Choice?

Why foil? For starters, you can easily mold it to fit the contours of any cupboard top with minimal cutting or folding. You can also quickly wipe it down if it gets dirty. When it’s time to replace the foil, scrunch it into a ball and toss it in the recycling bin, or hang it outside to keep birds and other pests away from your garden.

Advertisement
Advertisement
Home Improvement 3m read
0

Do This Once a Year To Save Your Home From Rot

There’s one simple yearly habit that can protect your home from a surprisingly expensive problem: rot. The good news is, it doesn’t involve climbing on your roof or crawling under your house — just a walk around the exterior with a sharp eye and a tube of caulk.

All featured products and deals are selected independently and objectively by the author. House Outlook may receive a share of sales via affiliate links in content.

There’s one simple yearly habit that can protect your home from a surprisingly expensive problem: rot. The good news is, it doesn’t involve climbing on your roof or crawling under your house — just a walk around the exterior with a sharp eye and a tube of caulk.

Meet the “caulk audit.” Once a year, usually in the spring or fall, take a slow lap around your home and inspect any place where two materials meet, such as around windows and doors, along siding seams, and where exterior trim meets masonry. Over time, caulking can crack, shrink, or pull away from surfaces, especially after a year of sun, rain, and temperature swings. When that happens, even a tiny gap can invite moisture inside your walls.

And moisture is the enemy. Left unchecked, water can lead to wood rot, mold growth, and damage that spreads until it’s suddenly a major repair job. A five-minute fix today could save you thousands later.

Here’s how to do your caulk audit like a pro:

1. Walk the Perimeter

Closely inspect all joints and seams, paying special attention to areas under eaves, around vent pipes, and along window and door frames. Use a flashlight to help spot any hairline cracks.

Related: 10 Lifesaving Home Safety Tips You’ve Probably Never Heard

2. Test the Seal

If you notice gaps, if the caulk looks dried out, or if it crumbles when pressed, consider that a red flag indicating the seal has failed.

Advertisement

3. Clean Before Resealing

Remove old, flaking caulk with a scraper or utility knife, then wipe the area clean of any dirt, dust, or mildew.

4. Choose the Right Caulk

For most exterior applications, a high-quality polyurethane or silicone-based caulk works best. The product should be labeled “exterior” and “paintable.”

5. Seal It Up

Apply the caulk in a smooth, continuous line. Then, immediately run a damp finger or a specialized tool along the bead to create a neat finish.

It’s not glamorous, but a caulk audit is an essential homeowner ritual that pays off big time. It keeps your home dry, protects your paint job, and prevents your siding from quietly decaying.

So before you hang those holiday lights or fire up the grill this year, grab your caulk gun and take a lap. Your future self — and your home — will thank you for it.

Advertisement
Featured Image Credit:  Yori Meirizan/ iStock | Updated  Nov 23, 2025 |
Jill Layton
Writer
Jill Layton started writing professionally when she realized her emails and texts were kinda funny. She’s an affiliate shopping writer and lifestyle contributor for Scary Mommy, Bustle, Mic, and Best Products. She’s the mom of two alarmingly witty kids and the world’s most perfect dog.
This article is for general informational purposes only.
Featured Image Credit:  Yori Meirizan/ iStock | Updated  Nov 23, 2025 |