Advertisement
Decorating 3m read
0

3 Design Fixes for Your Home’s Biggest Eyesores

When it comes to interior design, it’s the little things that matter most. According to interior designer Hans Lorei, the smallest elements in a room are often the ones that become the biggest eyesores.

All featured products and deals are selected independently and objectively by the author. House Outlook may receive a share of sales via affiliate links in content.

When it comes to interior design, it’s the little things that matter most. According to interior designer Hans Lorei, the smallest elements in a room are often the ones that become the biggest eyesores.

Great design is about two things, Lorei says: Highlighting the beauty and quieting the not-so-pretty necessities. With color drenching in style, details such as vents, light switches, and outlet covers can suddenly stand out for all the wrong reasons.

Fortunately, there are simple solutions. Read on for three quick, easy fixes that will make your home look instantly more polished.

1. Make Outlets and Light Switches Disappear — Or Stand Out

Nothing ruins a beautifully painted wall faster than bright white outlet covers. Since paintable outlet covers cost only a couple of dollars, swapping them out is a no-brainer. Paint them the same color as the wall and watch the magic happen as they visually recede.

Related: Design Trends Homeowners Regret the Most, According to Interior Designers

Alternatively, you could turn your light switches into a design moment. While the metal switches you see in high-end interiors are undeniably chic, they often come with an eye-popping price tag — especially if you’re outfitting an entire home. A stylish middle ground, Lorei says, is mother-of-pearl push-button switches paired with elegant cover plates. They offer a classic feel and add subtle texture, all without blowing your budget.

Advertisement

2. Tone Down Can Lights

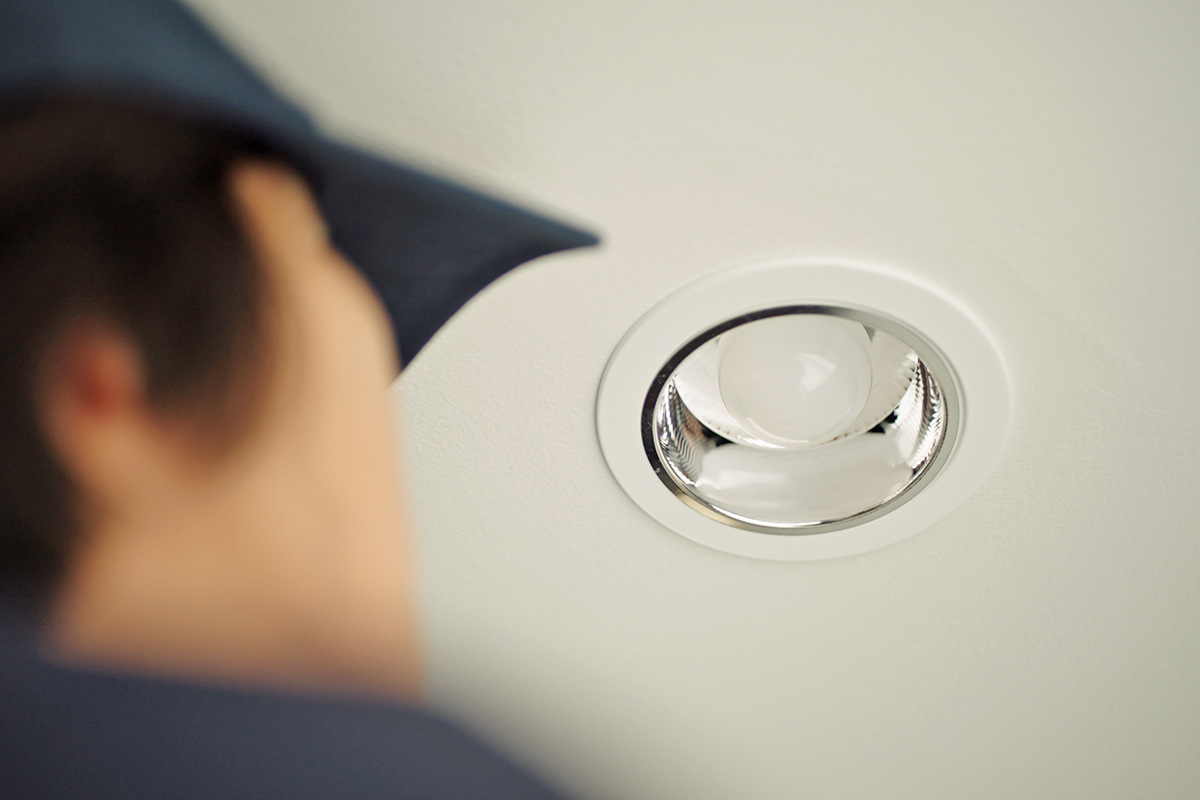
Take a look at your ceiling. The white plastic trim around recessed lights can really pop against a painted ceiling — and rarely in a good way. The quickest fix is to paint the trim to match the ceiling, even if it’s only a slightly different shade of white. For a sleeker, more modern look, consider switching to trimless cans.

Another solution is to eliminate them entirely. Many modern homes are “overlit,” according to Lorei, meaning you may be able to nix recessed cans in favor of layered ambient lighting. Floor lamps, sconces, table lamps, and even candles provide a far more inviting glow. 

3. Camouflage Vents and Registers

Decorative vent covers exist, but finding the right size and style can be tricky. Mud-in (or flush-mounted) options offer a sleek, custom look but are difficult to install and best left to the professionals. The easiest DIY option is to paint vents and registers the same color as your walls or ceiling. They’ll blend in seamlessly, no longer drawing unwanted attention.

Advertisement
Featured Image Credit:  pocketlight/ iStock | Updated  Feb 10, 2026 |
Megan McCarty
Writer
Megan McCarty is a Los Angeles-based writer who covers the fun stuff: design, travel, wellness, beauty, and fashion. She has written for publications including Domino, The Spruce, MyDomaine, Bustle, and Rue Magazine. Her life rules include, but are not limited to, zipper when merging, contribute to your IRA, and do the nice thing.
This article is for general informational purposes only.
Featured Image Credit:  pocketlight/ iStock | Updated  Feb 10, 2026 |
Advertisement
Home Improvement 3m read
0

Why You Should Always Put Tape on Your Drill Bit

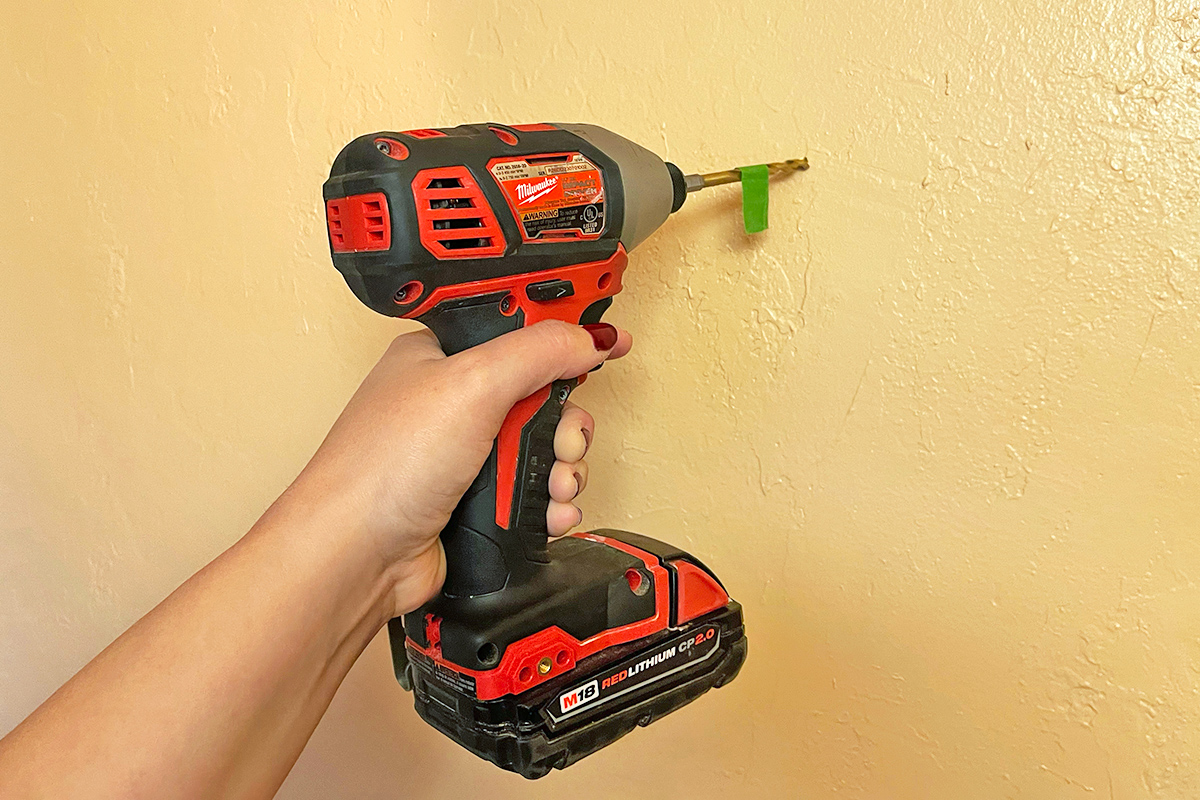
Some DIYers don’t take proper precautions before drilling into a wall or cabinet. For example, there are those who think they can just eyeball it, only to drill straight through the drywall and hit a hidden gas pipe. To avoid a potential disaster, it’s a good idea to use a visual aid that warns you when to stop. One easy way to do this is by wrapping a bit of tape around the drill bit — here’s how it works.

All featured products and deals are selected independently and objectively by the author. House Outlook may receive a share of sales via affiliate links in content.

Some DIYers don’t take proper precautions before drilling into a wall or cabinet. For example, there are those who think they can just eyeball it, only to drill straight through the drywall and hit a hidden gas pipe. To avoid a potential disaster, it’s a good idea to use a visual aid that warns you…

A Bit of Advice

The first step is to determine the exact depth of the hole you need to drill. This is typically done by measuring the hardware being inserted — such as a screw, anchor, or dowel — and transferring that measurement onto the drill bit using a tape measure. Mark the stopping point with a permanent marker or pencil, then wrap a piece of painter’s tape around the bit at that point. If you don’t have painter’s tape on hand, other durable options such as electrical tape or duct tape are solid alternatives, though they may leave behind a sticky residue.

Related: How To Drill Into Drywall Without Making a Mess

For example, if you need to drill exactly 2 inches into the wall, measure 2 inches from the tip of the drill bit and wrap it with painter’s tape, leaving only that 2-inch section exposed. The tape acts as a visual “stop sign,” alerting you when to stop drilling. In other words, you will know you’ve drilled 2 inches deep as soon as the tape sits flush against the wall. Because the edge of the tape can be difficult to see, try adding a 1-inch flag that extends from the bit, providing a more obvious visual marker for when you’ve drilled to your desired depth.

Advertisement

Beyond reducing the risk of drilling into hidden wires or pipes, this method ensures holes of a consistent depth. If you need to drill 10 holes that are each 2 inches deep, a little painter’s tape guarantees they will be equal depths without the need to remeasure every time.

A word to the wise: Don’t press too hard while drilling, as the extra pressure can cause the tape to slide up the drill bit ever so slightly. Maintain a steady, careful hand to ensure the tape stays put and the method remains effective.

Advertisement
Featured Image Credit:  Kelsey Morrison/ House Outlook Editor | Updated  Feb 10, 2026 |
Bennett Kleinman
Staff Writer
Bennett Kleinman is a New York City-based staff writer for Inbox Studio, covering topics for several brands including House Outlook and Better Report. He previously contributed to television programs such as "Late Show With David Letterman" and "Impractical Jokers," and digital publications like The Onion. Bennett is also a devoted New York Yankees and New Jersey Devils fan, and thinks plain seltzer is the best drink ever invented.
This article is for general informational purposes only.
Featured Image Credit:  Kelsey Morrison/ House Outlook Editor | Updated  Feb 10, 2026 |
Advertisement
Cleaning 3m read
0

Clean Hood Vent Filters Without Lifting a Finger

Range hoods are easy to overlook, but they’re among the most important appliances in your kitchen. These vents are designed to capture smoke, steam, and airborne grease to improve indoor air quality and prevent sticky buildup on your cabinets. In short, if you have a stove, you need a range hood. While the suction draws away pesky particles with ease, cleaning the filters that trap them is anything but effortless.

All featured products and deals are selected independently and objectively by the author. House Outlook may receive a share of sales via affiliate links in content.

Range hoods are easy to overlook, but they’re among the most important appliances in your kitchen. These vents are designed to capture smoke, steam, and airborne grease to improve indoor air quality and prevent sticky buildup on your cabinets. In short, if you have a stove, you need a range hood. While the suction draws…

Don’t Fret Over Greasy Filters

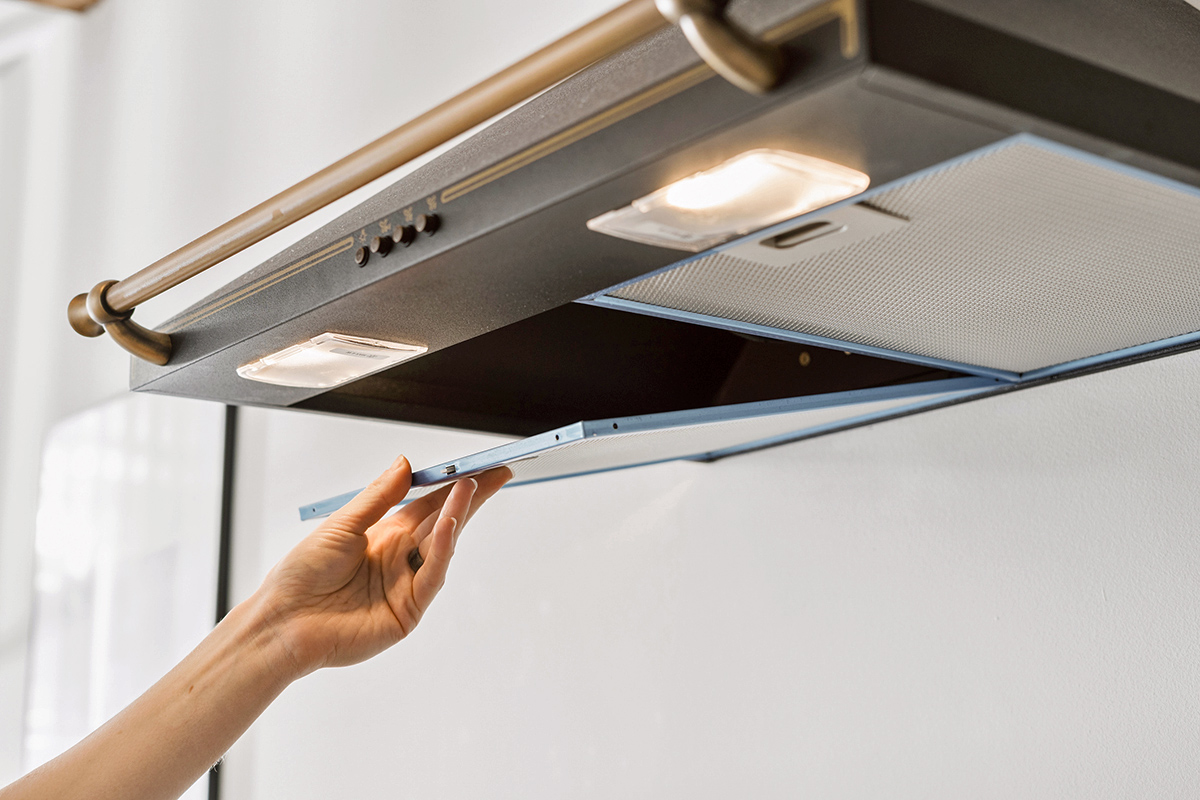
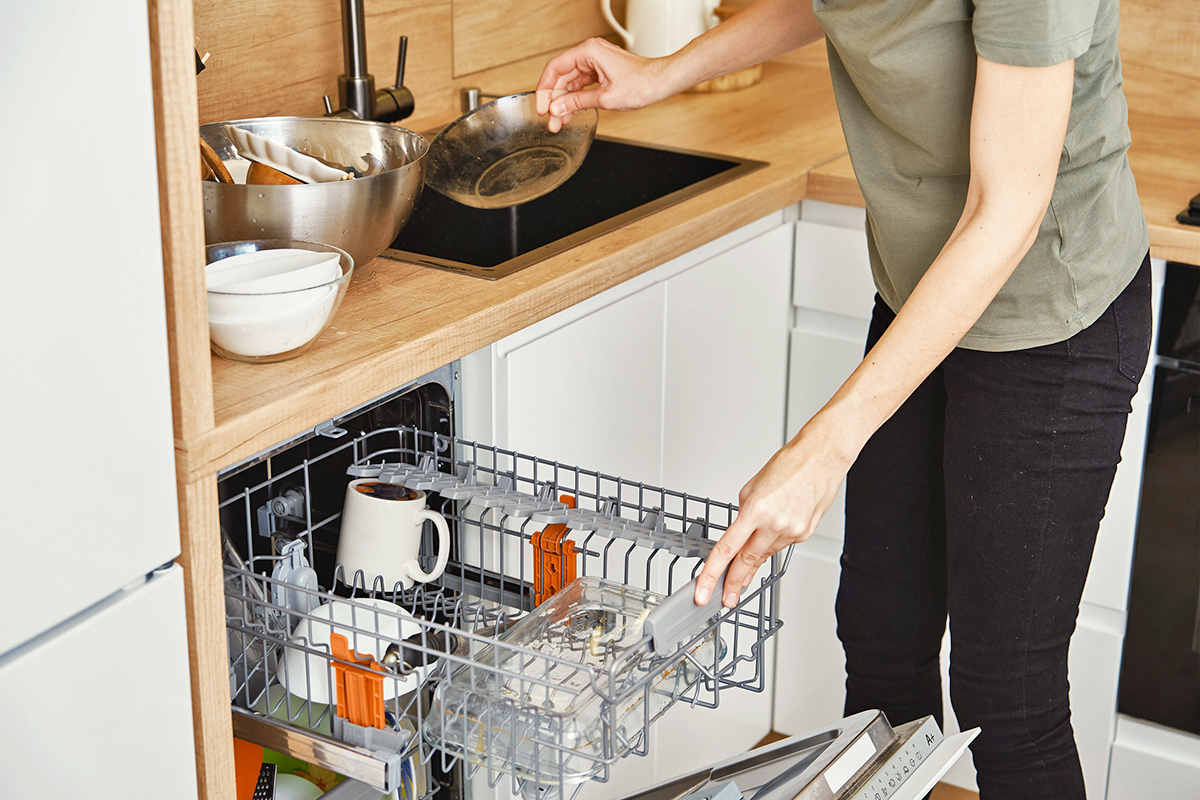
Cleaning your range hood filters is one of the most important things you can do to prevent fire hazards and maintain your home’s air quality. However, it’s not enough to simply wipe down these filters. Because they’re designed to trap oil (and do so quite effectively), grease gets stuck deep inside the mesh, making them difficult (and annoying) to scrub clean. What many people don’t realize is that you can often just pop these filters into the dishwasher and move on with your life.

Related: 9 Forgotten Household Filters You Need To Clean or Replace
Maintenance Tip

Clean your range hood filters every one to three months to ensure peak performance and better air quality throughout the home. If you do a lot of high-heat cooking or deep frying, consider cleaning the filters every two to four weeks. If you cook infrequently, once every six months is likely enough.

Advertisement

Let the Dishwasher Do the Work

Just like it does for your dirty dishes, a dishwasher can work magic on a filter’s stubborn grease and grime. The high-pressure jets and concentrated detergent break down heavy buildup far better than hand-scrubbing, ensuring your range hood runs both efficiently and effectively.

It’s best to wash the filters alone to prevent cross-contamination. Place them on the bottom rack of the dishwasher, spaced far apart and angled slightly downward. Select a cycle with a higher water temperature and longer wash time to cut through the grease. Once the dishwasher cycle is complete, check the filters for any remaining residue. A rinse under hot water may be necessary before drying them completely and reinstalling.

This method works well for many range hood filters, though there are some exceptions. If a filter is made of aluminum or contains charcoal, it’s not dishwasher-compatible. Harsh detergents can cause aluminum filters to discolor or oxidize, so you’ll want to clean them by hand with hot water and grease-cutting soap. (If you’re renting and find that the old, crusty aluminum filters in your range hood are beyond saving, you can also replace them.) Charcoal filters cannot be washed at all and must be replaced periodically. Refer to the owner’s manual for your specific model’s maintenance schedule.

Advertisement
Featured Image Credit:  brizmaker/ iStock | Updated  Feb 3, 2026 |
Jessie Quinn
Writer
Jessie Quinn is a Los Angeles-based lifestyle journalist with words published in PEOPLE, StyleCaster, Apartment Therapy, The Spruce, Byrdie, and more. She has a Bachelor's Degree in fashion journalism from Academy of Art University and her work spans across many categories, including style, beauty, home, health, crafts, and more.
This article is for general informational purposes only.
Featured Image Credit:  brizmaker/ iStock | Updated  Feb 3, 2026 |
Advertisement
Food & Drink 2m read
0

A Genius Way To Store Leftover Cake

From birthdays to bridal showers, any celebration is better with a little (or a lot of) cake. Whether you baked it from scratch or bought it from the grocery store, cutting and serving it to your guests is generally pretty easy. Storing the leftovers is another story. Do you leave the cake in that flimsy cardboard box or the disposable, comically loud plastic container to inevitably dry out? Or cover it in plastic wrap that’s sure to smudge the icing? A genius hack using a basic, reusable food storage container is about to make your life easier.

All featured products and deals are selected independently and objectively by the author. House Outlook may receive a share of sales via affiliate links in content.

From birthdays to bridal showers, any celebration is better with a little (or a lot of) cake. Whether you baked it from scratch or bought it from the grocery store, cutting and serving it to your guests is generally pretty easy. Storing the leftovers is another story. Do you leave the cake in that flimsy…

The Best Way To Store Leftover Cake

Storing leftover cake in its original packaging — especially a cardboard box — is a risky move. More often than not, the packaging isn’t airtight. In just a matter of days, your cake can dry out, turn stale, or, worse, absorb other food odors in the fridge.

An easy way to store leftover cake is to use a food storage container, but not in the way you’d expect. You could try to scoop some slices into the container the traditional way, but there’s a chance they’ll tip over or the frosting will smear.

For this hack, choose a food storage container tall enough to house your cake without squishing the top. This trick is particularly useful for stashing individual slices, allowing you to use the standard containers you already have on hand instead of hunting for an oversized one.

Advertisement
Related: The Baking Trick for Perfectly Flat Cake Layers

Take the lid of the food storage container and flip it over so the grooves are facing up; this will serve as the base. Slide the leftover cake onto the lid, then secure the container onto the lid like a dome. Think of it as a DIY cake stand, but with a much tighter seal. Your leftovers will stay moist and delicious, rather than drying out in a cardboard box.

Advertisement
Featured Image Credit:  Karolina Grabowska/ Unsplash+ | Updated  Feb 3, 2026 |
Pauline Lacsamana
Writer
Pauline Lacsamana is a freelance writer and editor who specializes in commerce, home, design, and lifestyle. She has bylines in The Spruce, Business Insider, U.S. News & World Report, Hunker, MyDomaine, Parade, and more.
This article is for general informational purposes only.
Featured Image Credit:  Karolina Grabowska/ Unsplash+ | Updated  Feb 3, 2026 |
Advertisement
Gardening 3m read
0

Cut Flowers Perfectly To Fit Any Vase

Creating a floral arrangement is one of those things that looks much easier than it actually is. It seems as simple as placing a few flowers into a vase, but in reality, there’s an art to it — you have to consider everything from the vase itself to the exact length and angle at which the stems are cut. Let’s start with the latter.

All featured products and deals are selected independently and objectively by the author. House Outlook may receive a share of sales via affiliate links in content.

Creating a floral arrangement is one of those things that looks much easier than it actually is. It seems as simple as placing a few flowers into a vase, but in reality, there’s an art to it — you have to consider everything from the vase itself to the exact length and angle at which…

How To Cut Stems To Fit Any Vase

As much as we’d love to have a vast collection of vases, most of us rotate through a trusty few. If that’s the case for you, this handy trick will save you a lot of guesswork.

To cut stems for a perfect fit in almost any vase, use the golden ratio: Ideally, your arrangement should be about 1.5 to 2 times the height of the vase. The stems should be long enough to reach the water and tall enough for the blooms to sit above the rim. If they’re over that sweet spot, it’s time to break out the shears. For example, if you have a 7-inch-tall vase, you would multiply that height by 1.5 to get 10.5 inches — or by 2 to get 14 inches. So, the length of your stems should be roughly 11 to 14 inches for a vase of this size.

While you could pull out a ruler, most florists simply eyeball it. Hold each stem against the outside of the vase so the base of the flower head sits about half a vase-length above the rim. This places the bottom of the bloom at about 1.5 times the vase height, with the petals extending slightly beyond that line.

Advertisement

Don’t just cut straight across the stem and call it a day. Instead, use sharp shears to trim each one at a 45-degree angle. This allows for better water absorption, making sure your bouquet stays hydrated. Next, remove any leaves that fall below the waterline to prevent bacterial growth. Once the stems are cut to the perfect length and angle, you can begin designing an arrangement that looks like it came straight from the florist.

Advertisement
Advertisement
Cleaning 3m read
0

Are You Overworking Your Dishwasher by Doing This?

Sometimes our appliances break down because we work them too hard, but dishwashers are different. They actually perform better when we stop trying to do their job for them. If your post-dinner ritual involves standing over the kitchen sink, spraying every last crumb off your plate, you’re about to save a lot of time — and water.

Sometimes our appliances break down because we work them too hard, but dishwashers are different. They actually perform better when we stop trying to do their job for them. If your post-dinner ritual involves standing over the kitchen sink, spraying every last crumb off your plate, you’re about to save a lot of time —…

Let Your Dishwasher Do the Dishes

Maybe we think we’re helping by giving the machine less work, or maybe we’re just stuck in the old-school habit of washing dishes by hand before arranging them on the rack. Whatever the reason, if you have a modern dishwasher made within the last 15 years, experts recommend that you stop rinsing before loading. Why? Rinsing too much can actually prevent your dishwasher from working properly.

Related: 12 Things You Should Never Put in the Dishwasher

Modern dishwashers include optical sensors that determine exactly how much water, heat, and force are needed to clean a load effectively. In short, they use beams of light to gauge how cloudy the water is with food particles. Rinsing your dishes not only wastes time and water but can also fool the sensors into detecting a lighter load. This may prompt the appliance to use less water, lower the temperature, and shorten the cycle time, resulting in less-than-spotless dishes. Instead, scrape large food scraps into the bin, add your favorite detergent, and let your dishwasher handle the rest.

Advertisement

How To Help Your Dishwasher

There are a couple of ways to ensure your dishwasher works its magic. While you don’t need to rinse with most modern dishwashers, you should still scrape away large food scraps that could be hard to spray off or clog the filter. Think bones, seeds, pasta, rice, potato peels, eggshells, or anything that’s particularly fatty or greasy. It’s also a good idea to clean your dishwasher’s filter and spray arms every couple of months — or sooner if the machine doesn’t seem as powerful as usual.

Of course, you should always consult your specific dishwasher’s instructions before you decide to skip the rinse. An owner’s manual outlines the best practices for getting the most out of your appliance. If you discarded or misplaced yours, you can usually find a PDF version on the manufacturer’s website or contact their customer service team for guidance.

Advertisement
Advertisement
Food & Drink 3m read
0

This Trick Stretches Ground Beef Without Sacrificing Flavor

Ground beef is a staple in many American kitchens, and for good reason. It’s highly adaptable, lending itself to countless recipes, from pasta bolognese to shepherd’s pie. It’s also easily divided up into smaller portions, making it easy to cook some now and save the rest in the freezer for later.

All featured products and deals are selected independently and objectively by the author. House Outlook may receive a share of sales via affiliate links in content.

Ground beef is a staple in many American kitchens, and for good reason. It’s highly adaptable, lending itself to countless recipes, from pasta bolognese to shepherd’s pie. It’s also easily divided up into smaller portions, making it easy to cook some now and save the rest in the freezer for later.

In the past, ground beef was significantly cheaper than other meats, which helped make it a household favorite. According to data from the Bureau of Labor Statistics, however, the price of ground beef rose 15.5% between December 2024 and December 2025, suggesting it’s no longer the ultra-cheap protein it once was. By comparison, prices for poultry, pork, and seafood ticked up 1.4%, 0.8%, and 4.4%, respectively, during the same period.

The good news is you can stretch a pack of ground beef without sacrificing flavor by using a low-cost plant protein: lentils.

Related: The Meat-Freezing Hack That Saves Time and Storage Space

Beef (and Lentils): It’s What’s for Dinner

Lentils are small but mighty legumes that are rich in protein, fiber, and iron. Because of their nutritional benefits and mild flavor, lentils are commonly used as a meat substitute in American vegetarian cooking. But you don’t have to be a vegetarian to enjoy lentils. They are a reliable ingredient for stretching ground beef, making it go further while remaining virtually unnoticeable to those eating it.

Here’s how to do it: Use 1 cup of dried (uncooked) lentils for every 1 pound of ground beef. (This may seem like a small amount of lentils, but remember that 1 cup of dried lentils yields about 2 1/2 cups once cooked.) For example, if you’re making 2 pounds of ground beef, you will need 2 cups of dried lentils.

Advertisement

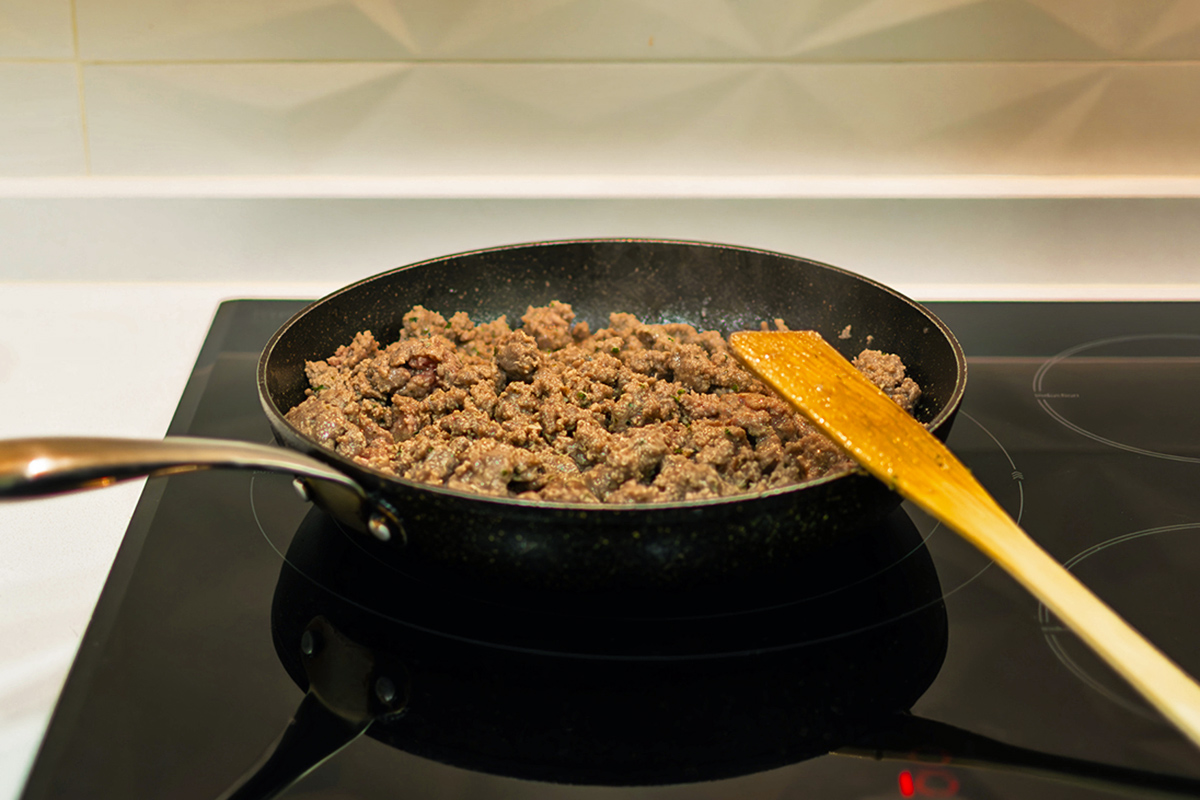
Cook the lentils according to the package directions until they are soft but not mushy; if a time range is listed, err on the shorter side. Next, brown the ground beef in a skillet and drain the excess fat. Once the meat is ready, stir in the cooked lentils along with your desired seasonings. You can also add a small amount of liquid, such as water or broth, and simmer for about 10 minutes to let the flavors meld. Then, serve as usual. This mixture works well for nearly any recipe that calls for ground beef, including meatloaf, chili, pasta sauce, tacos, casseroles, and more.

Tips and Tricks

Brown or green lentils are the best choice here because their mild flavor profile allows them to soak up the other flavors they’re cooked with. Avoid using red lentils, which have a more distinct taste and a texture that doesn’t blend well with ground beef. Also, keep in mind that lentils can cause digestive issues for some people. If you’re cooking for others, ask about their food sensitivities before incorporating the legumes into your meal.

Advertisement
Featured Image Credit:  Maria Sonia Salvador Verdugo/ iStock | Updated  Feb 3, 2026 |
Allegra Ringo
Writer
Allegra Ringo is a California-based writer who has written for publications including Reductress, The Hard Times, VICE, and The Atlantic. She loves sparkling water and old Chihuahuas with hardly any teeth, like her dog Pistachio.
This article is for general informational purposes only.
Featured Image Credit:  Maria Sonia Salvador Verdugo/ iStock | Updated  Feb 3, 2026 |
Advertisement
Home Improvement 3m read
0

This Food Coloring Trick Can Catch a Toilet Leak

If you’ve ever attempted to figure out if your toilet is leaking, you know how difficult it can be to diagnose with the naked eye. But ignoring the problem leads to wasted water and higher utility bills, which is why you want to address it as soon as possible. Fortunately, a common pantry staple can help you do just that. Here’s how a few drops of food dye can solve this bathroom headache.

All featured products and deals are selected independently and objectively by the author. House Outlook may receive a share of sales via affiliate links in content.

If you’ve ever attempted to figure out if your toilet is leaking, you know how difficult it can be to diagnose with the naked eye. But ignoring the problem leads to wasted water and higher utility bills, which is why you want to address it as soon as possible. Fortunately, a common pantry staple can…

A Drop in the Bucket

First, grab a bottle of liquid food coloring. Opt for a darker shade like blue or green rather than yellow, which can be difficult to see against the white bowl. It’s also worth noting that red dye can sometimes stain older or worn porcelain, so stick to blue or green if you want to play it safe.

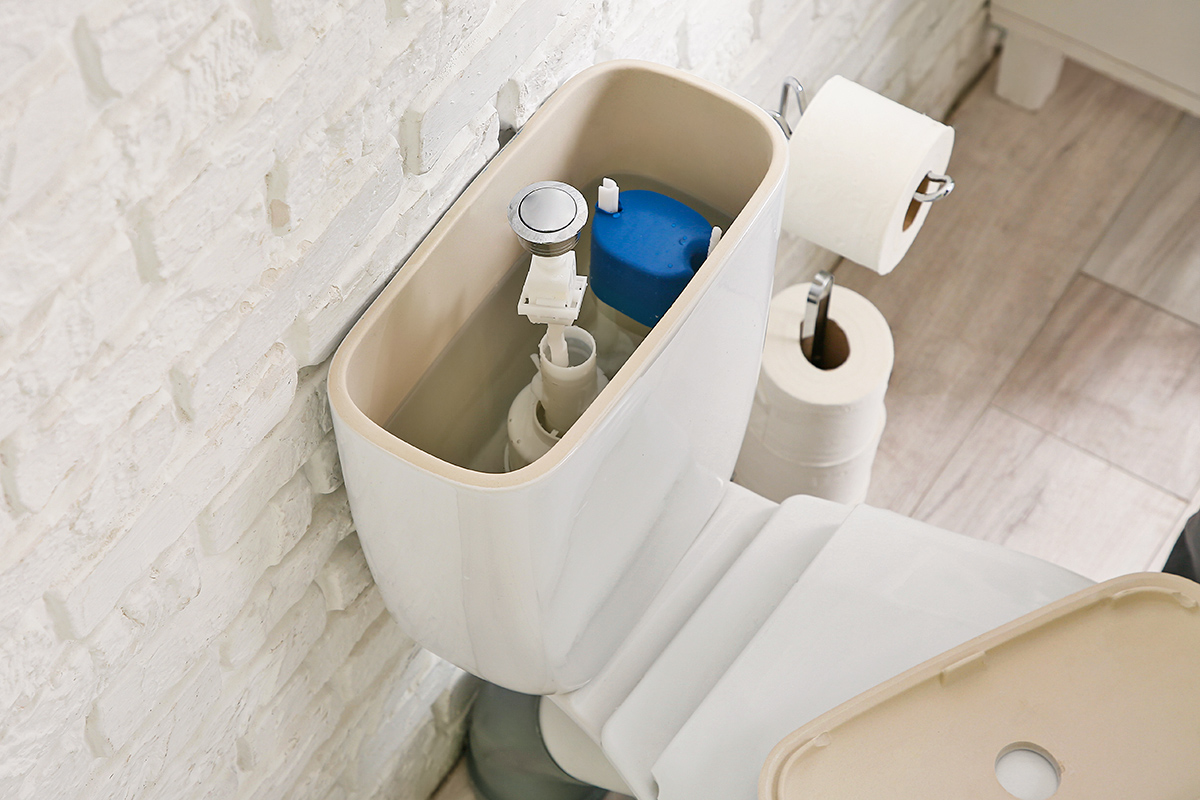
After removing the toilet tank lid, squeeze 10 to 15 drops of food coloring directly into the tank water. It’s important to put these drops into the tank, not the bowl. Doing the latter will invalidate the experiment before it even begins.

Let the dye sit for 20 minutes before checking the toilet bowl. If the water has changed from clear to tinted, your toilet probably has a leak. This means that the flapper valve inside the tank — which is meant to create a tight seal that keeps water from draining into the bowl — likely needs replacing. If the water in the bowl stays clear, however, your flapper is working correctly and there’s no cause for concern.

Advertisement

Fix the Flapper

If you’ve identified a leak, the next step is to replace the flapper valve. Flappers typically come in 2-inch, 3-inch, and 4-inch sizes, so consult the owner’s manual to determine which fit is right for your toilet. These parts cost about $10 each and are easy to replace yourself — installation takes only a few minutes.

Related: Why You Should Clean Your Toilet With Ice

Once the flapper has been replaced, repeat the food coloring test. Ideally, this will result in a clear toilet bowl, confirming that the leak has been resolved. If the dye still seeps through, however, you may need to contact a plumber for further assistance.

Advertisement
Featured Image Credit:  Pixel-Shot/ Adobe Stock | Updated  Feb 3, 2026 |
Bennett Kleinman
Staff Writer
Bennett Kleinman is a New York City-based staff writer for Inbox Studio, covering topics for several brands including House Outlook and Better Report. He previously contributed to television programs such as "Late Show With David Letterman" and "Impractical Jokers," and digital publications like The Onion. Bennett is also a devoted New York Yankees and New Jersey Devils fan, and thinks plain seltzer is the best drink ever invented.
This article is for general informational purposes only.
Featured Image Credit:  Pixel-Shot/ Adobe Stock | Updated  Feb 3, 2026 |
Advertisement
Decorating 3m read
0

A Designer Trick for Big Furniture on a Budget

When furnishing a home, choosing pieces isn’t simply a matter of whether you like them or not, though it would be nice if decorating were that straightforward. You have to consider material, color, silhouette, style, and price. Then there’s scale. Finding furniture that’s appropriately sized for your space isn’t always as easy (or as budget-friendly) as it sounds.

All featured products and deals are selected independently and objectively by the author. House Outlook may receive a share of sales via affiliate links in content.

When furnishing a home, choosing pieces isn’t simply a matter of whether you like them or not, though it would be nice if decorating were that straightforward. You have to consider material, color, silhouette, style, and price. Then there’s scale. Finding furniture that’s appropriately sized for your space isn’t always as easy (or as budget-friendly)…

Dining room credenzas, bookcases, media consoles, bedroom dressers, and storage cabinets are often among the most expensive pieces in a home. If you’re struggling to fill a long wall or anchor a large space, consider this designer-approved trick: Buy two of the same piece and place them side-by-side. This simple solution adds substantial storage and visual weight where you need it most, all while potentially saving you money. 

Why the Side-By-Side Furniture Solution Works

Instead of investing in one extra-long sideboard, dresser, or media console, purchasing two smaller-scale pieces often costs less and offers more flexibility. When placed directly next to each other, the repetition creates symmetry that feels intentional and elevated. The eye will read the pair as a single, expansive piece rather than two separate units. 

Related: 25 Hacks Only Interior Designers Know

This trick works especially well in dining rooms and living rooms, where elongated furniture helps ground the space and balance other large-scale elements. Choosing clean-lined designs with flat sides is key, so they sit flush together to give the illusion of a continuous unit.

Advertisement

It’s Functional and Flexible

Beyond the aesthetics, the functionality of doubling up is a major win. Two pieces often provide more usable storage than one long cabinet, offering better organization through additional drawers and compartments. This allows you to group items more efficiently, such as keeping table linens and cocktail glasses in a dining room credenza or electronics and board games in a media console.

For a seamless look, lean on styling. Treat the two pieces as one unit, ignoring the seam. Center your artwork, mirror, or television across the full width of the arrangement and style the surface with balance in mind. Consider placing matching lamps at either end for symmetry, or arranging a single long tray along the center to physically and visually connect the pieces.

Add Personality With Custom Details

A new console — or two — can benefit from a personal touch. Swap out the existing hardware for pulls with patina or character to add age and charm on a budget. This small upgrade instantly unifies the pair in a one-of-a-kind way.

Advertisement
Featured Image Credit:  Lisa Anna/ Unsplash | Updated  Feb 3, 2026 |
Megan McCarty
Writer
Megan McCarty is a Los Angeles-based writer who covers the fun stuff: design, travel, wellness, beauty, and fashion. She has written for publications including Domino, The Spruce, MyDomaine, Bustle, and Rue Magazine. Her life rules include, but are not limited to, zipper when merging, contribute to your IRA, and do the nice thing.
This article is for general informational purposes only.
Featured Image Credit:  Lisa Anna/ Unsplash | Updated  Feb 3, 2026 |
Advertisement
Decorating 2m read
0

Why the ‘Couch Tray’ Is Your New Must-Have

If you’re a fan of the “purse bowl” — a catchall spot where everyday essentials (such as lip balm, keys, and sunglasses) land so you can swap easily between a crossbody and a clutch without losing your wallet in the shuffle — it’s time to embrace its living room counterpart, the couch tray. This simple accessory blends practicality with style, solving some of the most frequent frustrations of lounging at home. With a couch tray, everything you need stays within reach, so you never have to crawl out from under your cozy blanket.

All featured products and deals are selected independently and objectively by the author. House Outlook may receive a share of sales via affiliate links in content.

If you’re a fan of the “purse bowl” — a catchall spot where everyday essentials (such as lip balm, keys, and sunglasses) land so you can swap easily between a crossbody and a clutch without losing your wallet in the shuffle — it’s time to embrace its living room counterpart, the couch tray. This simple…

What Is a Couch Tray?

A couch tray is a structured surface, often made of wood or acrylic, designed to sit securely on your sofa. Think of it like a personal landing zone for the items you reach for most — whether you’re working from home or winding down for the night. A couch tray is proof that the smallest additions often make the biggest difference in our homes.

Remotes will no longer disappear between couch cushions, and essentials like lip balm and hand cream stay within arm’s reach. A pen and journal can live there for when inspiration strikes, alongside a knitting project or crossword puzzle for those much-needed screenless breaks. Even charger cords and books feel more intentional when corralled in one stylish spot.

Related: The Right Way To Position a Sectional, According to a Designer

Beyond its practical benefits, a couch tray can elevate the look of your living room. It introduces a bit of structure to plush upholstery, creating contrast with soft pillows and throws. It’s equal parts organization and decor.

Advertisement

How To Style a Couch Tray

A couch tray shouldn’t resemble a junk drawer. To keep it looking polished, limit the items to your five most important essentials and one decorative touch. A small bud vase or mini-framed photo adds personality without crowding valuable space. Rotate items seasonally so the tray feels fresh and functional.

Advertisement
Featured Image Credit:  Tabitazn/ iStock | Updated  Jan 27, 2026 |
Megan McCarty
Writer
Megan McCarty is a Los Angeles-based writer who covers the fun stuff: design, travel, wellness, beauty, and fashion. She has written for publications including Domino, The Spruce, MyDomaine, Bustle, and Rue Magazine. Her life rules include, but are not limited to, zipper when merging, contribute to your IRA, and do the nice thing.
This article is for general informational purposes only.
Featured Image Credit:  Tabitazn/ iStock | Updated  Jan 27, 2026 |