Advertisement
Organizing 3m read
0

The Secret to a Tidy Home? Embrace the Clutter Closet

Keeping your house clean is one thing; keeping it tidy is something else entirely. If you’ve tried every decluttering hack under the sun and still can’t get away from all of your stuff (even after getting rid of items you no longer need), it might be time to embrace the clutter closet.

Keeping your house clean is one thing; keeping it tidy is something else entirely. If you’ve tried every decluttering hack under the sun and still can’t get away from all of your stuff (even after getting rid of items you no longer need), it might be time to embrace the clutter closet.

A clutter closet is a dedicated space with a door, used to store all the miscellaneous stuff that doesn’t fit or belong anywhere else. It can be an entire extra bedroom that you transform into a walk-in closet and storage area, or even a small hall closet — whatever you have space for. And the best part? You don’t have to worry about home decor or making it look aesthetically pleasing; you can simply close the door and hide everything away.

Conceal the Chaos

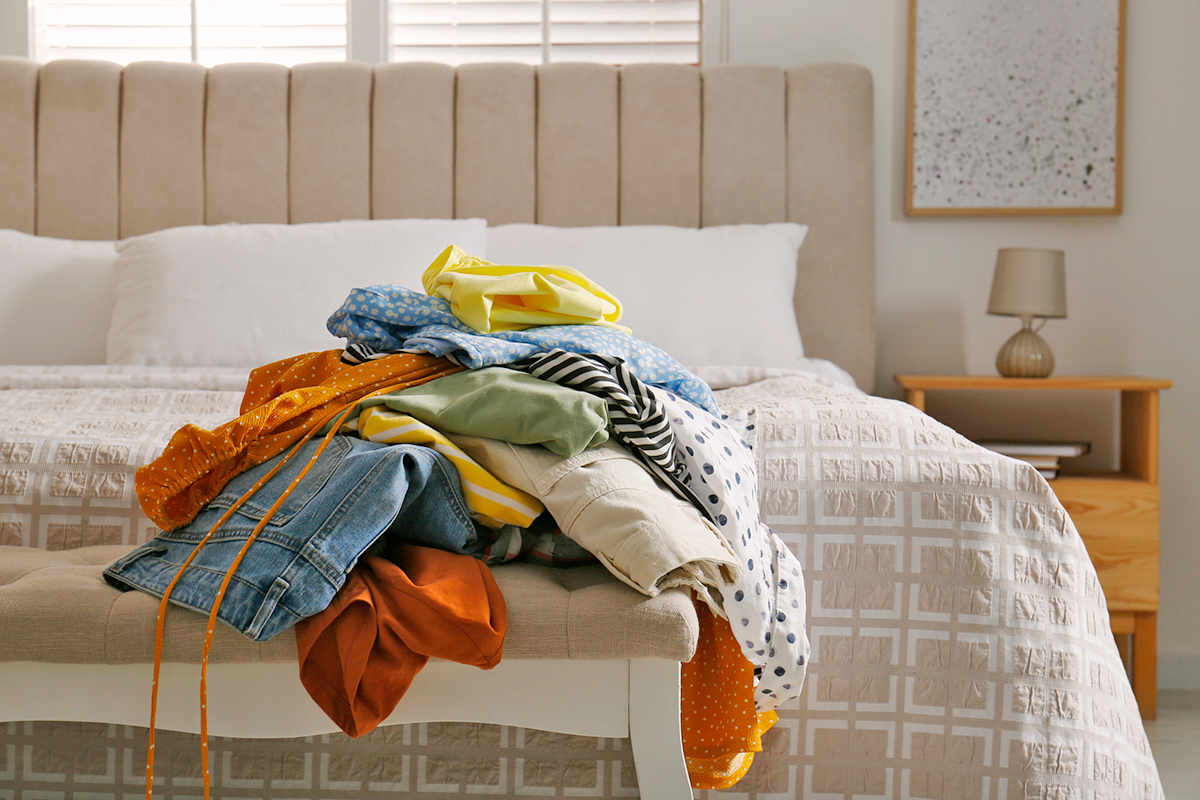
This concept comes to us from Medea Giordano, the former commerce editor at Better Report, who transformed her extra bedroom into a clutter closet. “No matter how clean your house actually is, having random odds and ends around looks messy. At some point, an organized mess is still a mess,” Giordano says.

Before embracing this approach (which, admittedly, is more of a commitment), Giordano says she tried the basket trick, which involves collecting all miscellaneous items into a basket at the end of the day to be put away later. “It keeps the mess off surfaces and gives you time to figure out what to do with it,” she explains. After having a baby, however, her single basket became many baskets, and she realized she didn’t need a container for her clutter — she needed a room.

Advertisement

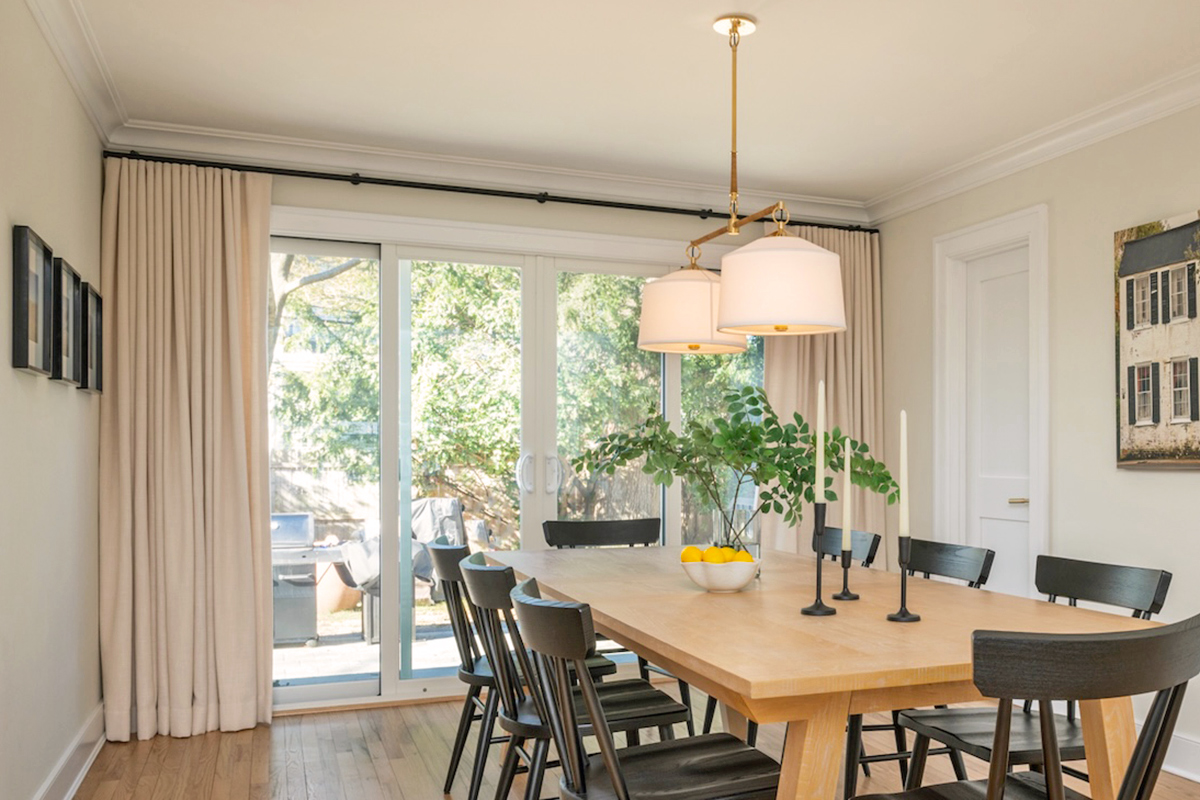
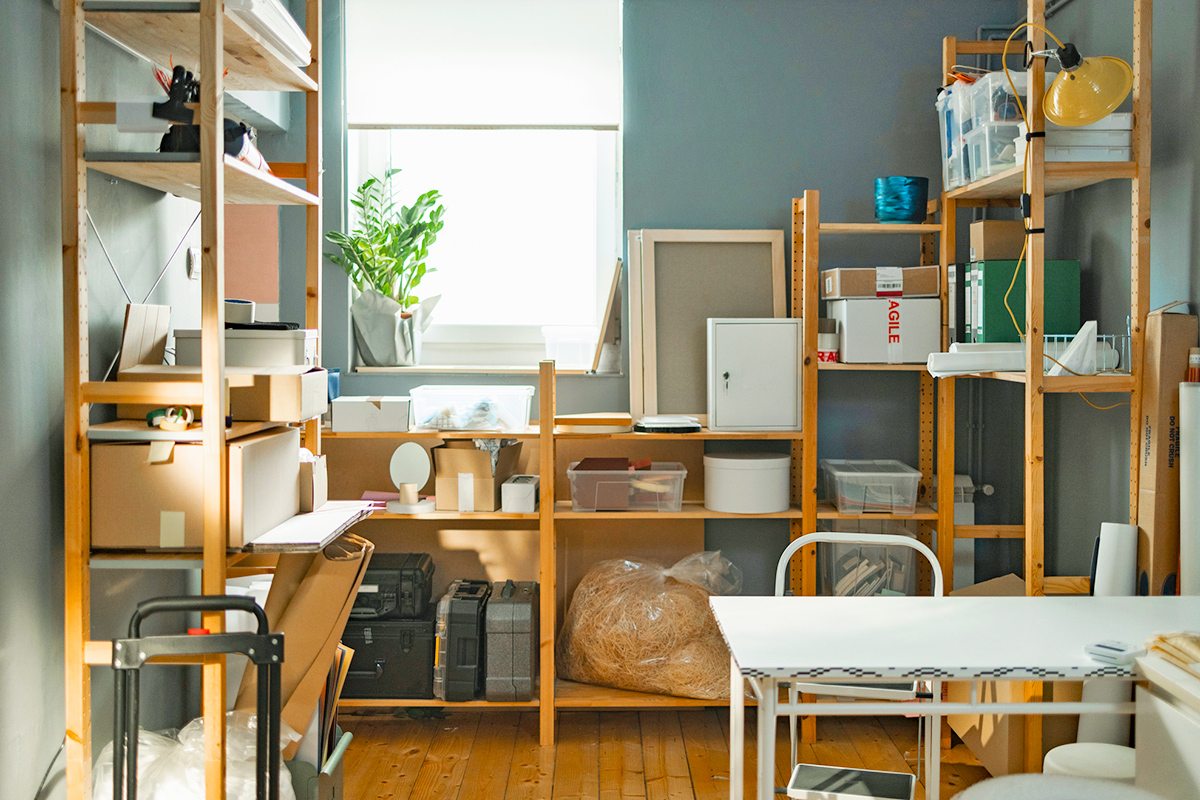
With some extra space to spare, Giordano and her husband turned an unused dining room with a door into a clothes closet and storage space. “Stackable bins hold my camera accessories, my baby’s swim diapers and SPF, the pump to my yoga ball, and other random stuff that never seems to have a good home, but I don’t want to pack away in a box in the basement,” Giordano says. The goal isn’t for the room to be beautiful, but to be functional. “It’s not pretty, but everything has a place that I can easily see and access.”

Related: The Smartest Spot To Declutter First (It’s Not Where You Think)

With a room (or a closet, if you don’t have the space) dedicated to clutter, Giordano says the rest of her house “finally feels tidy, like a place I can relax and have people over.”

Advertisement
Featured Image Credit:  FreshSplash/ iStock | Updated  Sep 5, 2025 |
Jessie Quinn
Writer
Jessie Quinn is a Los Angeles-based lifestyle journalist with words published in PEOPLE, StyleCaster, Apartment Therapy, The Spruce, Byrdie, and more. She has a Bachelor's Degree in fashion journalism from Academy of Art University and her work spans across many categories, including style, beauty, home, health, crafts, and more.
This article is for general informational purposes only.
Featured Image Credit:  FreshSplash/ iStock | Updated  Sep 5, 2025 |
Advertisement
Home Improvement 3m read
0

A Surprisingly Easy Way To Locate Wall Studs

Unless you’re visiting a Texas cattle farm, studs can be hard to find. This is especially true when you need to hang something heavy, such as a television or a framed piece of art. When nailing or drilling into the wall, wooden wall studs provide essential support, but because they’re hidden behind drywall, you’ll need a tool to figure out where they are. Instead of buying a stud finder, there’s an even easier way to locate them with minimal effort and cost.

All featured products and deals are selected independently and objectively by the author. House Outlook may receive a share of sales via affiliate links in content.

Unless you’re visiting a Texas cattle farm, studs can be hard to find. This is especially true when you need to hang something heavy, such as a television or a framed piece of art. When nailing or drilling into the wall, wooden wall studs provide essential support, but because they’re hidden behind drywall, you’ll need…

A Magnetic Attraction

You won’t believe just how easy it is to find wooden studs concealed behind drywall. All you’ll need is a magnet — and yes, we’re fully aware that wood isn’t magnetic. This trick targets the screw heads that hold the studs and plaster drywall together.

You don’t need a special magnet, but it’s important to use one that’s powerful enough to find any hidden screws. These small rare earth magnets are a great choice, as their pushpin-like shape makes them easy to grip and move around. We also recommend buying a set instead of just one magnet, for a reason we’ll explain momentarily.

Putting Magnets To Work

Take a magnet and move it around the wall until you feel a magnetic pull, then leave it in place. Just like that, you’ve almost certainly found a wall stud with a screw in it. Next, take a few more magnets and place them in other magnetic areas to create a vertical line. This will give you a much clearer idea of where the entire stud runs from floor to ceiling.

Advertisement

This trick serves two main purposes. First, it tells you the exact location of the wooden stud, which gives you an excellent idea of where to hang those heavier objects. Just be careful not to drill directly into the spot where the magnet was, or you risk hitting the screw. Instead, go a few centimeters above or below the spot so you drill directly into the wood.

Related: How To Magnetize Any Screwdriver

This method also tells you where studs are located if you’re trying to avoid them. Studs can contain electrical wiring, plumbing pipes, or even gas lines, so it may be in your best interest to steer clear of drilling into them. Either way, these little magnets will provide you with valuable information for your DIY projects.

Advertisement
Featured Image Credit:  Antonio_Diaz/ iStock | Updated  Sep 5, 2025 |
Bennett Kleinman
Staff Writer
Bennett Kleinman is a New York City-based staff writer for Inbox Studio, covering topics for several brands including House Outlook and Better Report. He previously contributed to television programs such as "Late Show With David Letterman" and "Impractical Jokers," and digital publications like The Onion. Bennett is also a devoted New York Yankees and New Jersey Devils fan, and thinks plain seltzer is the best drink ever invented.
This article is for general informational purposes only.
Featured Image Credit:  Antonio_Diaz/ iStock | Updated  Sep 5, 2025 |
Advertisement
Gardening 3m read
0

The Secret to Mums That Last All Fall

In autumn, when colorful blossoms are harder to find, fall mums make the perfect substitute. They come in a stunning range of colors, and you’ll find them everywhere from grocery stores to garden centers when their bloom season nears. Seasoned gardeners often grow them as perennials, but many of us are happy to settle for a few potted mums to brighten up our yards and patios as gardening season winds down. Here are our top three tips to help you keep your mums healthy and colorful until the cold arrives and your winter-blooming houseplants can take up the slack.

In autumn, when colorful blossoms are harder to find, fall mums make the perfect substitute. They come in a stunning range of colors, and you’ll find them everywhere from grocery stores to garden centers when their bloom season nears. Seasoned gardeners often grow them as perennials, but many of us are happy to settle for…

1. Choose Potted Mums Wisely

With so many retailers selling fall mums, it’s easy to make an impulse purchase you’ll later regret. The best place to buy them is usually a garden center or nursery, where you know they have been well cared for with proper lighting, watering, and feeding. Garden centers are also more informed about pest and disease management.

No matter where you buy your mums, be sure to check that the soil is moist and the plants are green and vigorous, without wilted leaves, stems, or visible pest damage. Don’t be swept away by the plant that looks best right this moment, either. The best mums to buy are those with lots of unopened buds, meaning they haven’t already peaked. They’ll blossom soon and last longer into the season. Just keep deadheading the spent blossoms, and new ones will continue to appear.

Related: This Trick Makes Bagging Fallen Leaves So Much Easier

2. Water From the Bottom

It’s no surprise that mums are thirsty plants, considering their pots are jammed full of stems and lavish displays of blossoms. For easier watering, keep mums in their original nursery pots. (You can always nest them inside decorative pots when they’re on display.)

Advertisement

Potted mums should be watered daily or every other day, but don’t reach for that watering can just yet. Watering from above is inefficient, and wet foliage is an invitation for mold and disease.

Instead, fill an adequately sized bowl or pan with a generous amount of water, and then place the mum (nursery pot and all) into it. Let the plant sit for about 20 minutes; the soil will absorb water until it can’t hold any more. Any excess water will drain out when you remove the plant. Do this whenever the soil feels dry to the touch, which is usually every day or two.

3. Get the Light Just Right

Mums do best with plenty of indirect light, not too much direct sun. Find a spot where they get morning light but are protected from full sun in the afternoon, as bright light can pale their blossoms. Also, watch out for artificial light sources, such as porch lights or security lights. A mum’s blossoms are triggered by autumn’s shortening days, and artificial light can prevent them from budding.

Advertisement
Featured Image Credit:  Crystal Bolin Photography/ iStock | Updated  Sep 5, 2025 |
Fred Decker
Writer
Fred Decker is a trained chef and former restaurateur. Since closing his restaurants over a decade ago he has been a prolific freelance writer, publishing several thousand articles on dozens of high-volume websites including Taste Of Home, Hunker, Tasting Table, Week&, eHow, and GOBankingRates. He lives on a rural acreage shared with a big garden, chickens, rabbits, and grandkids.
This article is for general informational purposes only.
Featured Image Credit:  Crystal Bolin Photography/ iStock | Updated  Sep 5, 2025 |
Advertisement
Food & Drink 3m read
0

A Simple Trick for Better Roasted Vegetables

Have you ever been underwhelmed by roasted vegetables? They can be absolutely delicious, but when they’re not cooked exactly right, they can fall a bit flat. (Think of a soft, mushy Brussels sprout compared to a browned, crispy one.) Roasted vegetables need a nice sear and ideally a bit of char, and it can be tricky to achieve this outcome consistently with different vegetables.

All featured products and deals are selected independently and objectively by the author. House Outlook may receive a share of sales via affiliate links in content.

Have you ever been underwhelmed by roasted vegetables? They can be absolutely delicious, but when they’re not cooked exactly right, they can fall a bit flat. (Think of a soft, mushy Brussels sprout compared to a browned, crispy one.) Roasted vegetables need a nice sear and ideally a bit of char, and it can be…

That’s where this simple but brilliant hack comes in. When you preheat your oven, put the sheet pan in there too. This technique gives the vegetables a better sear, and as a bonus, it will cook them slightly faster.

The Secret to Crispy Roasted Vegetables

Preheat your oven to 425 degrees Fahrenheit and set the sheet pan on the bottom rack. While the oven and sheet pan are heating up, dress and season your vegetables as you normally would. (Tossing them in a high-smoke-point oil will help prevent sticking and encourage browning.) When the oven is done preheating, carefully remove the hot sheet pan, add the vegetables, and slide it back in, placing it on the middle rack for even heat distribution. Set your timer for at least five minutes less than you usually would, especially the first time you try this hack. The hot pan will cook the vegetables faster, and you don’t want them to burn. Check on them earlier than you think you have to and add more time as needed.

Related: An Inexpensive Hack To Keep Produce Fresh Longer

If you know your oven runs hot, set it to 400 degrees Fahrenheit instead of 425. (If you’re not sure whether your oven runs hot, first try this easy hack or use an oven thermometer to figure it out.)

Advertisement

Bonus Hack: Different Pans for Different Plans

If you’re someone who cooks and bakes, it’s worth having one dedicated sheet pan for savory foods and another for sweet treats. Keep the “sweet pan” clean, and the savory one seasoned to increase the depth of flavor of anything you roast on it. Seasoning a sheet pan works the same way as seasoning a cast-iron skillet. Simply apply a very thin layer of oil to the pan, then put it upside down in the oven at 425 degrees Fahrenheit so the oil doesn’t pool in the corners. Bake it for one to two hours, or until the oil has hardened.

You can wash seasoned sheet pans with soap and water, but you shouldn’t use steel wool or other scratchy cleaning implements on them, and you should never put them in the dishwasher.

Advertisement
Advertisement
Decorating 3m read
0

The Decor Mistake That Makes Your Home Look Cheap

Curtains are one of the most transformative design elements in any space. Living rooms? Check. Bedrooms? Absolutely. Even kitchens, bathrooms, and dining rooms can benefit from the right window treatments. Not only do curtains provide privacy, but they’re imperative to adding personality and texture to a room.

All featured products and deals are selected independently and objectively by the author. House Outlook may receive a share of sales via affiliate links in content.

Curtains are one of the most transformative design elements in any space. Living rooms? Check. Bedrooms? Absolutely. Even kitchens, bathrooms, and dining rooms can benefit from the right window treatments. Not only do curtains provide privacy, but they’re imperative to adding personality and texture to a room.

“I love using window treatments to instantly elevate my clients’ spaces,” says Long Island, New York, interior designer Dawn Ianno of Dawn Interiors. “They add a beautiful mix of style, warmth, and comfort to a room.”

Not all curtain styles are created equal, though. Fabric type, color, and opacity are important, but so is the way the curtain attaches to the rod. According to Ianno, one common option instantly cheapens a room.

“I never recommend curtains with grommets,” she says. “They often read as less refined.”

No matter how beautiful the fabric, the exposed metal circles look tacky and mass-produced. Sure, they’re convenient to drape and often budget friendly, but they also draw unwanted attention to their hardware and compete with other metallic finishes in a room. The result? A space that feels disconnected and not very sophisticated.

Alternative Curtain Styles To Shop

For a more polished, styled design, there are plenty of other curtain styles to shop — and they’re often available for similar price points. “For a truly tailored look, I’m a big fan of ripple-fold drapes on a traverse rod for operable panels, and for stationary treatments — though they can be operable, too — I love back-tab, pinch-pleat, or reverse pinch-pleat styles,” Ianno says. “These details make all the difference in creating a high-end, custom feel.”

Advertisement

These styles allow fabric to fall in deeper, more natural folds, lending a tailored effortlessness to your space. They also pair well with heavier materials, such as velvet and blackout fabrics.

Related: This Curtain Hack Adds Instant Drama (and Height) to Any Room

Let your curtains frame the view, not distract from it. Skip the shiny grommets, and instead opt for a style that focuses on rich texture, graceful drape, and a timeless appeal.

Grommet-Less Curtains We Love

TWOPAGES Pinch-Pleated Light Filtering Linen Curtain Panel

Ike Blackout Curtain Panels, Set of Two

Cotton Dobby Striped Sheer Tie-Top Café Curtains, Set of Two

Navy Buffalo Check Cotton Blackout Window Curtain Panel

DKNY Antigua Jute Tab Curtain Panels, Set of Two

Bonus Tip: How Long Should My Curtains Be?

Curtains should “kiss” the floor — just barely graze it — or slightly puddle. When in doubt, err on the side of longer, not shorter.

Advertisement
Featured Image Credit:  Image courtesy of Design by Dawn Interiors | Updated  Sep 2, 2025 |
Megan McCarty
Writer
Megan McCarty is a Los Angeles-based writer who covers the fun stuff: design, travel, wellness, beauty, and fashion. She has written for publications including Domino, The Spruce, MyDomaine, Bustle, and Rue Magazine. Her life rules include, but are not limited to, zipper when merging, contribute to your IRA, and do the nice thing.
This article is for general informational purposes only.
Featured Image Credit:  Image courtesy of Design by Dawn Interiors | Updated  Sep 2, 2025 |
Advertisement
Cleaning 3m read
0

The Easiest Way To Clean Sneakers

White sneakers are a versatile wardrobe staple, but keeping them spotless is a struggle. You can find all sorts of products designed to clean sneakers, from specialized wipes to foaming cleansers to bristle brushes. But what if there were a simpler, more cost-effective way to get your kicks looking new again?

All featured products and deals are selected independently and objectively by the author. House Outlook may receive a share of sales via affiliate links in content.

White sneakers are a versatile wardrobe staple, but keeping them spotless is a struggle. You can find all sorts of products designed to clean sneakers, from specialized wipes to foaming cleansers to bristle brushes. But what if there were a simpler, more cost-effective way to get your kicks looking new again?

Melissa Pateras, the author of A Dirty Guide to a Clean Home, is a well-known expert in the “LaundryTok” community on TikTok. In an interview on CTV’s Your Morning, Pateras shared some clever advice for easily and effectively cleaning sneakers in the washing machine.

Nothing Sneaky About It

If you have sneakers made of canvas, nylon, cotton, or polyester, it’s perfectly safe to toss them in the washing machine, as long as you follow what Pateras describes as a “super simple process.” First, lightly wet your shoes in the sink, then apply a little bit of liquid dish soap to a soft-bristled brush and work the product into the fabric. This removes any caked-on dirt and starts to lift stains. Don’t worry about removing the laces; Pateras says you can leave them in. She also suggests using a Magic Eraser on the rubber sides and toes before allowing the sneakers to soak or putting them directly into the washing machine.

Related: Arrange Your Shoes Like This To Free Up More Closet Space

Add one or two clean bath towels to the machine along with the sneakers. The fabric of the towels will help scrub the shoes clean, while also reducing the noise of them banging against the drum. Pateras advises washing the shoes on a gentle or delicate cycle with cold water and your regular detergent. After that, they should be clean as a whistle.

Advertisement

Now, of course, comes the drying process. According to Pateras, you can either air-dry the shoes or use a clever hack to speed up the process. Tie the laces of the two shoes together and shut the dryer door so that part of the laces are hanging outside with the shoes dangling inside. This encourages airflow and prevents the shoes from banging around.

Run the dryer on a low heat seating, checking the shoes every so often until they are dry. (Note: Some sneakerheads warn against doing this, as heat can weaken the adhesive that holds the shoes together. If the sneakers are important to you, consider using newspaper to absorb some of the moisture or simply allowing them to air-dry.) Once they’re dry, use a suede brush to touch up problem areas, and your beloved white sneakers will be good to go.

Advertisement
Featured Image Credit:  Elena Abrosimova/ iStock | Updated  Sep 2, 2025 |
Bennett Kleinman
Staff Writer
Bennett Kleinman is a New York City-based staff writer for Inbox Studio, covering topics for several brands including House Outlook and Better Report. He previously contributed to television programs such as "Late Show With David Letterman" and "Impractical Jokers," and digital publications like The Onion. Bennett is also a devoted New York Yankees and New Jersey Devils fan, and thinks plain seltzer is the best drink ever invented.
This article is for general informational purposes only.
Featured Image Credit:  Elena Abrosimova/ iStock | Updated  Sep 2, 2025 |
Advertisement
Organizing 2m read
0

How To Hack a Basic Hanger for Skirts and Pants in Seconds

When your closet is in need of an overhaul, the temptation to buy a whole new set of hangers and organizers is hard to resist — especially if you decide to switch from folding your skirts and pants to hanging them. But instead of spending your hard-earned cash on new hangers with built-in clips, you can transform the hangers you already have with one simple purchase: a pack of velvet skirt clips.

All featured products and deals are selected independently and objectively by the author. House Outlook may receive a share of sales via affiliate links in content.

When your closet is in need of an overhaul, the temptation to buy a whole new set of hangers and organizers is hard to resist — especially if you decide to switch from folding your skirts and pants to hanging them. But instead of spending your hard-earned cash on new hangers with built-in clips, you can…

A Versatile Closet Essential

Velvet skirt clips are a tiny but mighty upgrade to any basic velvet hanger and, honestly, your entire closet. Just add them to a hanger and clip on a skirt, a pair of pants, or a delicate piece of clothing that tends to slip. You can even use them to combine multipiece sets on a single hanger or to clip similar skirts together, which makes them even more of a space-saver.

Since the clips are made of velvet, they prevent your clothes from slipping and keep them safely secured to the hanger. And unlike with some metal hangers that have built-in clips, you don’t have to worry about excess pulling, tears, or indentations. 

Another major pro of velvet skirt clips is that you can easily take them off if you no longer need them. This makes seasonal wardrobe swaps a breeze, so you can easily say goodbye to warm-weather skirts and hello to cozier, cool-weather apparel.

Advertisement

More Ways To Organize

Velvet skirt clips aren’t just for apparel — they’re also perfect for organizing accessories. You can use them to hang up scarves, ties, or belts, keeping them organized and easy to view. 

Related: This Hack Doubles Your Closet Space Instantly
Advertisement
Advertisement
Home Improvement 3m read
0

The One Thing You Should Do Before Turning on the Dishwasher

If dogs are man’s best friend, then dishwashers are a close second. Once you’ve owned a dishwasher, it’s hard to imagine ever washing dishes by hand again. But for all their convenience, these machines have their drawbacks. For example, they aren’t the quickest devices, with an average wash cycle taking a couple of hours. Plus, the longer they run, the more wear and tear they endure, making them susceptible to breaking down over time. Here’s one thing you can do before running the dishwasher to cut down on cleaning time and potentially extend its lifespan.

If dogs are man’s best friend, then dishwashers are a close second. Once you’ve owned a dishwasher, it’s hard to imagine ever washing dishes by hand again. But for all their convenience, these machines have their drawbacks. For example, they aren’t the quickest devices, with an average wash cycle taking a couple of hours. Plus,…

Get Clean Dishes in Less Time

To give your dishwasher a head start, run the hot water in your kitchen sink for a moment before pressing the “start” button. In the United States, the sink and dishwasher are often fed by the same water supply, so running hot water in the sink just before you start the dishwasher is essentially like preheating the water for the wash cycle. Otherwise, it could take much longer for the dishwasher to heat the water on its own — potentially one to two minutes to increase the temperature by a single degree.

Related: 12 Things You Should Never Put in the Dishwasher

Load up the dishwasher with dirty dishes and detergent, then select a shorter cycle than you’d normally use. (Depending on the model, this cycle may be labeled as “Quick Wash,” “One-Hour Wash,” or “Express.”) Before you hit start, turn on the kitchen sink’s hot water until it’s steaming, then turn it off. Now you can start the dishwasher and let the preheated water work its magic. Instead of wasting time heating the water, the dishwasher will get right to cleaning, resulting in a quicker and more effective wash. The shorter cycle also means less wear and tear, keeping your dishwasher in good shape for the long run.

Advertisement

Bonus Tip

To avoid wasting water, try to time things out so each action flows into the next. For example, if you’re going to prerinse dishes before placing them in the dishwasher, use the hottest water you can physically stand. Once those dishes are in the dishwasher, turn on the wash cycle immediately to take advantage of the fact that you’ve already warmed up the pipes and the water.

Advertisement
Featured Image Credit:  Dannko/ iStock | Updated  Sep 2, 2025 |
Bennett Kleinman
Staff Writer
Bennett Kleinman is a New York City-based staff writer for Inbox Studio, covering topics for several brands including House Outlook and Better Report. He previously contributed to television programs such as "Late Show With David Letterman" and "Impractical Jokers," and digital publications like The Onion. Bennett is also a devoted New York Yankees and New Jersey Devils fan, and thinks plain seltzer is the best drink ever invented.
This article is for general informational purposes only.
Featured Image Credit:  Dannko/ iStock | Updated  Sep 2, 2025 |
Advertisement
Gardening 2m read
0

Stop Your Plants From Leaning With This Free Fix

We all know that a good stretch is a great way to start the day, but what does it mean when your plants do it? If you’ve noticed your houseplants leaning in one direction, they’re simply stretching toward the window to get more light. Fortunately, you can help them return to an upright position with one simple trick.

We all know that a good stretch is a great way to start the day, but what does it mean when your plants do it? If you’ve noticed your houseplants leaning in one direction, they’re simply stretching toward the window to get more light. Fortunately, you can help them return to an upright position with…

Keeping Plants Propped Upright

Want to keep your plant standing tall? Just give it a little turn. Plants lean because they are reaching for the light from your windows. By rotating them slightly, you encourage the plant stems to reposition and grow straight. Gardening Know How suggests moving plants about a quarter turn every four to 14 days, but if that’s too much to keep track of, just give your potted plant a slight turn every time you water it. Your plant will let you know when it needs adjusting, so read its cues and lend a helpful hand when you can.

Related: 10 Low-Maintenance Houseplants That Grow in Water

Why Do Plants Lean?

Plants lean to stay energized and alive. They will stretch toward a window because they need sunlight to photosynthesize air and water into food. This process converts carbon dioxide from the air and water from the soil into glucose, a food source that keeps plants healthy and strong. As a bonus, this process releases oxygen back into the air, creating a cleaner environment inside your home.

Having an arched plant isn’t necessarily a cause for concern, but it can result in the stems becoming weak and spindly, especially in younger plants. Adding this little bit of care to your plant’s routine can create sturdier stems that are less likely to become top-heavy.

Advertisement
Advertisement
Food & Drink 3m read
0

Why You Should Store Potato Chips in the Freezer

How many times have you reached for an open bag of potato chips in the pantry, only to discover they’ve lost their crunch? Potato chips seem like they should have a long shelf life, but in reality, they often go stale within one to two weeks after you open the bag. Closure clips only do so much, and it’s hard to polish off an entire family-sized bag of sour cream and onion chips in a single night.

All featured products and deals are selected independently and objectively by the author. House Outlook may receive a share of sales via affiliate links in content.

How many times have you reached for an open bag of potato chips in the pantry, only to discover they’ve lost their crunch? Potato chips seem like they should have a long shelf life, but in reality, they often go stale within one to two weeks after you open the bag. Closure clips only do…

If you can relate, here’s a hack that will change how you store potato chips forever: Pour the leftover crisps into an airtight bag or container, and pop it in the freezer.

Cold Chips, Crispy Results

Before potato chips are packaged, most of their moisture is cooked out to prevent them from becoming soggy. However, once you open the bag, its contents are exposed to light, air, and moisture. These elements immediately begin to degrade the chips’ freshness.

Most people keep their chips and other packaged foods in a cool, dry place. The freezer might seem like a step beyond “cool,” but that extremely low temperature actually works in your favor. Putting the chips in the freezer stops the degradation process in its tracks, extending their freshness and crunch. The chips won’t actually freeze, by the way; they will just get very cold.

What Other Types of Chips Can You Freeze?

You can use this hack for more than just plain potato chips. It applies to most low-moisture chips, including tortilla chips, crackers, and pretzels.

Advertisement

Tips and Tricks

As with any food you put in the freezer, make sure your chips are in a sealed, airtight bag first. When you’re ready to chow down, take the chips out of the freezer and let them come to room temperature (unless you don’t mind cold chips).

Related: This Office Supply Is the Secret to a Clutter-Free Freezer

This hack can extend freshness for up to several months, but to our knowledge, it hasn’t been tested beyond that. If you become hungry for chips a year after freezing them, they’ll probably still be safe to eat, but will they be crunchy? As of now, the world simply does not know. This hack also works on unopened bags of potato chips, though it’s likely not needed.

Advertisement