Advertisement
Food & Drink 3m read
0

The Secret to Super Crispy Oven-Roasted Potatoes

Potatoes are one of the most versatile — and delicious — vegetables around. You can eat them with any meal, at any time of day, and the ways to prepare them are virtually endless. Still, there’s one thing about potatoes that constantly befuddles home chefs: How do you get roasted potatoes as crispy as the ones served in restaurants?

All featured products and deals are selected independently and objectively by the author. House Outlook may receive a share of sales via affiliate links in content.

Potatoes are one of the most versatile — and delicious — vegetables around. You can eat them with any meal, at any time of day, and the ways to prepare them are virtually endless. Still, there’s one thing about potatoes that constantly befuddles home chefs: How do you get roasted potatoes as crispy as the ones served…

Something Crispy This Way Comes

There’s a simple trick to this using something you probably already have in your pantry: cornstarch. America’s Test Kitchen is credited with creating this method, and it works like a charm. Here’s how to do it:

Grab a bag of Yukon Gold baby potatoes, or another small variety, and cut them in half. If your potatoes vary in size, cut the larger ones down so all the pieces are uniform. In a microwave-safe bowl large enough to hold your potatoes, whisk together 2 tablespoons of cornstarch and 1/2 cup of water. (This ratio is for 1 1/2 pounds of potatoes; adjust the measurements proportionally for larger or smaller batches.)

Related: Make Your Potatoes Last Longer With Only a Cardboard Box

Microwave the mixture in 20-second increments until it forms a gooey, jellylike substance. Next, add your potatoes to the bowl and use your hands to coat them thoroughly. This coating is what helps the potatoes get nice and crunchy on the outside while remaining creamy on the inside.

Advertisement

Preheat your oven to 425 degrees Fahrenheit. Coat a sheet pan with both cooking spray and a neutral oil with a high smoke point (e.g., avocado oil, grapeseed oil, vegetable oil, or canola oil). Don’t skip the cooking spray — its specific ingredients offer that extra bit of slip needed to keep the potatoes from sticking. Place your potatoes cut-side down on the sheet pan and tent it with aluminum foil. Roast in the oven for 15 minutes. The foil tent steams the potatoes, helping them achieve that wonderfully fluffy interior.

Next, remove the foil and return the pan to the oven until the potatoes are perfectly browned and crisp. This step typically takes 15 to 20 minutes, though you may need a bit longer depending on the size of your spuds.

Just before serving, toss the potatoes with your desired seasonings and pop them back in the oven for five more minutes to get them ultra-crispy.

Advertisement
Featured Image Credit:  grinchh/ Adobe Stock | Updated  Dec 19, 2025 |
Allegra Ringo
Writer
Allegra Ringo is a California-based writer who has written for publications including Reductress, The Hard Times, VICE, and The Atlantic. She loves sparkling water and old Chihuahuas with hardly any teeth, like her dog Pistachio.
This article is for general informational purposes only.
Featured Image Credit:  grinchh/ Adobe Stock | Updated  Dec 19, 2025 |
Advertisement
Decorating 3m read
0

The Trick Designers Use To Mix Patterns Perfectly

If you’ve ever tried mixing patterns at home — floral wallpaper here, gingham pillows there, a checkered rug for good measure — and wound up with a room that feels a little dizzying, you’re not alone. According to TikTok creator and interior designer Lily Walters, many people make the same mistake when decorating: They try to design with both color and pattern at the same time.

If you’ve ever tried mixing patterns at home — floral wallpaper here, gingham pillows there, a checkered rug for good measure — and wound up with a room that feels a little dizzying, you’re not alone. According to TikTok creator and interior designer Lily Walters, many people make the same mistake when decorating: They try…

The result is visual chaos. Fortunately, there’s an easy fix. With a simple mindset shift and a few smart guidelines, you’ll be layering prints like a pro in no time.

First, Decide What Kind of Decorator You Are

Walters says there are two kinds of decorators: color people and pattern people. While many of us try to be both, the results often feel disjointed. The real magic happens when you pick a lane.

If you’re drawn to color, let your home come alive through rich hues and bold contrasts. Lean into saturated paint, statement upholstery, and materials that carry your preferred color palette across the room. Let your colors do the talking while keeping patterns to a minimum.

Related: Create a Whole Home Color Palette That Looks Expertly Designed

If you’re more of a pattern person, focus on texture and layering. Consider adding wallpaper, patterned rugs, graphic tile, and printed upholstered furniture to build a collected, dimensional look. Don’t just pick your prints haphazardly — instead, use them within a structured framework.

Advertisement

Keep the Palette Tight and the Patterns Balanced

For pattern lovers, Walters says successful mixing comes down to two key rules:

1. Stick to Two or Three Tones

A tight color palette keeps the room cohesive. Whether you’re playing with stripes, florals, geometrics, animal prints, or all of the above, repeating the same curated colors makes every element feel intentional rather than overwhelming.

2. Mix the Scale of the Patterns

Varying the scale of the patterns is essential for a balanced, purposeful look. Aim for a mix of one large, one medium, and one small print. Then, let solid colors  — perhaps on your furniture or walls — act as the visual breathing space between them. By varying the scale, you allow the eye to rest, ensuring your patterns look expertly styled instead of noisy.

Advertisement
Featured Image Credit:  Clay Banks/ Unsplash+ | Updated  Dec 19, 2025 |
Megan McCarty
Writer
Megan McCarty is a Los Angeles-based writer who covers the fun stuff: design, travel, wellness, beauty, and fashion. She has written for publications including Domino, The Spruce, MyDomaine, Bustle, and Rue Magazine. Her life rules include, but are not limited to, zipper when merging, contribute to your IRA, and do the nice thing.
This article is for general informational purposes only.
Featured Image Credit:  Clay Banks/ Unsplash+ | Updated  Dec 19, 2025 |
Advertisement
Cleaning 3m read
0

How To Eliminate Mold From Your Front-Load Washer

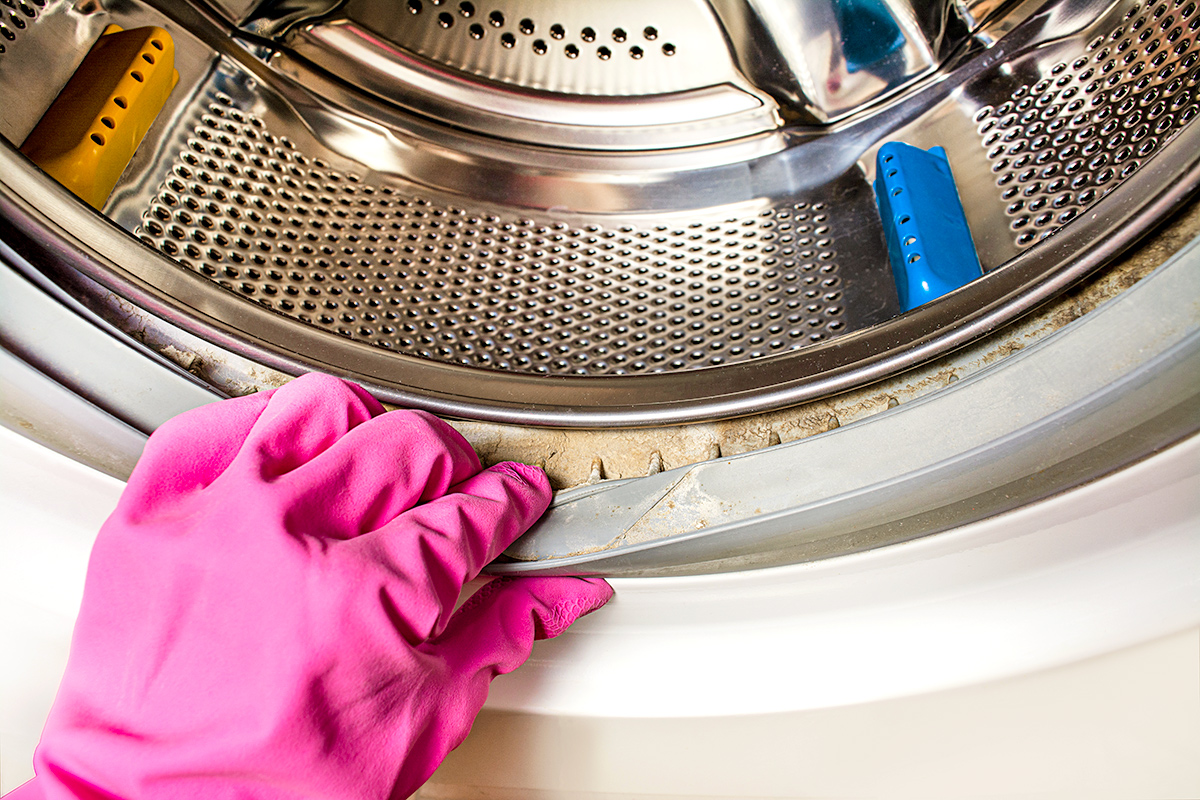
Front-load washers are efficient, quiet, and great for conserving water, but they’re also notorious for harboring mold. Airtight seals trap moisture, leading to musty odors and mold growth along the rubber gasket. If replacing the door seal is beyond your DIY abilities, don’t worry — you can still eliminate the mold and the stubborn stains it leaves behind.

All featured products and deals are selected independently and objectively by the author. House Outlook may receive a share of sales via affiliate links in content.

Front-load washers are efficient, quiet, and great for conserving water, but they’re also notorious for harboring mold. Airtight seals trap moisture, leading to musty odors and mold growth along the rubber gasket. If replacing the door seal is beyond your DIY abilities, don’t worry — you can still eliminate the mold and the stubborn stains it…

Why Front-Load Washers Get Moldy

Because front-loaders rely on rubber gaskets to keep water sealed inside, any moisture trapped within those folds becomes a breeding ground for mold. Add detergent residue or fabric-softener buildup to the mix, and you have a damp little ecosystem where mold thrives.

Related: This Dryer Trick Reduces Wrinkles and Energy Bills

How To Do a Monthly Deep Clean

Even if you make a habit of opening the door and detergent drawer to air them out, your machine still needs a deep clean about once a month. Start by removing any debris from the gasket and drum, then choose one of the following methods:

1. Run a cleaning tablet cycle: Drop a washing machine descaling tablet into an empty drum and run the hottest cycle. These are formulated to break down residue and flush out hidden gunk.

Advertisement

2. Neutralize with vinegar: For a natural alternative, pour two cups of distilled white vinegar directly into the drum and run a hot cycle.

3. Spot-clean stubborn areas: For mold that’s just beginning to appear around the seal, use a soft-bristled brush dipped in a mild bleach solution to scrub the affected areas. Caution: Never mix bleach with vinegar, and always rinse the area thoroughly afterward.

When Mold Has Already Built Up

If you’re dealing with multiple mold spots or persistent staining on the rubber gasket, you’ll need a more targeted approach. A gel-based cleaner, such as Active Mold Stain Remover, works especially well on front-load washers because it clings to curved surfaces without dripping. Apply the gel to the affected areas, allow it to sit for the recommended time, and wipe it away. Finish by running a hot rinse cycle or using a cleaning tablet to leave the machine sparkling.

With a monthly deep cleaning, your front-load washer will remain fresh, odor-free, and mold-resistant, no matter how many loads you run each week.

Advertisement
Featured Image Credit:  Юлия Ромашко/ Adobe Stock | Updated  Dec 19, 2025 |
Jill Layton
Writer
Jill Layton started writing professionally when she realized her emails and texts were kinda funny. She’s an affiliate shopping writer and lifestyle contributor for Scary Mommy, Bustle, Mic, and Best Products. She’s the mom of two alarmingly witty kids and the world’s most perfect dog.
This article is for general informational purposes only.
Featured Image Credit:  Юлия Ромашко/ Adobe Stock | Updated  Dec 19, 2025 |
Advertisement
Home Improvement 3m read
0

This Little-Known Trick Makes Shoveling Snow Easier

Much like a juicy steak or a relaxing bath, some things are immeasurably better when you add a little salt. The same holds true for shoveling snow; the job is a whole lot easier when salt is there to melt those fallen flurries. But while many people wait until after a snowstorm to start scattering, there are major benefits to beating Mother Nature to the punch. Here’s why you should salt long before the first snowflake hits the ground.

Much like a juicy steak or a relaxing bath, some things are immeasurably better when you add a little salt. The same holds true for shoveling snow; the job is a whole lot easier when salt is there to melt those fallen flurries. But while many people wait until after a snowstorm to start scattering,…

A Tip Worth One’s Salt

Salting early prevents snow and ice from bonding to the pavement and forming a solid sheet beneath your feet. Not only is ice tough to remove, but it’s also often hidden under a fresh layer of snow — making it all too easy to slip and possibly injure yourself while shoveling.

Being proactive and pre-salting your walkways is the best way to avoid these potential perils, though there are a few tricks to getting the most effective result. First, try to scatter your salt while temperatures are still above freezing. While that isn’t always possible, especially in colder parts of the country, doing so allows the salt to dissolve and creates a protective layer between the pavement and the snow. If you wait until it’s below freezing, the salt crystals will remain in their solid form instead of melting into that protective layer.

A few more tips: Aim to salt one hour before the anticipated snowfall to allow the granules enough time to dissolve. Also, keep your layers even and thin. Overuse can lead to pitted pavement or a withered lawn.

Advertisement

Doing Double Duty

Just because you’ve pre-salted doesn’t mean that the work is done — you’ll want to salt after the storm too. Shovel away as much snow as possible before adding this second layer of salt, as it doesn’t have the power to melt through snow that’s several inches deep. Also, always salt immediately after you finish shoveling to prevent black ice from forming.

Related: Stop Snow From Clinging to Your Shovel With This

Different Types of Salt

Not all ice melt products are created equal. Sodium chloride (aka rock salt) is the cheapest option, but it’s also corrosive, dangerous to pets, and less effective below 20 degrees Fahrenheit. Magnesium chloride is a better (albeit more expensive) choice; it continues working in temperatures as low as -13 degrees Fahrenheit and is gentler on the environment and pets. For truly frigid conditions, opt for calcium chloride, which performs in temperatures down to -25 degrees Fahrenheit. Note, however, that it comes with a higher price tag and can easily damage nearby vegetation if applied too heavily.

Advertisement
Featured Image Credit:  patty_c/ iStock | Updated  Dec 19, 2025 |
Bennett Kleinman
Staff Writer
Bennett Kleinman is a New York City-based staff writer for Inbox Studio, covering topics for several brands including House Outlook and Better Report. He previously contributed to television programs such as "Late Show With David Letterman" and "Impractical Jokers," and digital publications like The Onion. Bennett is also a devoted New York Yankees and New Jersey Devils fan, and thinks plain seltzer is the best drink ever invented.
This article is for general informational purposes only.
Featured Image Credit:  patty_c/ iStock | Updated  Dec 19, 2025 |
Advertisement
Organizing 2m read
0

The 5/7 Rule for Cleaner, Clearer Surfaces

If clutter is a constant struggle in your household, you’ve likely tried a hack or two to tidy up your space. Some require daily practice, like the “closing shift,” where you cross a few tasks off your cleaning to-do list every night to make mornings less stressful. Then there’s the 10-10 hack, which focuses on getting rid of 100 items in just 10 days. Another trick to try is the 5/7 rule — the results can leave your surfaces practically spotless.

If clutter is a constant struggle in your household, you’ve likely tried a hack or two to tidy up your space. Some require daily practice, like the “closing shift,” where you cross a few tasks off your cleaning to-do list every night to make mornings less stressful. Then there’s the 10-10 hack, which focuses on…

What Is the 5/7 Rule?

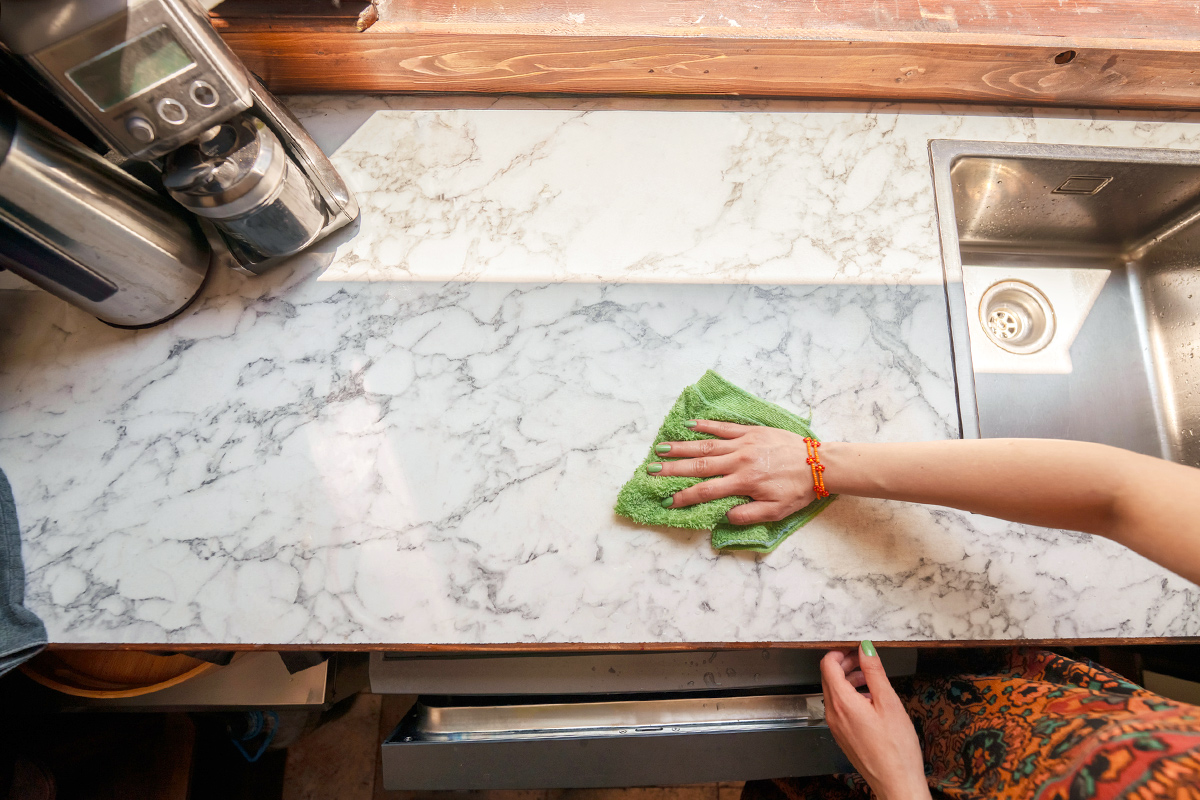
According to minimalist influencer Madeline Hegedus, the 5/7 method dictates that an item stays on the counter if — and only if — you use it at least five out of seven days a week. Everything else should be stored away. Taking inventory of what you actually use allows you to declutter any surface in a matter of days.

Related: 17 Clever Ways To Get Organized With a Rolling Cart

Take the kitchen, for example. Countertops are magnets for clutter, especially in busy homes. Between dinnerware, small appliances, and stray snacks, you can lose your workspace before you know it. If you make smoothies every morning, your beloved blender deserves its prime real estate. But that stand mixer you swear you’ll use more? If it’s just collecting dust, tuck it away in a pantry cabinet. As aesthetically pleasing as it might be, we bet you’ll love having the extra counter space even more.

Advertisement

Where To Use the 5/7 Rule

The 5/7 rule can be applied to any room in your home. While the kitchen is often the best place to start, don’t overlook the bathroom. With even less counter space to spare, this method helps keep surfaces clear and essentials within reach. But don’t stop there — the 5/7 rule can transform your desk, entryway, nightstands, and coffee table, too.

Advertisement
Advertisement
Food & Drink 3m read
0

How To Store Spices Like a Chef

Culinarily speaking, one of the most valuable pieces of real estate in your kitchen is the spot where you store your spices and herbs. Square inch for square inch, there’s no other area that gives you such flavor and versatility for a relatively small investment in space. Yet, many of us don’t give enough thought to where we situate our spice storage, or what that implies for their lifespan. To put things into perspective, let’s take a look at how chefs store spices and herbs.

All featured products and deals are selected independently and objectively by the author. House Outlook may receive a share of sales via affiliate links in content.

Culinarily speaking, one of the most valuable pieces of real estate in your kitchen is the spot where you store your spices and herbs. Square inch for square inch, there’s no other area that gives you such flavor and versatility for a relatively small investment in space. Yet, many of us don’t give enough thought…

Know Your Enemy: What Conditions Age Spices Quickly?

The flavors of spices and dried herbs come from a range of volatile compounds — organic molecules that create the familiar aromas and sweet or savory tastes that tickle our taste buds. Some of these are highly volatile and evaporate quickly (that’s why fresh-ground spices have the most flavor), but others will last for a longer or shorter time depending on the conditions they face. The biggest factors that cause spices to go stale and lose their taste are:

• Heat and humidity

• Direct light

• Exposure to oxygen

Related: When You Should Toss Old Spices

A rack of spice jars hanging in a well-lit kitchen on the wall beside your stove (or worse yet, over it) is just about the worst-case scenario, but that’s where we often put them. Here’s how to change your storage habits to ensure peak, long-lasting flavor.

Advertisement

Professional-Grade Spice Storage

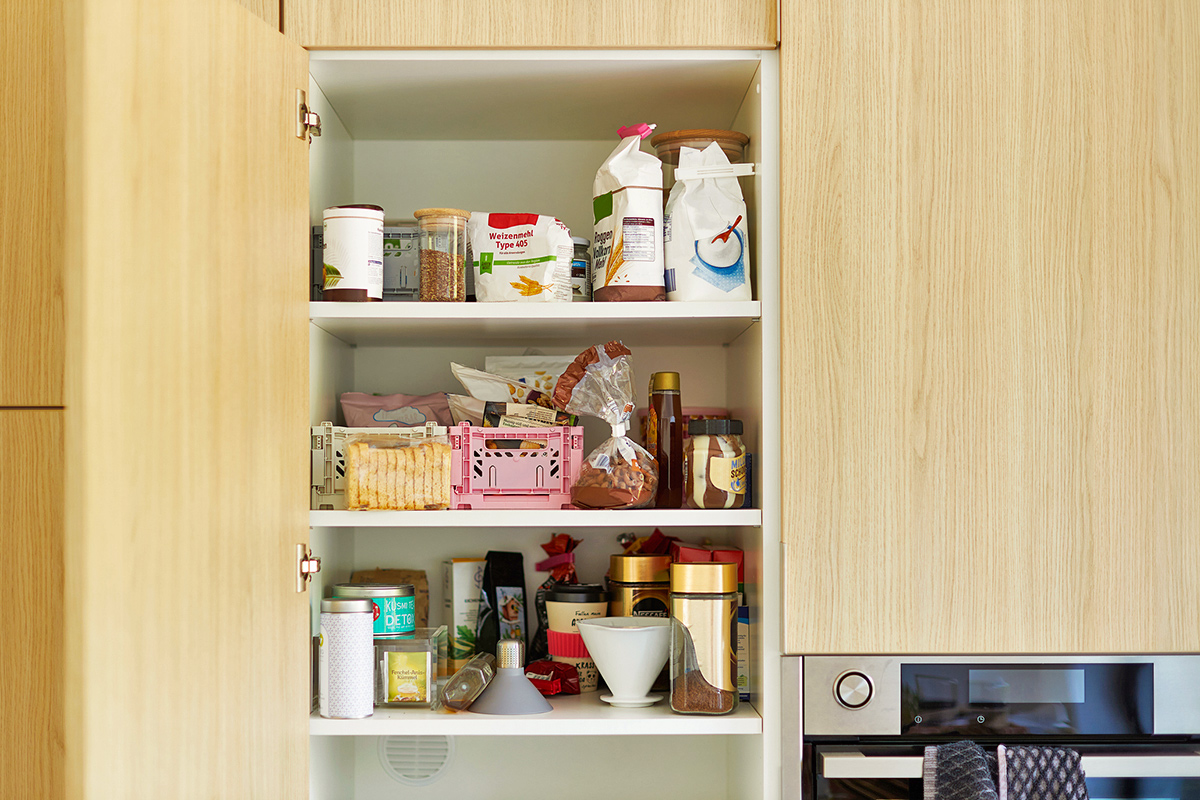
So, how do chefs store their spices? They start by choosing a cool, dark, well-ventilated location in or very close to the kitchen (such as a pantry). The cool and dark environment addresses the heat and light issues, while ventilation helps control humidity. Chefs also tend to buy their spices whole, grating or grinding them only as needed; this prevents oxidation and flavor loss. (For this, you’ll just need an inexpensive spice grinder or a small mortar and pestle.)

For spices you use infrequently and in small amounts, ordinary spice jars are perfectly fine, provided you keep them in a dark spot. For the spices you use more often, however, opt for small jars with an airtight seal. Mylar bags with a zipper seal are a good option for whole spices or dried herbs, and they take up less space inside a cupboard or drawer.

It’s fine to keep a few of your most-used spices near where you cook. For this setup, metal spice jars are your best bet, as they block light while allowing you to keep your favorites close to the stove. An in-drawer spice organizer is an excellent solution. You can find organizers that lay the spices flat in skinny drawers, or tiered versions for deeper drawers that angle the jars for space-efficient storage.

Advertisement
Featured Image Credit:  Panther Media Global/ Alamy Stock Photo | Updated  Dec 16, 2025 |
Fred Decker
Writer
Fred Decker is a trained chef and former restaurateur. Since closing his restaurants over a decade ago he has been a prolific freelance writer, publishing several thousand articles on dozens of high-volume websites including Taste Of Home, Hunker, Tasting Table, Week&, eHow, and GOBankingRates. He lives on a rural acreage shared with a big garden, chickens, rabbits, and grandkids.
This article is for general informational purposes only.
Featured Image Credit:  Panther Media Global/ Alamy Stock Photo | Updated  Dec 16, 2025 |
Advertisement
Cleaning 3m read
0

Remove Sweater Pills Using a Tool You Already Own

Frightful weather outside calls for cozy sweaters inside. Whether you’re wearing a brand-new style you snagged during a Black Friday sale, an incredible vintage find, or that favorite crewneck you always reach for this time of year, it’s hard to avoid pilling or shedding of the sweater fibers.

All featured products and deals are selected independently and objectively by the author. House Outlook may receive a share of sales via affiliate links in content.

Frightful weather outside calls for cozy sweaters inside. Whether you’re wearing a brand-new style you snagged during a Black Friday sale, an incredible vintage find, or that favorite crewneck you always reach for this time of year, it’s hard to avoid pilling or shedding of the sweater fibers.

Why Do Sweaters Pill?

The yarn used to knit sweaters consists of fibers (be it wool, cotton, cashmere, or synthetic materials like acrylic) spun together in a continuous strand. Depending on the materials used to create the fiber and the yarn’s construction, the knitted fabric can start to pill when it rubs against other surfaces or itself — such as the underarm area or around the waist and ribbing when layering with jackets. This is especially true for sweaters made with blended materials, such as wool and polyester, or any ultrasoft and shorter fiber, as these weaker fibers are easier to snag or break away from the strand. This breakage results in shedding or pilling.

How To Remove Pills From Sweaters

Although they’re annoying, pills are actually quite easy to remove. While you can invest in a fancy electric fabric shaver, you probably already have the best tool for removing pills stashed away in your bathroom. In a pinch, a sharp, new disposable razor can shave off the tiny wads of fiber and help reduce shedding. Any razor will work, as long as it doesn’t have a moisture strip (which can cause more pilling). However, a single blade razor is preferred because it provides a little more control when trimming off the pills.

Advertisement
Related: The Best Amazon Finds for a Neat and Organized Closet

To remove pills, lay the sweater on a flat surface, then use one hand to hold the material taut. Gently glide the razor in short, upward strokes with light pressure. Unlike with actual shaving, you don’t want to glide the razor too close to the fabric. Instead, focus on reducing the pills on the surface, being careful not to scrape the underlying fabric. Once you’re finished, use a piece of tape to clean up the trimmed pills and fibers.

Advertisement
Featured Image Credit:  Gunars/ Adobe Stock | Updated  Dec 16, 2025 |
Jessie Quinn
Writer
Jessie Quinn is a Los Angeles-based lifestyle journalist with words published in PEOPLE, StyleCaster, Apartment Therapy, The Spruce, Byrdie, and more. She has a Bachelor's Degree in fashion journalism from Academy of Art University and her work spans across many categories, including style, beauty, home, health, crafts, and more.
This article is for general informational purposes only.
Featured Image Credit:  Gunars/ Adobe Stock | Updated  Dec 16, 2025 |
Advertisement
Organizing 3m read
0

Do This Now To Avoid Tangled Christmas Lights Next Year

The last present has been unwrapped, the final cookie consumed, and you can’t stand to hear one more holiday song. You know what that means: It’s time to tackle the bittersweet task of taking down the Christmas tree. If you’ve ever spent an entire afternoon accidentally building a ball of knots, consider this end-of-season cheer: There’s an easy way to ensure tangle-free Christmas lights for next year, and you don’t need anything except a regular coat hanger.

All featured products and deals are selected independently and objectively by the author. House Outlook may receive a share of sales via affiliate links in content.

The last present has been unwrapped, the final cookie consumed, and you can’t stand to hear one more holiday song. You know what that means: It’s time to tackle the bittersweet task of taking down the Christmas tree. If you’ve ever spent an entire afternoon accidentally building a ball of knots, consider this end-of-season cheer:…

This hack keeps your lights neat, compact, and blissfully organized until next season. Your future self will thank you.

How To Wind Lights on Hangers

Instead of pulling an entire strand of lights off the tree, wrap it around a hanger as you take it off branch by branch. Start at the plug end and wind the strand around the hanger — narrow end to wide end, then back again. Think of it like wrapping a hose around a reel.

Related: An Inexpensive Storage Hack for Christmas Ornaments

Keep gentle tension on the strand as you wrap; this ensures the lights lie flat and prevents loops from slipping off. Once you’ve wrapped an entire strand, secure the last few inches by tucking them under a wrapped section or looping them around the hanger’s hook. The result is a tidy, portable bundle of lights that won’t morph into a knotted mess over the next 11 months. 

Advertisement

Where To Store the Hangers

Your newly wrapped hangers can hang on a closet rod, making them easy to store. If you have space to spare in a coat closet or guest bedroom wardrobe, group all of your light bundles together to free up valuable floor space. Then, whenever you decide to decorate again, simply grab a hanger, head to the tree, and unwind the strand with ease. Your tree will be glowing before you know it — no detangling sessions required.

Label Before You Store

Before storing your light bundles, label each hanger by wrapping a piece of masking tape around its neck. Quick identifiers, such as “tree lights” or “outdoor garland,” will ensure you know which set goes where next December. This means no more guesswork — just effortless holiday magic.

Advertisement
Featured Image Credit:  LeoPatrizi/ iStock | Updated  Dec 16, 2025 |
Megan McCarty
Writer
Megan McCarty is a Los Angeles-based writer who covers the fun stuff: design, travel, wellness, beauty, and fashion. She has written for publications including Domino, The Spruce, MyDomaine, Bustle, and Rue Magazine. Her life rules include, but are not limited to, zipper when merging, contribute to your IRA, and do the nice thing.
This article is for general informational purposes only.
Featured Image Credit:  LeoPatrizi/ iStock | Updated  Dec 16, 2025 |
Advertisement
Home Improvement 3m read
0

Stop Snow From Clinging to Your Shovel With This

Winter is full of fun activities, from skiing down the slopes to making snow angels, but it’s also a time for painstaking chores. Perhaps none is more grueling than shoveling snow. Unless you own a snowblower — or know a teenager who’s willing to help you shovel in exchange for a few bucks or some pizza — you’ll probably end up clearing all the pathways yourself. Here’s a tip to make this difficult task a little easier — all you’ll need is a staple found in nearly every kitchen.

All featured products and deals are selected independently and objectively by the author. House Outlook may receive a share of sales via affiliate links in content.

Winter is full of fun activities, from skiing down the slopes to making snow angels, but it’s also a time for painstaking chores. Perhaps none is more grueling than shoveling snow. Unless you own a snowblower — or know a teenager who’s willing to help you shovel in exchange for a few bucks or some…

The Solution? Cooking Spray

Getting snow stuck to the shovel is a far too common occurrence. And as snow freezes to the metal or plastic, it prevents you from scooping up a full load, making shoveling the driveway a lengthier and more arduous process.

Enter cooking spray: Much like it keeps food from sticking to a pan, it can also help prevent snow from sticking to your shovel. If you don’t have any cooking spray available, vegetable oil and wax are suitable alternatives. (Think candle wax, car wax, or even ski and snowboard wax, which is formulated for freezing conditions.)

Related: Defrost Your Windshield in Seconds With This Life-Changing Hack

Before heading outside, coat both sides of the blade with cooking spray. As you toil away, you’ll notice the snow sliding off with relative ease. This keeps your shovel operating at maximum efficiency, so you won’t have to waste time whacking it against the ground to unstick frozen snow. Reapply the cooking spray every 30 minutes or as needed.

Advertisement

Know the Limitations

Despite the usefulness of this hack, there are a number of important caveats. First, if you leave the shovel outside in the freezing cold the night before shoveling, the cooking spray will do little to help. The oil isn’t powerful enough to prevent sticking if the shovel itself is too cold to begin with. This is why you should always store shovels inside a garage, foyer, or any location where temperatures remain above freezing.

Second, this hack works only with slightly slushy snow that has started to melt and would otherwise stick to the blade. If you’re dealing with dry, hard snow, that type won’t stick anyway, which makes applying cooking spray redundant.

Advertisement
Featured Image Credit:  Unsplash+ via Getty Images | Updated  Dec 16, 2025 |
Bennett Kleinman
Staff Writer
Bennett Kleinman is a New York City-based staff writer for Inbox Studio, covering topics for several brands including House Outlook and Better Report. He previously contributed to television programs such as "Late Show With David Letterman" and "Impractical Jokers," and digital publications like The Onion. Bennett is also a devoted New York Yankees and New Jersey Devils fan, and thinks plain seltzer is the best drink ever invented.
This article is for general informational purposes only.
Featured Image Credit:  Unsplash+ via Getty Images | Updated  Dec 16, 2025 |
Advertisement
Organizing 3m read
0

How To Keep Your Kitchen Clutter-Free Year-Round

Keeping your kitchen clutter-free year-round doesn’t require a full renovation; it just takes a smart seasonal mindset and a few practical steps. Think of it like your wardrobe: You wouldn’t keep your winter coats front and center in August, so why should seldom-used kitchen gear occupy prime real estate? By rotating your kitchen items with the seasons, you can make your space work smarter, not harder.

Keeping your kitchen clutter-free year-round doesn’t require a full renovation; it just takes a smart seasonal mindset and a few practical steps. Think of it like your wardrobe: You wouldn’t keep your winter coats front and center in August, so why should seldom-used kitchen gear occupy prime real estate? By rotating your kitchen items with…

Audit and Categorize

Start by opening all your cabinets and drawers and pulling everything out. Identify three categories: daily essentials, seasonal/occasional items, and never or rarely used. Daily essentials — such as the coffee maker, your favorite frying pan, and frequently used dishes — should stay within easy reach. Seasonal or occasional items (large roasting pans, festive mugs, and specialty baking supplies) should go into a storage box or a less accessible location, perhaps alongside your holiday decorations.

Items that are never or rarely used should be decluttered and donated. If you simply can’t part with something, like the fondue set you inherited from your grandmother, find a dedicated storage spot for it outside of the kitchen. This seasonal swap helps reclaim precious kitchen space.

Related: Declutter 100 Items in 10 Days Using This Simple Method

Choose Better Spots for Less-Used Items

Once you’ve identified your seasonal or occasional items, give them a designated, off-to-the-side spot. This could be a shelf above the cabinets, a storage closet, or even the garage. Consider storing items that show up only once or twice a year — think holiday cookie cutters, themed serveware, and specialty appliances — in these less busy locations so your everyday zones stay clear.

Advertisement

Swap the Lineup as Seasons Change

When the seasons change or a major holiday concludes, take a few minutes to handle the swap. Move the summer grilling gear out after Labor Day. Bring in the holiday baking tools in November, and put them away early in the new year. The key is to use the seasonal transition as your trigger for decluttering and restocking the daily zone. This simple check-in helps prevent “back-of-the-cupboard” surprises, like finding a forgotten Santa mug at the bottom of a drawer.

Label and Maintain

Label storage boxes with their contents so you don’t have to rummage through six tubs looking for the gravy boat. Before storing, inspect items for damage, clean them thoroughly, and make sure they’re dry. Checking everything carefully before tucking it away will help you avoid potential pest or moisture damage issues.

Enjoy the Result

Once the seasonal rotation is complete, your cabinets and counters will feel breathable, your tools will be easier to find, and your entire kitchen will operate efficiently. A clutter-free kitchen isn’t only peaceful; it makes cooking, entertaining, and cleaning far more enjoyable.

Ultimately, a clutter-free kitchen isn’t about having less stuff — it’s about keeping the right stuff in the right place at the right time. With a seasonal swap, your kitchen can stay organized and efficient year-round.

Advertisement
Featured Image Credit:  2K Studio/ iStock | Updated  Dec 16, 2025 |
Jill Layton
Writer
Jill Layton started writing professionally when she realized her emails and texts were kinda funny. She’s an affiliate shopping writer and lifestyle contributor for Scary Mommy, Bustle, Mic, and Best Products. She’s the mom of two alarmingly witty kids and the world’s most perfect dog.
This article is for general informational purposes only.
Featured Image Credit:  2K Studio/ iStock | Updated  Dec 16, 2025 |