Advertisement
Cleaning 3m read
50

Is Your Dusting Routine Making Your House Dirtier?

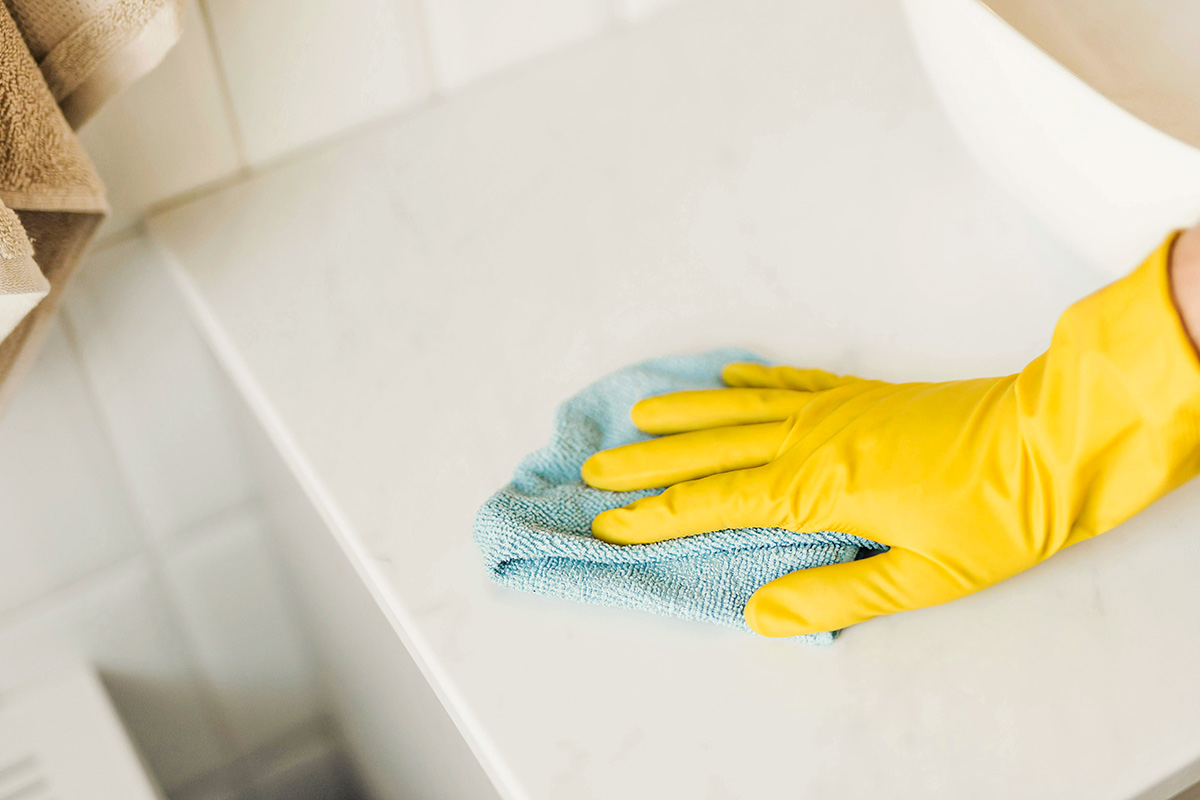
A dusty home is no match for a microfiber cloth, which picks up most debris in a single wipe without leaving streaks or lint behind. These cloths work best for dry dusting, but sometimes they struggle to grab everything — particularly pet hair and other allergens. Fortunately, you can improve their performance without spending a dime.

All featured products and deals are selected independently and objectively by the author. House Outlook may receive a share of sales via affiliate links in content.

A dusty home is no match for a microfiber cloth, which picks up most debris in a single wipe without leaving streaks or lint behind. These cloths work best for dry dusting, but sometimes they struggle to grab everything — particularly pet hair and other allergens. Fortunately, you can improve their performance without spending a…

Ditch Dust With a Damp Cloth

Microfiber cloths are great for dusting because they generate a slight electrostatic charge as you wipe. As the name suggests, the material is made up of millions of tiny synthetic polyester or nylon fibers. These fibers are split to be thinner than a human hair, increasing their surface area so they can trap and hold dust. The friction caused by wiping also creates a static charge that helps pull dust into the cloth.

Sometimes, however, dry dusting seems to only push debris around, especially if it’s been a while since you last cleaned or if there’s heavy buildup of pet hair and grime. In these cases, dampen your cloth with clean water, wring it out well, and wipe whatever surfaces need cleaning. This ensures that dust and allergens are picked up by the fibers rather than kicked up into the air to resettle elsewhere.

Related: Keep Your Ceiling Fan Dust-Free With This Easy Trick

Microfiber cloths are renowned for their ability to capture dust through static, but they are equally impressive when damp. They can hold over five times their weight in water, making them the perfect tool for tackling tough messes, such as sticky food spills, stubborn soap scum, and grease-laden cabinets.

Advertisement

Keeping Your Cloths Clean

Want to extend the lifespan of your microfiber cloths? Whether you prefer using them damp or dry, you can guarantee years of use from them with proper washing. Avoid using bleach or fabric softener, as these chemicals can damage the superfine fibers that make these cloths so effective. Bleach degrades the structural integrity of the fibers, while softeners leave behind a waxy residue that reduces their ability to trap dust or absorb liquid.

Instead, clean your cloths in a solution of warm water and your choice of either 3% hydrogen peroxide, distilled white vinegar, or an oxygen-based bleach alternative, such as OxiClean Odor Blasters. (Warning: Never mix hydrogen peroxide and vinegar together in the same container, as this causes a chemical reaction that can irritate the eyes, skin, and respiratory system.) Soak the microfiber cloths in the solution for 15 to 30 minutes, then rinse them thoroughly with clean water. It’s best to air dry them whenever possible, but if you must use a dryer, opt for a low-heat setting and skip the dryer sheets.

Advertisement
Advertisement
Home Improvement 3m read
700

How a Single Quarter Can Save You From a Highway Disaster

Anyone who’s been around the block knows that a quarter doesn’t have the same buying power it used to. Purchasing a slice of pizza or a movie ticket for 25 cents is a thing of the past, but the coin remains an unlikely yet incredibly useful tool for staying safe on the road. Many drivers don’t realize their car is at risk until it’s too late — especially when it comes to tire tread. Here’s how one measly quarter can prevent disaster.

Anyone who’s been around the block knows that a quarter doesn’t have the same buying power it used to. Purchasing a slice of pizza or a movie ticket for 25 cents is a thing of the past, but the coin remains an unlikely yet incredibly useful tool for staying safe on the road. Many drivers…

Treading With Caution

If you look at a brand-new set of tires, you’ll notice a series of intricate patterns and grooves. This is tire tread, and it’s essential for maintaining traction on the road. However, as you drive, those grooves gradually wear down until the tires become “bald.” A lack of tread prevents your tires from being able to grip the pavement, putting you at serious risk of losing control of your vehicle.

Related: Why You Should Keep Clear Nail Polish in Your Glove Box

For safety reasons, it’s important to keep track of the tread depth — which is measured in 32nds of an inch — and replace the tires when necessary. While new tires typically start with 10/32 to 12/32 of an inch of tread, you should consider replacements once they wear down to 4/32 of an inch, as that’s when traction begins to weaken. If your tread reaches 2/32 of an inch or less, you are at the legal limit and must replace the tires immediately.

Advertisement

The Quarter Trick

How do you know if your tires are in bad condition without consulting a mechanic? It’s simple: Insert a quarter into the tread with the top of Washington’s head pointing down into the groove. The distance from the edge of the coin to the top of his head is approximately 4/32 of an inch. If George’s scalp is concealed, you still have a safe amount of tread. But if you can clearly see the top of his head — or the tread sits right at that level — your tires are around 4/32 of an inch or less, which means it’s a good time to think about replacing them.

As stated before, things get especially dangerous when your tread depth is 2/32 of an inch or less. To check this, repeat the test with a penny, which measures about 2/32 of an inch from the rim to the top of Abraham Lincoln’s head. If you can see the top of Lincoln’s scalp — or the words “IN GOD WE TRUST” between his head and the rim — your tread is worn to the legal limit and the tires should be replaced right away.

Advertisement
Featured Image Credit:  © JJ Gouin/iStock | Updated  Mar 9, 2026 |
Bennett Kleinman
Staff Writer
Bennett Kleinman is a New York City-based staff writer for Inbox Studio, covering topics for several brands including House Outlook and Better Report. He previously contributed to television programs such as "Late Show With David Letterman" and "Impractical Jokers," and digital publications like The Onion. Bennett is also a devoted New York Yankees and New Jersey Devils fan, and thinks plain seltzer is the best drink ever invented.
This article is for general informational purposes only.
Featured Image Credit:  © JJ Gouin/iStock | Updated  Mar 9, 2026 |
Advertisement
Food & Drink 2m read
504

You’re Not Using Your Potato Peeler Correctly

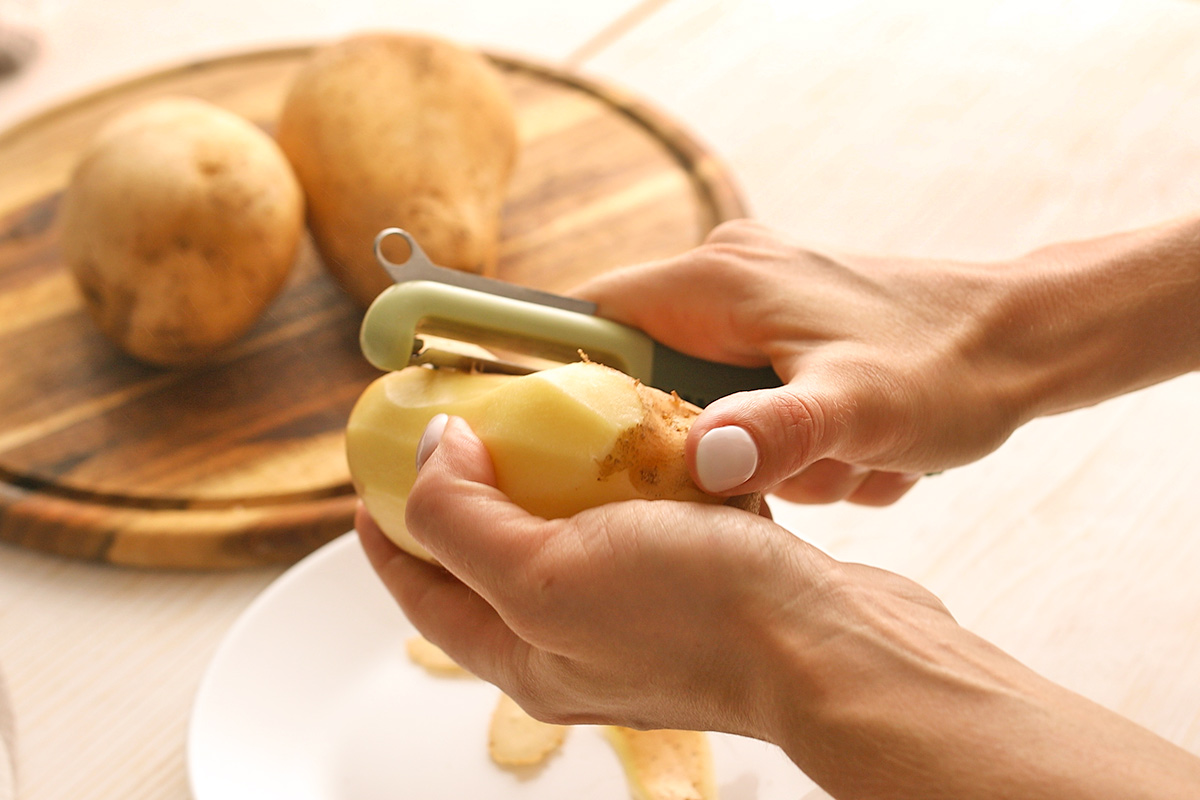
Most people intuitively understand how to use a potato peeler. You hold the long blade against the potato, press gently, and remove the skin with smooth, repeated motions. But what about the “eyes,” those pesky brown spots found on most potatoes? While they won’t harm anyone, they’re far too unsightly to leave behind.

All featured products and deals are selected independently and objectively by the author. House Outlook may receive a share of sales via affiliate links in content.

Most people intuitively understand how to use a potato peeler. You hold the long blade against the potato, press gently, and remove the skin with smooth, repeated motions. But what about the “eyes,” those pesky brown spots found on most potatoes? While they won’t harm anyone, they’re far too unsightly to leave behind.

Some people use a paring knife to remove potato eyes. This method works in a pinch, but having to switch tools is annoying, and the knife’s straight edge often creates unnecessary waste by digging too deep or wide. Other people run the peeler blade over the blemish multiple times until the eye no longer exists. While effective, this method wastes a lot of potato. It’s also cumbersome and time-consuming when you’re prepping for a dinner party, holiday meal, or weeknight coq au vin.

Related: Make Your Potatoes Last Longer With Only a Cardboard Box

In the Eye of the Beholder

Fortunately, most potato peelers include a feature designed specifically for this problem. It’s called a “potato eye remover” — that small, pointed notch found on the side or end of the peeler’s head.

Advertisement

Here’s how to use it: First, peel the potato as you normally would. To remove an eye, hold the pointed notch over the dark spot, press down gently, and twist. The tool scoops out the eye without removing excess potato. This feature is standard on most modern peelers, both swivel and Y-shaped. Just look for a protruding loop or a pointed prong at the tip or side of the head.

The potato eye remover is a simple tool, but its purpose appears to have been lost to time. Previous generations may well have been aware of it, but many contemporary home cooks are surprised to learn it even exists. Hopefully, that changes with your next meal.

Advertisement
Featured Image Credit:  © dkalashnikov/stock.adobe.com | Updated  Mar 20, 2026 |
Allegra Ringo
Writer
Allegra Ringo is a California-based writer who has written for publications including Reductress, The Hard Times, VICE, and The Atlantic. She loves sparkling water and old Chihuahuas with hardly any teeth, like her dog Pistachio.
This article is for general informational purposes only.
Featured Image Credit:  © dkalashnikov/stock.adobe.com | Updated  Mar 20, 2026 |
Advertisement
Decorating 3m read
21

The ‘Boring’ Secret to Making Interesting Furniture Pop

Designing a room that’s layered and inviting — one that earns compliments while making you feel at home — doesn’t require filling every square foot with statement pieces. Instead, the most compelling interiors rely on balance. Some furniture speaks loudly; other pieces are intentionally understated. When everything in a room tries to steal the spotlight, the result feels chaotic, but when every item fades into neutrality, it risks being boring. The sweet spot lies in the middle.

Designing a room that’s layered and inviting — one that earns compliments while making you feel at home — doesn’t require filling every square foot with statement pieces. Instead, the most compelling interiors rely on balance. Some furniture speaks loudly; other pieces are intentionally understated. When everything in a room tries to steal the spotlight, the…

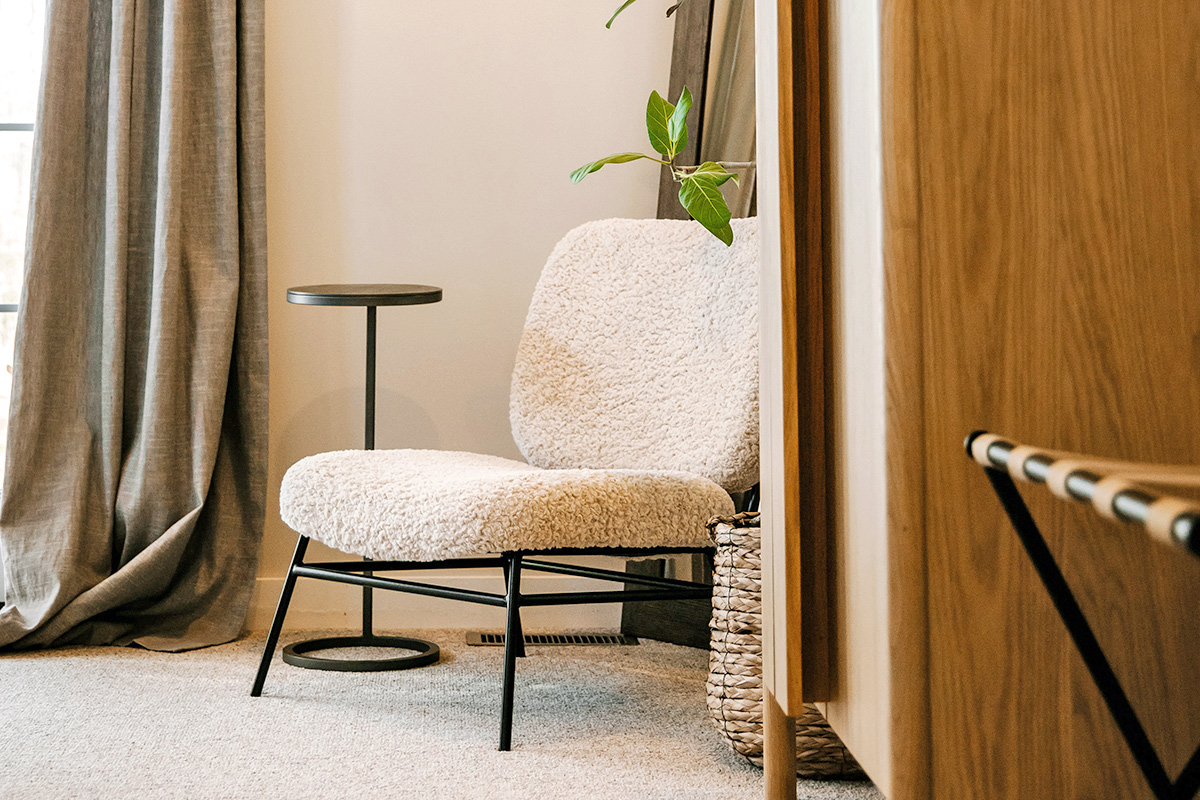
For a more dynamic space, try pairing a plain element with an interesting one. Think of each room as having a few lead characters with a supporting cast. Not every piece needs to command attention, just as not everything should fade into the background.

Alyssa Owens, a Melbourne, Australia-based interior designer, agrees. “The most compelling spaces balance expression with restraint,” she says. “A more minimal piece next to something sculptural or textural allows both to really land. You get that push and pull that makes a room feel layered and interesting, rather than overworked.”

Related: 9 Ways To Make Your Living Room Better for Conversation

Let One Piece Shine

Suppose you’re centering a space around a sculptural coffee table or an ornate vintage console. Instead of surrounding it with equally bold pieces, create contrast by pairing it with something simpler. A tailored sofa becomes the perfect backdrop for an interesting coffee table; the sofa grounds the space while the table brings personality.

Advertisement

This principle can work throughout your home. A streamlined vanity offers an opportunity for an eye-catching mirror. A simple bed frame allows sculptural side tables or bold lamps to shine. A clean-lined dining table becomes far more dynamic when paired with interesting chairs — perhaps with woven seats or an unexpected pop of color.

How To Create Contrast

Restraint is not synonymous with boring. A blank slate of a fireplace can feel architectural when juxtaposed with striking art. Minimal cabinetry becomes more impactful with dramatic hardware. When one element fades, the other stands out.

“Contrast is what keeps a room from falling flat,” Owens says. “I’m always pairing something soft with something structured, or something bold with something grounding. That tension is what gives a space energy while still allowing it to feel composed.”

Advertisement
Featured Image Credit:  © Hans/ Unsplash.com | Updated  Mar 9, 2026 |
Megan McCarty
Writer
Megan McCarty is a Los Angeles-based writer who covers the fun stuff: design, travel, wellness, beauty, and fashion. She has written for publications including Domino, The Spruce, MyDomaine, Bustle, and Rue Magazine. Her life rules include, but are not limited to, zipper when merging, contribute to your IRA, and do the nice thing.
This article is for general informational purposes only.
Featured Image Credit:  © Hans/ Unsplash.com | Updated  Mar 9, 2026 |
Advertisement
Cleaning 3m read
672

How To Remove Pet Smells From Furniture

There’s nothing quite like coming home after a long day and curling up on the couch with your favorite four-legged friend. The cuddles are great — the odor left behind on couches, bedding, and other soft surfaces, however, is not. Fortunately, a handful of inexpensive household items can eliminate those smells in seconds.

All featured products and deals are selected independently and objectively by the author. House Outlook may receive a share of sales via affiliate links in content.

There’s nothing quite like coming home after a long day and curling up on the couch with your favorite four-legged friend. The cuddles are great — the odor left behind on couches, bedding, and other soft surfaces, however, is not. Fortunately, a handful of inexpensive household items can eliminate those smells in seconds.

DIY Deodorizer Recipe

To get rid of pet odors in a pinch, you need a spray bottle, lukewarm water, and distilled white vinegar. Mix equal parts vinegar and water in your spritzer, give it a quick shake, and spray the solution liberally on any surface that needs freshening up. The solution is safe for pets, but you should allow it to dry completely before letting your dog or cat back onto the furniture.

Love the deodorizing power of vinegar but hate the sharp scent? Don’t worry — the sour odor naturally dissipates within 30 to 60 minutes. But if you want to mask the scent of vinegar with a more pleasant one, you can create a custom fragrance using your favorite herbs and fruits.

Related: 6 Cleaning Products Pet Parents Can’t Live Without

Why It Works

Why is vinegar such a powerhouse for eliminating odors? Its high acetic acid content neutralizes odor-causing particles rather than covering them up. The acid binds with the compounds found in pet odor molecules and chemically alters them until the scent vanishes.

Advertisement

The Power of Peels

Warning: This next step is not recommended for pet owners. Citrus peels contain high concentrations of d-limonene, a compound that is toxic to both dogs and cats.

Start by peeling the rind of whatever citrus you have on hand. Lemon is a popular choice, but you can also opt for orange or grapefruit for a sweeter, zestier aroma.

Fill a small saucepan halfway with water, then simmer the rinds of one citrus fruit with a few sprigs of an aromatic herb, such as rosemary, lavender, thyme, sage, or lemon balm, for 15 to 30 minutes. Remove the saucepan from the heat and let it sit for 24 hours. The next day, fill a spray bottle (preferably glass) halfway with the strained, infused liquid. Then, add an equal amount of distilled white vinegar and shake well to combine. Spritz the upholstery with your DIY deodorizer to eliminate those deep-seated odors.

A Time-Saving Tip

In lieu of peels, you can use citrus essential oils. Adding 10 to 15 drops to your spray bottle will take the edge off the vinegar and leave your upholstery smelling fresh. Note that citrus essential oils are also toxic to pets because they contain d-limonene.

Advertisement
Advertisement
Organizing 2m read
87

Follow the ‘Show vs. Stow’ Rule for a Stress-Free Home

Organization is the key to a stress-free home, but adopting a system that works for your lifestyle is often the hardest part of the process. You can declutter all day, every day, but without a strategy for where you place certain items and why, your space will quickly slip back into its old, chaotic patterns. For a home that stays organized without the need for constant tidying, follow the “show vs. stow” rule.

All featured products and deals are selected independently and objectively by the author. House Outlook may receive a share of sales via affiliate links in content.

Organization is the key to a stress-free home, but adopting a system that works for your lifestyle is often the hardest part of the process. You can declutter all day, every day, but without a strategy for where you place certain items and why, your space will quickly slip back into its old, chaotic patterns.…

The Show vs. Stow Rule

There’s no shortage of organization methods, from “one in, one out” and the 10-10 rule to the “core four.” While many of these focus on decluttering, the show vs. stow method is different. It prioritizes your daily needs, ensuring your most-used items are accessible within your personal setup.

Related: The 5/7 Rule for Cleaner, Clearer Surfaces

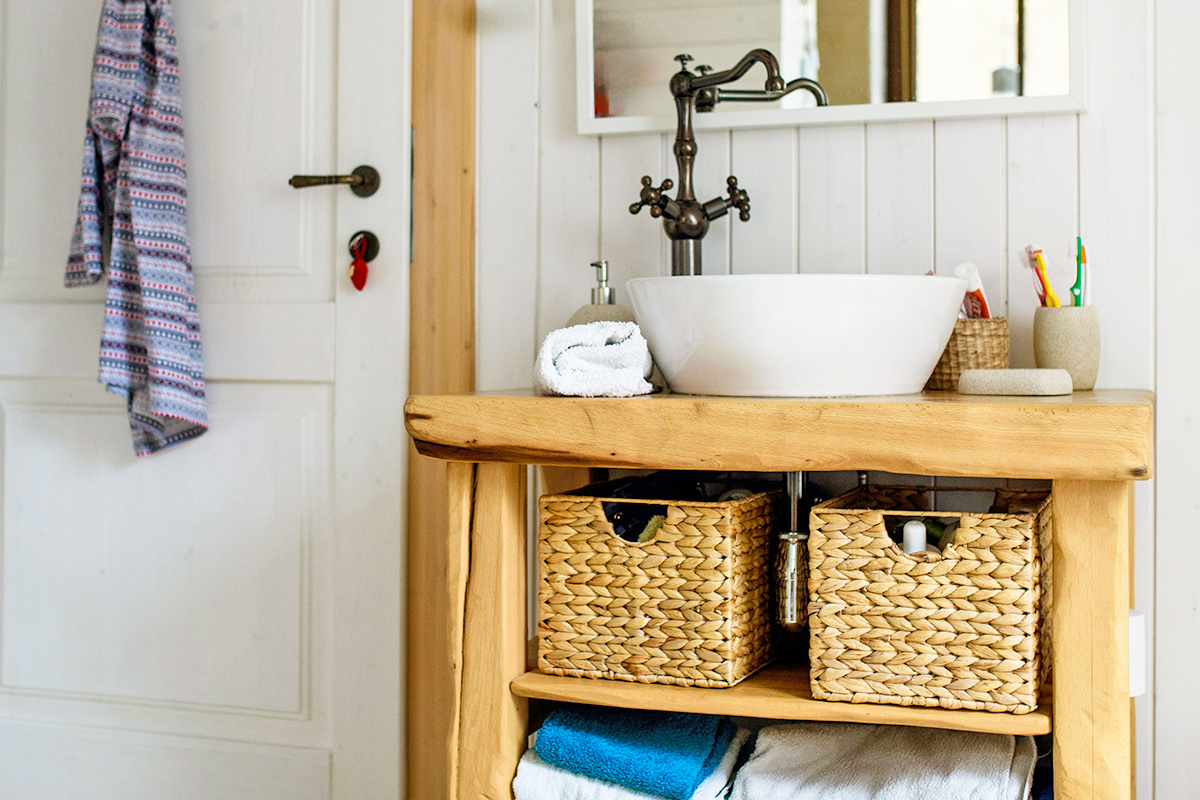
To start, consider the space you want to organize and your most essential needs. When TikTok creator @jenny.for.your.thoughts applied this rule to organize a bathroom, the “shows” included her most frequently used items, such as skin care, makeup, and allergy medications. These items should be front and center for easy access. You can use open shelving or decorative trays to keep your essentials visible yet contained and orderly. When your most-used items are the easiest to put away, a clear countertop — and a clear mind — will follow.

Advertisement

The “stows,” on the other hand, are occasional-use items better kept out of sight. Utilize concealed storage, such as medicine cabinets or vanity drawers. If your bathroom lacks built-ins, opt for freestanding cabinets, woven baskets, or an over-the-toilet storage unit.

Not Just for Bathrooms

While the “show vs. stow” rule works wonders for bathrooms, it can also be applied to other areas of your home. Try it out with the nightstands in your bedroom, the countertops in your kitchen, or the desk in your home office. This method reduces some of the friction that complicates our lives, making daily routines feel more manageable.

Advertisement
Featured Image Credit:  Unsplash+ via Getty Images | Updated  Mar 10, 2026 |
Pauline Lacsamana
Writer
Pauline Lacsamana is a freelance writer and editor who specializes in commerce, home, design, and lifestyle. She has bylines in The Spruce, Business Insider, U.S. News & World Report, Hunker, MyDomaine, Parade, and more.
This article is for general informational purposes only.
Featured Image Credit:  Unsplash+ via Getty Images | Updated  Mar 10, 2026 |
Advertisement
Cleaning 3m read
66

The 30-Second Trick for Hotel-Crisp Sheets Without an Iron

Sheets will inevitably wrinkle. Whether they’re fresh out of the dryer or nearing laundry day, the lightweight fabric is prone to wrinkles that can make your bedding look disheveled. Some people iron their linens to achieve hotel-level crispness, but there’s no need to spend 15 minutes at an ironing board when you can get the same results with significantly less time and effort.

All featured products and deals are selected independently and objectively by the author. House Outlook may receive a share of sales via affiliate links in content.

Sheets will inevitably wrinkle. Whether they’re fresh out of the dryer or nearing laundry day, the lightweight fabric is prone to wrinkles that can make your bedding look disheveled. Some people iron their linens to achieve hotel-level crispness, but there’s no need to spend 15 minutes at an ironing board when you can get the…

Ditch the Ironing Board

Instead of wrestling with an ironing board, you can use water and a wrinkle-release spray to achieve the same crispness in 30 seconds or less. It’s best to start with slightly damp fabric — this helps relax the fabric fibers and makes your bottle of wrinkle-release spray go further.

Related: One Little Trick That Makes Changing Sheets Faster

Fill a continuous mist bottle with lukewarm water and mist your bedding evenly until damp (not soaked). A continuous mist bottle works better than a regular spray bottle because it produces a fine, even layer of moisture without leaving behind wet spots. Once the fabric is damp, follow up with a light misting of Downy Wrinkle Releaser or a similar product, then tug the sheets tight from both sides of the bed. Use your hands to smooth out any remaining creases as the fabric settles. You can also use this trick on duvet covers, pillowcases, shams, and bed skirts.

Advertisement

Steam Your Sheets

If you don’t have those two items on hand, you can use your dryer to steam out wrinkles. Add two or three ice cubes to the drum during the last few minutes of a high-heat cycle. The heat of the dryer causes the ice cubes to melt and quickly evaporate, creating a steam effect that relaxes the fabric’s fibers. Remove the sheets from the dryer as soon as the cycle ends, and spread them across the bed while they’re still warm.

Bonus Hack

If you aren’t quite ready for laundry day, use a linen spray to refresh your bedding. While these concoctions are no replacement for a machine wash, they will give your sheets a much-needed boost and a fresher scent.

Advertisement
Featured Image Credit:  Natalia Blauth/ Unsplash | Updated  Mar 3, 2026 |
Jessie Quinn
Writer
Jessie Quinn is a Los Angeles-based lifestyle journalist with words published in PEOPLE, StyleCaster, Apartment Therapy, The Spruce, Byrdie, and more. She has a Bachelor's Degree in fashion journalism from Academy of Art University and her work spans across many categories, including style, beauty, home, health, crafts, and more.
This article is for general informational purposes only.
Featured Image Credit:  Natalia Blauth/ Unsplash | Updated  Mar 3, 2026 |
Advertisement
Food & Drink 2m read
156

A Time-Saving Hack for Perfectly Caramelized Onions

For anyone who loves to cook, the allium family — which includes onions, garlic, chives, leeks, shallots, and more — supplies some of the most fundamental flavors in the kitchen. The pungent, sulfur-based flavor compounds in these foods bring a savory kick to any dish, while a surprising sweetness hides beneath their sharp bite.

For anyone who loves to cook, the allium family — which includes onions, garlic, chives, leeks, shallots, and more — supplies some of the most fundamental flavors in the kitchen. The pungent, sulfur-based flavor compounds in these foods bring a savory kick to any dish, while a surprising sweetness hides beneath their sharp bite.

Caramelizing onions is a popular way to lean into that natural sweetness. They’re great on hamburgers and hot dogs and provide the base for popular dishes like French onion soup. The only downside is that the process takes more time and patience than most of us can muster on a weeknight. If you want that flavor without the endless stirring, there’s a downright brilliant shortcut you need to know.

How To Make Caramelized Onions Quickly

To understand this hack, it helps to know how onions caramelize. The standard technique is to fill a pan with onions and cook them over low heat, stirring constantly. As they wilt, they release juices containing their natural sugars and amino acids, which brown and mellow in the heat of the pan. It takes time, but the result is a batch of sweet, fragrant, and golden-brown caramelized onions.

Advertisement
Related: 3 Proven Hacks for Cutting Onions Without Crying

To speed up the process, just add water. Adding a splash of water (about 2 to 4 tablespoons) to the skillet and covering it with a lid creates steam, which serves two purposes: It keeps the onions from scorching and cooks them much faster than a dry, open pan. Once the onions wilt and release their juices — usually in just a few minutes — remove the lid and let the moisture evaporate as you stir for a few minutes longer. The onions will begin to brown as soon as the liquid reduces, completing the cooking process in record time.

Advertisement
Featured Image Credit:  funkybg/ iStock | Updated  Mar 3, 2026 |
Fred Decker
Writer
Fred Decker is a trained chef and former restaurateur. Since closing his restaurants over a decade ago he has been a prolific freelance writer, publishing several thousand articles on dozens of high-volume websites including Taste Of Home, Hunker, Tasting Table, Week&, eHow, and GOBankingRates. He lives on a rural acreage shared with a big garden, chickens, rabbits, and grandkids.
This article is for general informational purposes only.
Featured Image Credit:  funkybg/ iStock | Updated  Mar 3, 2026 |
Advertisement
Decorating 3m read
34

The One Thing You Must Do Before Lighting a Candle

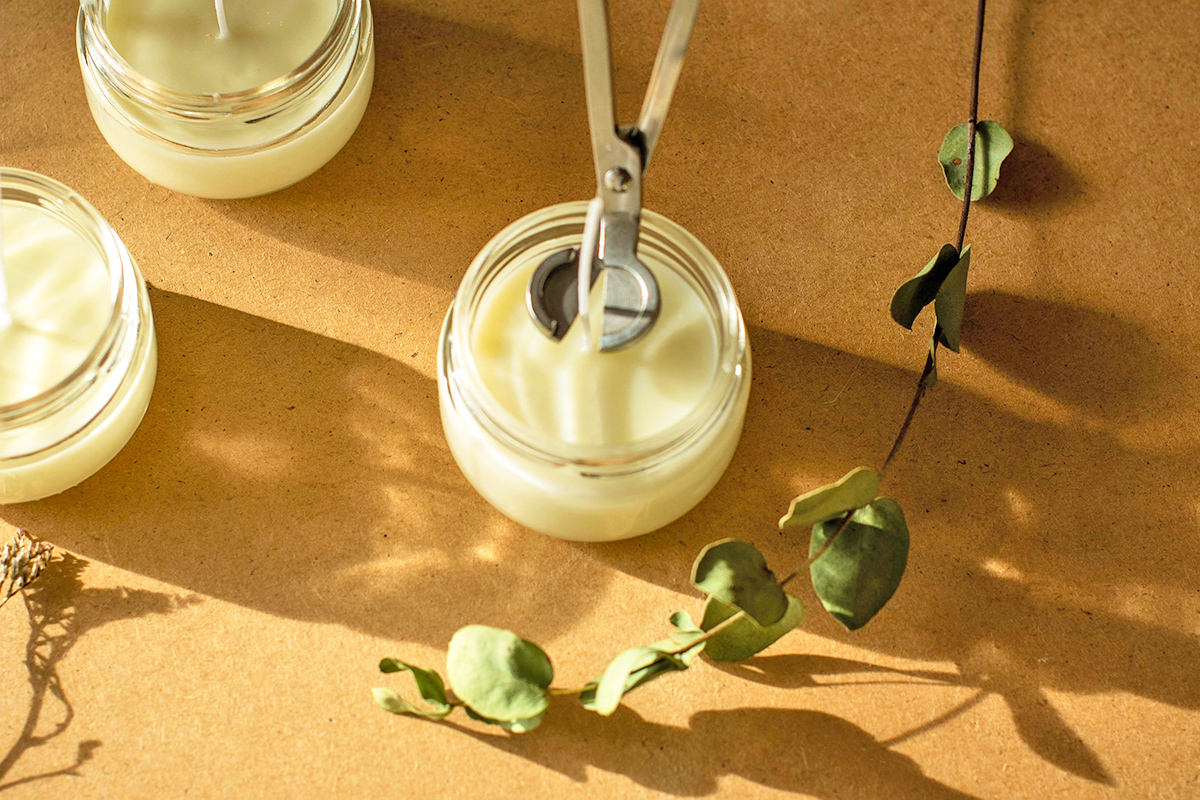
Between the gentle scent and the warm glow, lighting a candle creates an undeniably cozy feeling in your home. But before you strike a match, take a moment for one small step that makes a big difference in the lifespan of your candle: trimming the wick. It may seem like a minor task, but trimming the wick sets the stage for a cleaner, safer, longer-lasting burn. Using a wick trimmer or a petite pair of scissors, cut the wick of new candles to about 1/4 inch with one clean, horizontal snip. 

All featured products and deals are selected independently and objectively by the author. House Outlook may receive a share of sales via affiliate links in content.

Between the gentle scent and the warm glow, lighting a candle creates an undeniably cozy feeling in your home. But before you strike a match, take a moment for one small step that makes a big difference in the lifespan of your candle: trimming the wick. It may seem like a minor task, but trimming…

Read on for four reasons why trimming the wick deserves to be part of your candle-lighting routine, before the first lighting and every burn after.

It Helps Flames Stay Steady

A properly trimmed wick is essential for maintaining a safe flame height. When a wick is too long, the flame can grow tall and flicker wildly, increasing the risk of excess smoke or even a fire. An oversized flame also produces more heat, which can cause the jar to overheat and the wax to melt unevenly.

Trimming the wick to about 1/4 inch ensures a controlled, steady flame that creates an even melt pool across the surface.

Related: A Quick Fix for Leaning Taper Candles

It Helps Your Candle Last Longer

If you skip trimming the wick, carbon buildup can form at the tip — a phenomenon called “mushrooming.” That enlarged tip causes the flame to burn hotter and faster, consuming more wax than necessary. Snipping away that buildup before each lighting helps your candle burn more evenly and slowly, so you can enjoy every last ounce of wax.

Advertisement

It Prevents Soot

A wick that’s too long can lead to a dirty burn, with visible soot and smoke. This can discolor candle jars and even leave faint black marks on nearby walls. Keeping the wick neatly trimmed reduces excess smoke, which is better for both your decor and your air.

It Improves the Scent

When a candle burns at the proper height, the wax warms evenly to the ideal temperature. This allows fragrance oils to disperse more effectively into the air. With a steady, controlled flame, your favorite scent notes — such as bergamot, Frasier fir, or sandalwood — will fill the room consistently rather than fading away.

Advertisement
Featured Image Credit:  Marta Klos/ iStock | Updated  Mar 3, 2026 |
Megan McCarty
Writer
Megan McCarty is a Los Angeles-based writer who covers the fun stuff: design, travel, wellness, beauty, and fashion. She has written for publications including Domino, The Spruce, MyDomaine, Bustle, and Rue Magazine. Her life rules include, but are not limited to, zipper when merging, contribute to your IRA, and do the nice thing.
This article is for general informational purposes only.
Featured Image Credit:  Marta Klos/ iStock | Updated  Mar 3, 2026 |
Advertisement
Home Improvement 2m read
63

Why You Should Keep Clear Nail Polish in Your Glove Box

There are certain essentials every driver should keep in their vehicle. We’re talking jumper cables, a first aid kit, nail polish, a flashlight …. Wait, what was that third thing? It’s true — nail polish is surprisingly useful for more than just creating colorful designs on fingers and toes. The beauty product can also help drivers address a common issue many cars experience. Here’s why you should keep clear nail polish in the glove box and how it can help you out on the road.

All featured products and deals are selected independently and objectively by the author. House Outlook may receive a share of sales via affiliate links in content.

There are certain essentials every driver should keep in their vehicle. We’re talking jumper cables, a first aid kit, nail polish, a flashlight …. Wait, what was that third thing? It’s true — nail polish is surprisingly useful for more than just creating colorful designs on fingers and toes. The beauty product can also help…

Prevent Windshield Cracks From Spreading

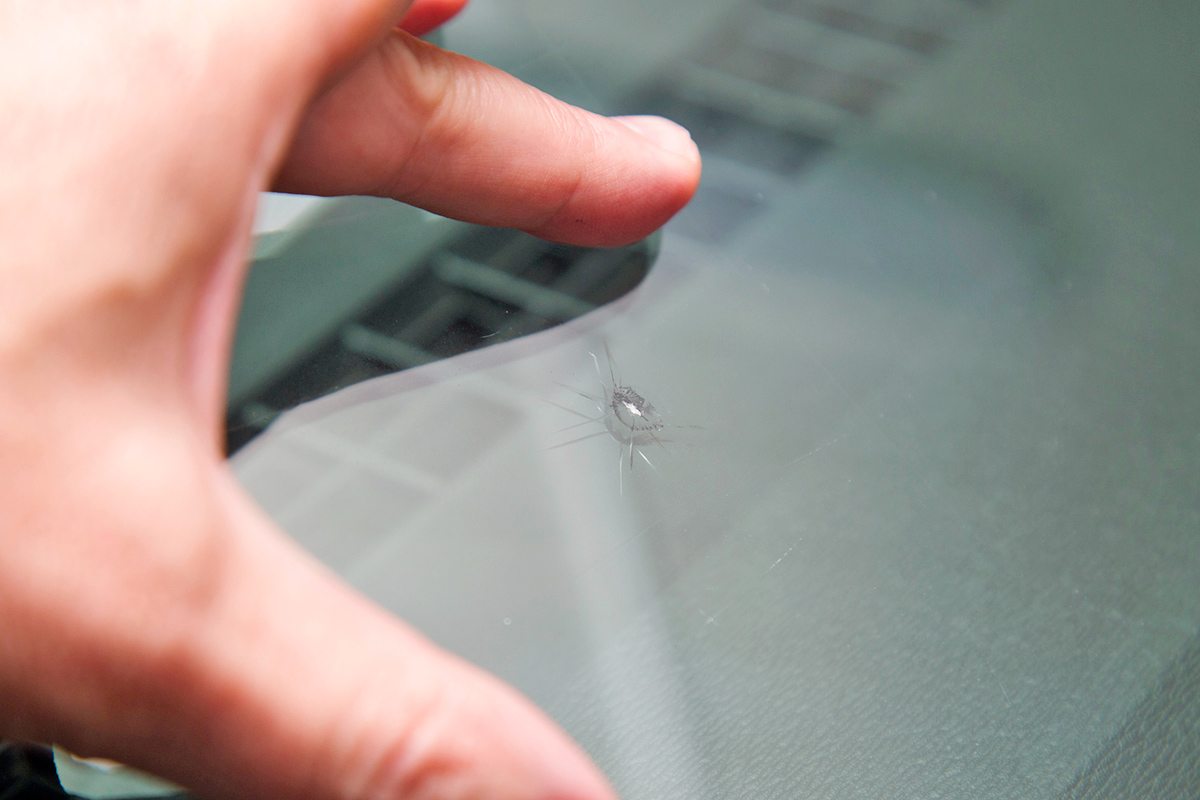
Sometimes a small pebble kicks up from the road and cracks the windshield. While the damage may be tiny at first, it inevitably grows until the vehicle is unsafe to drive and the glass must be replaced. You can delay that spread, however, with a little bit of nail polish.

Always use clear nail polish for this hack. Colored versions create opaque obstructions that can cloud your vision. When a windshield crack forms, safely pull over and grab a microfiber cloth and the nail polish from your glove box.

Related: The Best Organizers To Tame Car Clutter

First, use the cloth to thoroughly clean the cracked area and remove any debris. If the damage affects both the interior and exterior of the glass, wipe down the inside as well. Next, apply the clear nail polish on both sides of the windshield. (This is a “better safe than sorry” approach as the crack may have depth that’s not visible to the naked eye.) Let it dry for the recommended time on the bottle before getting back on the road.

Advertisement

Why It Works

The idea here is that the nail polish forms a tight, temporary seal, protecting the crack from the elements and keeping it from growing. To be clear, this isn’t a permanent solution — you’ll still need to replace the windshield eventually. However, this allows you to reach your destination safely without the damage spreading. This hack also gives you the flexibility to schedule a repair or replacement on your own timeline instead of dealing with an immediate crisis.

Advertisement
Featured Image Credit:  Aleksandr Potashev/ iStock | Updated  Mar 10, 2026 |
Bennett Kleinman
Staff Writer
Bennett Kleinman is a New York City-based staff writer for Inbox Studio, covering topics for several brands including House Outlook and Better Report. He previously contributed to television programs such as "Late Show With David Letterman" and "Impractical Jokers," and digital publications like The Onion. Bennett is also a devoted New York Yankees and New Jersey Devils fan, and thinks plain seltzer is the best drink ever invented.
This article is for general informational purposes only.
Featured Image Credit:  Aleksandr Potashev/ iStock | Updated  Mar 10, 2026 |