Advertisement
Cleaning 3m read
522

Most People Use Disinfecting Products Incorrectly

Spritz and wipe — that’s all it takes to leave your kitchen countertops germ-free, right? Not necessarily. If you don’t give your favorite household disinfectant time to work, you’re merely cleaning the surface, not killing viruses and bacteria. The secret to eliminating pathogens is contact time — here’s how to use disinfectants correctly to ensure your surfaces are sufficiently sanitized.

All featured products and deals are selected independently and objectively by the author. House Outlook may receive a share of sales via affiliate links in content.

Spritz and wipe — that’s all it takes to leave your kitchen countertops germ-free, right? Not necessarily. If you don’t give your favorite household disinfectant time to work, you’re merely cleaning the surface, not killing viruses and bacteria. The secret to eliminating pathogens is contact time — here’s how to use disinfectants correctly to ensure…

Cleaning vs. Disinfecting

To get the most out of your cleaning products, you’ll want to learn the difference between two key terms: cleaning and disinfecting.

Cleaning is simply the act of removing dirt and debris from surfaces. This includes everything from kitchen counters to bathroom sinks and dining tables. According to professional house cleaner and TikTok creator Kellsie Zapata, cleaning should be done daily, while disinfecting should be reserved for “sick days, high-touch areas, bathroom cleanups, or when the [product] label specifically calls for it.”

Disinfecting goes a step further by destroying the germs that cause illness, including cold viruses and the bacteria responsible for food poisoning. Zapata stresses that you don’t need to disinfect every day; in fact, doing so can trigger respiratory issues, skin irritation, and even lead to antimicrobial resistance or health risks for pets.

Advertisement

How To Properly Disinfect 

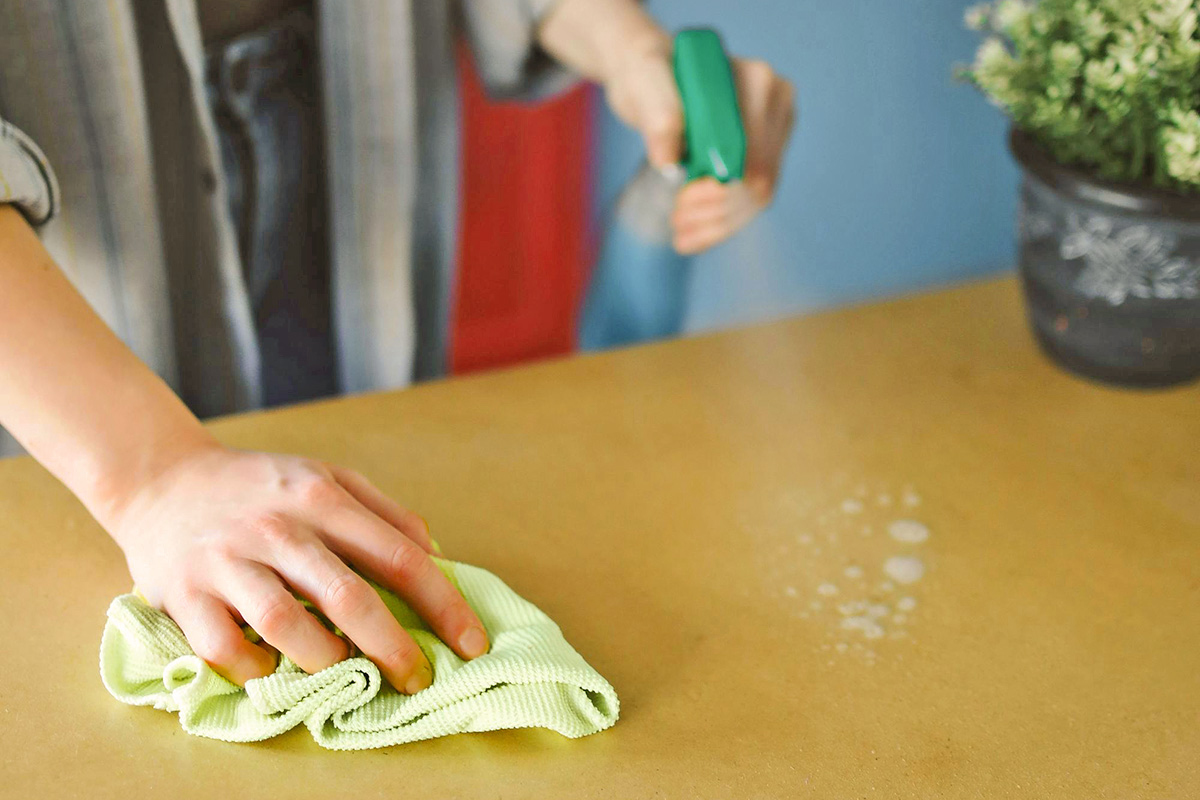
Disinfecting requires more than just a quick wipe; it needs contact time to actually work. Zapata recommends spraying the surface until it’s visibly wet. The surface must remain visibly wet for the entire recommended contact time, which can range from 2 to 10 minutes depending on the brand. (Remember to check the product label to confirm.) If the disinfectant dries before your timer goes off, you need to spray more to keep the surface wet.

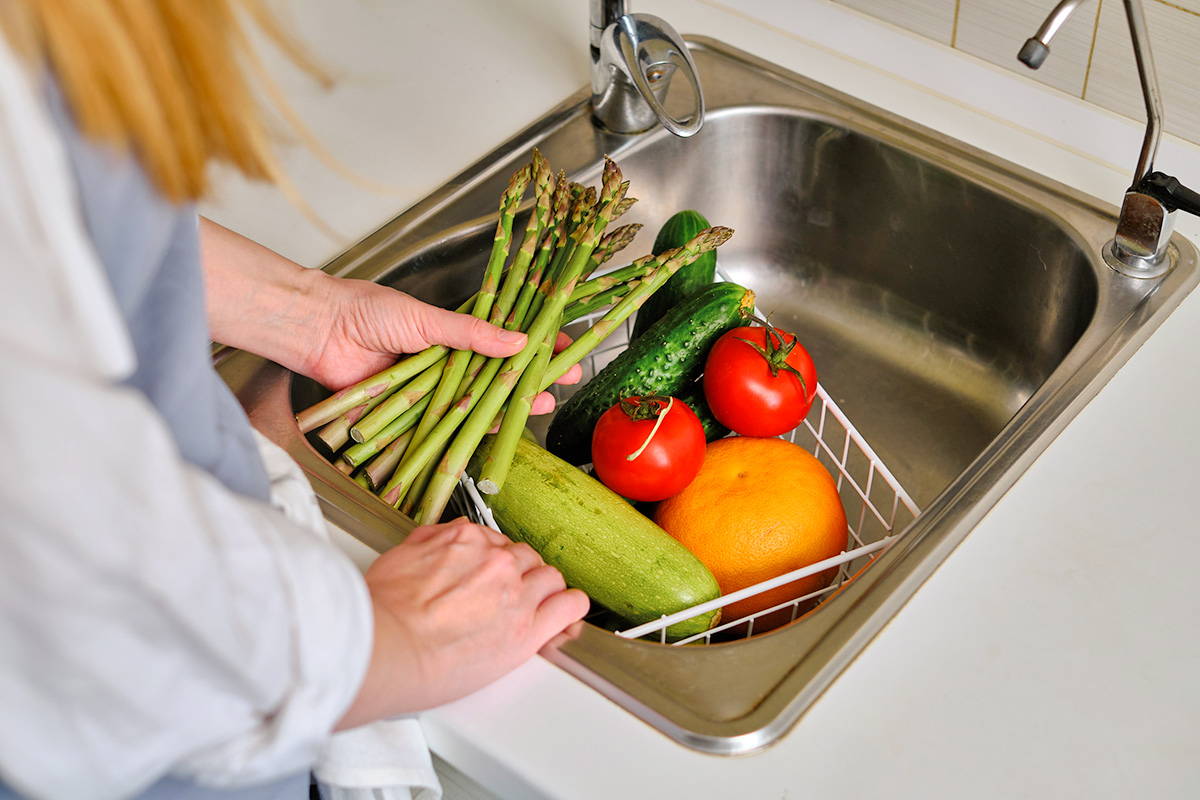
Some disinfectants require rinsing with water, especially on food-prep surfaces such as cutting boards, sinks, and countertops. To do this, wet a clean microfiber cloth and wipe down the area a few times — rinsing the cloth with clean water in between — until all the product is gone. Now your surfaces aren’t just clean; they’re thoroughly disinfected and safe to use.

Advertisement
Advertisement
Home Improvement 2m read
467

The Trick for Cabinet Hardware That Never Loosens

Cabinets are among the hardest-working pieces of furniture in any home. Whether they’re built-ins or freestanding credenzas, the constant opening and closing often results in loose screws. If you have cabinet hardware that always loosens up, no matter how often you tighten it, you could buy threadlocker to glue the fastener in place — or you could look in your bathroom cabinet. You likely have an alternative that works just as well.

All featured products and deals are selected independently and objectively by the author. House Outlook may receive a share of sales via affiliate links in content.

Cabinets are among the hardest-working pieces of furniture in any home. Whether they’re built-ins or freestanding credenzas, the constant opening and closing often results in loose screws. If you have cabinet hardware that always loosens up, no matter how often you tighten it, you could buy threadlocker to glue the fastener in place — or…

Get a Grip

Whether you’re fixing a loose screw or want to prevent hardware from wiggling, add a thin drop of clear nail polish to the screw threads before inserting the screw and tightening it into place. Similar to commercial threadlocker, nail polish acts like a light adhesive that fills the gaps between threads to lock them into place. Clear nail polish dries almost instantly and stands up to the constant vibration of opening and closing cabinets and drawers.

Related: Why You Should Always Put Tape on Your Drill Bit

If you don’t have clear nail polish, you can achieve a similar result using super glue, rubber cement, or even Teflon tape. You can also opt for specialized fasteners, such as nylon insert nuts, lock washers, or safety wire to keep hardware locked in place.

Advertisement

Other Household Uses for Clear Nail Polish

Clear nail polish doesn’t just belong in your manicure kit — it’s one of the most useful tools to have around the house. Beyond its use as a threadlocker alternative, clear nail polish is great for stopping runs in stockings or tights before they spread. It also works well for temporarily patching small holes in window screens or preventing cut rope from fraying. And if you’re an avid camper or building an emergency kit, you can waterproof matches by dipping the heads in clear nail polish.

Advertisement
Featured Image Credit:  brizmaker/ iStock | Updated  Feb 10, 2026 |
Jessie Quinn
Writer
Jessie Quinn is a Los Angeles-based lifestyle journalist with words published in PEOPLE, StyleCaster, Apartment Therapy, The Spruce, Byrdie, and more. She has a Bachelor's Degree in fashion journalism from Academy of Art University and her work spans across many categories, including style, beauty, home, health, crafts, and more.
This article is for general informational purposes only.
Featured Image Credit:  brizmaker/ iStock | Updated  Feb 10, 2026 |
Advertisement
Food & Drink 3m read
571

Do This One Thing Before Eating Fresh Produce

We all know that eggs, undercooked chicken, and questionable shellfish are potential causes of food poisoning, but don’t overlook the risks from fresh produce. We typically cook meats and eggs, but produce such as lettuce, sprouts, and fresh fruit — just to name a few — are almost always eaten raw. If they’re carrying any bacteria (and with all the handling they get between the field and your table, who knows?), those pathogens will end up in your gut, where they become a problem for your immune system.

All featured products and deals are selected independently and objectively by the author. House Outlook may receive a share of sales via affiliate links in content.

We all know that eggs, undercooked chicken, and questionable shellfish are potential causes of food poisoning, but don’t overlook the risks from fresh produce. We typically cook meats and eggs, but produce such as lettuce, sprouts, and fresh fruit — just to name a few — are almost always eaten raw. If they’re carrying any…

You’ll find plenty of commercial produce washes on store shelves, but the USDA remains skeptical. The agency argues that these washes haven’t been well studied and raises concerns about the chemical residues they leave behind. Fortunately, a science-backed alternative exists that is inexpensive and relies on ingredients you likely already have on hand. Here’s how it works to keep your produce safe.

Cleaning Fresh Produce With Hydrogen Peroxide and Vinegar

Back in 1996, researcher Susan Sumner — then at the University of Nebraska and later Virginia Tech — discovered that two common household products could be a produce-cleaning powerhouse. By pairing distilled white vinegar with 3% hydrogen peroxide, she found they could kill nearly all salmonella, shigella, and E. coli bacteria, even on produce deliberately contaminated at high levels. Here’s the process:

• Fill a spray bottle with distilled white vinegar, or find a spray mechanism to fit the vinegar bottle. Do the same with 3% hydrogen peroxide; make sure the bottle is dark or opaque, as light breaks down the active ingredient.

• Wash your produce first under clean, running water to remove any dirt that might give bacteria a hiding place.

• Spray the produce thoroughly with the vinegar, then immediately follow up with the hydrogen peroxide. Your produce should be visibly wet and glistening.

• Allow the produce to sit for at least 20 minutes.

• Rinse the produce under cool, running water for 30 to 60 seconds to remove any remaining vinegar or hydrogen peroxide. (Note: Trace amounts of hydrogen peroxide are generally considered safe to consume, as the compound eventually breaks down into water and oxygen when exposed to light and air.)

Advertisement

The Do’s and Don’ts

A couple of final notes: First, to avoid cross-contamination, wash your hands thoroughly before you begin. Second, don’t combine the distilled white vinegar and hydrogen peroxide in the same bottle — mixing them ahead of time reduces their effectiveness.

Related: 5 Tips for Ripening Your Favorite Fruits Faster

For delicate produce such as greens and berries, wait until you’re ready to use them before washing. For sprouts, swish them in a bowl of hydrogen peroxide followed by a dip in vinegar (or vice versa). Finally, don’t use this hack on cantaloupes. Their rinds are too porous and rough for the treatment to work, and the fruit can absorb the taste. Scrub those under running water with a stiff brush instead.

Advertisement
Featured Image Credit:  Iuliia Pilipeichenko/ iStock | Updated  Feb 10, 2026 |
Fred Decker
Writer
Fred Decker is a trained chef and former restaurateur. Since closing his restaurants over a decade ago he has been a prolific freelance writer, publishing several thousand articles on dozens of high-volume websites including Taste Of Home, Hunker, Tasting Table, Week&, eHow, and GOBankingRates. He lives on a rural acreage shared with a big garden, chickens, rabbits, and grandkids.
This article is for general informational purposes only.
Featured Image Credit:  Iuliia Pilipeichenko/ iStock | Updated  Feb 10, 2026 |
Advertisement
Cleaning 3m read
295

How To Remove Lingering Odors From Plastic Containers

Plastic food storage containers have a way of multiplying in our cupboards. They sneak in through takeout deliveries and the inevitable transfer of custody that happens whenever a friend sends you home with leftovers. While glass is aesthetically pleasing, plastic containers are considerably more affordable, shatterproof, and lightweight — making them the ideal choice for bringing your lunch to work. But whether you prefer the name-brand Tupperware or a budget-friendly alternative, the convenience comes with a catch.

All featured products and deals are selected independently and objectively by the author. House Outlook may receive a share of sales via affiliate links in content.

Plastic food storage containers have a way of multiplying in our cupboards. They sneak in through takeout deliveries and the inevitable transfer of custody that happens whenever a friend sends you home with leftovers. While glass is aesthetically pleasing, plastic containers are considerably more affordable, shatterproof, and lightweight — making them the ideal choice for bringing…

Ink Out the Stink

Since plastic is porous, food odors can easily seep into the material, leaving behind an off-putting scent that seems impossible to get rid of, even after the container is run through the dishwasher. Instead of scrubbing, reach for a sheet of black-and-white newspaper to get rid of the smell.

Related: The Smartest Way To Label All of Your Food Containers

Newspaper is made of highly porous fibers and carbon-based ink. The fibers absorb the odor-causing molecules like a sponge, and the ink works to neutralize them. To get rid of food smells in plastic containers, crumple a sheet of newspaper, stuff it inside the container, and secure the lid. For best results, place the container in a sunny spot in your home. The warmth helps release the odor-causing molecules, making them easier to trap, while UV rays help break down the chemical bonds of those lingering scents. Let the container sit overnight for a quick refresh. If you’re dealing with a particularly stubborn smell, you can leave it for a few days (up to four) until you’re satisfied with the results.

Advertisement

A Bright Idea for Stained Plastic

If your clear plastic containers are sporting an orange glow — whether it be from spaghetti and meatballs or coconut chicken curry —  you’re going to want to try this trick. Direct sunlight can significantly fade and reduce discoloration on plastic food storage containers. You can up the ante by rubbing a cut lemon over the stained areas; the citric acid acts as a natural bleach, working with the UV rays to lift away stains. For more stubborn cases, mix 3 tablespoons of baking soda with 1 tablespoon of water until it forms a thick paste. Apply it generously to the stained areas and let it sit for 30 minutes to an hour before scrubbing. The baking soda cuts through grease and acts as a mild abrasive, buffing out those deep-set stains.

Advertisement
Featured Image Credit:  Bibica/ iStock | Updated  Feb 19, 2026 |
Jessie Quinn
Writer
Jessie Quinn is a Los Angeles-based lifestyle journalist with words published in PEOPLE, StyleCaster, Apartment Therapy, The Spruce, Byrdie, and more. She has a Bachelor's Degree in fashion journalism from Academy of Art University and her work spans across many categories, including style, beauty, home, health, crafts, and more.
This article is for general informational purposes only.
Featured Image Credit:  Bibica/ iStock | Updated  Feb 19, 2026 |
Advertisement
Food & Drink 3m read
333

Make Restaurant-Style Pizza in Your Own Oven

There’s a reason most of us prefer pizzeria pizza over homemade, and it isn’t always because we don’t feel like cooking. The primary reason is heat: Commercial pizza ovens reach temperatures far beyond home ovens, which typically max out at 500 degrees Fahrenheit. The wood-fired oven at that trendy pizza place across town, on the other hand, routinely hits 800 degrees or more. That intense blast of heat rapidly puffs the crust, creating a leopard-spotted underside and a flavor-enhancing char while quickly browning the cheese and other toppings.

All featured products and deals are selected independently and objectively by the author. House Outlook may receive a share of sales via affiliate links in content.

There’s a reason most of us prefer pizzeria pizza over homemade, and it isn’t always because we don’t feel like cooking. The primary reason is heat: Commercial pizza ovens reach temperatures far beyond home ovens, which typically max out at 500 degrees Fahrenheit. The wood-fired oven at that trendy pizza place across town, on the…

So how can you replicate this in a home oven that lacks the heat capacity, stone floor, and domed roof of a commercial model? A simple workaround can give you some of the best homemade pizza you’ve ever tasted with minimal fuss and investment.

Restaurant-Quality Home Oven Pizza

First, you must replicate the floor — or hearth — of a commercial oven. For that, you’ll need a pizza stone or steel large enough to hold the biggest pizza you plan to cook. While a steel is more expensive, it’s more durable and arguably more effective. Place it in your oven at its maximum temperature (usually 500 degrees Fahrenheit) for at least 30 minutes before baking.

Related: This Chef-Approved Trick Keeps Herbs Fresher for Longer

To recreate the tomato-blistering, cheese-browning top-down heat of a commercial oven, switch from the bake setting to the broiler. Your elements ordinarily heat the oven’s air, and it’s the air that heats the food. Your broiler uses infrared radiation from the red-hot element (usually a metal coil) to cook the surface of the food directly. 

Advertisement

The Best Homemade Pizza, Step by Step

Preheat the hearth: Put the pizza steel or stone in the oven and preheat to 500 degrees Fahrenheit (or as high as your oven will go) for at least 30 minutes.

Prepare the pie: Assemble your pizza and add your desired toppings.

Switch to the broiler: Once the oven is preheated, turn it off and immediately switch to the broil setting. If your broiler offers both high and low settings, select high.

Slide and bake: Carefully slide the pizza onto the hot stone or steel. Using cornmeal — or better yet, semolina flour — under the dough makes this easier. Take care not to burn yourself (a pizza peel is especially handy for this step). Broil until the cheese is bubbly and the crust is browned, then remove the pizza from the oven.

Advertisement
Featured Image Credit:  amirali mirhashemian/ Unsplash | Updated  Feb 10, 2026 |
Fred Decker
Writer
Fred Decker is a trained chef and former restaurateur. Since closing his restaurants over a decade ago he has been a prolific freelance writer, publishing several thousand articles on dozens of high-volume websites including Taste Of Home, Hunker, Tasting Table, Week&, eHow, and GOBankingRates. He lives on a rural acreage shared with a big garden, chickens, rabbits, and grandkids.
This article is for general informational purposes only.
Featured Image Credit:  amirali mirhashemian/ Unsplash | Updated  Feb 10, 2026 |
Advertisement
Decorating 3m read
1,296

3 Design Fixes for Your Home’s Biggest Eyesores

When it comes to interior design, it’s the little things that matter most. According to interior designer Hans Lorei, the smallest elements in a room are often the ones that become the biggest eyesores.

All featured products and deals are selected independently and objectively by the author. House Outlook may receive a share of sales via affiliate links in content.

When it comes to interior design, it’s the little things that matter most. According to interior designer Hans Lorei, the smallest elements in a room are often the ones that become the biggest eyesores.

Great design is about two things, Lorei says: Highlighting the beauty and quieting the not-so-pretty necessities. With color drenching in style, details such as vents, light switches, and outlet covers can suddenly stand out for all the wrong reasons.

Fortunately, there are simple solutions. Read on for three quick, easy fixes that will make your home look instantly more polished.

1. Make Outlets and Light Switches Disappear — Or Stand Out

Nothing ruins a beautifully painted wall faster than bright white outlet covers. Since paintable outlet covers cost only a couple of dollars, swapping them out is a no-brainer. Paint them the same color as the wall and watch the magic happen as they visually recede.

Related: Design Trends Homeowners Regret the Most, According to Interior Designers

Alternatively, you could turn your light switches into a design moment. While the metal switches you see in high-end interiors are undeniably chic, they often come with an eye-popping price tag — especially if you’re outfitting an entire home. A stylish middle ground, Lorei says, is mother-of-pearl push-button switches paired with elegant cover plates. They offer a classic feel and add subtle texture, all without blowing your budget.

Advertisement

2. Tone Down Can Lights

Take a look at your ceiling. The white plastic trim around recessed lights can really pop against a painted ceiling — and rarely in a good way. The quickest fix is to paint the trim to match the ceiling, even if it’s only a slightly different shade of white. For a sleeker, more modern look, consider switching to trimless cans.

Another solution is to eliminate them entirely. Many modern homes are “overlit,” according to Lorei, meaning you may be able to nix recessed cans in favor of layered ambient lighting. Floor lamps, sconces, table lamps, and even candles provide a far more inviting glow. 

3. Camouflage Vents and Registers

Decorative vent covers exist, but finding the right size and style can be tricky. Mud-in (or flush-mounted) options offer a sleek, custom look but are difficult to install and best left to the professionals. The easiest DIY option is to paint vents and registers the same color as your walls or ceiling. They’ll blend in seamlessly, no longer drawing unwanted attention.

Advertisement
Featured Image Credit:  pocketlight/ iStock | Updated  Feb 10, 2026 |
Megan McCarty
Writer
Megan McCarty is a Los Angeles-based writer who covers the fun stuff: design, travel, wellness, beauty, and fashion. She has written for publications including Domino, The Spruce, MyDomaine, Bustle, and Rue Magazine. Her life rules include, but are not limited to, zipper when merging, contribute to your IRA, and do the nice thing.
This article is for general informational purposes only.
Featured Image Credit:  pocketlight/ iStock | Updated  Feb 10, 2026 |
Advertisement
Home Improvement 3m read
553

Why You Should Always Put Tape on Your Drill Bit

Some DIYers don’t take proper precautions before drilling into a wall or cabinet. For example, there are those who think they can just eyeball it, only to drill straight through the drywall and hit a hidden gas pipe. To avoid a potential disaster, it’s a good idea to use a visual aid that warns you when to stop. One easy way to do this is by wrapping a bit of tape around the drill bit — here’s how it works.

All featured products and deals are selected independently and objectively by the author. House Outlook may receive a share of sales via affiliate links in content.

Some DIYers don’t take proper precautions before drilling into a wall or cabinet. For example, there are those who think they can just eyeball it, only to drill straight through the drywall and hit a hidden gas pipe. To avoid a potential disaster, it’s a good idea to use a visual aid that warns you…

A Bit of Advice

The first step is to determine the exact depth of the hole you need to drill. This is typically done by measuring the hardware being inserted — such as a screw, anchor, or dowel — and transferring that measurement onto the drill bit using a tape measure. Mark the stopping point with a permanent marker or pencil, then wrap a piece of painter’s tape around the bit at that point. If you don’t have painter’s tape on hand, other durable options such as electrical tape or duct tape are solid alternatives, though they may leave behind a sticky residue.

Related: How To Drill Into Drywall Without Making a Mess

For example, if you need to drill exactly 2 inches into the wall, measure 2 inches from the tip of the drill bit and wrap it with painter’s tape, leaving only that 2-inch section exposed. The tape acts as a visual “stop sign,” alerting you when to stop drilling. In other words, you will know you’ve drilled 2 inches deep as soon as the tape sits flush against the wall. Because the edge of the tape can be difficult to see, try adding a 1-inch flag that extends from the bit, providing a more obvious visual marker for when you’ve drilled to your desired depth.

Advertisement

Beyond reducing the risk of drilling into hidden wires or pipes, this method ensures holes of a consistent depth. If you need to drill 10 holes that are each 2 inches deep, a little painter’s tape guarantees they will be equal depths without the need to remeasure every time.

A word to the wise: Don’t press too hard while drilling, as the extra pressure can cause the tape to slide up the drill bit ever so slightly. Maintain a steady, careful hand to ensure the tape stays put and the method remains effective.

Advertisement
Featured Image Credit:  Kelsey Morrison/ House Outlook Editor | Updated  Feb 10, 2026 |
Bennett Kleinman
Staff Writer
Bennett Kleinman is a New York City-based staff writer for Inbox Studio, covering topics for several brands including House Outlook and Better Report. He previously contributed to television programs such as "Late Show With David Letterman" and "Impractical Jokers," and digital publications like The Onion. Bennett is also a devoted New York Yankees and New Jersey Devils fan, and thinks plain seltzer is the best drink ever invented.
This article is for general informational purposes only.
Featured Image Credit:  Kelsey Morrison/ House Outlook Editor | Updated  Feb 10, 2026 |
Advertisement
Cleaning 3m read
443

Clean Hood Vent Filters Without Lifting a Finger

Range hoods are easy to overlook, but they’re among the most important appliances in your kitchen. These vents are designed to capture smoke, steam, and airborne grease to improve indoor air quality and prevent sticky buildup on your cabinets. In short, if you have a stove, you need a range hood. While the suction draws away pesky particles with ease, cleaning the filters that trap them is anything but effortless.

All featured products and deals are selected independently and objectively by the author. House Outlook may receive a share of sales via affiliate links in content.

Range hoods are easy to overlook, but they’re among the most important appliances in your kitchen. These vents are designed to capture smoke, steam, and airborne grease to improve indoor air quality and prevent sticky buildup on your cabinets. In short, if you have a stove, you need a range hood. While the suction draws…

Don’t Fret Over Greasy Filters

Cleaning your range hood filters is one of the most important things you can do to prevent fire hazards and maintain your home’s air quality. However, it’s not enough to simply wipe down these filters. Because they’re designed to trap oil (and do so quite effectively), grease gets stuck deep inside the mesh, making them difficult (and annoying) to scrub clean. What many people don’t realize is that you can often just pop these filters into the dishwasher and move on with your life.

Related: 9 Forgotten Household Filters You Need To Clean or Replace
Maintenance Tip

Clean your range hood filters every one to three months to ensure peak performance and better air quality throughout the home. If you do a lot of high-heat cooking or deep frying, consider cleaning the filters every two to four weeks. If you cook infrequently, once every six months is likely enough.

Advertisement

Let the Dishwasher Do the Work

Just like it does for your dirty dishes, a dishwasher can work magic on a filter’s stubborn grease and grime. The high-pressure jets and concentrated detergent break down heavy buildup far better than hand-scrubbing, ensuring your range hood runs both efficiently and effectively.

It’s best to wash the filters alone to prevent cross-contamination. Place them on the bottom rack of the dishwasher, spaced far apart and angled slightly downward. Select a cycle with a higher water temperature and longer wash time to cut through the grease. Once the dishwasher cycle is complete, check the filters for any remaining residue. A rinse under hot water may be necessary before drying them completely and reinstalling.

This method works well for many range hood filters, though there are some exceptions. If a filter is made of aluminum or contains charcoal, it’s not dishwasher-compatible. Harsh detergents can cause aluminum filters to discolor or oxidize, so you’ll want to clean them by hand with hot water and grease-cutting soap. (If you’re renting and find that the old, crusty aluminum filters in your range hood are beyond saving, you can also replace them.) Charcoal filters cannot be washed at all and must be replaced periodically. Refer to the owner’s manual for your specific model’s maintenance schedule.

Advertisement
Featured Image Credit:  brizmaker/ iStock | Updated  Feb 3, 2026 |
Jessie Quinn
Writer
Jessie Quinn is a Los Angeles-based lifestyle journalist with words published in PEOPLE, StyleCaster, Apartment Therapy, The Spruce, Byrdie, and more. She has a Bachelor's Degree in fashion journalism from Academy of Art University and her work spans across many categories, including style, beauty, home, health, crafts, and more.
This article is for general informational purposes only.
Featured Image Credit:  brizmaker/ iStock | Updated  Feb 3, 2026 |
Advertisement
Food & Drink 2m read
381

A Genius Way To Store Leftover Cake

From birthdays to bridal showers, any celebration is better with a little (or a lot of) cake. Whether you baked it from scratch or bought it from the grocery store, cutting and serving it to your guests is generally pretty easy. Storing the leftovers is another story. Do you leave the cake in that flimsy cardboard box or the disposable, comically loud plastic container to inevitably dry out? Or cover it in plastic wrap that’s sure to smudge the icing? A genius hack using a basic, reusable food storage container is about to make your life easier.

All featured products and deals are selected independently and objectively by the author. House Outlook may receive a share of sales via affiliate links in content.

From birthdays to bridal showers, any celebration is better with a little (or a lot of) cake. Whether you baked it from scratch or bought it from the grocery store, cutting and serving it to your guests is generally pretty easy. Storing the leftovers is another story. Do you leave the cake in that flimsy…

The Best Way To Store Leftover Cake

Storing leftover cake in its original packaging — especially a cardboard box — is a risky move. More often than not, the packaging isn’t airtight. In just a matter of days, your cake can dry out, turn stale, or, worse, absorb other food odors in the fridge.

An easy way to store leftover cake is to use a food storage container, but not in the way you’d expect. You could try to scoop some slices into the container the traditional way, but there’s a chance they’ll tip over or the frosting will smear.

For this hack, choose a food storage container tall enough to house your cake without squishing the top. This trick is particularly useful for stashing individual slices, allowing you to use the standard containers you already have on hand instead of hunting for an oversized one.

Advertisement
Related: The Baking Trick for Perfectly Flat Cake Layers

Take the lid of the food storage container and flip it over so the grooves are facing up; this will serve as the base. Slide the leftover cake onto the lid, then secure the container onto the lid like a dome. Think of it as a DIY cake stand, but with a much tighter seal. Your leftovers will stay moist and delicious, rather than drying out in a cardboard box.

Advertisement
Advertisement
Gardening 3m read
338

Cut Flowers Perfectly To Fit Any Vase

Creating a floral arrangement is one of those things that looks much easier than it actually is. It seems as simple as placing a few flowers into a vase, but in reality, there’s an art to it — you have to consider everything from the vase itself to the exact length and angle at which the stems are cut. Let’s start with the latter.

All featured products and deals are selected independently and objectively by the author. House Outlook may receive a share of sales via affiliate links in content.

Creating a floral arrangement is one of those things that looks much easier than it actually is. It seems as simple as placing a few flowers into a vase, but in reality, there’s an art to it — you have to consider everything from the vase itself to the exact length and angle at which…

How To Cut Stems To Fit Any Vase

As much as we’d love to have a vast collection of vases, most of us rotate through a trusty few. If that’s the case for you, this handy trick will save you a lot of guesswork.

To cut stems for a perfect fit in almost any vase, use the golden ratio: Ideally, your arrangement should be about 1.5 to 2 times the height of the vase. The stems should be long enough to reach the water and tall enough for the blooms to sit above the rim. If they’re over that sweet spot, it’s time to break out the shears. For example, if you have a 7-inch-tall vase, you would multiply that height by 1.5 to get 10.5 inches — or by 2 to get 14 inches. So, the length of your stems should be roughly 11 to 14 inches for a vase of this size.

While you could pull out a ruler, most florists simply eyeball it. Hold each stem against the outside of the vase so the base of the flower head sits about half a vase-length above the rim. This places the bottom of the bloom at about 1.5 times the vase height, with the petals extending slightly beyond that line.

Advertisement

Don’t just cut straight across the stem and call it a day. Instead, use sharp shears to trim each one at a 45-degree angle. This allows for better water absorption, making sure your bouquet stays hydrated. Next, remove any leaves that fall below the waterline to prevent bacterial growth. Once the stems are cut to the perfect length and angle, you can begin designing an arrangement that looks like it came straight from the florist.

Advertisement