Advertisement
Home Improvement 2m read
0

Your Tape Measure Can Double as an Eraser

When you hear the term “double threat,” you probably think of performers who can both sing and act, such as Madonna or Jamie Foxx. But it’s also a fitting description for your tape measure, which can both measure and erase. Yes, it’s true — many standard tape measures feature a head designed to help you rub out pencil marks on wood surfaces.

All featured products and deals are selected independently and objectively by the author. House Outlook may receive a share of sales via affiliate links in content.

When you hear the term “double threat,” you probably think of performers who can both sing and act, such as Madonna or Jamie Foxx. But it’s also a fitting description for your tape measure, which can both measure and erase. Yes, it’s true — many standard tape measures feature a head designed to help you…

A Helpful Hack Beyond Measure

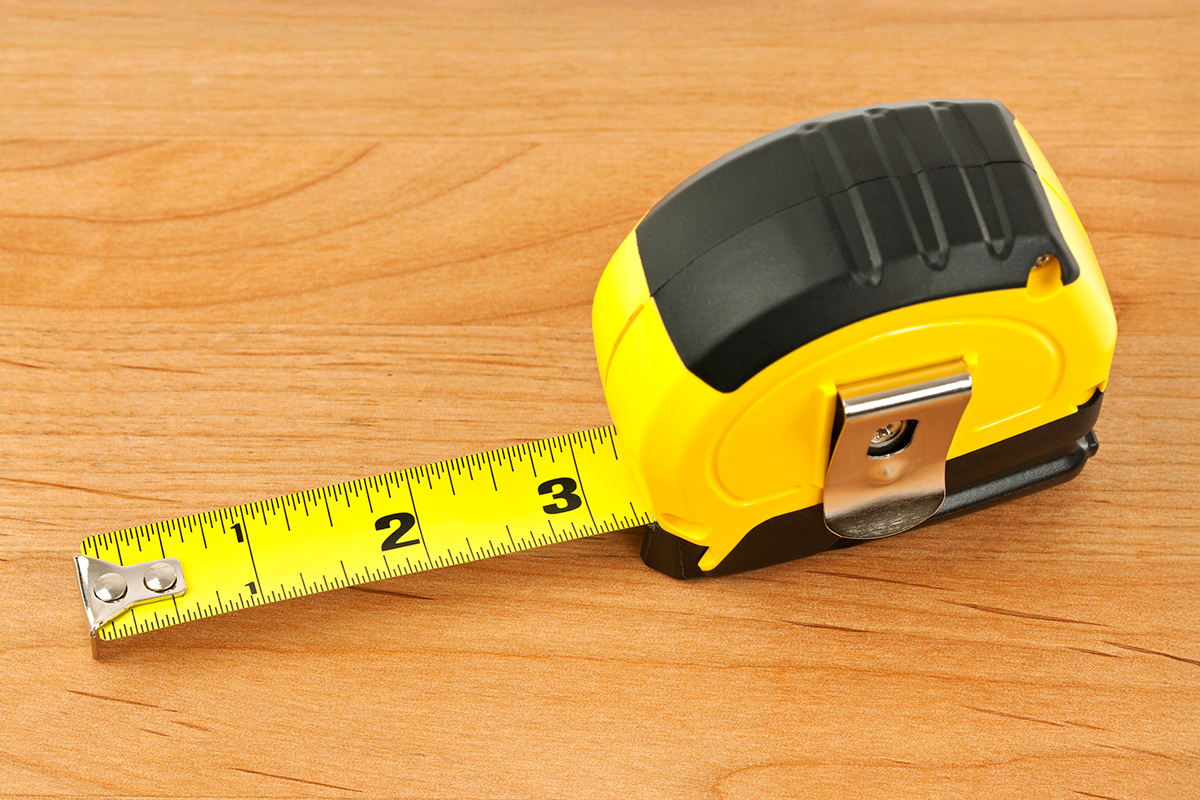
Some, but not all, tape measures have a rubber casing that’s not just for added grip — it can also be used to erase pencil marks from wood. Before we explain how, there are some important pitfalls to be aware of. First, never try this on drywall, as it’s likely to leave behind an unsightly mark. This trick is intended only for wooden materials. Also, be sure to use a tape measure with a rubber exterior and never one fully encased in metal, which will lead to unwanted scratches.

Related: No Measuring Tape? Just Reach for Your Wallet

Now, let’s say you’re building a wooden bookshelf and accidentally make a pencil mark in the wrong place. Flip the tape measure over so the rubber side is facing the wood. Rub it against the pencil mark, moving with the grain of the wood rather than against it. After just a few strokes, you should notice the pencil marks start to fade and eventually disappear.

Advertisement

No Pencil? No Problem

In addition to removing marks, tape measures can also help you make them, even if you don’t have a pencil on hand. It all depends on the serrated metal clip at the very end of the tape. As shown in this video from the YouTube account Try This DIY, you can use the clip to scratch a tiny guide mark into drywall or wood. These marks are helpful in a pinch, but are subtle enough to be painted over when the project is done.

Advertisement
Featured Image Credit:  DonNichols/ iStock | Updated  Aug 18, 2025 |
Bennett Kleinman
Staff Writer
Bennett Kleinman is a New York City-based staff writer for Inbox Studio, covering topics for several brands including House Outlook and Better Report. He previously contributed to television programs such as "Late Show With David Letterman" and "Impractical Jokers," and digital publications like The Onion. Bennett is also a devoted New York Yankees and New Jersey Devils fan, and thinks plain seltzer is the best drink ever invented.
This article is for general informational purposes only.
Featured Image Credit:  DonNichols/ iStock | Updated  Aug 18, 2025 |
Advertisement
Gardening 2m read
0

Try This Trick for Professional-Looking Floral Arrangements

There’s no denying that fresh flowers can instantly elevate a space. A beautiful floral arrangement can bring new life into your home, whether for a special occasion or a simple pick-me-up. But as nice as it is to get one designed by a professional, it’s not exactly budget-friendly to buy them on a weekly or monthly basis. Luckily, with just a pair of scissors, you can make a store-bought bouquet look like it was crafted by a seasoned florist.

All featured products and deals are selected independently and objectively by the author. House Outlook may receive a share of sales via affiliate links in content.

There’s no denying that fresh flowers can instantly elevate a space. A beautiful floral arrangement can bring new life into your home, whether for a special occasion or a simple pick-me-up. But as nice as it is to get one designed by a professional, it’s not exactly budget-friendly to buy them on a weekly or…

How To Arrange Flowers Like a Pro

1. First things first, get some flowers. The grocery store or farmers market are perfect places to shop.

2. Once you have your bouquet, separate the pieces. Set aside about one-fifth of the flowers, and trim them 1 to 2 inches shorter than the others. (You’ll want to cut all the stems at a 45-degree angle to allow for better water and nutrient absorption.)

3. Arrange the longer flowers in the center of the vase, and place the shorter pieces along the rim.

4. After that, you can trim the remaining flowers as needed, filling in any empty spaces with stems of various lengths to create a fuller arrangement.

Related: This Ingredient Is the Secret to Longer-Lasting Flowers
Advertisement

Why This Works

Rather than unpacking a store-bought bouquet and tossing it in a vase, trimming the stems to different lengths can give your arrangement a more tailored and elevated look. It’s also fantastic for the flowers themselves, as properly cutting the stems can help them last longer.

Bonus Hack: Disinfect Your Tools

Want to take your floral arrangements to the next level? When trimming the stems, use sharp and disinfected scissors. Sharpness prevents the stems from being crushed, allowing them to absorb water properly. A quick wipe with rubbing alcohol also helps deter bacteria from contaminating the flowers.

Advertisement
Advertisement
Food & Drink 2m read
0

Your Spice Jar Lid Has a Hidden Hack

Many sci-fi fans are familiar with the phrase “the spice must flow” — a quote from the classic 1984 film Dune. But in the kitchen, spices sometimes don’t flow as smoothly as you’d hope. Spices and seasonings can clump up inside the jar, and you might end up having to vigorously shake or even hit the container to sprinkle some onto your food. But shaking too hard can lead to a mess and makes it hard to measure a precise amount. Fortunately, we have an easy solution that’s truly lying in plain sight, and it all has to do with the jar’s lid.

Many sci-fi fans are familiar with the phrase “the spice must flow” — a quote from the classic 1984 film Dune. But in the kitchen, spices sometimes don’t flow as smoothly as you’d hope. Spices and seasonings can clump up inside the jar, and you might end up having to vigorously shake or even hit…

Just Do the Twist

When you open up a spice jar, you’ll find a thin, perforated cover. This little piece of plastic, known as a sifter, is designed to give you better control when seasoning your food. With the jar held upside down over your food, pinch the sides of the sifter between your thumb and forefinger, and twist the jar back and forth. The spice will sprinkle out effortlessly and evenly, which reduces mess and waste. When you’re done, release your grip and the spice will stop flowing.

Related: When You Should Toss Old Spices

A visual explanation always helps, so check out this Instagram reel from Aaron Turk(@fatsdabarber), who first brought this hack to our attention. Much like Turk, you may be left wondering why you didn’t know about this trick sooner.

Advertisement

The Two-Jar Trick

YouTube food scientist Jessica Gavin offered up another tip for those stubborn spices. This hack works best with glass spice bottles, especially those that have a textured bottom, as the ridges help create friction. For this, you’ll need two spice jars. First, turn the stubborn spice jar upside down. Then hold the other spice jar right side up and rub the bottoms of the two jars together. The vibration from the ridges rubbing against each other will travel through the glass, helping to dislodge any clumps. The spices should now flow freely from the jar.

Advertisement
Featured Image Credit:  Ladanifer/ iStock | Updated  Aug 18, 2025 |
Bennett Kleinman
Staff Writer
Bennett Kleinman is a New York City-based staff writer for Inbox Studio, covering topics for several brands including House Outlook and Better Report. He previously contributed to television programs such as "Late Show With David Letterman" and "Impractical Jokers," and digital publications like The Onion. Bennett is also a devoted New York Yankees and New Jersey Devils fan, and thinks plain seltzer is the best drink ever invented.
This article is for general informational purposes only.
Featured Image Credit:  Ladanifer/ iStock | Updated  Aug 18, 2025 |
Advertisement
Decorating 3m read
0

This Is How High You Should Hang Your Light Fixtures

When illuminating your home with light fixtures, the secret isn’t just in choosing the right bulb (though that’s important too). The true magic comes from hanging the fixture at the perfect height. Secure it too high, and it’ll feel disconnected from the space; too low, and you’ll risk hitting your head.

All featured products and deals are selected independently and objectively by the author. House Outlook may receive a share of sales via affiliate links in content.

When illuminating your home with light fixtures, the secret isn’t just in choosing the right bulb (though that’s important too). The true magic comes from hanging the fixture at the perfect height. Secure it too high, and it’ll feel disconnected from the space; too low, and you’ll risk hitting your head.

There are a few foolproof rules to follow to get the height just right, though. Follow the guidelines below — all recommended by Sarah Speck, director of product strategy and partnerships at Hudson Valley Lighting Group — to find the sweet spot every time.

How High To Hang Fixtures

Chandeliers

Scale is essential for chandeliers. To size a chandelier for proportionality, not clearance, first determine the appropriate diameter by adding the room’s length and width in feet, then converting that number to inches. For example, an 8-by-7-foot room calls for a fixture about 15 inches wide. For height, multiply the ceiling height (in feet) by 2.5 to 3 to get the ideal fixture height in inches — but only if the ceiling height and placement allow. For a 10-foot ceiling, for example, the ideal fixture height is 25 to 30 inches. In open areas, leave at least 7 feet of clearance from the floor to the bottom of the fixture. If the chandelier is placed over a table or island, hang it 30 to 34 inches above the surface.

Sconces

Bathroom sconces look best mounted 60 to 65 inches from the floor to the midpoint of the backplate and spaced about 28 inches apart, ideally flanking a mirror. For bedside plug-in sconces, Speck recommends hanging them 55 to 60 inches from the floor to the top of the fixture — that way you can easily reach them while lying down.

Table Lamps

While table lamps are not hung, it’s best to keep the bottom of a table lamp’s shade about 42 inches from the floor. “It’s a small detail that makes a big difference,” Speck says.

Advertisement

Lighting Above Surfaces

Over a Dining Table

Speck aims for 30 to 36 inches from the tabletop to the bottom of the fixture. “This helps ground the dining zone while still allowing clear sight lines,” she says.

Related: Follow This One Designer Tip When Shopping for Lightbulbs

Beside a Bed

For a high-end look in your bedroom, replace traditional bedside lamps with pendants or sconces. “I recommend hanging these so that the shade or sconce is about even with your head from a seated position,” Speck says. That usually measures to be about 42 inches above the floor for pendants or 55 to 60 inches to the top of a wall sconce (again, making sure it’s within arm’s reach).

Over a Kitchen Island

Leave 30 to 32 inches of clearance from the countertop to the bottom of the fixture, spacing them about 30 inches apart.

Bonus Hack: The String Test

Before drilling into your wall or ceiling, mock up the fixture height with string or painter’s tape. Live with it for a day, then adjust as needed. “This will help to visualize how the fixture will feel in the room,” Speck says.

Advertisement
Featured Image Credit:  Image courtesy of Hudson Valley Lighting Group | Updated  Aug 18, 2025 |
Megan McCarty
Writer
Megan McCarty is a Los Angeles-based writer who covers the fun stuff: design, travel, wellness, beauty, and fashion. She has written for publications including Domino, The Spruce, MyDomaine, Bustle, and Rue Magazine. Her life rules include, but are not limited to, zipper when merging, contribute to your IRA, and do the nice thing.
This article is for general informational purposes only.
Featured Image Credit:  Image courtesy of Hudson Valley Lighting Group | Updated  Aug 18, 2025 |
Advertisement
Cleaning 2m read
0

Harness the Sun To Remove Stains Naturally

The sun does so much more than just sustain life and provide warmth — it can also be the solution to pesky stains. Dealing with unsightly sweat stains or a dark blood stain that just won’t come out? Harness the sun’s rays to get rid of them for good.

The sun does so much more than just sustain life and provide warmth — it can also be the solution to pesky stains. Dealing with unsightly sweat stains or a dark blood stain that just won’t come out? Harness the sun’s rays to get rid of them for good.

Let There Be Light

Organic stains are a common, messy part of everyday life. They include sweat stains underneath your pits, blood stains from an unexpected bloody nose, and the many puke and poop stains that come with having a newborn. If you’re dealing with any or all of these stubborn stains, you may be able to eliminate them with just water, vinegar, and the heat of the sun.

First, wet the stained garment, either by running it through a wash cycle or by submerging it in water. (Tip: Always use cold water for organic stains; warm water can “cook” the protein in the stain, causing it to set.) Next, lay the item as flat as possible with the stain facing upward. Apply an acid, such as lemon juice or distilled white vinegar, directly to the stain. Finally, let the garment sit in direct sunlight for two to three hours. Once enough time has passed, bring the garment back inside.

Related: 3 Hacks for Getting Rid of Grass Stains Fast

Upon inspection, you should notice that the stain has either completely disappeared or at least started to fade. If it’s still obvious, simply repeat the process until the stain is gone.

Advertisement

Word to the Wise

While this hack seems fairly straightforward, there are two important things to keep in mind. First, only use this method on durable garments, as the sun’s harsh rays can damage delicate fabrics. Second, stick to plain white items to avoid bleaching out more vibrant hues. At the end of the day, it’s best to take any delicate or valuable items to a professional cleaning service rather than risk ruining them further.

Advertisement
Featured Image Credit:  Victoria Kotlyarchuk/ iStock | Updated  Aug 11, 2025 |
Bennett Kleinman
Staff Writer
Bennett Kleinman is a New York City-based staff writer for Inbox Studio, covering topics for several brands including House Outlook and Better Report. He previously contributed to television programs such as "Late Show With David Letterman" and "Impractical Jokers," and digital publications like The Onion. Bennett is also a devoted New York Yankees and New Jersey Devils fan, and thinks plain seltzer is the best drink ever invented.
This article is for general informational purposes only.
Featured Image Credit:  Victoria Kotlyarchuk/ iStock | Updated  Aug 11, 2025 |
Advertisement
Cleaning 3m read
0

This One Ingredient Wards Off Pantry Pests

Many people buy more dried spices than they can realistically use. (You might think that a Costco-sized shaker of red pepper flakes is a good idea, but you’ll be using it for years to come.) Once those leftover spices lose their luster, they often end up in the trash.

All featured products and deals are selected independently and objectively by the author. House Outlook may receive a share of sales via affiliate links in content.

Many people buy more dried spices than they can realistically use. (You might think that a Costco-sized shaker of red pepper flakes is a good idea, but you’ll be using it for years to come.) Once those leftover spices lose their luster, they often end up in the trash.

Take bay leaves, for example. While they can last for up to three years with proper storage, some leaves inevitably go to waste once their flavor starts to degrade. Don’t throw away those old bay leaves, though, because they’re capable of more than just flavoring food. They’re also a natural remedy for keeping bugs out of the pantry — here’s why.

Bye Bye Bugs

In a culinary context, bay leaves produce a subtle, woodsy flavor that enhances stews, sauces, and other low-and-slow recipes. As appealing as this aroma is to us humans, it actually repels bugs and even some mice. It all has to do with an essential oil called eucalyptol, which is abundantly present in your average bay leaf. Once pests catch a whiff of it, they are far less likely to pillage the pantry.

Related: These Pantry Items Are Probably Past Their Prime

However, you can’t just leave the bay leaves in their jar and expect them to work. Take a couple of stale leaves and place them inside potential problem areas where pests like to gather (e.g., bags of flour, sacks of rice, or bowls of beans). Unlike other popular repellants, bay leaves are completely natural and won’t contaminate your food. Since stale bay leaves have already lost most of their flavor, they won’t leave behind any earthy residue either. They will, however, successfully keep pests at bay. Just remember to remove any bay leaves before cooking with those pantry staples.

Advertisement

You can also use crumbled bits of bay leaves outside the pantry. Sprinkle them inside your garbage bins to prevent bugs from congregating, or scatter some on a windowsill to deter pests from entering your home. (Warning: Bay leaves are toxic to dogs and cats, so keep them out of your pets’ reach.)

Bonus Tip: Use Airtight Storage Containers

If you don’t have any bay leaves handy, there are other ways to keep your pantry items safe from pests. It all begins with using proper, airtight storage containers, such as these clear, leakproof options. They not only act as a barrier against bugs but also keep your food fresher for longer.

Advertisement
Featured Image Credit:  Valerii Honcharuk/ Adobe Stock | Updated  Aug 11, 2025 |
Bennett Kleinman
Staff Writer
Bennett Kleinman is a New York City-based staff writer for Inbox Studio, covering topics for several brands including House Outlook and Better Report. He previously contributed to television programs such as "Late Show With David Letterman" and "Impractical Jokers," and digital publications like The Onion. Bennett is also a devoted New York Yankees and New Jersey Devils fan, and thinks plain seltzer is the best drink ever invented.
This article is for general informational purposes only.
Featured Image Credit:  Valerii Honcharuk/ Adobe Stock | Updated  Aug 11, 2025 |
Advertisement
Gardening 3m read
0

Don’t Make This Mistake When Repotting Houseplants

Taking care of a houseplant sounds easy, but there’s a learning curve and a surprising amount of nuance. Repotting can be especially tricky, not to mention messy. When it comes to selecting a new pot, many people are (understandably) inclined to choose one based on the plant’s foliage or overall size. However, this is a mistake. You should actually choose a pot based on the size of your plant’s root ball.

All featured products and deals are selected independently and objectively by the author. House Outlook may receive a share of sales via affiliate links in content.

Taking care of a houseplant sounds easy, but there’s a learning curve and a surprising amount of nuance. Repotting can be especially tricky, not to mention messy. When it comes to selecting a new pot, many people are (understandably) inclined to choose one based on the plant’s foliage or overall size. However, this is a…

What Is a Root Ball?

The root ball is the mass of roots and soil underneath the plant’s stem. All plants have a root ball, and it’s the most important thing for the pot to support. Root balls vary greatly in size and don’t always correlate with the size of the plant above the soil. For this reason, small plants can have large root balls, and vice versa.

Find the Right Pot for Your Plant

A good rule of thumb is to choose a pot that’s only about 1 to 2 inches bigger than the root ball. A pot that’s too big makes the plant more susceptible to root rot because the roots aren’t able to absorb all that water, leaving a portion of the soil wet for too long. But if you house your plant in an adequately sized pot, the soil dries out at a rate the roots can keep up with, providing them with the oxygen they need to thrive.

Nursery Pots vs. Decorative Pots

Your plant should always be kept in a nursery pot (also called a plastic or grow pot) that has drainage holes. You can then place this nursery pot inside a decorative pot if you wish. Never plant your greenery directly into a decorative pot, especially one without proper drainage. 

Advertisement

Using a nursery pot ensures that the soil doesn’t get oversaturated, leading to root rot. Plus, it’s easier to check on the plant’s root health and swap out decorative pots whenever you get the urge to refresh your space. If you’re worried about the nursery pot sticking up past the edge of your decorative pot, you can always trim it down to size.

Related: Always Get a Perfect Fit When Repotting Plants

You can purchase multipacks of nursery pots with different sizes, which are a great option if you’re not sure which size to opt for. It’s also best to choose dark-colored nursery pots over clear ones to protect the roots from light exposure and algae.

Advertisement
Advertisement
Food & Drink 3m read
0

Why You Should Always Add a Carrot to Your Frying Pan

Most of us own a few frying pans, and they’re the kind of utensil that gets used almost every day. Despite this, most of the “frying” we do is actually sautéing, which is different from what we think of as “fried food.” Frying in oil — whether it’s a half-inch for shallow frying or a few inches for deep frying — is a handy skill when you’re craving crispy chicken, latkes, schnitzel, and other indulgent foods. But the process can be a bit intimidating until you get used to it. Oddly enough, adding a carrot to your frying pan can help make it safer and easier. Here’s why.

All featured products and deals are selected independently and objectively by the author. House Outlook may receive a share of sales via affiliate links in content.

Most of us own a few frying pans, and they’re the kind of utensil that gets used almost every day. Despite this, most of the “frying” we do is actually sautéing, which is different from what we think of as “fried food.” Frying in oil — whether it’s a half-inch for shallow frying or a…

Adding a Carrot Makes for Better Fried Food

This clever carrot hack comes to us from acclaimed cookbook author Adeena Sussman. In an Instagram reel, she describes it as an old trick used by North African cooks. She simply puts a whole, uncut carrot (or half a large one) into the pan as the oil heats up, and leaves it in while frying her latkes or other foods.

Related: An Easy Trick To Revive Carrots That Have Gone Limp

So, what’s happening here, and why does it work? As food cooks, bits of breading, batter, seasoning, or potato collect against the sides of the carrot, which keeps them from getting into your food. The carrot, because of its density, also helps moderate the oil’s temperature, acting as a thermal mass to prevent temperature swings as food enters and leaves the pan. This is particularly helpful on electric cooktops, where burners cycle on and off to maintain temperature.

Advertisement

The Carrot Trick Protects Against Burning

The biggest benefit of using a carrot is that it helps protect your oil from breaking down. Those floating bits gradually burn, which degrades the oil and reduces its quality. Aside from the cost of replacing that oil, anyone who’s ever worked a restaurant fryer will tell you that food browns (and eventually burns) — faster as the oil breaks down.

By moderating the oil’s temperature and slowing its deterioration, a carrot reduces the risk of burning your food. Your oil will eventually break down and need to be safely disposed of, but this trick will help it last longer, allowing you to get a few more uses out of it.

Advertisement
Featured Image Credit:  Olga Nikiforova/ iStock | Updated  Aug 11, 2025 |
Fred Decker
Writer
Fred Decker is a trained chef and former restaurateur. Since closing his restaurants over a decade ago he has been a prolific freelance writer, publishing several thousand articles on dozens of high-volume websites including Taste Of Home, Hunker, Tasting Table, Week&, eHow, and GOBankingRates. He lives on a rural acreage shared with a big garden, chickens, rabbits, and grandkids.
This article is for general informational purposes only.
Featured Image Credit:  Olga Nikiforova/ iStock | Updated  Aug 11, 2025 |
Advertisement
Decorating 2m read
0

The Rug Trick That Elevates Your Bedroom for Less

Switching up your bedding, replacing a ho-hum light fixture, and adding a fresh coat of paint are a few ways to spruce up your bedroom. But one of our favorite fixes for an instantly cozier and more put-together bedroom is an area rug. Grounding your space with a rug adds a touch of warmth and comfort underfoot. You can opt for a neutral color to match your decor scheme, or go for a statement-making piece that captures your attention as soon as you enter the room.

All featured products and deals are selected independently and objectively by the author. House Outlook may receive a share of sales via affiliate links in content.

Switching up your bedding, replacing a ho-hum light fixture, and adding a fresh coat of paint are a few ways to spruce up your bedroom. But one of our favorite fixes for an instantly cozier and more put-together bedroom is an area rug. Grounding your space with a rug adds a touch of warmth and…

The bad news? Rugs aren’t cheap. The good news? There’s a way to get the look of a big rug without the big price tag.

Try Two Runners

Runner rugs aren’t reserved only for hallways, kitchens, entryways, and other narrow spaces. They’re also the perfect addition to any bedroom and a fantastic alternative to a large area rug. Instead of spending hundreds of dollars on a rug that’s big enough to fit around and underneath your bed, you can get the same look by placing a runner rug on either side.

Related: Fix Carpet Dents Overnight With This $0 Hack

Why It Works

A queen-size bed typically needs an 8-by-10-foot rug to get the perfect amount of overflow to anchor the bed in a room and provide adequate coverage for a nice, soft surface for your feet when you get out of bed. However, the cost of a rug that size can be high.

Advertisement

Runner rugs often cost a fraction of the price of a full 8-by-10-foot rug, while giving you the same quality, comfort, and cozy look. Not only do they fill the space, but two runners are also easier to remove and clean than a single large area rug.

Advertisement
Advertisement
Cleaning 3m read
0

Iron Clothes Faster With This Kitchen Staple

If you like wrinkle-free clothes but don’t like ironing, know that we see you and we understand you. We all aspire to be the type of person who wakes up early enough to iron their dress shirt before work — or, even better, has the foresight to do it the night before — but sometimes the snooze button is too hard to resist. Or, just as woefully, perhaps you’ve never learned to iron properly and your attempts at using a steamer instead have failed. Fortunately, there is a better way that takes half the time.

All featured products and deals are selected independently and objectively by the author. House Outlook may receive a share of sales via affiliate links in content.

If you like wrinkle-free clothes but don’t like ironing, know that we see you and we understand you. We all aspire to be the type of person who wakes up early enough to iron their dress shirt before work — or, even better, has the foresight to do it the night before — but sometimes…

What You’ll Need

You don’t need much to get started — just an iron, an ironing board, and a roll of aluminum foil. The foil is the key to this hack; when you place it under your garment, it reflects the iron’s heat back up through the fabric, smoothing wrinkles from both sides. Since there’s no need to flip your clothes, you’ll save valuable time and effort.

Related: The Only Laundry Setting You Need

Iron in Half the Time

The first step is to line your entire ironing board with the aluminum foil, so make sure you have a full roll handy. (A roll of about 25 square feet should provide adequate coverage, but it’s a good idea to have a little extra just in case.) Make sure the shiny side of the foil is facing up, then place your ironing board cover on top.

Next, lay your wrinkled shirt, dress, or other article of clothing flat on the foil-covered ironing board and iron as usual with the steam setting. Instead of turning the garment over the way you normally would, let the foil do its thing and passively remove wrinkles from the underside of your clothing. Since the aluminum foil can be left on your ironing board, this is a hack you’ll be able to use for months to come. Replace the foil when it becomes crumpled, wrinkled, or torn. The goal is to keep the surface smooth so it remains heat-reflective.

Advertisement

Bonus Tip for a Flawless Finish

In addition to enjoying the time you saved by not having to flip your clothes, be sure to let them cool completely before putting them on. Failure to do so runs the risk of rewrinkling your garment, which is more likely when the fabric is still warm. The final step is to decide between keeping this home hack to yourself or impressing your friends and family with your newfound knowledge, earning you a deserved reputation as a true iron (wo)man.

Advertisement