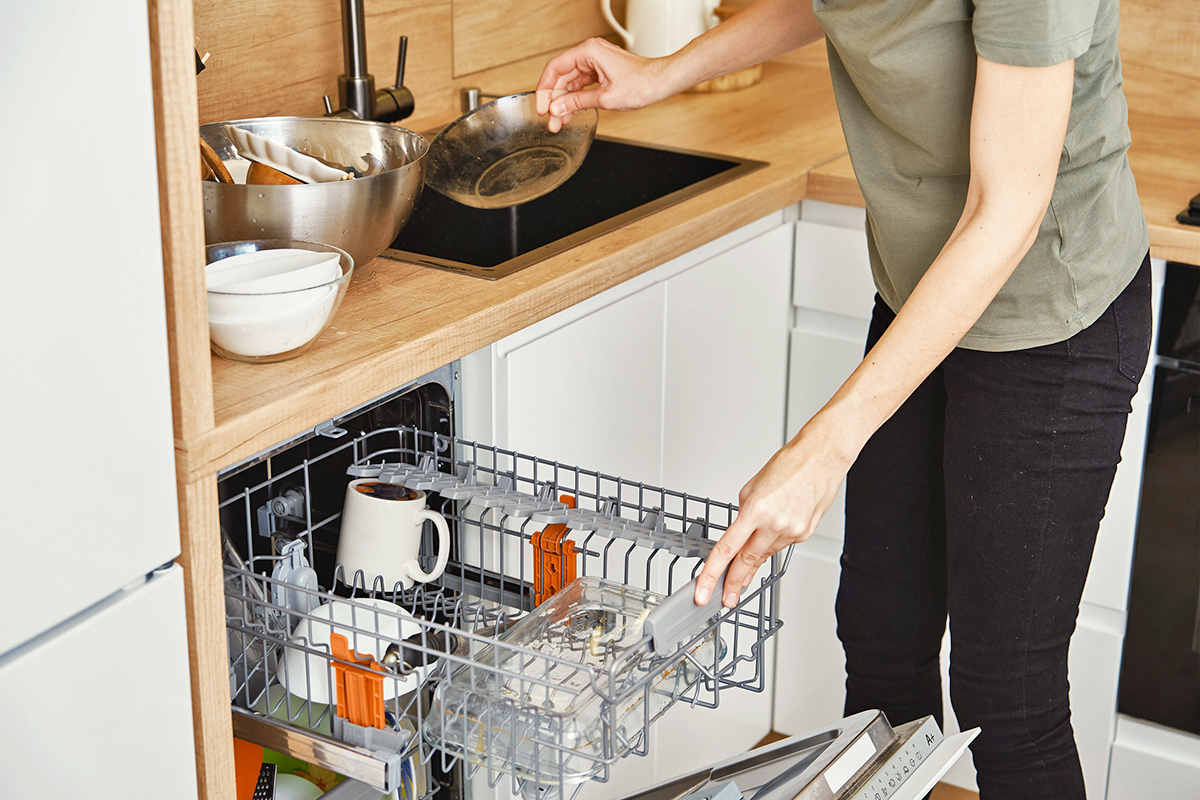
Advertisement
Food & Drink 3m read
0

This Corn Shucking Hack Saves So Much Time

There’s nothing better than freshly cooked corn in summer. Corn is cheap, delicious, and a staple at any outdoor gathering between June and September.

All featured products and deals are selected independently and objectively by the author. House Outlook may receive a share of sales via affiliate links in content.

There’s nothing better than freshly cooked corn in summer. Corn is cheap, delicious, and a staple at any outdoor gathering between June and September.

But removing corn husks and silks, especially if you’re cooking for a large group of people, can be a real pain. That’s where this ultra-easy hack comes in. It not only saves a lot of time but also spares you the effort of cleaning up corn silks (and inevitably finding them in random places in your kitchen for the next week).

You can use this hack to fully cook your corn, or simply to remove the husks if you want to finish cooking it another way, such as grilling or sauteing. All you need is a microwave, a sink, a pair of oven mitts, and a sharp knife.

Related: The Easiest Way To Cook Corn on the Cob for a Crowd

How To Microwave Your Corn To Easily Remove the Husks

1. Rinse the corn (still in the husk) in your sink, in such a way that a bit of water gets inside the husk.

2. Microwave the corn in the husk for either:

• seven minutes to completely steam the corn (meaning you don’t have to cook it any further once it’s microwaved), or

• two to four minutes if you just want to get the husks off for another cooking method.

Advertisement

Note: We recommend microwaving only one or two ears of corn at a time due to their size and to ensure even cooking. Since cooking time will vary from microwave to microwave, you may want to conduct a test with one ear of corn first to get the timing right.

3. Wearing your oven mitts, cut off the base of the corn plus a little bit more (half an inch or so). Then, gently wiggle and squeeze the corn out of the husk. It should come out easily. If it doesn’t, put the corn, still in its husk, back in the microwave and cook more in 30-second increments.

Advertisement
Allegra Ringo
Writer
Allegra Ringo is a California-based writer who has written for publications including Reductress, The Hard Times, VICE, and The Atlantic. She loves sparkling water and old Chihuahuas with hardly any teeth, like her dog Pistachio.
This article is for general informational purposes only.
Affiliate Disclaimer 
|
Financial Disclaimer
Featured Image Credit:  Vlad/ Unsplash | Updated  Jun 4, 2025 |
Advertisement
Home Improvement 3m read
0

This Outdoor Lighting Swap Keeps Insects Away

If you’ve ever spent a warm evening outside under your porch lights, string lights, or any other lighting, chances are you’ve shared that space with swarms of bugs. Insects such as mosquitoes, moths, and gnats are notoriously attracted to artificial light, especially the bright white variety. But there’s a simple, science-backed solution for keeping these bugs under control: swapping your white-hued outdoor bulbs for yellow ones.

All featured products and deals are selected independently and objectively by the author. House Outlook may receive a share of sales via affiliate links in content.

If you’ve ever spent a warm evening outside under your porch lights, string lights, or any other lighting, chances are you’ve shared that space with swarms of bugs. Insects such as mosquitoes, moths, and gnats are notoriously attracted to artificial light, especially the bright white variety. But there’s a simple, science-backed solution for keeping these…

Why Are Bugs Drawn to Light Bulbs?

Most flying insects rely on ultraviolet (UV) light and short wavelengths of visible light, such as blue and white, for navigation. Traditional white incandescent, halogen, and many cool white LED bulbs emit a spectrum that includes these blue tones and often some UV, essentially acting as a beacon for bugs.

Yellow light, on the other hand, contains longer wavelengths that are much less attractive to insects. By replacing standard white bulbs with yellow ones, you can significantly reduce the number of pests buzzing around your patio or front door. These bulbs don’t repel insects; they simply don’t attract them.

Related: Make an All-Natural Bug-Repellent Spray Using This Spice Rack Staple

Swap Out White Bulbs for Yellow Ones

Swapping bulbs is easy and affordable. Yellow bulbs are widely available at hardware stores, home improvement stores, and online, typically costing just a few dollars more than traditional bulbs. They’re available in incandescent, CFL, and LED versions, with LEDs being the most energy-efficient and long-lasting option.

Advertisement

While no light is completely bug-proof, yellow bulbs can make a noticeable difference, especially when used alongside other pest control strategies such as spatial mosquito repellents, portable fans, and eliminating standing water where mosquitoes breed.

This small lighting change is also environmentally friendly. Using yellow or warm-hued lights can help reduce light pollution, which negatively impacts nocturnal animals and disrupts ecosystems. You might even notice fewer nighttime visits from unwanted wildlife that are drawn by insect activity near bright lights.

Whether you’re hosting a backyard barbecue or simply enjoying a quiet evening under the stars, swapping your white outdoor bulbs for yellow ones can help create a more peaceful, pest-free environment. It’s a quick fix that pays off all season long.

Advertisement
Jill Layton
Writer
Jill Layton started writing professionally when she realized her emails and texts were kinda funny. She’s an affiliate shopping writer and lifestyle contributor for Scary Mommy, Bustle, Mic, and Best Products. She’s the mom of two alarmingly witty kids and the world’s most perfect dog.
This article is for general informational purposes only.
Affiliate Disclaimer 
|
Financial Disclaimer
Featured Image Credit:  Hans Isaacson/ Unsplash | Updated  Jun 3, 2025 |
Advertisement
Decorating 2m read
0

How To Make Your Throw Pillows Extra Fluffy

Whether on your couch or bed, throw pillows are a great way to tie together various design elements and create a cozy feel in your space — so long as they aren’t flat and deflated. To make yours fuller, forget everything you know about pillow insert sizes. Instead of buying a pillow insert that matches the size of your cover, opt for one that is at least one size bigger, or two sizes bigger if you want it to look extra stuffed.

All featured products and deals are selected independently and objectively by the author. House Outlook may receive a share of sales via affiliate links in content.

Whether on your couch or bed, throw pillows are a great way to tie together various design elements and create a cozy feel in your space — so long as they aren’t flat and deflated. To make yours fuller, forget everything you know about pillow insert sizes. Instead of buying a pillow insert that matches…

Before squeezing the inserts into the covers, toss them in the dryer for 20 minutes. This will make them extra fluffy and help you achieve a fuller look. While it’s not necessary, you can also add a couple of tennis balls to the dryer along with the inserts to help break up any clumps and spread the filling out evenly. Just be sure to set the temperature to low- or no-heat for pillows stuffed with polyfill or other synthetic materials.

Additional Tips for Making Throw Pillows Look Fuller

The best way to make your pillows fluffier is to use a larger insert — but it’s not the only way. In addition to getting the right size, consider these tips to make throw pillows look luxurious.

Washing and Drying

If your pillow inserts are machine washable, make sure they dry thoroughly after a quick cycle, as a damp pillow can flatten inside the cover (and may also result in mold or mildew, which you definitely don’t want). Drying practices can vary depending on the insert, so check the manufacturer’s instructions for proper care.

Advertisement

Pillow Protectors

To give your pillows some shape — and keep the inserts cleaner for longer — consider adding a pillow protector into the mix. This extra layer can help with shaping and make the fluffed effect last longer, too.

Related: This Is the Secret to Fluffy, Luxury Hotel-Style Bedding

Reshaping and Fluffing

One of the best ways to make pillows look fuller is to get into the habit of reshaping and fluffing them regularly, especially after sitting on or leaning into them while lounging on your couch or bed.

Advertisement
Jessie Quinn
Writer
Jessie Quinn is a Los Angeles-based lifestyle journalist with words published in PEOPLE, StyleCaster, Apartment Therapy, The Spruce, Byrdie, and more. She has a Bachelor's Degree in fashion journalism from Academy of Art University and her work spans across many categories, including style, beauty, home, health, crafts, and more.
This article is for general informational purposes only.
Affiliate Disclaimer 
|
Financial Disclaimer
Featured Image Credit:  Hans Isaacson/ Unsplash | Updated  Jun 3, 2025 |
Advertisement
Cleaning 3m read
0

The Only Laundry Setting You Need

Don’t be fooled by all the fancy settings on a washing machine. Aside from the standard normal cycle, you may find options for everything from activewear to bulky items. However, according to one laundry expert, there’s only one setting you actually need — and it will save you not only time, but also energy and money.

Don’t be fooled by all the fancy settings on a washing machine. Aside from the standard normal cycle, you may find options for everything from activewear to bulky items. However, according to one laundry expert, there’s only one setting you actually need — and it will save you not only time, but also energy and…

Use Express for a Little Mess

Laundry expert Patric Richardson, also known as The Laundry Evangelist, revealed on HuffPost’s Am I Doing It Wrong? podcast that the best laundry setting to use is “express.” This fast wash cycle may also be labeled “quick wash,” “speed wash,” or “rapid wash,” depending on the machine. True to its name, it’s a short wash that cleans clothes quickly. And less time circling the drum means less wear and tear on your favorite items.

Related: Why You Should Keep a Dry Erase Marker in Your Laundry Room

Clean Clothes in a Flash

Depending on your washing machine, the express wash cycle typically ranges from 15 to 30 minutes. But there’s more to it than just saving you time while waiting for a laundry load to finish. Since the cycle is quicker, it tends to use less water and energy, saving you money on utilities. And with an express wash, you only need around 1 to 2 tablespoons of laundry detergent for a regular-sized load, cutting down on your costs for supplies, too.

Advertisement

Will It Actually Clean Your Clothes?

According to Richardson, yes, an express cycle will clean your clothes. In fact, the cleaning expert and host of The Laundry Guy on discovery+ said that if he could build a washing machine, it would feature a single button, warm water, and an express setting.

When Not To Use the Express Cycle

Despite the ease of running your clothes through a quick wash — including getting multiple loads done in no time — you’ll still want to use your best judgment. Lightly soiled items are perfect for a quick wash. However, when it comes to larger loads of laundry or heavily soiled items, you might need a more thorough cleaning setting.

Advertisement
Pauline Lacsamana
Writer
Pauline Lacsamana is a freelance writer and editor who specializes in commerce, home, design, and lifestyle. She has bylines in The Spruce, Business Insider, U.S. News & World Report, Hunker, MyDomaine, Parade, and more.
This article is for general informational purposes only.
Affiliate Disclaimer 
|
Financial Disclaimer
Featured Image Credit:  RDNE Stock project/ Pexels | Updated  Jun 3, 2025 |
Advertisement
Gardening 3m read
0

How To Stop Birds From Destroying Your Garden

Got birds wreaking havoc on your garden? Few things are more frustrating than seeing the literal fruits of your labor go to the birds every summer. Fortunately, there’s an easy, humane way to keep birds out of your fruit trees and raised beds, and it will only cost you a few pennies.

All featured products and deals are selected independently and objectively by the author. House Outlook may receive a share of sales via affiliate links in content.

Got birds wreaking havoc on your garden? Few things are more frustrating than seeing the literal fruits of your labor go to the birds every summer. Fortunately, there’s an easy, humane way to keep birds out of your fruit trees and raised beds, and it will only cost you a few pennies.

Beating the Birds With Foil

You can keep birds away without resorting to harsh chemicals by using an inexpensive item you probably already have in your kitchen drawer: aluminum foil. Adding strips of foil to your trees or garden beds is a fast, easy way to keep birds from pillaging your plants.

Birds are usually drawn to fruits and seeds. To deter them, tear some foil into strips, then attach the strips to the trees and plants that see the most damage — the wind and sun will do the rest. You can tie foil strips onto trees with fishing line, or use clothespins to pinch them onto your plants and flowers. An even easier method is to mold the aluminum foil directly around the branches to keep it secure.

Tip: If you don’t want to waste a roll of aluminum foil, you can achieve similar results with reflective tape.

Why Does Foil Make Birds Fly On? 

Our feathered friends typically avoid investigating reflective things because, well, it scares them. The sudden glint of sunlight off the tinfoil startles birds because their senses tell them it’s a possible predator. Sometimes, territorial birds even mistake their own reflections for rival avians, causing them to flee, fast.

Advertisement

If you don’t wish to wrap your garden in foil this summer, look to other reflective items to keep birds at bay. Consider adding wind chimes fitted with reflective beads or baubles, or making a mobile out of old CDs or DVDs; these will bounce light and send birds packing.

Related: Save This Kitchen Scrap for Pest-Free Plants
A Note on Safety

Reflective materials can, in rare cases, ignite fires when sunlight is focused into a concentrated beam. However, aluminum foil’s often crumpled, uneven surface causes light to scatter, not concentrate.

Don’t Forget To Deter the Deer

If you live in a deer-prone area, use that leftover tinfoil to keep them from damaging your trees or shrubs. Simply wrap the roll around the trunks of trees and saplings for protection. This can help prevent deer from rubbing their antlers on young tree trunks or eating the bark when food is scarce; the animals dislike the tinfoil’s rough texture and reflective surface. Be sure to cover your trees about waist-high so the deer don’t just reach over it.

Birds are amazing pollinators and provide natural pest control, so we don’t want to get rid of them completely. However, with a roll of aluminum foil, you can stop them from destroying your favorite fruits and veggies. This hack is a great way to keep your garden safe, but you can also plant regionally adapted wildflowers for your avian neighbors to safely munch on instead — check your local seed library for options.

Advertisement
Krissy Howard
Writer
Krissy Howard is a New Mexico-based writer. Her work has appeared in Byrdie, Hunker, and Simplemost, and she is the former managing editor of music satire website, The Hard Times.
This article is for general informational purposes only.
Affiliate Disclaimer 
|
Financial Disclaimer
Featured Image Credit:  Credit: Tim Kelly/ Unsplash | Updated  Jun 3, 2025 |
Advertisement
Food & Drink 2m read
0

How To Store Ice Cream To Avoid Freezer Burn

When it comes to ice cream, most of us avoid freezer burn the easy way: by eating it before the problem arises. There’s another method, however, and it has the added benefit of ensuring that your mint chocolate chip scoops so easily that bent spoons are a problem of the past.

All featured products and deals are selected independently and objectively by the author. House Outlook may receive a share of sales via affiliate links in content.

When it comes to ice cream, most of us avoid freezer burn the easy way: by eating it before the problem arises. There’s another method, however, and it has the added benefit of ensuring that your mint chocolate chip scoops so easily that bent spoons are a problem of the past.

What Causes Freezer Burn?

Freezer burn occurs when improperly sealed food is exposed to air, which can negatively affect both appearance and taste — though it won’t actually make the food in question unsafe to eat. When moisture evaporates, ice crystals form in its place. As the cardboard that most ice cream is stored in isn’t the most solid of materials, rocky road and its ilk are especially susceptible to freezer burn.

Related: This Office Supply Is the Secret to a Clutter-Free Freezer

Seal Out Freezer Burn for Good

All you have to do is place the ice cream — whether a family-size tub or Ben & Jerry’s mini cup — inside a resealable plastic bag. “Surely it’s not that simple, House Outlook,” you might find yourself saying right now. And yet it is, dear reader.

Advertisement

Placing your ice cream within the confines of a Ziploc really will make dessert time that much more efficient, provided the lid is closed tightly and you remove as much air as possible from the bag itself. Doing so will insulate your next midnight snack and prevent ice crystals from forming — a bonus you won’t get from simply placing the tub on the kitchen counter and (im)patiently waiting for it to ever so slightly thaw. The only risk this secretive process runs is that your highly scoopable ice cream may not make it to a second session.

Advertisement
Michael Nordine
Staff Writer and Editor
Michael Nordine is a writer and editor living in Los Angeles. He has two cats and wishes he had more. His film criticism has appeared in Variety, The Los Angeles Times, and The Village Voice, among others.
This article is for general informational purposes only.
Affiliate Disclaimer 
|
Financial Disclaimer
Featured Image Credit:  tenkende/ iStock | Updated  May 27, 2025 |
Advertisement
Decorating 3m read
0

This Is the Ideal Height To Mount a TV on the Wall

Mounting a TV on the wall allows you to take advantage of vertical space and makes your console look less cluttered (with more space for decor items). All too often, however, TVs are mounted either too low or too high, resulting in an aesthetically unbalanced wall space and an uncomfortable viewing experience from the couch or bed.

Mounting a TV on the wall allows you to take advantage of vertical space and makes your console look less cluttered (with more space for decor items). All too often, however, TVs are mounted either too low or too high, resulting in an aesthetically unbalanced wall space and an uncomfortable viewing experience from the couch…

The ideal height for wall-mounting a TV is eye-level when seated in your living room, or eye-level when lying down in your bedroom. Mounting your TV at this height makes the space look more visually appealing while also minimizing eye and neck strain.

For most viewers, the center of a living room TV should be mounted 42 to 50 inches from the floor. The rule of thumb for bedrooms is around 50 inches from the floor to the screen’s center. However, the ideal height also depends on the size of your TV and the distance you’re viewing it from. For example, if you have a larger TV that’s over 65 inches, you may want to mount it so the midpoint is slightly higher than eye level to avoid straining to see the entire screen.

TV Mounting Tips and Tricks

With that out of the way, here are four other things to keep in mind for an optimal TV-viewing experience.

Viewing Distance Is Key

In addition to height, it’s also worth considering distance and ensuring your couch is at least 1.5 to 2.5 times the diagonal width of the screen from your mounted TV. The same goes for your bed, but instead of measuring from the base of your bed frame, measure from where you’ll be seated upright.

Choose the Right TV Stand Width

Even if your TV is mounted on the wall, a TV stand, console, or credenza can help anchor the area. However, if this piece of furniture is the wrong size, the media center can look a bit off. “Make sure your TV stand is wider than your TV,” interior decorator Kiva Brent said in a recent TikTok. “Your TV stand width should be equal to the width of your TV, plus 12 inches — and even wider is fine, too.”

Advertisement

Keep the TV Stand Free of Clutter

Decor is a nice way to zhuzh up your TV stand, but too many items in front of the screen can be distracting. Brent said that instead of sprinkling decor across the entire surface, you should place just a few items in the peripheral areas so that they don’t distract.

Related: A Designer’s Trick for Choosing the Right Nightstands

Avoid Hanging Above a Fireplace

The space above your fireplace might seem ideal for mounting your TV, but it can actually cause damage to your device. If you use your fireplace, it can degrade the TV’s internal components and shorten its overall lifespan. Soot and smoke from a wood-burning fireplace may even clog the electronics’ vents, leading to potential overheating. Additionally, this space is rarely at eye level, so a TV mounted too high can lead to uncomfortable neck and eye strain.

Advertisement
Jessie Quinn
Writer
Jessie Quinn is a Los Angeles-based lifestyle journalist with words published in PEOPLE, StyleCaster, Apartment Therapy, The Spruce, Byrdie, and more. She has a Bachelor's Degree in fashion journalism from Academy of Art University and her work spans across many categories, including style, beauty, home, health, crafts, and more.
This article is for general informational purposes only.
Affiliate Disclaimer 
|
Financial Disclaimer
Featured Image Credit:  Casa imágenes/ Adobe Stock | Updated  May 27, 2025 |
Advertisement
Cleaning 3m read
0

3 Hacks for Getting Rid of Grass Stains Fast

Grass stains are often a sign of a good time — whether from a rec league softball game, tending to your garden, or practicing yoga in the park — but they’re also notoriously difficult to remove. These green smudges latch onto fabric fibers and can be tough to get out with a standard wash. The sooner you treat grass stains, the better, although it’s still possible to remove them after they’ve had time to settle. You may need to repeat the stain treatment method or give the solution more time to work.

All featured products and deals are selected independently and objectively by the author. House Outlook may receive a share of sales via affiliate links in content.

Grass stains are often a sign of a good time — whether from a rec league softball game, tending to your garden, or practicing yoga in the park — but they’re also notoriously difficult to remove. These green smudges latch onto fabric fibers and can be tough to get out with a standard wash. The…

Luckily, there are a few quick and effective tricks to tackle even the most stubborn stains and help you save your favorite clothes from the discard pile.

A Word of Caution

If you’re dealing with a particularly stubborn stain and a green tint remains after your first removal attempt, repeat the process before drying; heat can permanently set the stain. Washing a stained item in warm water can have the same effect, as the hotter temperature “cooks” the protein-based stain, making it much harder to remove.

Advertisement

1. Vinegar and Baking Soda

The natural combination of vinegar and baking soda works as an effective stain remover because vinegar breaks down the proteins and plant material in the stain, while baking soda lifts the residue for easier removal.

Start by mixing equal parts distilled white vinegar and water. Apply the solution directly to the stained area; you can dab it on with a clean cloth or use a spray bottle. Let it sit for five to 10 minutes to help loosen the stain. Next, sprinkle baking soda over the area and scrub gently with a soft brush or an old toothbrush. The baking soda acts as a mild abrasive, helping to lift the stain without damaging the fabric.

Related: How To Rescue Smelly Towels From Mildew

2. Rubbing Alcohol or Hand Sanitizer

If you’re in a pinch and don’t have cleaning supplies on hand, grab some rubbing alcohol or an alcohol-based hand sanitizer. Dab the alcohol onto the stain using a cloth or cotton ball and let it sit for 10 to 15 minutes. Then, rinse the fabric in cold water and machine wash as usual.

Alcohol dissolves chlorophyll, the green pigment in grass, which is what makes these stains so tough to remove.

Advertisement

3. Dish Soap

Using dish soap is one of the simplest and most accessible methods for removing grass stains. First, rinse the stained area with cold water to remove as much of the green mark as possible. Apply a small amount of liquid dish soap directly onto the stain — preferably one designed to cut through grease, such as Palmolive Ultra Strength or Dawn Platinum. Gently work it into the fabric using your fingers or a soft brush, and let it sit for 10 to 15 minutes.

Dish soap breaks down the organic compounds in grass, loosening the stain from the fabric. After scrubbing lightly, rinse thoroughly with cold water and check the stain before tossing the item into the wash.

Advertisement
Jill Layton
Writer
Jill Layton started writing professionally when she realized her emails and texts were kinda funny. She’s an affiliate shopping writer and lifestyle contributor for Scary Mommy, Bustle, Mic, and Best Products. She’s the mom of two alarmingly witty kids and the world’s most perfect dog.
This article is for general informational purposes only.
Affiliate Disclaimer 
|
Financial Disclaimer
Featured Image Credit:  Halyna Romaniv/ iStock | Updated  May 27, 2025 |
Advertisement
Organizing 3m read
0

This Hack Reveals Your Closet’s Hidden Clutter

Do you ever stare into a packed closet and feel like you have absolutely nothing to wear? It happens to the best of us, and more often than we would like to admit. Although there are countless ways to create more space in your closet, from connecting hangers with soda tabs to opting for baby hangers instead of full-sized ones, it’s impossible to hack your way out of too much clutter.

All featured products and deals are selected independently and objectively by the author. House Outlook may receive a share of sales via affiliate links in content.

Do you ever stare into a packed closet and feel like you have absolutely nothing to wear? It happens to the best of us, and more often than we would like to admit. Although there are countless ways to create more space in your closet, from connecting hangers with soda tabs to opting for baby…

If the thought of dumping out all your clothes and sorting through each piece feels too daunting, there’s a simpler way to pare down your wardrobe: the reverse hanger method.

What Is the Reverse Hanger Method?

The reverse hanger method is one of the easiest ways to determine which clothes to keep and which to donate, but it won’t happen overnight.

The first step is to reverse all the hangers in your closet so the open side of the hook faces the opposite way you normally hang them.

Once you’ve worn an item, rehang it and return it to the closet rod, ensuring the hook is pointing in the direction you typically hang clothes. Over time, you’ll see which items you actually wear and which you don’t. It’s the perfect way to identify what deserves a spot in your closet and free up precious storage space.

Related: Arrange Your Shoes Like This To Free Up More Closet Space

Mark Your Calendars

As we noted earlier, the reverse hanger method takes some time to complete. To make it easier, you can set a specific time frame. For instance, you can give yourself a month, start at the beginning of each season, or better yet, make this a yearlong project with check-ins every few months.

Advertisement

Stick With It

The key to making this decluttering hack work is to actually remove the unworn items at the end. Once your set time is up, put them in a box to donate to your local thrift or charity shop. If you’re looking to make some extra cash, consider selling the items on a resale site such as Poshmark, ThredUp, or Facebook Marketplace.

There are some exceptions, of course. If you don’t store out-of-season clothing and your closet is jammed with bulky coats and sweaters year-round, those hangers are unlikely to get reversed during the warmer months. While we recommend decluttering and stowing away such items, you may need to evaluate them individually at the end of the specified time frame.

This decluttering method won’t deliver instant results, but it’s incredibly easy and well worth the wait.

Advertisement
Pauline Lacsamana
Writer
Pauline Lacsamana is a freelance writer and editor who specializes in commerce, home, design, and lifestyle. She has bylines in The Spruce, Business Insider, U.S. News & World Report, Hunker, MyDomaine, Parade, and more.
This article is for general informational purposes only.
Affiliate Disclaimer 
|
Financial Disclaimer
Featured Image Credit:  RealPeopleGroup/ iStock | Updated  May 27, 2025 |
Advertisement
Home Improvement 2m read
0

Quiet Creaky Floors With This Household Item

Hardwood floors are a dream design element for many people. Perhaps you crave the classic elegance of white oak in a herringbone pattern or the rustic charm of ultra-wide plank hickory. Either way, they’re stylish, require relatively little maintenance, and hold up well over time. Eventually, though, some of those floorboards might start to creak. The good news is you can silence them with just one ingredient and a few minutes.

All featured products and deals are selected independently and objectively by the author. House Outlook may receive a share of sales via affiliate links in content.

Hardwood floors are a dream design element for many people. Perhaps you crave the classic elegance of white oak in a herringbone pattern or the rustic charm of ultra-wide plank hickory. Either way, they’re stylish, require relatively little maintenance, and hold up well over time. Eventually, though, some of those floorboards might start to creak.…

Why Do Floorboards Creak?

Over time, many floorboards develop annoying creaks and squeaks. These are often the result of changes in temperature and humidity, which cause the wood to expand and contract, eventually creating gaps between the planks. Instead of replacing your boards, you can fill in those spaces for just a couple of bucks, using good old-fashioned baby powder.

How To Quiet Creaky Floorboards

To fill your floorboard gaps, grab some baby powder, a clean damp cloth, and something with a smooth edge or surface. You can use a plastic putty knife, or for even better floor protection, opt for a paint pad.

Related: How To Silence a Squeaky Door Hinge

Start by locating your squeaky floorboard. Sprinkle a bit of baby powder over it, focusing on the gaps between planks. Use your flat-edged tool to spread the baby powder around, working it into those spaces. You will see the white powder build up, forming solid lines. Throughout this process, it’s recommended to lightly press on or nudge the boards to ensure the baby powder settles deeply into the gaps.

Advertisement

Once they’re filled in, sweep or vacuum up any excess baby powder. Then, use your damp cloth to give the area a good wipe, and follow it up with a hardwood floor cleaner if desired.

When To Seek Out a Pro

This trick only works for creaks caused by gaps between floorboards. If your floors are creaking because of loose fasteners, joists, or a subfloor issue, reach out to a professional in your area to determine the right fix.

Advertisement
Krissy Howard
Writer
Krissy Howard is a New Mexico-based writer. Her work has appeared in Byrdie, Hunker, and Simplemost, and she is the former managing editor of music satire website, The Hard Times.
This article is for general informational purposes only.
Affiliate Disclaimer 
|
Financial Disclaimer
Featured Image Credit:  Douglas Rissing/ iStock | Updated  May 27, 2025 |