Advertisement
Organizing 2m read
5

Follow the ‘Show vs. Stow’ Rule for a Stress-Free Home

Organization is the key to a stress-free home, but adopting a system that works for your lifestyle is often the hardest part of the process. You can declutter all day, every day, but without a strategy for where you place certain items and why, your space will quickly slip back into its old, chaotic patterns. For a home that stays organized without the need for constant tidying, follow the “show vs. stow” rule.

All featured products and deals are selected independently and objectively by the author. House Outlook may receive a share of sales via affiliate links in content.

Organization is the key to a stress-free home, but adopting a system that works for your lifestyle is often the hardest part of the process. You can declutter all day, every day, but without a strategy for where you place certain items and why, your space will quickly slip back into its old, chaotic patterns.…

The Show vs. Stow Rule

There’s no shortage of organization methods, from “one in, one out” and the 10-10 rule to the “core four.” While many of these focus on decluttering, the show vs. stow method is different. It prioritizes your daily needs, ensuring your most-used items are accessible within your personal setup.

Related: The 5/7 Rule for Cleaner, Clearer Surfaces

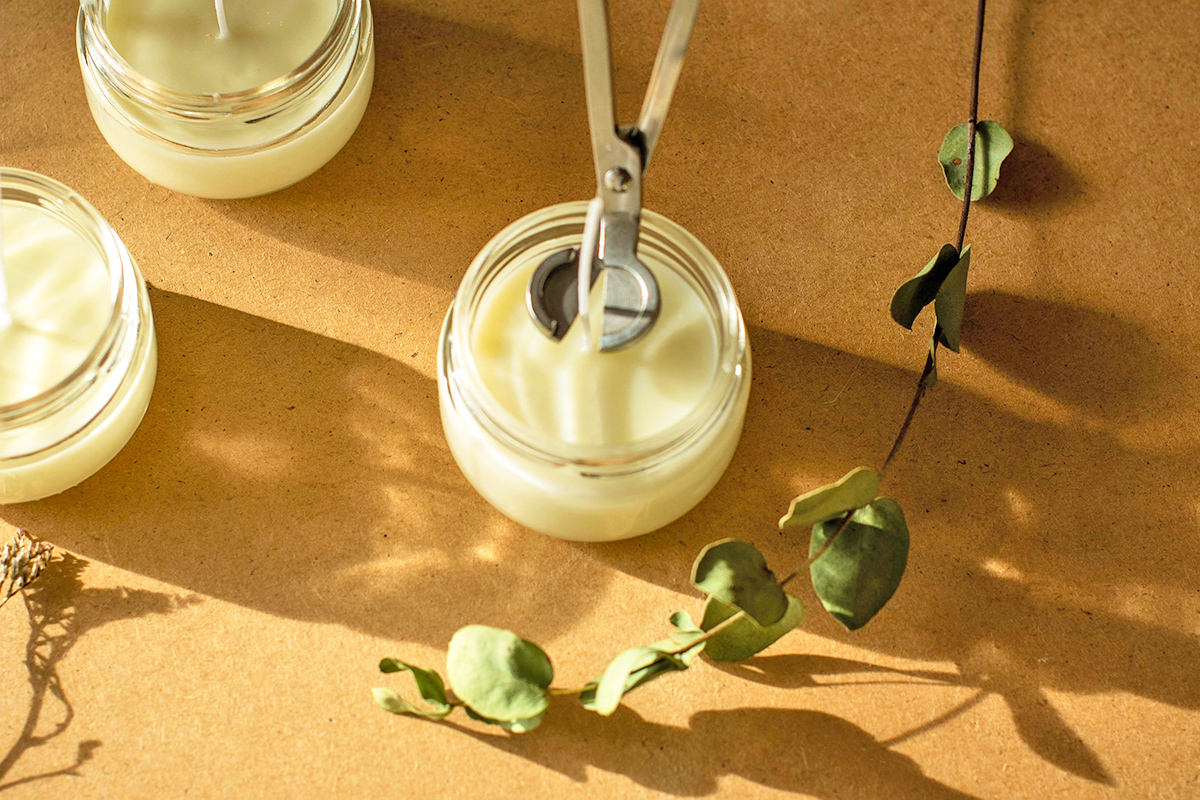
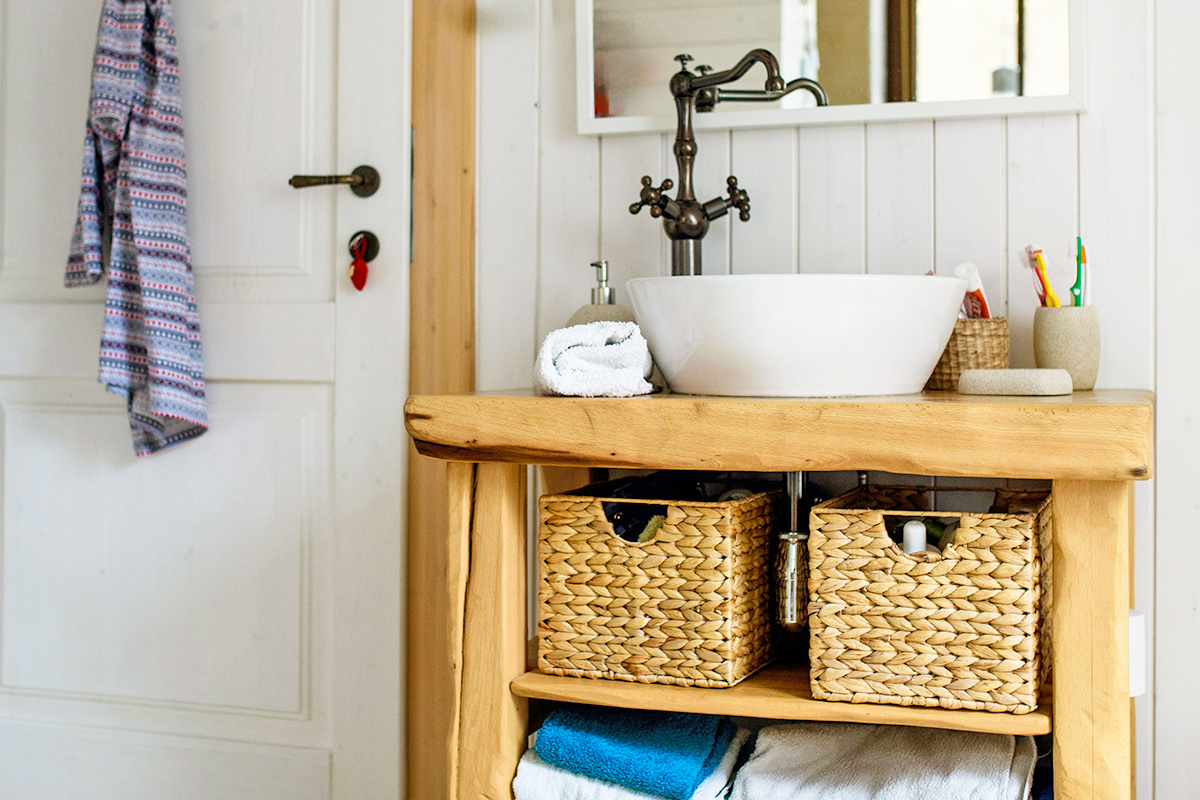
To start, consider the space you want to organize and your most essential needs. When TikTok creator @jenny.for.your.thoughts applied this rule to organize a bathroom, the “shows” included her most frequently used items, such as skin care, makeup, and allergy medications. These items should be front and center for easy access. You can use open shelving or decorative trays to keep your essentials visible yet contained and orderly. When your most-used items are the easiest to put away, a clear countertop — and a clear mind — will follow.

Advertisement

The “stows,” on the other hand, are occasional-use items better kept out of sight. Utilize concealed storage, such as medicine cabinets or vanity drawers. If your bathroom lacks built-ins, opt for freestanding cabinets, woven baskets, or an over-the-toilet storage unit.

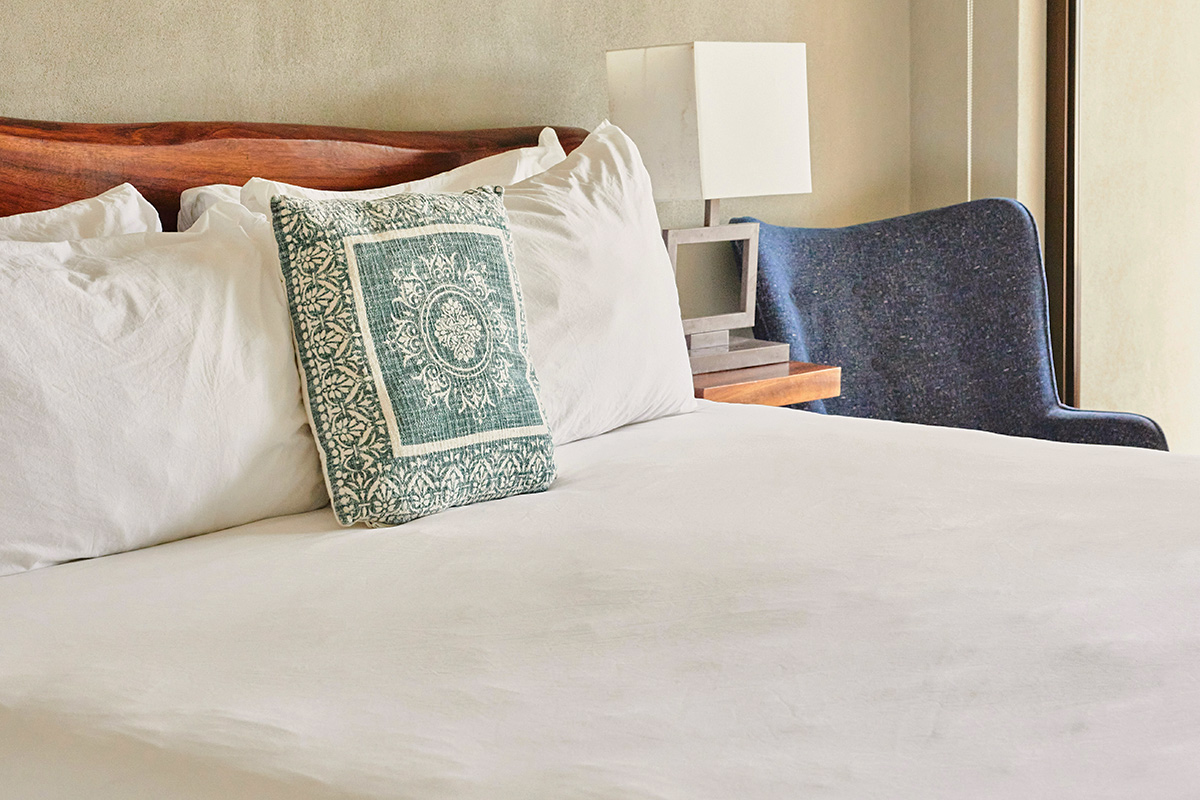
Not Just for Bathrooms

While the “show vs. stow” rule works wonders for bathrooms, it can also be applied to other areas of your home. Try it out with the nightstands in your bedroom, the countertops in your kitchen, or the desk in your home office. This method reduces some of the friction that complicates our lives, making daily routines feel more manageable.

Advertisement
Advertisement
Cleaning 3m read
1

The 30-Second Trick for Hotel-Crisp Sheets Without an Iron

Sheets will inevitably wrinkle. Whether they’re fresh out of the dryer or nearing laundry day, the lightweight fabric is prone to wrinkles that can make your bedding look disheveled. Some people iron their linens to achieve hotel-level crispness, but there’s no need to spend 15 minutes at an ironing board when you can get the same results with significantly less time and effort.

All featured products and deals are selected independently and objectively by the author. House Outlook may receive a share of sales via affiliate links in content.

Sheets will inevitably wrinkle. Whether they’re fresh out of the dryer or nearing laundry day, the lightweight fabric is prone to wrinkles that can make your bedding look disheveled. Some people iron their linens to achieve hotel-level crispness, but there’s no need to spend 15 minutes at an ironing board when you can get the…

Ditch the Ironing Board

Instead of wrestling with an ironing board, you can use water and a wrinkle-release spray to achieve the same crispness in 30 seconds or less. It’s best to start with slightly damp fabric — this helps relax the fabric fibers and makes your bottle of wrinkle-release spray go further.

Related: One Little Trick That Makes Changing Sheets Faster

Fill a continuous mist bottle with lukewarm water and mist your bedding evenly until damp (not soaked). A continuous mist bottle works better than a regular spray bottle because it produces a fine, even layer of moisture without leaving behind wet spots. Once the fabric is damp, follow up with a light misting of Downy Wrinkle Releaser or a similar product, then tug the sheets tight from both sides of the bed. Use your hands to smooth out any remaining creases as the fabric settles. You can also use this trick on duvet covers, pillowcases, shams, and bed skirts.

Advertisement

Steam Your Sheets

If you don’t have those two items on hand, you can use your dryer to steam out wrinkles. Add two or three ice cubes to the drum during the last few minutes of a high-heat cycle. The heat of the dryer causes the ice cubes to melt and quickly evaporate, creating a steam effect that relaxes the fabric’s fibers. Remove the sheets from the dryer as soon as the cycle ends, and spread them across the bed while they’re still warm.

Bonus Hack

If you aren’t quite ready for laundry day, use a linen spray to refresh your bedding. While these concoctions are no replacement for a machine wash, they will give your sheets a much-needed boost and a fresher scent.

Advertisement
Featured Image Credit:  Natalia Blauth/ Unsplash | Updated  Mar 3, 2026 |
Jessie Quinn
Writer
Jessie Quinn is a Los Angeles-based lifestyle journalist with words published in PEOPLE, StyleCaster, Apartment Therapy, The Spruce, Byrdie, and more. She has a Bachelor's Degree in fashion journalism from Academy of Art University and her work spans across many categories, including style, beauty, home, health, crafts, and more.
This article is for general informational purposes only.
Featured Image Credit:  Natalia Blauth/ Unsplash | Updated  Mar 3, 2026 |
Advertisement
Food & Drink 2m read
3

A Time-Saving Hack for Perfectly Caramelized Onions

For anyone who loves to cook, the allium family — which includes onions, garlic, chives, leeks, shallots, and more — supplies some of the most fundamental flavors in the kitchen. The pungent, sulfur-based flavor compounds in these foods bring a savory kick to any dish, while a surprising sweetness hides beneath their sharp bite.

For anyone who loves to cook, the allium family — which includes onions, garlic, chives, leeks, shallots, and more — supplies some of the most fundamental flavors in the kitchen. The pungent, sulfur-based flavor compounds in these foods bring a savory kick to any dish, while a surprising sweetness hides beneath their sharp bite.

Caramelizing onions is a popular way to lean into that natural sweetness. They’re great on hamburgers and hot dogs and provide the base for popular dishes like French onion soup. The only downside is that the process takes more time and patience than most of us can muster on a weeknight. If you want that flavor without the endless stirring, there’s a downright brilliant shortcut you need to know.

How To Make Caramelized Onions Quickly

To understand this hack, it helps to know how onions caramelize. The standard technique is to fill a pan with onions and cook them over low heat, stirring constantly. As they wilt, they release juices containing their natural sugars and amino acids, which brown and mellow in the heat of the pan. It takes time, but the result is a batch of sweet, fragrant, and golden-brown caramelized onions.

Advertisement
Related: 3 Proven Hacks for Cutting Onions Without Crying

To speed up the process, just add water. Adding a splash of water (about 2 to 4 tablespoons) to the skillet and covering it with a lid creates steam, which serves two purposes: It keeps the onions from scorching and cooks them much faster than a dry, open pan. Once the onions wilt and release their juices — usually in just a few minutes — remove the lid and let the moisture evaporate as you stir for a few minutes longer. The onions will begin to brown as soon as the liquid reduces, completing the cooking process in record time.

Advertisement
Featured Image Credit:  funkybg/ iStock | Updated  Mar 3, 2026 |
Fred Decker
Writer
Fred Decker is a trained chef and former restaurateur. Since closing his restaurants over a decade ago he has been a prolific freelance writer, publishing several thousand articles on dozens of high-volume websites including Taste Of Home, Hunker, Tasting Table, Week&, eHow, and GOBankingRates. He lives on a rural acreage shared with a big garden, chickens, rabbits, and grandkids.
This article is for general informational purposes only.
Featured Image Credit:  funkybg/ iStock | Updated  Mar 3, 2026 |
Advertisement
Decorating 3m read
5

The One Thing You Must Do Before Lighting a Candle

Between the gentle scent and the warm glow, lighting a candle creates an undeniably cozy feeling in your home. But before you strike a match, take a moment for one small step that makes a big difference in the lifespan of your candle: trimming the wick. It may seem like a minor task, but trimming the wick sets the stage for a cleaner, safer, longer-lasting burn. Using a wick trimmer or a petite pair of scissors, cut the wick of new candles to about 1/4 inch with one clean, horizontal snip. 

All featured products and deals are selected independently and objectively by the author. House Outlook may receive a share of sales via affiliate links in content.

Between the gentle scent and the warm glow, lighting a candle creates an undeniably cozy feeling in your home. But before you strike a match, take a moment for one small step that makes a big difference in the lifespan of your candle: trimming the wick. It may seem like a minor task, but trimming…

Read on for four reasons why trimming the wick deserves to be part of your candle-lighting routine, before the first lighting and every burn after.

It Helps Flames Stay Steady

A properly trimmed wick is essential for maintaining a safe flame height. When a wick is too long, the flame can grow tall and flicker wildly, increasing the risk of excess smoke or even a fire. An oversized flame also produces more heat, which can cause the jar to overheat and the wax to melt unevenly.

Trimming the wick to about 1/4 inch ensures a controlled, steady flame that creates an even melt pool across the surface.

Related: A Quick Fix for Leaning Taper Candles

It Helps Your Candle Last Longer

If you skip trimming the wick, carbon buildup can form at the tip — a phenomenon called “mushrooming.” That enlarged tip causes the flame to burn hotter and faster, consuming more wax than necessary. Snipping away that buildup before each lighting helps your candle burn more evenly and slowly, so you can enjoy every last ounce of wax.

Advertisement

It Prevents Soot

A wick that’s too long can lead to a dirty burn, with visible soot and smoke. This can discolor candle jars and even leave faint black marks on nearby walls. Keeping the wick neatly trimmed reduces excess smoke, which is better for both your decor and your air.

It Improves the Scent

When a candle burns at the proper height, the wax warms evenly to the ideal temperature. This allows fragrance oils to disperse more effectively into the air. With a steady, controlled flame, your favorite scent notes — such as bergamot, Frasier fir, or sandalwood — will fill the room consistently rather than fading away.

Advertisement
Featured Image Credit:  Marta Klos/ iStock | Updated  Mar 3, 2026 |
Megan McCarty
Writer
Megan McCarty is a Los Angeles-based writer who covers the fun stuff: design, travel, wellness, beauty, and fashion. She has written for publications including Domino, The Spruce, MyDomaine, Bustle, and Rue Magazine. Her life rules include, but are not limited to, zipper when merging, contribute to your IRA, and do the nice thing.
This article is for general informational purposes only.
Featured Image Credit:  Marta Klos/ iStock | Updated  Mar 3, 2026 |
Advertisement
Home Improvement 2m read
5

Why You Should Keep Clear Nail Polish in Your Glove Box

There are certain essentials every driver should keep in their vehicle. We’re talking jumper cables, a first aid kit, nail polish, a flashlight …. Wait, what was that third thing? It’s true — nail polish is surprisingly useful for more than just creating colorful designs on fingers and toes. The beauty product can also help drivers address a common issue many cars experience. Here’s why you should keep clear nail polish in the glove box and how it can help you out on the road.

All featured products and deals are selected independently and objectively by the author. House Outlook may receive a share of sales via affiliate links in content.

There are certain essentials every driver should keep in their vehicle. We’re talking jumper cables, a first aid kit, nail polish, a flashlight …. Wait, what was that third thing? It’s true — nail polish is surprisingly useful for more than just creating colorful designs on fingers and toes. The beauty product can also help…

Prevent Windshield Cracks From Spreading

Sometimes a small pebble kicks up from the road and cracks the windshield. While the damage may be tiny at first, it inevitably grows until the vehicle is unsafe to drive and the glass must be replaced. You can delay that spread, however, with a little bit of nail polish.

Always use clear nail polish for this hack. Colored versions create opaque obstructions that can cloud your vision. When a windshield crack forms, safely pull over and grab a microfiber cloth and the nail polish from your glove box.

Related: The Best Organizers To Tame Car Clutter

First, use the cloth to thoroughly clean the cracked area and remove any debris. If the damage affects both the interior and exterior of the glass, wipe down the inside as well. Next, apply the clear nail polish on both sides of the windshield with clear nail polish. (This is a “better safe than sorry” approach as the crack may have depth that’s not visible to the naked eye.) Let it dry for the recommended time on the bottle before getting back on the road.

Advertisement

Why It Works

The idea here is that the nail polish forms a tight, temporary seal, protecting the crack from the elements and keeping it from growing. To be clear, this isn’t a permanent solution — you’ll still need to replace the windshield eventually. However, this allows you to reach your destination safely without the damage spreading. This hack also gives you the flexibility to schedule a repair or replacement on your own timeline instead of dealing with an immediate crisis.

Advertisement
Featured Image Credit:  Aleksandr Potashev/ iStock | Updated  Mar 3, 2026 |
Bennett Kleinman
Staff Writer
Bennett Kleinman is a New York City-based staff writer for Inbox Studio, covering topics for several brands including House Outlook and Better Report. He previously contributed to television programs such as "Late Show With David Letterman" and "Impractical Jokers," and digital publications like The Onion. Bennett is also a devoted New York Yankees and New Jersey Devils fan, and thinks plain seltzer is the best drink ever invented.
This article is for general informational purposes only.
Featured Image Credit:  Aleksandr Potashev/ iStock | Updated  Mar 3, 2026 |
Advertisement
Food & Drink 3m read
3

How To Pulverize Garlic in Just Seconds Using an Immersion Blender

Having garlic on hand is a given for nearly every home cook. It’s a key ingredient in so many dishes worldwide that you couldn’t possibly list them all. But prepping those cloves can be time-consuming. After peeling, you still have to chop them — and because most recipes call for a fine mince, this process can take a long time, especially if you’re cooking for a crowd.

All featured products and deals are selected independently and objectively by the author. House Outlook may receive a share of sales via affiliate links in content.

Having garlic on hand is a given for nearly every home cook. It’s a key ingredient in so many dishes worldwide that you couldn’t possibly list them all. But prepping those cloves can be time-consuming. After peeling, you still have to chop them — and because most recipes call for a fine mince, this process…

Don’t Chop, Pulverize

If you own an immersion blender, though, you can whip up minced garlic in mere seconds, saving you the time and effort of chopping it yourself. With the power off for safety, hold your immersion blender with the blades facing up. Place several peeled garlic cloves between the blades, making sure they fit within the bell-shaped blade guard. Cover the entire head of the immersion blender tightly with an open, resealable plastic bag, using one hand to secure it around the shaft. Then, turn on your immersion blender — start with a low setting — and in just a few seconds, your garlic will be pulverized. As a bonus, you won’t have to deal with that persistent garlic smell on your fingers.

Related: How To Save Time Peeling Lots of Garlic

This hack also works for mincing ginger, shallots, and chilies, or for grinding spices such as peppercorns, cumin seeds, coriander seeds, fennel seeds, and mustard seeds. Because the mess is contained in a plastic bag, your favorite aromatics are easy to store and ready to use. 

Advertisement

How To Store Minced Garlic in the Freezer

Looking to save time by prepping garlic in bulk? Mince several bulbs of garlic at once using a food processor (or do multiple rounds of the immersion blender trick). Put the minced garlic into a freezer-safe plastic bag and roll it flat with a rolling pin or your hands. Next, use the back of a knife to draw (not cut) a grid of vertical and horizontal lines across the bag. Place it in the freezer on a flat surface. Once it’s frozen, you’ll have perfectly portioned garlic squares that you can pop out and use as needed whenever you cook.

Advertisement
Advertisement
Cleaning 3m read
4

The Trick to Saving Sweat-Stained Hats

Many people have a favorite ballcap, whether it shows off a sports superfandom, provides sun protection, or hides messy hair. But as you wear that hat, the fabric inevitably develops unsightly sweat stains. While you might think the washing machine is your best option, be careful — that appliance can easily damage the cap’s shape. Here’s a trick to restore vibrancy to any sweaty hat without turning it into a floppy mess.

All featured products and deals are selected independently and objectively by the author. House Outlook may receive a share of sales via affiliate links in content.

Many people have a favorite ballcap, whether it shows off a sports superfandom, provides sun protection, or hides messy hair. But as you wear that hat, the fabric inevitably develops unsightly sweat stains. While you might think the washing machine is your best option, be careful — that appliance can easily damage the cap’s shape.…

A No-Sweat Solution

Creating a homemade cleaning paste is a much safer alternative to the washing machine. To make the solution, mix 1/2 cup of baking soda with 1 tablespoon of fine-grain table salt and 1 tablespoon of 3% hydrogen peroxide. Combine those ingredients in a small bowl, grab a soft-bristled brush (such as an old toothbrush or a laundry stain brush), and you’re ready to begin.

Before applying the mixture, dip your brush into the paste and test it on an inconspicuous part of the hat. This spot test is essential to ensure the solution won’t damage or discolor the fabric. Wait 20 to 30 minutes, or until the paste is completely dry, to check the results.

Once you know that the paste is fabric-safe, slather it on the inside of the hat, focusing on the sweatband and any other problem areas. Use your soft brush to scrub the paste into the fabric with small, circular motions. Let the paste sit for at least 20 minutes. The hydrogen peroxide acts as a color-safe bleach to remove stains, while the baking soda and salt work together to neutralize odors and scrub away oils.

Advertisement

After 20 minutes, submerge the hat in cool water to rinse away the paste — assuming the material is durable enough. While this method works for sturdier modern hats, be cautious with vintage hats made before the 1980s. These may contain cardboard brims that will lose their shape if soaked. For older hats, carefully wipe the paste away with a damp towel instead.

Related: Harness the Sun To Remove Stains Naturally

Molded to Perfection

After removing the paste, let the hat air-dry. To maintain its shape, place the cap on a rounded object that resembles the shape of a human head, such as an upside-down bowl. This helps prevent the hat from flattening, ensuring it’s ready to wear once dry. If any stubborn sweat stains persist, repeat the process until the cap is clean enough for your liking.

Advertisement
Featured Image Credit:  Porechenskaya/ iStock | Updated  Mar 3, 2026 |
Bennett Kleinman
Staff Writer
Bennett Kleinman is a New York City-based staff writer for Inbox Studio, covering topics for several brands including House Outlook and Better Report. He previously contributed to television programs such as "Late Show With David Letterman" and "Impractical Jokers," and digital publications like The Onion. Bennett is also a devoted New York Yankees and New Jersey Devils fan, and thinks plain seltzer is the best drink ever invented.
This article is for general informational purposes only.
Featured Image Credit:  Porechenskaya/ iStock | Updated  Mar 3, 2026 |
Advertisement
Food & Drink 2m read
1,524

Adding Water to Bacon Sounds Wrong — But It’s Actually Genius

If you’ve ever mustered the courage to attempt classic French dishes such as beef bourguignon or coq au vin, you may have noticed that the recipes take an odd approach to preparing bacon. It’s cut into lardons — relatively thick, inch-long strips — which are then simmered in water to render the fat before being crisped in their own juices. It sounds counterintuitive — after all, water is usually the enemy of crispness — but it actually works beautifully.

If you’ve ever mustered the courage to attempt classic French dishes such as beef bourguignon or coq au vin, you may have noticed that the recipes take an odd approach to preparing bacon. It’s cut into lardons — relatively thick, inch-long strips — which are then simmered in water to render the fat before being…

You can use this chef-style technique for your breakfast bacon, too. Even if you’re skeptical, one try will prove that it’s the secret to the best bacon ever. Here’s a breakdown of how and why it works.

Low Temperature Is the Key to Better Bacon

If your usual approach is to warm up a pan and slap your bacon right in, you’ll still get decent results. (Let’s face it — even mediocre bacon is still pretty good.) The problem is that the pan conducts heat only to the parts of the bacon in direct contact with it. As the meat contracts in the high heat, it wrinkles and curls. This leaves you with corrugated bacon where relatively little of the strip touches the pan.

Advertisement
Related: An Easy Way To Safely Discard Cooking Oil

It’s better to lay out your bacon in a cold pan, then pour about 1/4 cup of cold tap water over the strips before turning up the heat. The water does two things: It keeps the pan’s temperature low, since water can’t exceed 212 degrees Fahrenheit, and it distributes heat evenly to every inch of the bacon. That helps the fat render out more effectively. Once the water evaporates, that rendered fat browns and crisps the bacon perfectly. It takes a few extra minutes, but the results are worth the wait.

Advertisement
Featured Image Credit:  vitalssss/ iStock | Updated  Feb 24, 2026 |
Fred Decker
Writer
Fred Decker is a trained chef and former restaurateur. Since closing his restaurants over a decade ago he has been a prolific freelance writer, publishing several thousand articles on dozens of high-volume websites including Taste Of Home, Hunker, Tasting Table, Week&, eHow, and GOBankingRates. He lives on a rural acreage shared with a big garden, chickens, rabbits, and grandkids.
This article is for general informational purposes only.
Featured Image Credit:  vitalssss/ iStock | Updated  Feb 24, 2026 |
Advertisement
Cleaning 2m read
279

Clean Your Grimy Bathtub in Half the Time

As relaxing as a bath can be, keeping the tub clean is tough. It’s one of those spots in the home that gets grimy seemingly as soon as you’re done scrubbing it; between daily use and the constant humidity in your bathroom, buildup can appear in just a few days. Fortunately, there are easy ways to keep your tub looking fresh. Simple habits such as a post-shower squeegee or a quick rinse after a bath go a long way, but if you’re dealing with existing stains, this DIY cleaner is exactly what you need.

All featured products and deals are selected independently and objectively by the author. House Outlook may receive a share of sales via affiliate links in content.

As relaxing as a bath can be, keeping the tub clean is tough. It’s one of those spots in the home that gets grimy seemingly as soon as you’re done scrubbing it; between daily use and the constant humidity in your bathroom, buildup can appear in just a few days. Fortunately, there are easy ways…

Out With the Grime, In With a DIY Cleaner

If you guessed that baking soda is partially responsible for removing those stubborn stains, you’re correct. (Honestly, what can’t baking soda fix?) To get your bathtub sparkling again, all you need is baking soda and 3% hydrogen peroxide.

Mix two parts baking soda with one part 3% hydrogen peroxide to create a thick paste. Apply the mixture to any bathtub stains — whether it’s soap scum or hard water — and let it sit for anywhere from 10 minutes to an hour, depending on the severity of the discoloration.

After allowing the paste to work its magic, take a nonabrasive sponge and begin scrubbing. Buff the paste into the stains and watch them disappear. Between the gentle abrasiveness of the baking soda and the stain-fighting power of the hydrogen peroxide, bathtub grime doesn’t stand a chance. Just give it a thorough rinse afterward, and your bathtub will be looking brand-new.

Advertisement
Related: Get Rid of Soap Scum Buildup on Shower Doors

Stubborn Stains? No Problem

If you have a stain that just won’t budge, don’t give up yet. You can repeat the process, but instead of waiting only 10 minutes, let the paste sit for the full hour. This allows the ingredients to really sink in before you scrub your way to a stain-free tub.

Advertisement
Advertisement
Organizing 3m read
248

How To Keep Your Home Tidy With Almost Zero Effort

If you’ve ever looked around your living room and wondered how all those little messes piled up so fast, you’re in good — if slightly cluttered — company. Busy schedules, family chaos, and an ever-growing to-do list can make a clean house feel like an impossible feat. But what if the secret to a tidier space is not a major cleaning overhaul or a fancy new storage system, but a tiny habit that takes less than 60 seconds?

If you’ve ever looked around your living room and wondered how all those little messes piled up so fast, you’re in good — if slightly cluttered — company. Busy schedules, family chaos, and an ever-growing to-do list can make a clean house feel like an impossible feat. But what if the secret to a tidier…

Enter the “one-minute rule” — a simple mindset shift that keeps your home neat without the stress.

What’s the One-Minute Rule?

If a task takes 60 seconds or less to complete, do it right away instead of postponing it. This idea turns quick actions into major long-term payoff. By tackling small chores the moment they pop up, you stop the mess before it ever has the chance to become clutter.

Why It Works

Clutter isn’t born from big messes — it’s created by lots of tiny ones. A lone sock on the floor, a single dish in the sink, a stack of mail on the counter — each feels harmless, until, suddenly, it isn’t.

The brilliance of the one-minute rule lies in its simplicity:

It’s fast: You have dozens of “spare” minutes every day.

It’s automatic: Acting immediately trains your brain to stop procrastinating.

It prevents buildup: Small actions stop minor messes from becoming a major headache.

By handling these micro tasks in the moment, you reclaim your space — clearing both the clutter on your counters and the noise inside your head.

Advertisement

How To Practice It Daily

Here are easy, everyday ways to make the one-minute rule work in your household:

• Hang up your jacket as soon as you walk in the door.

• Wipe the bathroom counter after getting ready.

• Return books to the shelf when you’re done reading.

• Toss trash and recyclables right away.

• Go through the mail as you receive it.

Related: ‘Scary Hour’ Helps You Complete Tasks You Don’t Want To Do

Eventually, your home stays orderly without the need for marathon cleaning sessions, and your brain finally gets a break from carrying around all those little to-dos.

Advertisement
Featured Image Credit:  Daiga Ellaby/ Unsplash | Updated  Mar 3, 2026 |
Jill Layton
Writer
Jill Layton started writing professionally when she realized her emails and texts were kinda funny. She’s an affiliate shopping writer and lifestyle contributor for Scary Mommy, Bustle, Mic, and Best Products. She’s the mom of two alarmingly witty kids and the world’s most perfect dog.
This article is for general informational purposes only.
Featured Image Credit:  Daiga Ellaby/ Unsplash | Updated  Mar 3, 2026 |