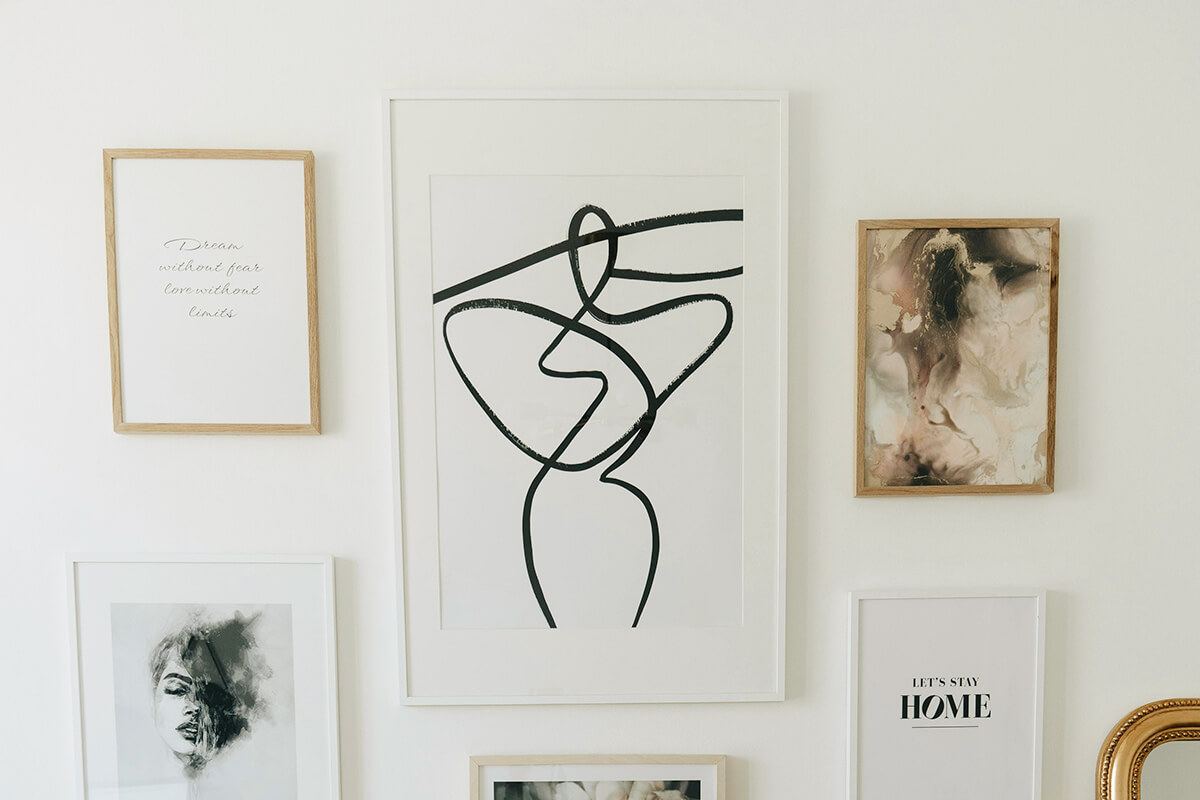
Gallery walls are an eye-catching way to add personality — specifically your personality — to your home. Artwork can showcase your style, interests, and loved ones in a way a piece of furniture or paint color can’t. The thought of hanging a gallery wall can be daunting, though. How do you choose which pieces to…
Not to worry — with these six easy tips, you’ll be able to arrange a cohesive gallery wall that will show off your art collection or personal photos and get all your guests talking.
• Artwork or photos
• Hammer
• Nails, picture hangers, or double-sided adhesive tape
• Ruler or measuring tape
• Level
• Kraft paper (optional)
• Pencil (optional)
Tip 1: Narrow Down a Color Palette
To pull off a good-looking gallery wall, you’ll need to be intentional in choosing a color scheme. Pieces shouldn’t be matchy-matchy — that will feel forced — but you should opt for art that’s similar in tone and intensity. For example, you could start with a base of navy, cream, and gold. Then add small pops of color, pulling accent shades from dominant pieces.
If you’re planning a photo-heavy gallery wall, consider mixing and matching the frame colors. To keep it cohesive, interior designer Emily Henderson recommends starting with two or three frame colors and then determining whether more are needed. While some people prefer the look of all color or all black and white photos, don’t be afraid to use both — the key is finding the right balance.

Tip 2: Start With the Largest Piece
Anchor your gallery wall by starting with your largest piece of art. Don’t place it directly in the center, though. Hanging the biggest piece slightly off-center (but still toward the middle) will encourage your eye to travel around the gallery wall. It will serve as a jumping-off point for everything else you’ll hang, so simply fill in around it. If you have a second standout piece, hang it diagonally across from your largest one for a balanced feel.
Tip 3: Mix It Up
Variety is the spice of life — and of your gallery wall, too. For a compelling mix of pieces, select a diverse collection of artwork in a range of sizes and orientations. You’ll want horizontal, vertical, and square pieces. You’ll also want oversized, petite, and in-between-sized ones. Including oddly shaped pieces of art adds even more interest; think about adding a miniature portrait in a round frame or pressed flowers in a shadow box.
Not everything needs to be in a frame, either. You could include a sconce for dimension, a hanging plant for liveliness, a tapestry for texture, or an embroidery hoop for some curves. The more mediums, the better. Mix and match paintings with photography, textiles, thrift store finds, and more.


Tip 4: Include Meaningful Items
No matter where your gallery wall is — an entryway, a hallway, a living room — it’ll become a focal point, so be sure to include pieces that are meaningful to you. Big-box store art is convenient and affordable, but can feel stale if it’s not complemented by more personal pieces.
If the word “artwork” has you seeing dollar signs, remember that anything can be art, especially if it’s important to you. Consider framing a kindergartener’s masterpiece, a sonogram, vintage family photos, or a bar napkin from the location of your first date.

Tip 5: Keep Pieces Equidistant From Each Other
Finding the balance of space between frames (“rivers,” as some interior designers call them) is essential for a professional-looking gallery wall. Too close feels cramped; too far away feels accidental. Aim for consistent rivers that are 2 to 3 inches apart, or up to 6 inches if all of your pieces are large-scale. This is where a ruler or measuring tape comes in handy, as well as a level to make sure every piece is hung straight.

Tip 6: Strategize a Seamless Way To Hang Everything
Before you start hammering nails into your walls willy-nilly, come up with a game plan — otherwise, you may end up with a wall full of holes that need patching and painting. TikTok creator Katie Behlert Kruithof of Yeah Baby Goods uses this technique:
1. Measure kraft or wrapping paper to the size of your wall.
2. With the paper on the floor, arrange your pieces and experiment with different layouts.
3. Once you find a placement you like, take a picture of it and trace the outline of each frame.
4. Tape the paper to your wall.
5. Find the center of each outlined frame with a tape measure and mark with a pencil dot. At the marked spots, drill pilot holes before adding screws, or hammer in nails. Nails are sufficient for lightweight pieces, but screws are recommended for anything over 20 pounds.
6. Remove the paper.
7. Refer to the picture to hang your artwork.