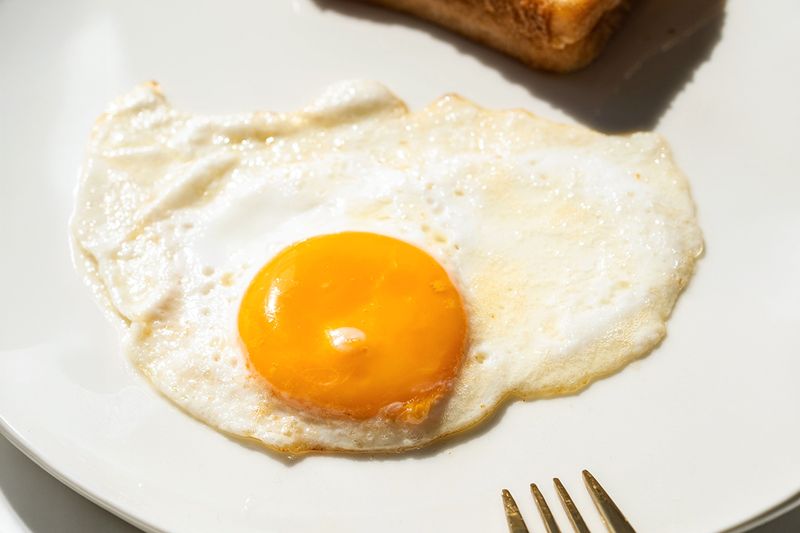
Sunny-side-up eggs are usually what you’ll see in the picture — both because they’re photogenic and because they’re genuinely popular. They’re also more challenging than they look. Achieving a runny yolk with perfectly set whites may feel intimidating, but once you learn the trick to it, breakfast will be a breeze.
Put a Lid on It
If you want to recreate your favorite diner’s sunny-side-up eggs at home, here’s what you need to do. Start with a pan the eggs won’t stick to, either nonstick or well-seasoned cast iron. Bring it to medium-low heat, and add either oil or butter. (Oil will shimmer a little when it’s ready, while butter will stop foaming.) To reduce the risk of breaking a yolk, crack your eggs into a ramekin or small bowl before sliding them into the pan.
Now here’s the trick: Clap a tight-fitting lid over the pan, ideally a glass one so you can see what’s happening. Give the egg about 90 seconds under the lid, allowing steam to build and help cook the whites. Then lift the lid and cook for another 1 1/2 to 2 minutes, until the eggs are set. Slide them from your pan to your plate, and enjoy your picture-perfect eggs.
Dialing Them In
After nailing the lid trick, there are a few additional tweaks you can make to get your eggs just the way you like them. One is to master your stove’s heat: If the yolks are getting a bit too cooked on the bottom before the whites set, your pan is too hot. Turn it down a smidge. If the yolks get slightly cloudy-looking on top before the lid comes off, try removing it 10 to 15 seconds earlier.
More from our network
House Outlook is part of Inbox Studio, which publishes content that uplifts, informs, and inspires.


Finally, use the freshest eggs you can get. Egg whites loosen over time, which can cause them to spread out and look messy. Fresh eggs sit up proud and tall in the pan, with a more compact and symmetrical shape (if your stove is level). Those small details — plus the difference in flavor — will elevate your breakfast game.