Some DIYers don’t take proper precautions before drilling into a wall or cabinet. For example, there are those who think they can just eyeball it, only to drill straight through the drywall and hit a hidden gas pipe. To avoid a potential disaster, it’s a good idea to use a visual aid that warns you…
A Bit of Advice
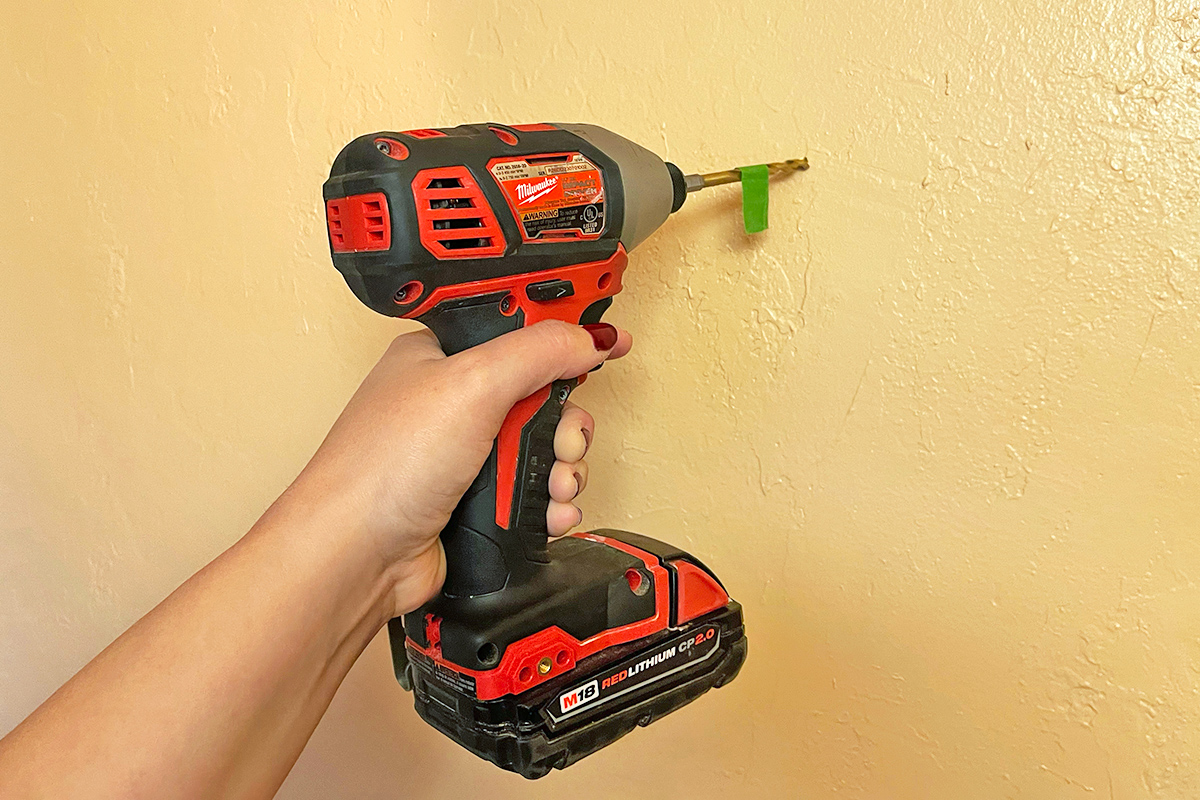
The first step is to determine the exact depth of the hole you need to drill. This is typically done by measuring the hardware being inserted — such as a screw, anchor, or dowel — and transferring that measurement onto the drill bit using a tape measure. Mark the stopping point with a permanent marker or pencil, then wrap a piece of painter’s tape around the bit at that point. If you don’t have painter’s tape on hand, other durable options such as electrical tape or duct tape are solid alternatives, though they may leave behind a sticky residue.
For example, if you need to drill exactly 2 inches into the wall, measure 2 inches from the tip of the drill bit and wrap it with painter’s tape, leaving only that 2-inch section exposed. The tape acts as a visual “stop sign,” alerting you when to stop drilling. In other words, you will know you’ve drilled 2 inches deep as soon as the tape sits flush against the wall. Because the edge of the tape can be difficult to see, try adding a 1-inch flag that extends from the bit, providing a more obvious visual marker for when you’ve drilled to your desired depth.
More from our network
House Outlook is part of Inbox Studio, which publishes content that uplifts, informs, and inspires.


Beyond reducing the risk of drilling into hidden wires or pipes, this method ensures holes of a consistent depth. If you need to drill 10 holes that are each 2 inches deep, a little painter’s tape guarantees they will be equal depths without the need to remeasure every time.
A word to the wise: Don’t press too hard while drilling, as the extra pressure can cause the tape to slide up the drill bit ever so slightly. Maintain a steady, careful hand to ensure the tape stays put and the method remains effective.